Pioneer XC-HM70-K – page 2
Manual for Pioneer XC-HM70-K
Table of contents
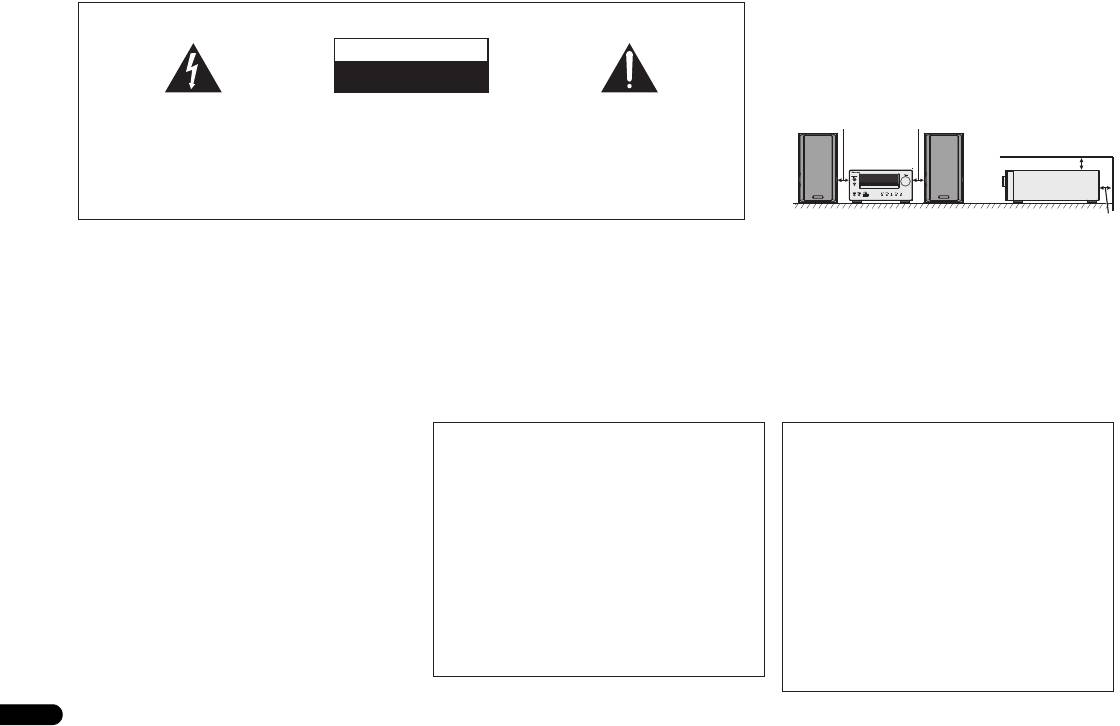
- VENTILATION CAUTION IMPORTANT Operating Environment
- Contents Accessories
- Before you start
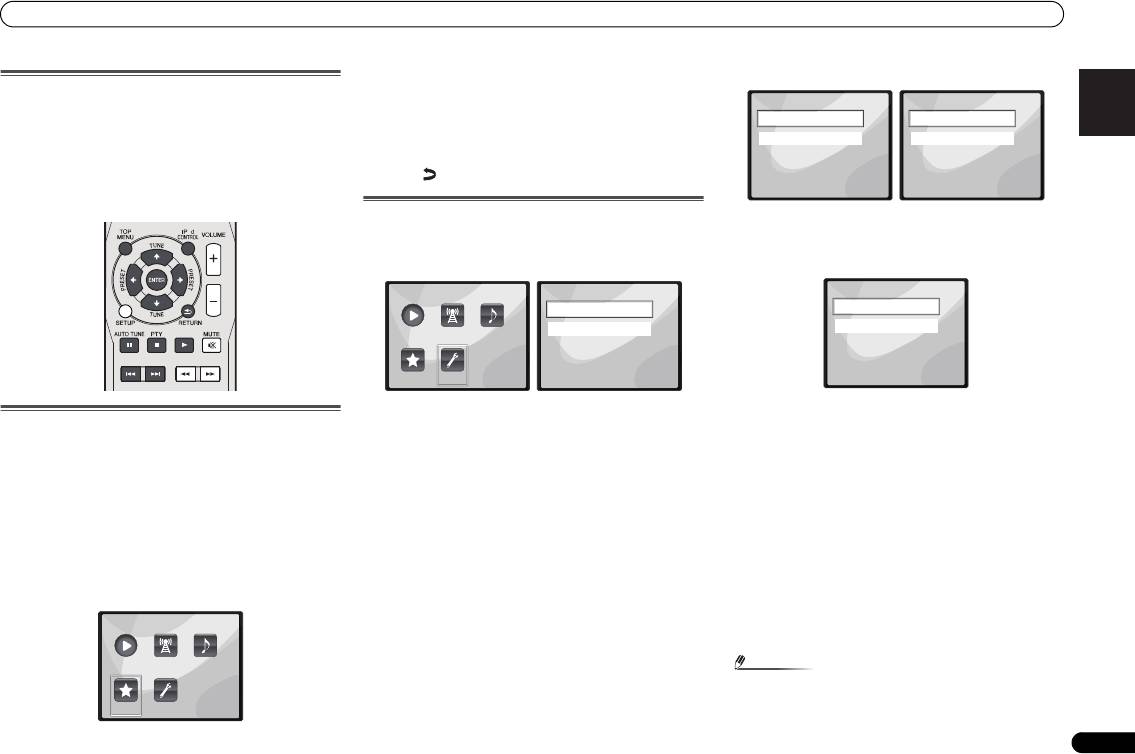
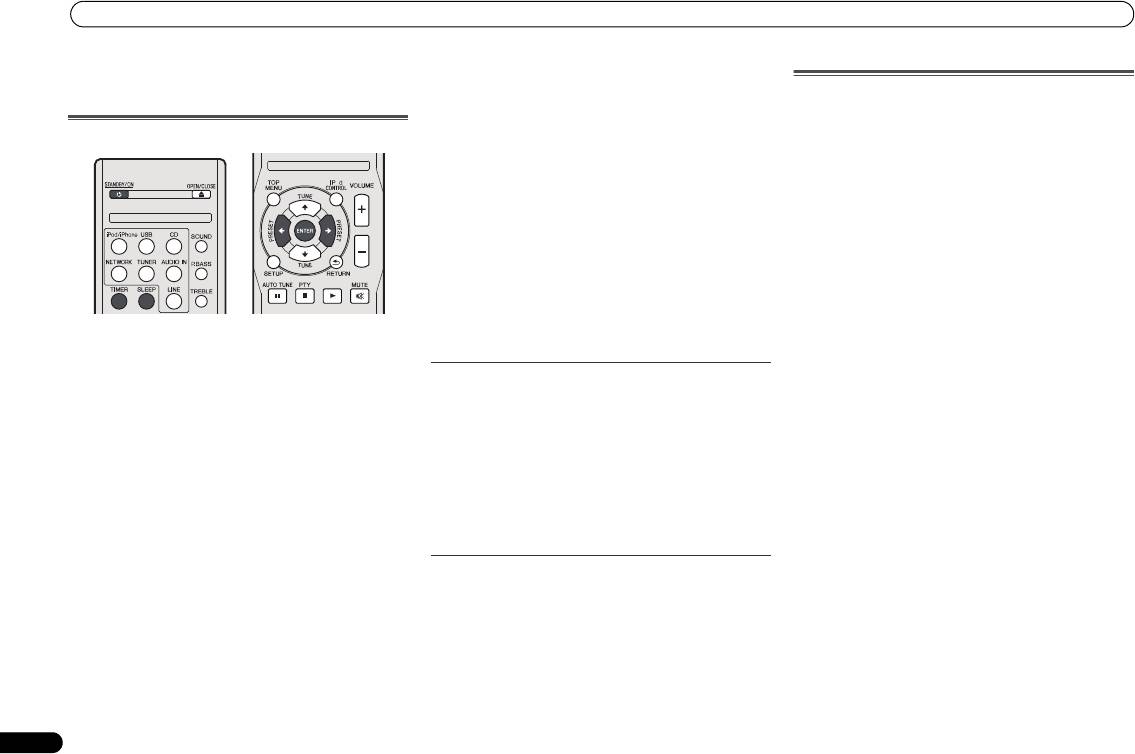
- Controls and Displays Remote control
- Front Panel Speaker system (X-HM70 only)
- Connecting your equipment Aerial connection
- Speaker connection Using other subwoofer Connecting a TV, etc.
- Connecting to the network through LAN interface AC power connection
- General control To turn the power on Setting the clock Auto power down setup
- Enhancing your system
- Listening to a CD or MP3/ WMA disc
- Advanced CD or MP3/WMA disc playback
- MP3/WMA folder mode (only for MP3/WMA files)
- Procedure to playback MP3/WMA disc with folder mode on
- Listening to the iPod, iPhone or iPad Supported iPod, iPhone and iPad models: Connecting your iPod/iPhone To insert iPad adaptor
- Playing an iPod, iPhone or iPad Basic playback controls
- Listening to USB mass storage device/MP3 player Connecting a USB device Playing a USB device
- Playback with NETWORK feature Listening to Internet radio stations
- Playing back audio files stored on components on the network Playing back your favorite songs
- Network connection requirements
- Glossary
- Listening to the radio Improving FM sound Saving station presets Listening to station presets Naming preset stations Changing the noise cut mode
- Using the Radio Data System (RDS) An introduction to RDS Displaying RDS information Searching for RDS programs
- Timer and sleep operation Sleep operation Setting the wake-up timer Turning the wake-up timer on/off
- Additional Information
- Additional Information
- Additional Information
- Category Extension Stream About playable music file formats Category Extension Stream About status messages Status messages Descriptions
- Specifications About iPod/iPhone/iPad
Playback with NETWORK feature
2Use
/
to select audio file or Internet radio station,
1 Select ‘Network’ from the Settings menu.
English Français Español Italiano
Playing back audio files stored on
and then press ENTER.
components on the network
3Use
/
to select playback or delete options and then
press ENTER.
You can perform the following operations with the remote
– Selected item will begin playing
control of this receiver. Note that some buttons are not
available for operation depending on the category currently
– Deletes selected item from Favorites folder
being played back.
• Select to undo previous operation.
•Press NETWORK to switch the remote control to the
NETWORK operation mode.
Network setup menu
2 Select ‘Modes’ from the Network Settings menu.
Setting up the network to listen to Internet radio on this
In case you make changes to the network configuration
receiver.
without the DHCP server function, make the corresponding
1 Select ‘Settings’ from the Main Menu.
changes to the network settings of this receiver.
Deutsch
2 Select the setting you want to adjust.
• DHCP (default setting) – Select if the server is DHCP
Playing back your favorite songs
• Network – Adjust settings for the network (see Network
compatible.
settings below).
-
When DHCP is selected, connection will begin
Registering audio files and Internet radio stations
• General – Use to reset all network connection settings to
automatically. Connection is complete when network
Nederlands
connection details are displayed. Press ENTER to return
While Playing back a song, press
/
to select “Add to
their initial, factory-setting condition (see General settings
to the previous screen.
Favor”, and then press ENTER.
on page 22).
The selected song is then registered in the Favorites folder.
• STATIC – To connect to the server manually, follow the
Network settings
instructions listed below.
Note that only the audio files stored on components on the
In case the router connected to the LAN terminal on this
network can be registered.
-
Press to delete the immediately preceding character.
receiver is a broadband router (with a built-in DHCP server
-
Press to switch between character types.
function), simply turn on the DHCP server function, and you
Playing and deleting audio files and Internet radio
-
Press / to choose the desired character from those
will not need to set up the network manually. You must set up
stations in and from the Favorites folder
displayed and press ENTER.
the network as described below only when you have
1 Select ‘Favorites’ from the Main Menu.
connected this receiver to a broadband router without a
-
Once input is complete, or if you wish to cancel the
DHCP server function. Before you set up the network, consult
input operation, press until OK/CANCEL is
with your ISP or the network manager for the required
displayed, then use / to choose either OK or
settings. It is advised that you also refer to the operation
CANCEL and press ENTER.
manual supplied with your network component.
21
En
Note
O
•If STATIC is selected, the settings will be as follows.
Main Menu
Now Playing
Internet
Music
Radio
Library
Favorites Settings
X-HM70_En.fm 21 ページ 2011年8月2日 火曜日 午後4時46分
Settings
Network Settings
Network
Modes
General
Status
1 of
1 of
1
1
Main Menu
Settings
Network Modes
Network
DHCP
Now Playing
Internet
Music
General
STATIC
Radio
Library
1 of
Favorites Settings
1 of
1
1
X-HM70_En.fm 22 ページ 2011年8月2日 火曜日 午後4時46分
Playback with NETWORK feature
-
IP (IP address)
• About – Displays the MAC address of this receiver.
DLNA
The IP address to be entered must be defined within the
following ranges. If the IP address defined is beyond the
following ranges, you cannot play back audio files
Network connection requirements
stored on components on the network or listen to
The NETWORK allows you to play music on media servers
Internet radio stations.
connected on an identical Local Area Network (LAN) as the
Class A: 10.0.0.1 to 10.255.255.254
receiver. This unit allows for the playing of files stored on the
Class B: 172.16.0.1 to 172.31.255.254
following:
Class C: 192.168.0.1 to 192.168.255.254
• PCs running Microsoft Windows Vista or XP with
-
MASK (Subnet Mask)
Windows Media Player 11 installed
In case an xDSL modem or a terminal adapter is directly
• PCs running Microsoft Windows 7 with Windows Media
DLNA CERTIFIED™ Audio Player
connected to this receiver, enter the subnet mask
Player 12 installed
The Digital Living Network Alliance (DLNA) is a cross-
provided by your ISP on paper. In most cases, enter
• DLNA-compatible digital media servers (on PCs or other
industry organization of consumer electronics, computing
255.255.255.0.
components)
industry and mobile device companies. Digital Living
-
Gateway (Default Gateway)
provides consumers with easy sharing of digital media
To play back audio files stored on components on the
In case a gateway (router) is connected to this receiver,
through a wired or wireless network in the home.
network or listen to Internet radio stations, you must turn on
enter the corresponding IP address.
the DHCP server function of your router. In case your router
The DLNA certification logo makes it easy to find products
-
DNS (DNS server)
does not have the built-in DHCP server function, it is
that comply with the DLNA Interoperability Guidelines. This
Enter the DNS server address you received in writing
necessary to set up the network manually. Otherwise, you
unit complies with DLNA Interoperability Guidelines v1.5.
from your internet service provider.
cannot play back audio files stored on components on the
When a PC running DLNA server software or other DLNA
• Select Status from the Network Settings menu to show
network or listen to Internet radio stations. Network setup
compatible device is connected to this player, some setting
your current network connection mode and details.
menu on page 21 for more on this.
changes of software or other devices may be required. Please
refer to the operating instructions for the software or device
General settings
Authorizing this receiver
for more information.
1 Select ‘General’ from the Settings menu.
In order to be able to play with NETWORK, this receiver must
DLNA
TM
, the DLNA Logo and CERTIFIED
TM
are trademarks,
be authorized. This happens automatically when the receiver
service marks, or certification marks of the Digital Living
Settings
General Settings
makes a connection over the network to the PC. If not, please
Network Alliance.
Network
Factory Settings
authorize this receiver manually on the PC. The authorization
General
About
(or permission) method for access varies depending on the
Content playable over a network
type of server currently being connected. For more
• Even when encoded in a compatible format, some files
information on authorizing this receiver, refer to the
may not play correctly.
instruction manual of your server.
1 of
1 of
• Movie or Photo files cannot be played back.
1
1
• There are cases where you cannot listen to an Internet
2 Select the item you want to set up from the General
About network playback
radio station even if the station can be selected from a list
Settings menu.
of radio stations.
The network playback function of this unit uses the following
• Factory Settings – Use to reset all network connection
technologies:
• Some functions may not be supported depending on the
settings to their initial, factory-setting condition.
server type or version used.
Windows Media Player
-
When “Warning: All Settings will be lost! Are you
• Supported file formats vary by server. As such, files not
See Windows Media Player 11/ Windows Media Player 12 on
sure?” is displayed, select and press ENTER. While
supported by your server are not displayed on this unit.
page 23 for more on this.
the settings are being reset, the screen will display a
For more information check with the manufacturer of
“Please Wait” message. Resetting is complete once the
your server.
screen returns to the Main Menu.
-
To quit the resetting, select .
22
En

X-HM70_En.fm 23 ページ 2011年8月2日 火曜日 午後4時46分
Playback with NETWORK feature
About playback behavior over a network
FLAC
English Français Español Italiano
• Playback may stall when the PC is switched off or any
FLAC (Free Lossless Audio Codec) is an audio format allows
media files stored on it are deleted while playing content.
lossless codec. Audio is compressed in FLAC without any
• If there are problems within the network environment
loss in quality. For more details about FLAC, visit the
(heavy network traffic, etc.) content may not be displayed
following website: http://flac.sourceforge.net/
or played properly (playback may be interrupted or
Windows Media
stalled). For best performance, a 100BASE-TX connection
Windows Media is a multimedia framework for media
between player and PC is recommended.
creation and distribution for Microsoft Windows. Windows
• If several clients are playing simultaneously, as the case
Media is either a registered trademark or trademark of
may be, playback is interrupted or stalled.
Microsoft Corporation in the U.S. and/or other countries. Use
• Depending on the security software installed on a
an application licensed by Microsoft Corporation to author,
connected PC and the setting of such software, network
distribute, or play Windows Media formatted content. Using
connection may be blocked.
an application unauthorized by Microsoft Corporation is
Pioneer is not responsible for any malfunction of the player
subject to malfunction.
and/or the NETWORK features due to communication error/
malfunctions associated with your network connection and/
Windows Media DRM
Deutsch
or your PC, or other connected equipment. Please contact
Windows Media DRM is a DRM (Digital Rights Management)
your PC manufacturer or Internet service provider.
service for the Windows Media platform. It is designed to
“Windows Media™” is a trademark of Microsoft Corporation.
provide secure delivery of audio and/or video content over an
This product includes technology owned by Microsoft
IP network to a PC or other playback device in such a way that
Corporation and cannot be used or distributed without a
the distributor can control how that content is used. The
license from Microsoft Licensing, Inc.
WMDRM-protected content can only be played back on a
component supporting the WMDRM service.
Microsoft®, Windows®7, Windows®Vista, Windows®XP,
Windows®2000, Windows®Millennium Edition, Windows®98,
Windows Media Player 11/
and WindowsNT® are either registered trademarks or
Windows Media Player 12
Nederlands
trademarks of Microsoft Corporation in the United States and/
Windows Media Player is software to deliver music, photos
or other countries.
and movies from a Microsoft Windows computer to home
stereo systems and TVs.
Glossary
With this software, you can play back files stored on the PC
through various devices wherever you like in your home.
aacPlus
This software can be downloaded from Microsoft’s website.
AAC decoder uses aacPlus developed by Coding Technologies.
• Windows Media Player 11 (for Windows XP or Windows
(www.codingtechnologies.com)
Vista)
• Windows Media Player 12 (for Windows 7)
For more information check the official Microsoft website.
23
En
Listening to the radio
Listening to the radio
Improving FM sound
If the or indicators don’t light when tuning to an FM
The following steps show you how to tune in to FM and AM
station because the signal is weak, set the receiver to the
radio broadcasts using the automatic (search) and manual
mono reception mode.
(step) tuning functions. Once you are tuned to a station you
Press BAND to select FM MONO.
can memorize the frequency for recall later. See Saving
This should improve the sound quality and allow you to enjoy
station presets below for more on how to do this.
the broadcast.
Saving station presets
If you often listen to a particular radio station, it’s convenient
to have the receiver store the frequency for easy recall
whenever you want to listen to that station. This saves the
effort of manually tuning in each time. This unit can
memorize up to 40 stations.
1 Press TUNER to select the tuner.
2 Use BAND to change the band (FM or AM), if necessary.
1 Tune to a station you want to memorize.
Each press switches the band between FM (stereo or mono)
See Listening to the radio above for more on this.
and AM.
2 Press TUNER EDIT.
3 Tune to a station.
The preset number is blinking.
There are three ways to do this:
3 Press PRESET
/
to select the station preset you
Automatic tuning
want.
To search for stations in the currently selected band,
You can also use the numeric buttons. See Direct track search
press and hold TUNE / for about a second. The
on page 14.
receiver will start searching for the next station, stopping
4 Press ENTER.
when it has found one. Repeat to search for other
The preset number stop blinking and the receiver stores the
stations.
station.
Manual tuning
To change the frequency one step at a time, press
TUNE /.
High speed tuning
Press and hold TUNE / for high speed tuning.
Release the button at the frequency you want.
– Lights when a normal broadcast channel.
– Lights when a stereo FM broadcast is being received in
auto stereo mode.
24
En
Note
X-HM70_En.fm 24 ページ 2011年8月2日 火曜日 午後4時46分
Listening to station presets
You will need to have some presets stored to do this. See
Saving station presets above if you haven’t done this already.
Press PRESET
/
to select the station preset you
want.
You can also use the numeric buttons.
O
Naming preset stations
For easier identification, you can name all of your preset
stations.
1 Choose the station preset you want to name.
See Listening to station presets above for how to do this.
2 Press TUNER EDIT twice.
The cursor at the first character position is blinking on the
O
display.
3 Input the name you want.
Choose a name up to eight characters long.
•Use / to select character position.
•Use / to select characters.
• The name is stored when ENTER is pressed.
Changing the noise cut mode
If you find that the AM sound quality is bad even after trying
the above, you may be able to improve it using a different
noise cut mode. Just choose the one that sounds best.
Default setting: Mode1
1 Press SETUP button after tuning to an AM radio station.
2Press
/
to select “Noise Cut”.
3Press
/
to choose a Noise cut mode (1, 2 or 3) then
press ENTER.
• If the receiver is left disconnected from the AC power
outlet for over a month, the station memories will be lost
and will have to be reprogrammed.
• Stations are stored in stereo. When the station is stored
in the FM MONO mode, it shows as when recalled.
Using the Radio Data System (RDS)
English Français Español Italiano
Using the Radio Data
System (RDS)
An introduction to RDS
Radio Data System (RDS) is a system used by most FM radio
stations to provide listeners with various kinds of
information—the name of the station and the kind of show
they’re broadcasting, for example.
One feature of RDS is that you can search by type of program.
For example, you can search for a station that’s broadcasting
a show with the program type, JAZZ.
You can search the following program types:
Deutsch
Nederlands
25
En
Note
Displaying RDS information
Use the DISPLAY button to display the different types of RDS
information available.
Press DISPLAY for RDS information.
Each press changes the display as follows:
• Radio Text (RT) – Messages sent by the radio station. For
example, a talk radio station may provide a phone number
as RT.
• Program Service Name (PS) – The name of the radio
station.
•Program Type (PTY) – This indicates the kind of program
currently being broadcast.
• Current tuner frequency (FREQ)
Searching for RDS programs
You can search for a program type listed above.
1 Press TUNER then press BAND to select the FM band.
• RDS is only possible in the FM band.
2 Press PTY.
SEARCH shows in the display.
3 Press PRESET
/
to select the program type you
want to hear.
4 Press ENTER to search for the program type.
The system starts searching through the station presets for a
match, stopping when it was found one. Repeat to search for
other stations.
If NO PTY is displayed it means the tuner couldn’t find that
program type at the time of the search.
• RDS searches station presets only. If no stations have
been preset, or if the program type could not be found
among the station presets NO PTY is displayed. FINISH
means the search is complete.
• In addition, there are three other program types, ALARM,
ALARMTST, and NO TYPE. ALARM and ALARMTST are
used for emergency announcements. NO TYPE appears
when a program type cannot be found.
Note
X-HM70_En.fm 25 ページ 2011年8月2日 火曜日 午後4時46分
O
NEWS – News
FINANCE – Stock market
• If any noise is picked up while displaying the RT scroll,
AFFAIRS – Current Affairs
reports, commerce, trading,
some characters may be displayed incorrectly.
INFO – General Information
etc.
CHILDREN – Programs for
• If you see NO TEXT in the RT display, it means no RT data
SPORT – Sport
is sent from the broadcast station. The display will
EDUCATE – Educational
children
SOCIAL – Social affairs
automatically switch to the PS data display (if no PS data,
DRAMA – Radio plays, etc.
RELIGION – Programs
NO NAME is displayed).
CULTURE – National or
regional culture, theater, etc.
concerning religion
• In the PTY display, NO PTY may be shown.
SCIENCE – Science and
PHONE IN – Public expressing
technology
their views by phone
VARIED – Usually talk-based
TRAVEL – Holiday-type travel
material, such as quiz shows
rather than traffic
or interviews.
announcements
POP M – Pop music
LEISURE – Leisure interests
ROCK M – Rock music
and hobbies
EASY M – Easy listening
JAZZ – Jazz
LIGHT M – ‘Light’ classical
COUNTRY – Country music
music
NATION M – Popular music in
CLASSICS – ‘Serious’ classical
a language other than English
music
OLDIES – Popular music from
OTHER M – Music not fitting
the ’50s and ’60s
above categories
FOLK M – Folk music
WEATHER – Weather reports
DOCUMENT – Documentary
Timer and sleep operation
The timer can be set as follows.
Timer and sleep operation
Sleep operation
Press SLEEP to change the amount of time before the
Setting the wake-up timer
receiver switches into standby (30 min. – 60 min. – 90
min. – Off).
• You can check the remaining sleep time at any time by
7 Press ENTER.
pressing SLEEP once.
8 Set the switch-on time.
Use /button to set the hour, then press ENTER.
Set the minute in the same way, pressing ENTER when you’re
done.
9 Set the switch-off time.
Set as above, pressing
ENTER
when done.
10 Use
/
button to set the volume.
11 Press ENTER.
The TIMER indicator light, and the settings are confirmed in
the display.
Timer playback:
12 Press STANDBY/ON to enter the power stand-by mode.
The unit turns on and plays the desired source (CD, TUNER,
USB or iPod/iPhone) at a preset time.
Turning the wake-up timer on/off
Before setting timer:
If you have already set the wake-up timer, you can switch it
• Check that the clock is set to the correct time (Setting the
on/off.
clock on page 11). If it is not set, you cannot use the timer
1 When the power is on, press and hold TIMER button for
function.
two seconds.
• For timer playback: Plug in USB or load discs or iPod to
2Press
/
button to select ‘Timer On’ or ‘Timer Off’
be played.
within ten seconds, then press ENTER.
1 Press STANDBY/ON button.
When ‘
Timer On
’ is selected, the timer indicator light, and
2 Press and hold TIMER button for more than two
the settings are confirmed in the display.
seconds.
3 When ‘Timer On’ is selected, press STANDBY/ON to set
3Press
/
button to select ‘Timer Set’ within ten
the stand-by mode.
seconds, then press ENTER.
4 Select the source you want played.
Reusing the memorised timer setting
Use / button to select CD, TUNER, USB or iPod/iPhone
The timer setting will be memorised once it is entered. To
function.
reuse the same setting, perform the following operations.
5 Press ENTER.
1 When the power is on, press and hold TIMER button for
6 Set the day(s) of the week.
two seconds.
Use /button to choose the day(s).
2Press
/
button to select ‘Timer Call’ within ten
seconds, then press ENTER.
The TIMER indicator light, and the settings are confirmed in
the display.
26
En
O
X-HM70_En.fm 26 ページ 2011年8月2日 火曜日 午後4時46分
EVERYDAY SUNDAY MONDAY
TUESDAY WEDNESDAY THURSDAY
FRIDAY SATURDAY MON-FRI
TUE-SAT SAT-SUN

X-HM70_En.fm 27 ページ 2011年8月2日 火曜日 午後4時46分
Additional Information
Internet security software is currently installed in the
English Français Español Italiano
Additional Information
Tuner
connected component. There are cases where a component
The radio makes unusual noises continuously.
with Internet security software installed cannot be accessed.
Is the unit placed near the TV or computer?
The audio component on the network which has been
Troubleshooting chart
Is the FM aerial or AM loop aerial placed properly? Move the
switched off is switched on. Switch on the audio component
on the network before switching on this receiver.
Many potential problems can be resolved by the owner
aerial away from the AC power lead if it is located nearby.
Playback does not start while ‘Please Wait’ continues to be
without calling a service technician.
displayed.
If something is wrong with this product, check the following
USB
The component is currently disconnected from this receiver or
before calling your authorized PIONEER dealer or service
Device cannot be detected.
the power supply. Check whether the component is properly
centre.
Is there any MP3/WMA file available?
connected to this receiver or the power supply.
Is the device properly connected?
The PC or Internet radio is not properly operated.
General
Is it an MTP device?
The corresponding IP address is not properly set. Switch on
Does the device contain AAC file only?
The clock is not set to the correct time.
the built-in DHCP server function of your router, or set up the
Did a power failure occur?
Playback does not start.
network manually according to your network environment
Is it a copyright protected WMA file?
(page 21).
Reset the clock. (Refer to page 11)
Is it a false MP3 file?
The IP address is being automatically configured. The
Deutsch
When a button is pressed, the unit does not respond.
automatic configuration process takes time. Please wait.
Set the unit to the power stand-by mode and then turn it back
on.
iPod and iPhone
The audio files stored on components on the network, such
as a PC, cannot be played back.
If the unit still malfunctions, reset it. (Refer to page 29)
No sound is produced. No image appears on the TV/monitor.
Windows Media Player 11 or Windows Media Player 12 is not
No sound is heard.
The iPod or iPhone is not playing.
currently installed on your PC. Install Windows Media Player
Is the volume level set to “Min”?
The iPod or iPhone is not properly connected to the unit.
11 or Windows Media Player 12 on your PC.
Are the headphones connected?
Is the AC power lead of the unit plugged in?
Audio files were recorded in formats other than MP3, WAV
Are the speaker wires disconnected?
The video cable is not properly connected.
(LPCM only), MPEG-4 AAC, FLAC, and WMA. Play back audio
The TV/monitor’s input selection is not properly set.
files recorded in MP3, WAV (LPCM only), MPEG-4 AAC, FLAC,
CD player
Audio from the iPod/iPhone cannot be heard via the
or WMA. Note that some audio files recorded in these formats
Nederlands
headphones connected to the unit.
may not be played back on this receiver.
Playback does not start.
iPod or iPhone will not charge.
Audio files recorded in MPEG-4 AAC or FLAC are being played
Playback stops in the middle or is not performed properly.
The iPod or iPhone is not making full contact with the
back on Windows Media Player 11 or Windows Media Player
Is the disc loaded upside down?
connector.
12. Audio files recorded in MPEG-4 AAC or FLAC cannot be
Does the disc satisfy the standards?
Using iPod (3
rd
generation).
played back on Windows Media Player 11 or Windows Media
Is the disc distorted or scratched?
Player 12. Try using another server. Refer to the operation
Playback sounds are skipped, or stopped in the middle of a
The iPod or iPhone is not supported. Refer to Supported iPod,
manual supplied with your server.
track.
iPhone and iPad models: on page 17 for compatible models.
The component connected to the network is not properly
Is the unit located near excessive vibrations?
“This accessory is not made to work with iPhone” or “This
operated.
Is the disc very dirty?
accessory is not supported by iPhone” appears on iPhone
-
Check whether the component is affected by special
Has condensation formed inside the unit?
screen.
circumstances or is in the sleep mode.
The iPhone battery is low. Please charge the iPhone.
-
Try rebooting the component if necessary.
iPhone is not properly docked.
Remote control
The component connected to the network does not permit file
sharing. Try changing the settings for the component
The remote control does not operate.
NETWORK feature
connected to the network.
Is the AC power lead of the unit plugged in?
Cannot access the network.
The folder stored on the component connected to the network
Is the battery polarity correct?
has been deleted or damaged. Check the folder stored on the
Are the batteries dead?
The LAN cable is not firmly connected. Firmly connect the
component connected to the network.
Is the distance or angle incorrect?
LAN cable (page 10).
Does the remote control sensor receive strong light?
The router is not switched on. Switch on the router.
27
En

X-HM70_En.fm 28 ページ 2011年8月2日 火曜日 午後4時46分
Additional Information
Cannot access the component connected to the network.
The NETWORK function cannot be operated with the
The wireless LAN converter is properly connected to the
The component connected to the network is not properly set. If
buttons on the remote control.
receiver and the wireless LAN converter’s indicators are lit,
the client is automatically authorized, you need to enter the
The remote control is not currently set to the NETWORK
but the wireless LAN converter cannot be set from the receiver
corresponding information again. Check whether the
mode. Press NETWORK to set the remote control to the
(the settings screen cannot be displayed).
connection status is set to “Do not authorize”.
NETWORK mode (page 20).
If Network Modes in the receiver’s Network Settings is set
There are no playable audio files on the component connected
to STATIC and the IP address has been set manually, the IP
to the network. Check the audio files stored on the component
address set in the wireless LAN converter may not match. In
Troubleshooting of wireless LAN
connected to the network.
the receiver’s Network Settings, set Network Modes to
Network cannot be accessed via wireless LAN.
Audio playback is undesirably stopped or disturbed.
DHCP. After the setting is completed, turn the receiver’s
Wireless LAN converter’s power is not on (Wireless LAN
power off. Next, turn the receiver’s power back on and check
The audio file currently being played back was not recorded in
converter’s “Power”, “WPS” and “Wireless” indicators are not
whether the wireless LAN converter’s settings can be
a format playable on this receiver.
all lit). Check that the USB cable connecting the wireless LAN
displayed with the receiver.
-
Check whether the audio file was recorded in a format
converter to the receiver’s DC OUTPUT for WIRELESS LAN
If the settings can be displayed, change the IP address
supported by this receiver.
terminal is properly connected.
settings of the receiver and wireless LAN converter as
-
Check whether the folder has been damaged or corrupted.
The LAN cable is not firmly connected. Firmly connect the
necessary.
-
Note that there are cases where even the audio files listed as
playable on this receiver cannot be played back or displayed
LAN cable (page 10).
The IP address settings of the receiver and wireless LAN
(page 22).
Wireless LAN converter and base unit (wireless LAN router,
converter do not match the settings of the wireless LAN
router, etc.
The LAN cable is currently disconnected. Connect the LAN
etc.) are too far apart or there is an obstacle between them.
cable properly (page 10).
Improve the wireless LAN environment by moving the wireless
Check the IP address settings of the receiver and wireless
LAN converter and base unit closer together, etc.
LAN converter (including the Network Modes).
There is heavy traffic on the network with the Internet being
There is a microwave oven or other device generating
If the receiver’s Network Modes is DHCP, turn the receiver’s
accessed on the same network. Use 100BASE-TX to access
electromagnetic waves near the wireless LAN environment.
power off, then turn the power back on.
the components on the network.
-
Use the system in a place away from microwave ovens or
Check that the IP addresses of the receiver and wireless LAN
Cannot access Windows Media Player 11 or Windows Media
others device generating electromagnetic waves.
converter match the settings of the wireless LAN router, etc.
Player 12.
-
Avoid using devices generating electromagnetic waves as
If the receiver’s Network Modes is STATIC, set an IP address
In case of Windows Media Player 11: You are currently logged
much as possible when using the system with the wireless
matching the network of the base unit (wireless LAN router,
onto the domain through your PC with Windows XP or
LAN.
etc.).
Windows Vista installed. Instead of logging onto the domain,
Multiple wireless LAN converters are connected to the
For example, if the wireless LAN router’s IP address is
log onto the local machine (page 20).
wireless LAN router. When connecting multiple wireless LAN
“192.168.1.1”, set the receiver’s IP address to “192.168.1.XXX”
In case of Windows Media Player 12: You are currently logged
converters, their IP addresses must be changed. For example,
(*1), the subnet mask to “255.255.255.0”, the gateway and
onto the domain through your PC with Windows 7 installed.
if the wireless LAN router’s IP address is “192.168.1.1”, set the
DNS to “192.168.1.1”.
Instead of logging onto the domain, log onto the local
first wireless LAN converter’s IP address to “192.168.1.249”,
Next, set the wireless LAN converter’s IP address to
machine (page 20).
the second wireless LAN converter’s IP address to
“192.168.1.249” (*2).
Cannot listen to Internet radio stations.
“192.168.1.248”, using values between 2 and 249 (such as
(*1) Set the “XXX” in “192.168.1.XXX” to a number between 2
The firewall settings for components on the network are
“249” and “248”) that are not assigned to other wireless LAN
and 248 that is not assigned to other devices.
currently in operation. Check the firewall settings for
converters or to other devices.
(*2) Set the “249” in “192.168.1.249” to a number between 2
components on the network.
Wireless LAN connections cannot be established between the
and 249 that is not assigned to other devices.
You are currently disconnected from the Internet. Check the
wireless LAN converter and base unit (wireless LAN router,
Try making the wireless LAN converter’s advanced settings.
connection settings for components on the network, and
etc.).
The wireless LAN converter can be connected to a computer
consult with your network service provider if necessary
-
With the wireless LAN converter connected to the receiver,
to make the advanced wireless LAN settings. For details, see
(page 21).
turn the receiver’s power off, unplug the power cord from the
the CD-ROM included for the wireless LAN converter. Check
The broadcasts from an Internet radio station are stopped or
power outlet, then plug the power cord back in and turn the
the settings of the wireless LAN router, etc., then change the
interrupted. There are cases where you cannot listen to some
receiver’s power on.
settings of the wireless LAN converter.
Internet radio stations even when they are listed in the list of
-
The wireless LAN converter must be set in order to establish
Note, however, that making the advanced wireless LAN
Internet radio stations on this receiver (page 20).
wireless LAN connections. For details, refer to the operating
settings will not necessarily improve the wireless LAN
instructions of the wireless LAN converter.
environment. Be careful when changing the settings.
The access point is set to conceal the SSID. In this case, the
SSID may not be displayed on the access point list screen. If
28
En
Additional Information
not, set the SSID, etc., by making the wireless LAN converter
English Français Español Italiano
settings on the receiver manually.
The access point’s security settings use WEP 152-bit length
code key or shared key authentication. The receiver does not
support WEP 152-bit length code key or shared key
authentication.
Network connections cannot be established even when the
above measures are taken. Reset the wireless LAN converter.
After this, redo the wireless LAN converter’s settings.
-
About resetting
1. Check that the wireless LAN converter’s power is on.
2. Press the wireless LAN converter’s reset button for at least
3 seconds.
3. Release the reset button.
When the wireless LAN converter is restarted, the resetting
procedure is completed.
Deutsch
Condensation
Sudden temperature changes, storage or operation in an
extremely humid environment may cause condensation
inside the cabinet (CD pickup, etc.) or on the transmitter on
the remote control. Condensation can cause the unit to
malfunction. If this happens, leave the power on with no disc
in the unit until normal playback is possible (about 1 hour).
Wipe off any condensation on the transmitter with a soft
cloth before operating the unit.
Nederlands
If problem occurs
When this product is subjected to strong external
interference (mechanical shock, excessive static electricity,
abnormal supply voltage due to lightning, etc.) or if it is
operated incorrectly, it may malfunction.
If such a problem occurs, do the following:
1 Set the unit to the stand-by mode and turn the power
on again.
2 If the unit is not restored in the previous operation,
unplug and plug in the unit again, and then turn the
power on.
29
En
Note
Factory reset, clearing all memory
If iPod or iPhone is connected to the unit, disconnect it.
1 Press the STANDBY/ON button to enter the power
stand-by mode.
2 Press both STANDBY/ON button and button on the
unit.
‘RESET YES?’ appears.
3 Press / ( ) button.
‘RESET...’ appears.
If you don’t press / ( ) button within 10 minutes after
STEP 2, RESET MODE is canceled.
• If neither operation above restores the unit, clear all the
memory by resetting it.
CAUTION
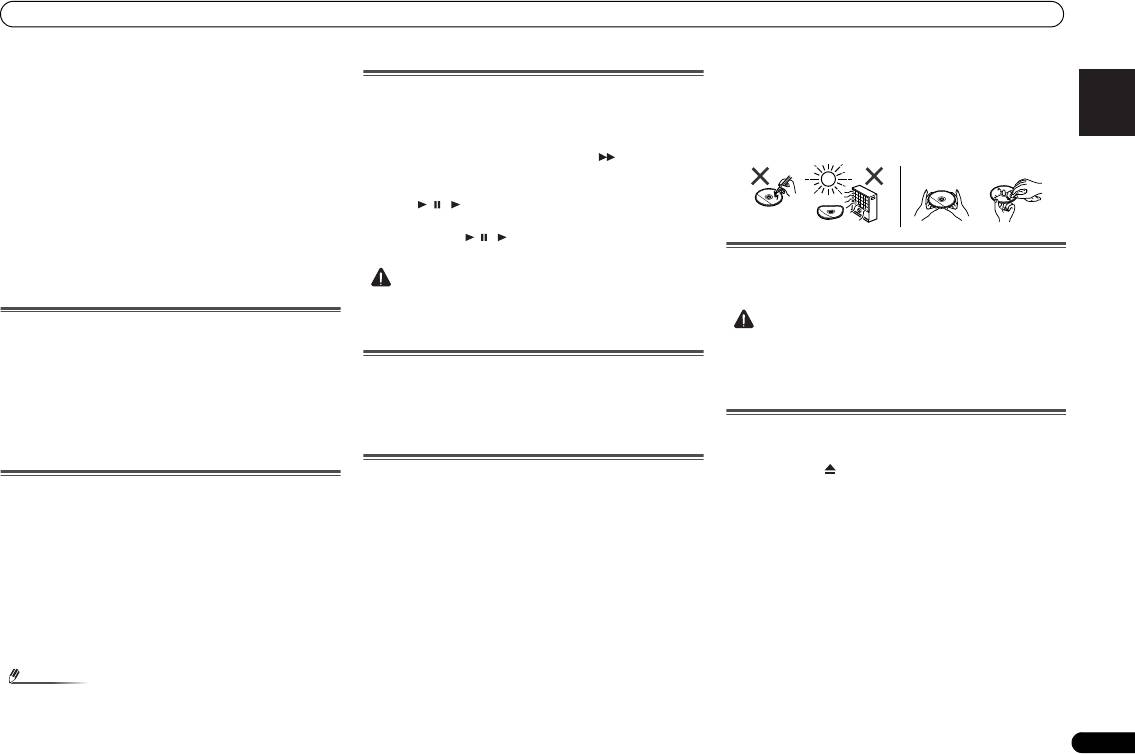
• Always hold the CDs by the edges. Fingerprints, dirt, or
water on the CDs can cause noise or mistracking. If a CD
is dirty or does not play properly, clean it with a soft, dry
cloth, wiping straight out from the centre, along the
radius.
Cleaning the cabinet
Periodically wipe the cabinet with a soft cloth and a diluted
• This operation will erase all data stored in memory
soap solution, then with a dry cloth.
including clock, timer settings, tuner preset, and CD
programme.
Before transporting the unit
Remove the iPod, USB memory device and disc from the
unit. Then, set the unit to the power stand-by mode. Carrying
the unit with iPod or USB memory device left docked or discs
left inside might damage the unit.
Care of compact discs
Compact discs are fairly resistant to damage, however
mistracking can occur due to an accumulation of dirt on the
disc surface. Follow the guidelines below for maximum
enjoyment from your CD collection and player.
• Do not write on either side of the disc, particularly the
non-label side from which signals are read. Do not mark
this surface.
• Keep your discs away from direct sunlight, heat, and
excessive moisture.
CAUTION
• Do not use chemicals for cleaning (petrol, paint thinner,
etc.). It may damage the cabinet.
• Do not apply oil to the inside of the unit. It may cause
malfunctions.
Caution for when the unit is installed in a rack
with a glass door
Do not press the OPEN/CLOSE on the remote control to
open the disc tray while the glass door is closed. The door will
hamper the movement of the disc tray, and the unit could be
damaged.
NO
YES
Correct
X-HM70_En.fm 29 ページ 2011年8月2日 火曜日 午後4時46分
X-HM70_En.fm 30 ページ 2011年8月2日 火曜日 午後4時46分
Additional Information
Category Extension Stream
About playable music file formats
The USB and NETWORK function of this receiver supports the following music file formats.
FLAC .flac FLAC Sampling frequency 44.1 kHz, 48 kHz, 96 kHz
• Note that some file formats are not available for playback although they are listed as
Quantization bitrate 16 bit, 24 bit
playable file formats. Also, the compatibility of file formats varies depending on the type of
server. Check with your server to ensure the compatibility of file formats supported by your
Channel 2 ch
server.
Bitrate —
Category Extension Stream
a “MPEG Layer-3 audio decoding technology licensed from Fraunhofer IIS and Thomson multimedia.”
MP3
a
.mp3 MPEG-1 Audio
Sampling frequency 44.1 kHz to 48 kHz
Layer-3
Quantization bitrate 16 bit
About status messages
Refer to the following information when you come up with a status message while operating
Channel 2 ch
the NETWORK function.
Bitrate 32 kbps to 320 kbps
Status messages Descriptions
VBR/CBR Supported/Supported
List empty, Add from Now Playing... The list is empty. Please add from Now Playing.
WAV .wav LPCM Sampling frequency 44.1 kHz, 48 kHz, 96 kHz
No item There are no items.
Quantization bitrate 16 bit, 20 bit, 24 bit
Rescanning devices... Rescanning. Please wait.
Channel 2 ch
Unsupported Format This format is not supported.
WMA .wma WMA2/7/8 Sampling frequency 44.1 kHz to 48 kHz
Server Connection Error Cannot connect to server.
Quantization bitrate 16 bit
Error opening stream This is a stream error.
Channel 2 ch
Already in favorites This is already registered in your favorites.
Bitrate 32 kbps to 320 kbps
Unsupported item This item is not supported by this receiver.
VBR/CBR Supported/Supported
Unknown error An unidentified error has occurred.
WMA9 Sampling frequency 44.1 kHz to 48 kHz
Connection Error... Cannot connect to network.
Quantization bitrate 16 bit
Channel 2 ch
Bitrate 32 kbps to 320 kbps
VBR/CBR Supported/Supported
AAC .m4a
MPEG-4 AAC LC
Sampling frequency 44.1 kHz to 48 kHz
.aac
MPEG-4 HE AAC
Quantization bitrate 16 bit
(aacPlus v1/2)
Channel 2 ch
Bitrate 16 kbps to 320 kbps
VBR/CBR Supported/Supported
30
En
X-HM70_En.fm 31 ページ 2011年8月2日 火曜日 午後4時46分
Additional Information
Weight . . . . . . . . . . . . . . . . . . . . . . . . . . . . . . . . . . . . . . . . 4.7 kg
Pioneer does not represent or warrant that content services
English Français Español Italiano
Specifications
will continue to be provided or available for a particular
Speaker (X-HM70 only)
As part of our policy of continuous improvement, PIONEER
period of time, and any such warranty, express or implied, is
Type
reserves the right to make design and specification changes
disclaimed.
2-way type speaker system
for product improvement without prior notice. The
2.5 cm Dome-Tweeter
performance specification figures indicated are nominal
12 cm Woofer
values of production units. There may be some deviations
Maximum input power. . . . . . . . . . . . . . . . . . . . . . . . . . . .50 W
from these values in individual units.
Impedance . . . . . . . . . . . . . . . . . . . . . . . . . . . . . . . . . . .4 ohms
*The specifications are applicable when the power supply is
Dimensions
230 V.
Width . . . . . . . . . . . . . . . . . . . . . . . . . . . . . . . . . . . . . 148 mm
Height . . . . . . . . . . . . . . . . . . . . . . . . . . . . . . . . . . 263.5 mm
Amplifier section
Depth. . . . . . . . . . . . . . . . . . . . . . . . . . . . . . . . . . . . . 208 mm
RMS Power Output . . . . . . . . . . . . . . . . . . . . . . .50 W + 50 W
Weight . . . . . . . . . . . . . . . . . . . . . . . . . . . . . . . . . . . 2.7 kg/each
(1 kHz, 10 % T.H.D., 4 ohms)
Guaranteed speaker impedance. . . . . . . .4 ohms to 16 ohms
Headphones . . . . . . . . . . . . . . . . . . . recommended: 32 ohms
About iPod/iPhone/iPad
Deutsch
Tuner section
Frequency Range (FM). . . . . . . . . . . . . . 87.5 MHz to 108 MHz
Antenna Input (FM) . . . . . . . . . . . . . . . . 75 ohms unbalanced
Frequency Range (AM) . . . . . . . . . . . . . . 531 kHz to 1602 kHz
Antenna (AM) . . . . . . . . . . . . . . . . . . . . . . . . . . . Loop antenna
Video section
“Made for iPod,” “Made for iPhone” and “Made for iPad”
Signal level (Composite) . . . . . . . . . . . . . . . .1 Vp-p (75 ohms)
mean that an electronic accessory has been designed to
connect specifically to iPod, iPhone, or iPad, respectively,
Network section
and has been certified by the developer to meet Apple
Nederlands
LAN terminal. . . . . . . . . . . . . . . . . . . . . . . . . . . . .Ethernet jack
performance standards. Apple is not responsible for the
10BASE-T/100BASE-TX
operation of this device or its compliance with safety and
regulatory standards. Please note that the use of this
Other connectors
accessory with iPod, iPhone, or iPad may affect wireless
Power supply
performance.
Front USB connector. . . . . . . . . . . . . . . . . . . . . . . 5 V, 2.1 A
iPad, iPhone, iPod, iPod classic, iPod nano and iPod touch are
iPod connector. . . . . . . . . . . . . . . . . . . . . . . . . . . . 5 V, 1.0 A
trademarks of Apple Inc., registered in the U.S. and other
Rear DC output connector (for Wireless LAN)
countries.
. . . . . . . . . . . . . . . . . . . . . . . . . . . . . . . . . . . . . . . 5 V, 600 mA
Miscellaneous
Disclaimer for Third Party Content
Power source . . . . . . . . . . . . . . . . . . AC 220 V to 240 V, 50 Hz
Access to content provided by third parties requires a high
Power consumption
speed internet connection and may also require account
Power on. . . . . . . . . . . . . . . . . . . . . . . . . . . . . . . . . . . . .80 W
registration and a paid subscription.
Power stand-by. . . . . . . . . . . . . . . . . . . . . . . . . 0.5 W or less
Dimensions
Third party content services may be changed, suspended,
© 2011 PIONEER CORPORATION.
Width. . . . . . . . . . . . . . . . . . . . . . . . . . . . . . . . . . . . . 215 mm
interrupted, or discontinued at any time without notice, and
All rights reserved.
Height . . . . . . . . . . . . . . . . . . . . . . . . . . . . . . . . . . . . 111 mm
Pioneer disclaims any liability in connection with such
Depth. . . . . . . . . . . . . . . . . . . . . . . . . . . . . . . . . . . . . 353 mm
occurrences.
31
En
PR
IMPORTANT
ATTENTION
DANGER D´ELECTROCUTION
NE PAS OUVRIR
Ce symbole de l’éclair, placé dans un
ATTENTION :
Ce point d’exclamation, placé dans un
triangle équilatéral, a pour but d’attirer
POUR ÉVITER TOUT RISQUE
triangle équilatéral, a pour but d’attirer
l’attention de l’utilisateur sur la présence, à
D’ÉLECTROCUTION, NE PAS ENLEVER LE
l’attention de l’utilisateur sur la présence,
l’intérieur du coffret de l’appareil, de
COUVERCLE (NI LE PANNEAU ARRIÈRE).
dans les documents qui accompagnent
“tensions dangereuses” non isolées d’une
AUCUNE PIÈCE RÉPARABLE PAR
l’appareil, d’explications importantes du
grandeur suffisante pour représenter un
L’UTILISATEUR NE SE TROUVE À
point de vue de l’exploitation ou de
risque d’électrocution pour les êtres
L’INTÉRIEUR. CONFIER TOUT ENTRETIEN À
l’entretien.
humains.
UN PERSONNEL QUALIFIÉ UNIQUEMENT.
D3-4-2-1-1_A1_Fr
AVERTISSEMENT
Milieu de fonctionnement
Cet appareil n’est pas étanche. Pour éviter les risques
Température et humidité du milieu de fonctionnement :
d’incendie et de décharge électrique, ne placez près de
De +5 °C à +35 °C (de +41 °F à +95 °F) ; Humidité
lui un récipient rempli d’eau, tel qu’un vase ou un pot de
relative inférieure à 85 % (orifices de ventilation non
fleurs, et ne l’exposez pas à des gouttes d’eau, des
obstrués)
éclaboussures, de la pluie ou de l’humidité.
N’installez pas l’appareil dans un endroit mal ventilé ou
D3-4-2-1-3_A1_Fr
un lieu soumis à une forte humidité ou en plein soleil
(ou à une forte lumière artificielle).
D3-4-2-1-7c*_A1_Fr
AVERTISSEMENT
Avant de brancher l’appareil pour la première, lisez
Si la fiche d’alimentation secteur de cet appareil ne
attentivement la section suivante.
convient pas à la prise secteur à utiliser, la fiche doit
La tension de l’alimentation électrique disponible
être remplacée par une appropriée. Ce
varie selon le pays ou la région. Assurez-vous que
remplacement et la fixation d’une fiche secteur sur le
la tension du secteur de la région où l’appareil sera
cordon d’alimentation de cet appareil doivent être
utilisé correspond à la tension requise (par ex. 230
effectués par un personnel de service qualifié. En cas
V ou 120 V), indiquée sur le panneau arrière.
de branchement sur une prise secteur, la fiche de
D3-4-2-1-4*_A1_Fr
coupure peut provoquer une sérieuse décharge
électrique. Assurez-vous qu’elle est éliminée
AVERTISSEMENT
correctement après sa dépose.
Pour éviter les risques d’incendie, ne placez aucune
L’appareil doit être déconnecté en débranchant sa
flamme nue (telle qu’une bougie allumée) sur
fiche secteur au niveau de la prise murale si vous
l’appareil.
prévoyez une période prolongée de non utilisation
D3-4-2-1-7a_A1_Fr
(par exemple avant un départ en vacances).
D3-4-2-2-1a_A1_Fr
2
Fr
É
X-HM70_Fr_Anki.fm 2 ページ 2011年8月1日 月曜日 午後10時27分
CAUTION DE VENTILATION
Lors de l’installation de l’appareil, veillez à laisser un
espace suffisant autour de ses parois de manière à
améliorer la dissipation de chaleur (au moins 10 cm sur
le dessus, 10 cm à l’arrière et 10 cm de chaque côté).
10 cm 10 cm
10 cm
TIMER
10 cm
AVERTISSEMENT
Les fentes et ouvertures du coffret sont prévues pour la
ventilation, pour assurer un fonctionnement stable de
l’appareil et pour éviter sa surchauffe. Pour éviter les
risques d’incendie, ne bouchez jamais les ouvertures et
ne les recouvrez pas d’objets, tels que journaux, nappes
ou rideaux, et n’utilisez pas l’appareil posé sur un tapis
épais ou un lit.
D3-4-2-1-7b*_A1_Fr
ATTENTION
L’interrupteur STANDBY/ON de cet appareil ne
coupe pas complètement celui-ci de sa prise secteur.
Comme le cordon d’alimentation fait office de
dispositif de déconnexion du secteur, il devra être
débranché au niveau de la prise secteur pour que
l’appareil soit complètement hors tension. Par
conséquent, veillez à installer l’appareil de telle
manière que son cordon d’alimentation puisse être
facilement débranché de la prise secteur en cas
d’accident. Pour éviter tout risque d’incendie, le
cordon d’alimentation sera débranché au niveau de
la prise secteur si vous prévoyez une période
prolongée de non utilisation (par exemple avant un
départ en vacances).
D3-4-2-2-2a*_A1_Fr
X-HM70_Fr_Anki.fm 3 ページ 2011年8月1日 月曜日 午後10時27分
Condensation
Information à destination des utilisateurs sur la collecte et l’élimination des
Si vous transportez sans transition le lecteur d’un
English Français Español Italiano
équipements et batteries usagés
endroit froid dans un pièce chaude (en hiver, par
exemple), ou si la température de la pièce où se trouve
Marquage pour les
Ces symboles qui figurent sur les produits, les emballages et/ou les documents
le lecteur augmente rapidement, des gouttelettes d’eau
équipements
d’accompagnement signifient que les équipements électriques et électroniques et
(condensation) peuvent se former à l’intérieur du
batteries usagés ne doivent pas être jetés avec les déchets ménagers et font l’objet
lecteur (sur les pièces et la lentille). En cas de
d’une collecte sélective.
condensation, le lecteur ne fonctionne pas
Pour assurer l’enlèvement et le traitement appropriés des produits et batteries
correctement et la lecture n’est pas possible. Laissez le
lecteur en service pendant 1 ou 2 heures à la
usagés, merci de les retourner dans les points de collecte sélective habilités
température ambiante (pour que l’humidité ait le temps
conformément à la législation locale en vigueur.
de s’évaporer). Les gouttelettes d’eau se dissiperont et
Exemples de marquage
En respectant les circuits de collecte sélective mis en place pour ces produits, vous
la lecture sera de nouveau possible.
De la condensation peut aussi se former en été si le
pour les batteries
contribuerez à économiser des ressources précieuses et à prévenir les impacts
négatifs éventuels sur la santé humaine et l’environnement qui pourraient résulter
lecteur est exposé à l’air d’un climatiseur. Dans ce cas,
d’une mauvaise gestion des déchets.
éloignez le lecteur du climatiseur.
S005_A1_Fr
Deutsch
Pour plus d’information sur la collecte et le traitement des produits et batteries
usagés, veuillez contacter votre municipalité, votre service de gestion des déchets
Ce produit est destiné à une utilisation domestique
ou le point de vente chez qui vous avez acheté ces produits.
générale. Toute panne due à une utilisation autre qu'à
des fins privées (comme une utilisation à des fins
Ces symboles ne sont valables que dans les pays de l’Union Européenne.
commerciales dans un restaurant, dans un autocar
Pour les pays n’appartenant pas à l’Union Européenne :
ou sur un bateau) et qui nécessite une réparation
Pb
Si vous souhaitez jeter ces articles, veuillez contacter les autorités ou revendeurs
sera aux frais du client, même pendant la période de
locaux pour connaître les méthodes d’élimination appropriées.
garantie.
K041_A1_Fr
Nederlands
K058a_A1_Fr
ATTENTION
Cet appareil est un produit laser de Classe 1, classé
selon l’article IEC 60825-1:2007 relatif à la Sécurité
des produits laser.
APPAREIL À LASER DE CLASSE 1
D58-5-2-2a_A2_Fr
3
Fr

X-HM70_FrTOC.fm 4 ページ 2011年8月1日 月曜日 午後10時25分
Nous vous remercions d’avoir porté votre choix sur ce produit PIONEER. Pour en tirer le meilleur parti, veuillez lire ce mode d’emploi très attentivement. Il vous guidera dans l’utilisation de
votre produit PIONEER.
Utilisation de la fonction de lecture réseau
Micro-chaîne CD et réseau X-HM70, composée d'une unité
Table des matières
(NETWORK). . . . . . . . . . . . . . . . . . . . . . . . . . . . . 20
principale et d'une paire d'enceintes.
Écoute des stations radio Internet . . . . . . . . . . . . . . . . . 20
Micro-chaîne CD et réseau XC-HM70, composée d'une unité
Accessoires. . . . . . . . . . . . . . . . . . . . . . . . . . . . . . 4
Lecture de fichiers audio enregistrés sur des composants
principale.
en réseau . . . . . . . . . . . . . . . . . . . . . . . . . . . . . . . . . . . . 21
Préparatifs . . . . . . . . . . . . . . . . . . . . . . . . . . . . . . 5
Généralités . . . . . . . . . . . . . . . . . . . . . . . . . . . . . . . . . . . . 5
Lecture de vos morceaux préférés . . . . . . . . . . . . . . . . . 21
Mise en place des piles. . . . . . . . . . . . . . . . . . . . . . . . . . . 5
Menu de configuration du réseau. . . . . . . . . . . . . . . . . . 21
Accessoires
Conditions requises pour la connexion réseau . . . . . . . . 22
Commandes et affichages . . . . . . . . . . . . . . . . . 6
À propos de la lecture en réseau . . . . . . . . . . . . . . . . . . 22
Veuillez vérifier la présence des accessoires suivants.
Télécommande . . . . . . . . . . . . . . . . . . . . . . . . . . . . . . . . . 6
Glossary . . . . . . . . . . . . . . . . . . . . . . . . . . . . . . . . . . . . . 23
Panneau avant . . . . . . . . . . . . . . . . . . . . . . . . . . . . . . . . . 7
Pour écouter la radio . . . . . . . . . . . . . . . . . . . . 24
o
Système d’enceintes (X-HM70 uniquement) . . . . . . . . . . . 7
Raccordement de votre équipement . . . . . . . . . 8
Utilisation du système RDS (Radio Data System)
Raccordement des antennes. . . . . . . . . . . . . . . . . . . . . . . 8
. . . . . . . . . . . . . . . . . . . . . . . . . . . . . . . . . . . . . . 25
Raccordement des enceintes . . . . . . . . . . . . . . . . . . . . . . 9
Présentation du système RDS . . . . . . . . . . . . . . . . . . . . 25
Télécommande x 1
Pile « AAA » x 2
Utilisation d’un autre woofer auxiliaire . . . . . . . . . . . . . . . 9
Utilisation des fonctions d'arrêt automatique et
Raccordement d’un téléviseur, etc.. . . . . . . . . . . . . . . . . . 9
de réveil . . . . . . . . . . . . . . . . . . . . . . . . . . . . . . . 26
Raccordement au réseau par l’interface LAN . . . . . . . . . 10
Réglage du minuteur de réveil . . . . . . . . . . . . . . . . . . . . 26
Branchement du cordon d’alimentation . . . . . . . . . . . . . 10
Mise en arrêt différée . . . . . . . . . . . . . . . . . . . . . . . . . . . 26
Antenne FM x 1
Câble vidéo x 1
Commandes générales . . . . . . . . . . . . . . . . . . . 11
Informations complémentaires . . . . . . . . . . . . 27
Pour allumer l’appareil . . . . . . . . . . . . . . . . . . . . . . . . . . 11
Dépannage. . . . . . . . . . . . . . . . . . . . . . . . . . . . . . . . . . . 27
Réglage de l'horloge . . . . . . . . . . . . . . . . . . . . . . . . . . . . 11
Condensation . . . . . . . . . . . . . . . . . . . . . . . . . . . . . . . . . 29
Enrichissement du système . . . . . . . . . . . . . . . . . . . . . . 12
Si le problème survient . . . . . . . . . . . . . . . . . . . . . . . . . . 29
Réinitialisation des réglages d’usine, effacement de toute
Câbles des enceintes x 2
Écoute de disques MP3/WMA ou CD . . . . . . . . 13
la mémoire . . . . . . . . . . . . . . . . . . . . . . . . . . . . . . . . . . . 29
Cadre-antenne PO x 1
(X-HM70 uniquement)
Lecture de disque . . . . . . . . . . . . . . . . . . . . . . . . . . . . . . 13
Diverses fonctions de disque. . . . . . . . . . . . . . . . . . . . . . 13
Avant de transporter l’appareil . . . . . . . . . . . . . . . . . . . . 29
Lecture avancée de disques MP3/WMA ou CD . . . . . . . . 14
Entretien de disques compact . . . . . . . . . . . . . . . . . . . . 29
Carte de garantie
Mode dossier MP3/WMA (seulement pour des fichiers
Nettoyage du coffret . . . . . . . . . . . . . . . . . . . . . . . . . . . . 29
MP3/WMA) . . . . . . . . . . . . . . . . . . . . . . . . . . . . . . . . . . . 15
Attention si l’appareil est installé dans un meuble avec une
Ce mode d’emploi
porte en verre . . . . . . . . . . . . . . . . . . . . . . . . . . . . . . . . . 29
Écoute de l’iPod, iPhone et iPad . . . . . . . . . . . 17
À propos des formats de fichiers de musique
Modèles d’iPod, iPhone et iPad pris en charge : . . . . . . . 17
lisibles . . . . . . . . . . . . . . . . . . . . . . . . . . . . . . . . . . . . . . 30
Connexion de votre iPod/iPhone . . . . . . . . . . . . . . . . . . . 17
À propos des mentions d’état . . . . . . . . . . . . . . . . . . . . . 30
Enceintes x 2
Pour retirer l'adaptateur pour iPod ou iPhone . . . . . . . . . 17
Spécifications. . . . . . . . . . . . . . . . . . . . . . . . . . . . . . . . . 31
Pour insérer l’adaptateur iPad. . . . . . . . . . . . . . . . . . . . . 17
(X-HM70 uniquement)
À propos de l’iPod/iPhone/iPad . . . . . . . . . . . . . . . . . . . 31
Lecture à partir d’un iPod, iPhone ou iPad . . . . . . . . . . . 18
Clause d'exclusion de responsabilite des contenus de
tiers . . . . . . . . . . . . . . . . . . . . . . . . . . . . . . . . . . . . . . . . 31
Lecture mémoire de grande capacité USB/
Avis concernant la licence du logiciel. . . . . . . . . . . . . . . 32
lecteur MP3 . . . . . . . . . . . . . . . . . . . . . . . . . . . . 19
Raccordement d’un appareil USB. . . . . . . . . . . . . . . . . . 19
Lecture à partir d’un périphérique USB. . . . . . . . . . . . . . 19
4
Fr
Préparatifs
Généralités
English Français Español Italiano
• Installer l’appareil sur un socle stable, horizontal et
exempt de vibrations.
• Placer les enceintes à une distance d’au moins 30 cm de
tout téléviseur CRT afin d’éviter les variations de couleurs
à travers l’écran du téléviseur. Si les variations persistent,
éloigner les enceintes du téléviseur. Le téléviseur LCD
n’est pas enclin à de telles variations.
• Mettre l’appareil à l’abri du soleil, du champ magnétique,
de la poussière excessive ou de l’humidité. On l’écartera
aussi d’un appareil électronique (ordinateur domestique,
télécopieur, etc.) qui provoquerait des parasites.
• Ne rien placer sur l’appareil.
• Mettre l’appareil à l’abri de l’humidité, de la chaleur
excessive (supérieure à 60°C) ou du froid excessif.
• Si le système ne fonctionne pas correctement,
Deutsch
débrancher et rebrancher le système. Rebrancher le
système et le rallumer.
• En cas d’orage, débrancher l’appareil.
• Débrancher le cordon d’alimentation en le tenant par la
fiche pour ne pas abîmer les fils internes.
• La prise CA est utilisée comme dispositif de déconnexion
et doit rester aisément accessible.
• Ne pas ôter l’enveloppe, on s’exposera à la secousse
électrique. Pour toute réparation interne, s’adresser
Nederlands
au revendeur PIONEER.
• Veiller à ne pas couvrir les ouvertures de ventilation de
journaux, de nappes, de rideaux, etc.
• Ne poser aucune source de flamme nue, telle qu’une
bougie, sur l’appareil.
• Il faut traiter une pile usée selon la réglementation
environnementale.
• L’appareil est conçu pour une utilisation en climat
tempéré.
5
Fr
ATTENTION
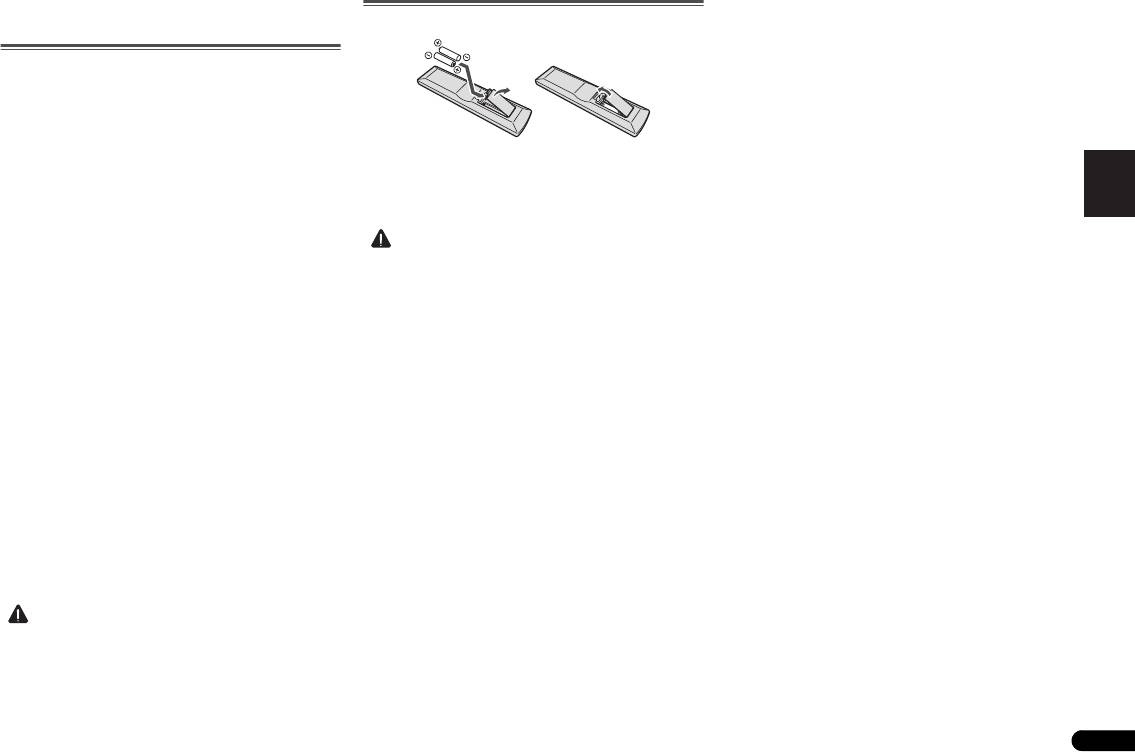
Mise en place des piles
Les piles de la télécommande fournies avec l’appareil
permettent d’effectuer les premières opérations ; il est
possible qu’elles ne durent pas très longtemps. Nous
recommandons l’usage de piles alcalines, dont la durée de
vie est supérieure.
• Respecter la tension indiquée sur l’appareil. Le
fonctionnement sur une tension plus élevée est
dangereux et risque de provoquer un incendie ou tout
autre type d’accident. PIONEER ne sera pas tenu pour
responsable des dommages causés par le non-respect de
la tension spécifiée.
ATTENTION
X-HM70_Fr.fm 5 ページ 2011年8月2日 火曜日 午後4時46分
• Une mauvaise utilisation des piles peut provoquer des
accidents tels que fuites ou explosions. Veuillez observer
les recommandations suivantes :
-
N’utilisez jamais des piles neuves et usagées dans le
même appareil.
-
Insérez les piles en respectant les indications de
polarité situées à l’intérieur du boîtier.
-
Des piles de même forme peuvent avoir des voltages
différents. N’utilisez jamais des piles de voltage différent
dans le même appareil.
-
Au moment d’éliminer les piles usagées, veuillez
respecter les réglementations gouvernementales ou les
recommandations publiques relatives à la protection de
l’environnement en vigueur dans votre pays ou région.
• N’utilisez ni ne conservez les piles sous la lumière directe
du soleil ou dans un endroit excessivement chaud,
comme une voiture ou à proximité d’un appareil de
chauffage. Les piles risqueraient de fuir, de surchauffer,
d’exploser ou de s’enflammer. Ceci pourrait aussi réduire
la durée de vie et les performances des piles.
X-HM70_Fr.fm 6 ページ 2011年8月2日 火曜日 午後4時46分
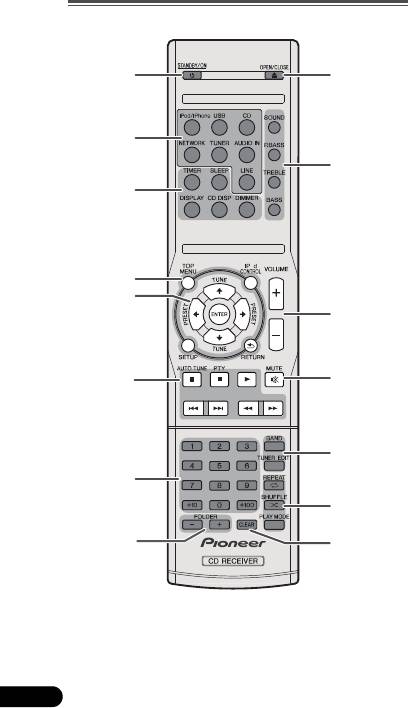
3 Touches de commande du récepteur
9 OPEN/CLOSE
Commandes et affichages
DIMMER – Obscurcit ou éclaircit l’affichage. Quatre
Permet d'ouvrir ou de refermer le tiroir disque (page 13).
étapes sont nécessaires pour commander la luminosité
10 Touches de contrôle du son
(page 11).
Pour ajuster la qualité du son (page 12).
Télécommande
SLEEP – Appuyez sur cette touche pour modifier le délai
11 Touche de contrôle du volume
qui s’écoule avant que le récepteur ne passe en mode
Permet de régler le volume d’écoute (page 11).
veille (30 min. – 60 min. – 90 min. – Off). Vous pouvez
12 MUTE
1
9
vérifier le temps restant avant le passage en mode veille
Permet de couper/restaurer le son (page 12).
en appuyant une fois sur la touche SLEEP (page 26).
13 Touches de commande du tuner
TIMER – Permet de régler l'heure, ainsi que de régler et
BAND – Permet de naviguer entre les bandes de signaux
de vérifier les minuteries de réveil et d'arrêt automatique
radio AM, FM ST (stéréo) et FM MONO (page 24).
2
(page 11, 26).
TUNER EDIT – Permet de mémoriser/nommer des
DISPLAY – Afficher les informations disponibles pour les
stations de radio à rappeler (page 24).
10
disques MP3/WMA ou les stations de radio RDS
14 Touches de modes de lecture
(page 15).
3
REPEAT – Appuyez sur cette touche pour modifier les
CD DISP – Affiche les informations du disque.
paramètres de lecture répétée à partir d'un CD, d'un iPod
4 Touches de commande du récepteur
ou d'un périphérique USB (page 14).
TOP MENU – Appuyez pour afficher le menu principal de
SHUFFLE – Appuyez sur cette touche pour modifier les
l'iPod (page 18).
paramètres de lecture aléatoire à partir d'un CD, d'un
O
iPod CONTROL – Permet de basculer entre les
iPod ou d'un périphérique USB (page 14).
4
commandes de l’iPod et celles du récepteur (page 18).
PLAY MODE – Pour changer le mode de lecture entre CD
5
SETUP – Appuyez pour accéder au menu de
et disque MP3/WMA (page 14).
11
configuration du récepteur (page 11, 24).
15 CLEAR
RETURN – Permet de confirmer et de quitter l’écran du
Pour effacer la programmation de lecture (page 15).
menu affiché.
5
///
(TUNE
/
, PRESET
/
), ENTER
6
12
Utilisez ces touches pour sélectionner les paramètres du
système, basculer entre les modes et confirmer les actions.
Les touches TUNE / permettent de rechercher une
fréquence radio et les touches PRESET / servent à
13
rechercher une station de radio préréglée (page 24).
6 Touches de commande de la fonction de lecture
7
Les touches principales (, , etc.) servent à contrôler les
fonctions après avoir sélectionné la fonction désirée à l'aide
14
des touches de fonctions d'entrée.
PTY – Permet de rechercher des programmes de type
8
15
RDS (page 25).
• La touche AUTO TUNE n’est pas utilisée sur cet
appareil.
7 Touches numérotées
1 STANDBY/ON
Ces touches permettent d'entrer des numéros (page 14).
Cette touche permet d’allumer le récepteur et de le mettre en
8 FOLDER +/-
veille (page 11).
Pour sélectionner un dossier sur un disque MP3/WMA
2 Touches de fonction d’entrée
(page 15).
Pour sélectionner la source d’entrée de ce récepteur.
6
Fr
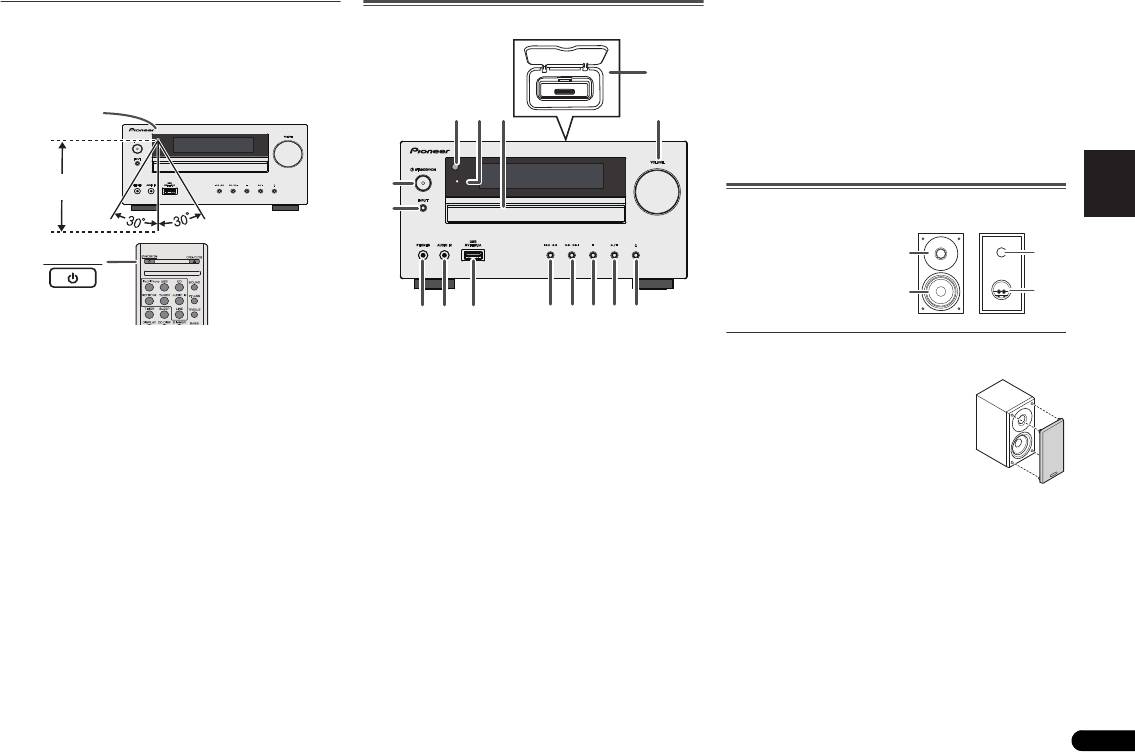
11 Bouton Tune Down, Skip Down
Essai de la télécommande
Panneau avant
Pour sélectionner la piste ou le dossier à lire.
Vérifier la télécommande après avoir fait correctement tous
12 Bouton Tune Up, Skip Up
les raccordements.
Pour sélectionner la piste ou le dossier à lire.
Diriger la télécommande vers le capteur placé sur l’appareil.
13 Touche Stop
La télécommande peut être utilisée dans le rayon illustré ci-
Pour arrêter la lecture.
English Français Español Italiano
dessous :
14 Bouton Play or Pause
Pour arrêter la lecture ou reprendre la lecture à partir de
l'endroit où elle a été mise en pause.
TIMER
15 Touche d’ouverture/fermeture de tiroir de disque
Permet d'ouvrir ou de refermer le tiroir disque (page 13).
Système d’enceintes (X-HM70 uniquement)
STANDBY/ON
Deutsch
1Capteur
Les façades des enceintes sont amovibles
Reçoit les signaux provenant de la télécommande.
2 Voyant du minuteur
S'allume lorsque la minuterie est activée (page 26).
3 Tiroir dinsertion du disque
Placez le disque côté étiquette vers le haut (page 13).
4 Station d’accueil de l’iPod ou de l’iPhone
Station d'accueil pour iPod/iPhone (page 17).
Nederlands
5 Commande de volume
Permet de régler le volume d’écoute (page 11).
6 Bouton STANDBY/ON
Cette touche permet d’allumer le récepteur et de le mettre en
veille (page 11).
7 Bouton INPUT
Permet de sélectionner la source d’entrée (page 12).
8 Prise casque
Permet de raccorder un casque. Lorsque le casque est
branché, les enceintes ne fournissent aucun son (page 12).
9 Prise AUDIO IN
Pour raccorder un équipement auxiliaire à l’aide d’un câble
stéréo mini-jack (page 12).
10 Prise USB
Permet de raccorder votre périphérique de stockage de
masse USB ou votre iPad pour l'utiliser comme source audio
(page 19).
7
Fr
Capteur
7 m
4
1
3
52
6
TIMER
7
8 11 12 13 14 15
9
10
1 Dôme-Tweeter
2 Grave
1
3
3 Évent de baffle réflex
4 Bornes d’enceinte
2
4
Veiller à ce que rien n’entre en contact
avec les membranes de haut-parleurs
lorsque les grilles sont retirées.
X-HM70_Fr.fm 7 ページ 2011年8月2日 火曜日 午後4時46分
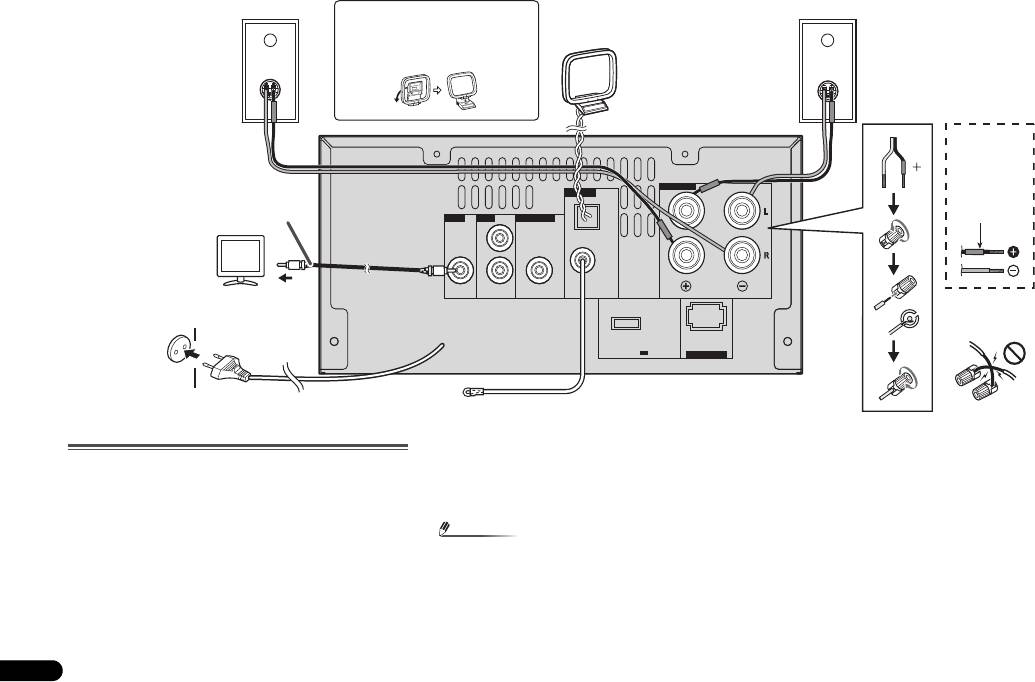
Raccordement de votre équipement
Avant d'effectuer ou de modifier les raccordements, mettez l'appareil hors tension et débranchez le cordon d'alimentation au niveau de la prise secteur.
Cadre-antenne PO fourni :
Raccordement des antennes
Raccorder le cadre-antenne PO à la prise AM. Orientez le
cadre antenne PO de manière à obtenir une réception
Antenne FM fournie :
optimale. Placez l'antenne AM sur une étagère, etc., ou fixez-
Raccorder l’antenne FM à la prise FM 75 OHMS et diriger
la sur un support.
l’antenne FM vers la direction qui assure la meilleure
réception.
Antenne extérieure FM :
Utiliser une antenne extérieure FM (câble coaxial 75 ohms)
pour obtenir une meilleure réception. Déconnecter le câble
d’antenne FM fourni lorsqu’on utilise une antenne FM
extérieure.
8
Fr
Remarque
• Éloigner l’antenne de l’appareil ou du cordon
d’alimentation pour assurer une meilleure réception.
Placez l’antenne loin de l’unité pour une meilleure
réception.
SPEAKERS
ANTENNA
AM
VIDEO LINE
SUBWOOFER
LOOP
L
FM
UNBAL
R
75
Ω
OUT
IN
PREOUT
DC OUTPUT
for WIRELESS LAN
(OUTPUT 5 V
0.6 A MAX)
LAN
10/100
(
)
Enceinte
Enceinte
droite
gauche
Mise en place du cadre PO
Cadre-
antenne PO
< Montage >
Câble
d'enceinte
fourni
(X-HM70
uniquement)
Câble vidéo
Tube rouge
Téléviseur
Prise murale
Vers la prise
(220 V à 240 V CA,
d’entrée vidéo
50 Hz)
Incorrect
Antenne FM
X-HM70_Fr.fm 8 ページ 2011年8月2日 火曜日 午後4時46分
Raccordement des enceintes
Si vous n'utilisez pas les enceintes fournies
• Le fil d'enceinte fourni portant le repère rouge doit être
raccordé à la borne plus (+). Raccordez le fil avec le tube
English Français Español Italiano
rouge à la borne plus (+) et l'autre fil à la borne moins (–).
• Utilisez des enceintes de 4 ohms d'impédance au
minimum ; des enceintes d'impédance inférieure
pourraient endommager l'appareil.
Deutsch
Nederlands
9
Fr
ATTENTION
• Ne rien placer ou laisser pénétrer dans l’évent de baffle
réflex.
• Éviter de monter (ou s’asseoir) sur les enceintes. On
risque de se blesser en tombant.
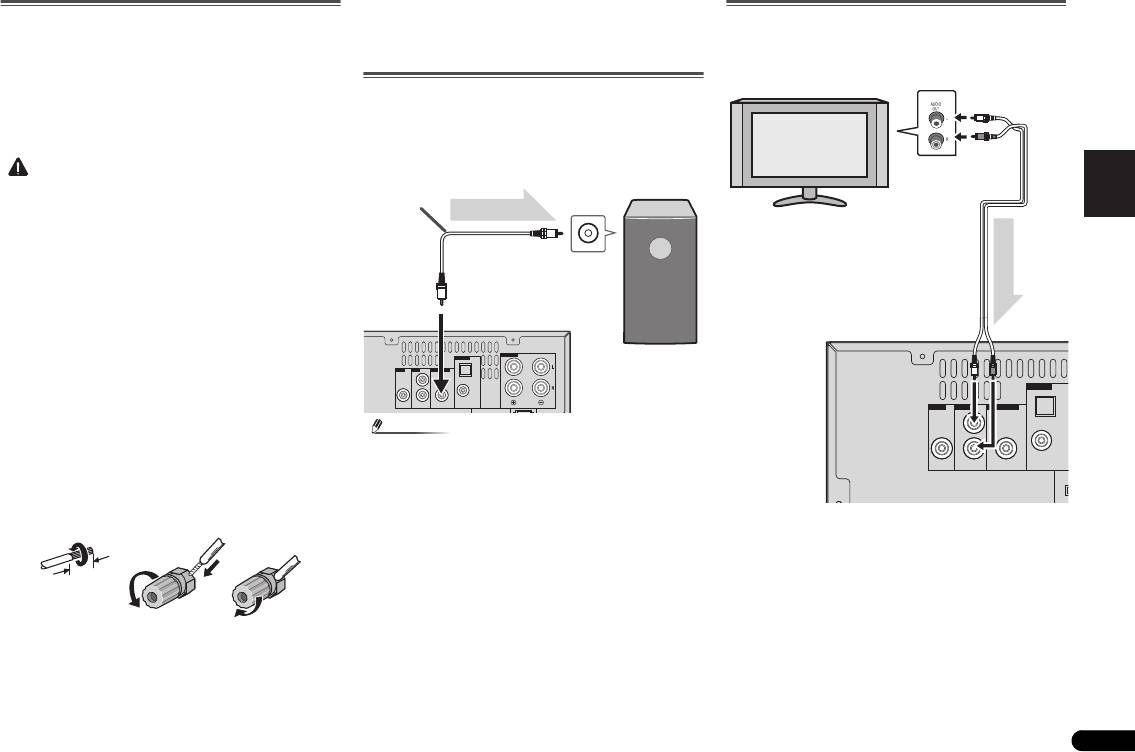
Utilisation d’un autre woofer auxiliaire
Vous pouvez raccorder un woofer auxiliaire avec un
amplificateur à la prise SUBWOOFER PREOUT.
• Les bornes des haut-parleurs sont sous une tension
DANGEREUSE. Pour éviter tout risque de décharge
électrique lors du branchement et du débranchement
des câbles de haut-parleur, débranchez le cordon
d’alimentation avant de toucher des parties non isolées.
• Ne pas prendre le canal droit pour le canal gauche.
L’enceinte de droite est celle située à droite quand on se
place devant le système.
• Ne pas laisser se toucher les fils dénudés des enceintes.
• Assurez-vous que tous les brins de fil dénudés du câble
d’enceinte sont torsadés ensemble et insérés
complètement dans la borne de l’enceinte. Si une partie
du fil d’enceinte exposé entre en contact avec le panneau
arrière, l’alimentation peut être coupée par mesure de
sécurité.
Si vous n'utilisez pas les câbles d'enceintes fournis
Branchement des fils nus
1 Torsadez ensemble les brins de fil dénudés.
2 Libérez la borne de l’enceinte et insérez-y le fil.
3 Refermez la borne.
X-HM70 uniquement :
• N'installez pas les enceintes en hauteur sur un mur ou au
plafond. La grille est conçue pour être démontable, et
pour cette raison elle peut tomber et causer des
dommages ou des blessures si les enceintes sont
suspendues en hauteur.
Remarque
Raccordement d’un téléviseur, etc.
Raccorder au téléviseur à l’aide d’un câble audio.
• Aucun son ne sort du woofer auxiliaire dépourvu d’un
ampli intégré.
Pour sélectionner la fonction d'entrée de ligne :
12 3
• Sur l'appareil principal : Appuyez de manière répétée sur
la touche INPUT jusqu’à ce que l’indication Line In
s’affiche.
• Sur la télécommande : Appuyez sur la touche LINE.
10 mm
ANTENNA
SPEAKERS
VIDEO LINE
SUBWOOFER
LOOP
AM
L
FM
UNBAL
R
75
Ω
OUT
IN
PREOUT
(OUTPUT 5 V
for WIRELESS LAN
DC OUTPUT
0.6 A MAX)
LAN
10/100
(
)
Câble audio
(disponible dans
le commerce)
Signal audio
Vers la prise
d’entrée audio
Vers la prise
Appareil
SUBWOOFER PREOUT
principal
Caisson de basse
disponible dans le
commerce (avec
amplificateur
ANTENNA
SPEAKERS
VIDEO LINE SUBWOOFER
AM
LOOP
L
FM
UNBAL
R
75
Ω
OUT
IN
PREOUT
(OUTPUT 5 V
for WIRELESS LAN
DC OUTPUT
0.6 A MAX)
LAN
10/100
(
)
Téléviseur Vers les prises de
sortie audio
Câble audio
(disponible dans
le commerce)
Signal audio
Vers les prises
Appareil principal
d’entrée LINE
X-HM70_Fr.fm 9 ページ 2011年8月2日 火曜日 午後4時46分
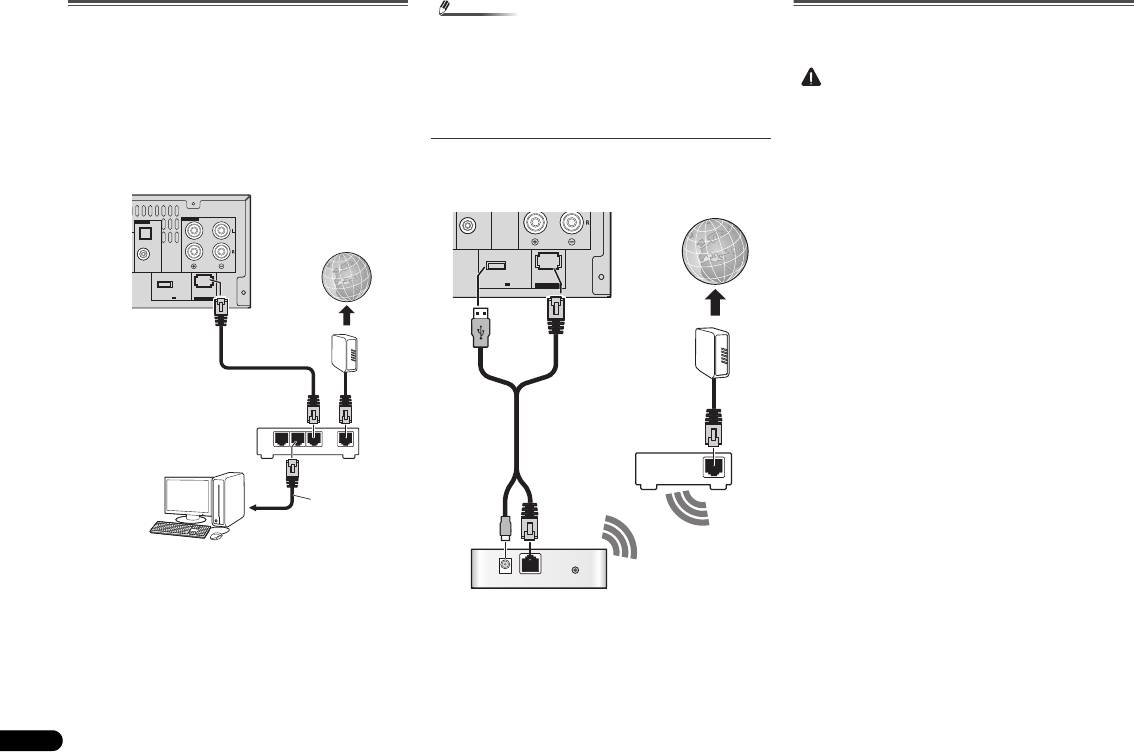
Raccordement au réseau par l’interface LAN
En connectant cet appareil à votre réseau domestique via la
prise LAN, vous pouvez écouter les stations de radio sur
Internet. Pour pouvoir écouter des stations radio Internet, il
faut s’abonner auprès d’un fournisseur de service Internet
(FSI).
Lorsque le récepteur est connecté de cette manière, il est
possible de lire des fichiers audio stockés sur des
équipements reliés au réseau, tels que votre ordinateur, en
utilisant les fonctions NETWORK.
Raccordez la borne LAN de ce récepteur à la borne LAN de
votre routeur (avec ou sans fonction de serveur DHCP) par un
câble LAN direct (CAT 5 ou supérieur).
Mettez la fonction de serveur DHCP de votre routeur en
service. Si votre routeur ne présente pas cette fonction, il
faudra paramétrer le réseau manuellement. Pour plus de
détails, voir la section Menu de configuration du réseau à la
page 21.
10
Fr
Remarque
Branchement du cordon d’alimentation
• Consultez le manuel d’utilisation de l’équipement
connecté au réseau. La méthode de connexion peut varier
Après avoir vérifié tous les raccordements, brancher
selon votre environnement Internet.
l’appareil.
• L’utilisation d’une connexion Internet haut-débit
nécessite un contrat auprès d’un fournisseur d’accès
Internet. Pour plus d’informations, contactez votre
fournisseur d’accès Internet local.
Connexion à un réseau sans fil (WLAN)
Il est possible de connecter le récepteur au réseau via une
connexion sans fil (WLAN). Pour cela, utilisez le
convertisseur AS-WL300, vendu séparément.
Pour plus d'informations, consultez le mode d’emploi fourni
avec le convertisseur de réseau sans fil (AS-WL300).
ATTENTION
• Débrancher le cordon d’alimentation secteur de la prise
murale si l’appareil doit rester inutilisé pendant une
longue période.
• Tenez le cordon d’alimentation par sa prise lorsque vous
le manipulez. Ne débranchez pas le connecteur
d'alimentation en tirant sur le cordon et ne touchez pas le
cordon d'alimentation avec les mains humides ou
mouillées. Cela risquerait de provoquer un court-circuit
ou un choc électrique. Ne posez pas l'appareil, un meuble
ou tout autre objet, sur le câble, et ne pincez pas le câble.
Ne faites pas de nœud avec le cordon d'alimentation et ne
l'attachez pas avec d'autres cordons ou câbles. Les câbles
d'alimentation doivent être installés de façon à ce que l'on
ne puisse pas marcher dessus. Un câble abîmé peut
provoquer un risque d'incendie ou un choc électrique.
Vérifiez l’état du cordon de temps à autre. En cas
d'endommagement, contactez le service après-vente
PIONEER le plus proche ou votre revendeur local, pour
remplacement.
ANTENNA
SPEAKERS
AM
LOOP
FM
UNBAL
75
Ω
DC OUTPUT
(OUTPUT 5 V
for WIRELESS LAN
0.6 A MAX)
LAN
(
10/100
)
LAN
321
WAN
Internet
Modem
Routeur
Câble LAN
(vendu
séparément)
au port LAN
ANTENNA
SPEAKERS
AM
LOOP
FM
UNBAL
75
Ω
DC OUTPUT
(OUTPUT 5 V
for WIRELESS LAN
0.6 A MAX)
LAN
(
10/100
)
RT
WAN
DC 5V WPS
Ethernet
Internet
Modem
Routeur
Convertisseur de réseau sans fil (WLAN) (AS-WL300)
X-HM70_Fr.fm 10 ページ 2011年8月2日 火曜日 午後4時46分
