Pioneer S-LX70W: PANEL FACILITIES FRONT PANEL REAR PANEL
PANEL FACILITIES FRONT PANEL REAR PANEL: Pioneer S-LX70W
Table of contents
- IMPORTANT
- Operating Environment POWER-CORD CAUTION
- CONTENTS FEATURES IN COMBINATION WITH SPEAKERS ACCESSORY ITEMS
- INSTALLATION Speaker Installation Installation Precautions
- PANEL FACILITIES FRONT PANEL REAR PANEL
- CONNECTIONS LINE LEVEL CONNECTION OPERATION
- TROUBLESHOOTING SYMPTOM CAUSE REMEDY SPECIFICATIONS
01_S_LX70W_En.book 6 ページ 2008年7月18日 金曜日 午後5時4分
• The installation location selected should have a sturdy
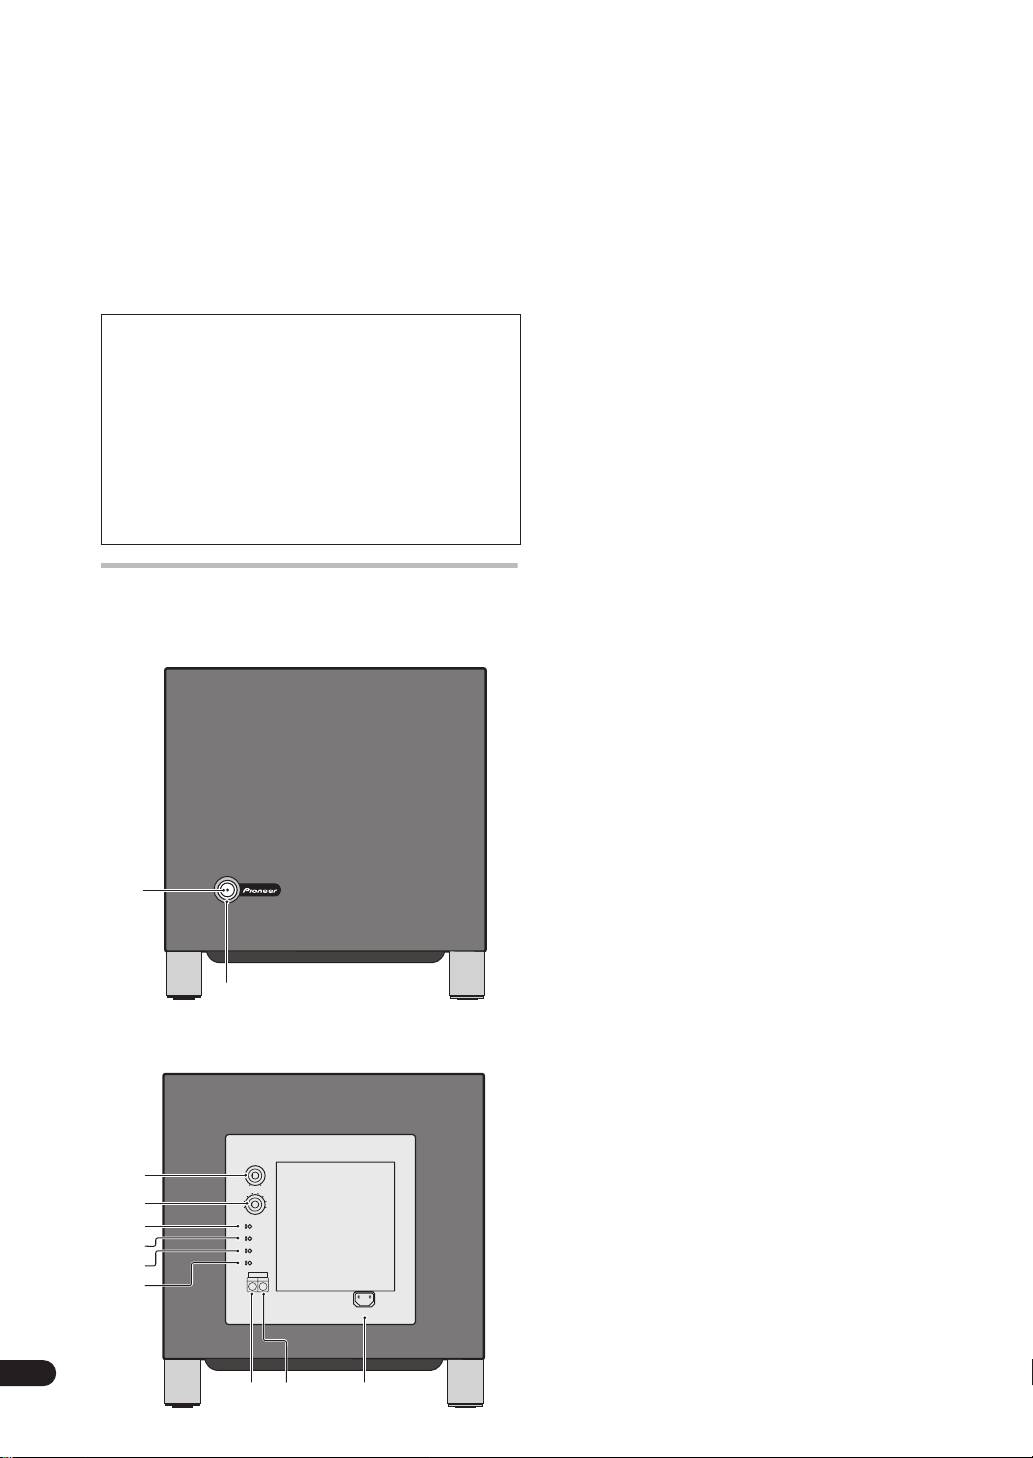
1 Power Indicator (STANDBY/ON)
floor surface. Mounting the speaker on a long-pile
Lights blue when the power has been switched ON.
carpet should be avoided, since the carpet may touch
When AUTO STANDBY switch is set to ON, lights blue
the driver’s diaphram, causing distorted sound.
whenever the speaker receive an audio signal. If the
• Please install this unit away from the antenna cable of
power is switched OFF only briefly, the indicator lights
the tuner, as noise can be caused with installation
blue when power is restored. If no signal is present for
close to the antenna cable. In such a case, use this
more than 12 minutes, the subwoofer automatically
unit at a position away from the antenna and the
reverts to standby mode and the power indicator lights
antenna cable, or when playback of extra bass is not
red. If, subsequently, a signal is received, power
required, switch off the power for this unit.
automatically comes back on and the power indicator
lights blue.
MAINTENANCE OF EXTERNAL SURFACES
NOTE:
• Clean the surface by wiping with the provided
• If you are planning on switching the unit OFF for a long
polishing cloth, or with another soft, dry cloth.
period of time, make sure to check that the indicator
• When the surfaces are very dirty, wipe with a soft
light has gone out after switching OFF.
cloth dipped in some neutral cleanser diluted five
or six times with water, and wrung out well, and
2 Power switch (POWER)
then wipe again with a dry cloth. Do not use
When pressed, power is turned ON; when pressed
furniture wax or cleaners.
again, power is turned OFF.
• Never use thinners, benzine, insecticide sprays
and other chemicals on or near this unit, since
these will corrode the surfaces.
3 Volume knob (VOLUME)
Sets the subwoofer volume.
• Turn the knob slowly from the MIN position.
• With this unit, the bass level can be independently
PANEL FACILITIES
set, so do not turn up the bass on the AV amplifier.
FRONT PANEL
4 Crossover knob (CROSSOVER)
When using the subwoofer, set the upper frequency
limit for the subwoofer (
50 Hz, 60 Hz, 70 Hz, 80 Hz,
100 Hz, 120 Hz, 160 Hz, 200 Hz
) so that it
complemets the output from your other speakers.
When using the bass managment features of an AV
receiver, set to
BYPASS ON
in order to use the low-
pass filter of the AV receiver for high quality sound.
5 Bypass switch (BYPASS)
When set to
ON
, the audio signal is routed directly to
POWER
STANDBY/ON
the woofer unit, bypassing the amplifier’s filter.
1
6 Bass mode switch (BASS MODE)
MUSIC
: The characteristic frequencies become flat.
Recommended for music sources.
CINEMA
: Low frequencies are emphasized.
Recommended for sources that require strong bass.
2
7 Phase switch (PHASE 0º /180º)
REAR PANEL
When set to
180º
, the output phase becomes the
reverse of the input signal, and when set to
0º
, it is in
the same phase as the input signal.
• Normally, the switch is set to
0º
.
But when the sound connection between the
subwoofer and the left and right speakers sounds
unnatural, try switching to
180º
and set the switch
3
MIN
VOLUME
MAX
in the position where the sound is natural.
70Hz
100Hz80Hz
120Hz
60Hz
160Hz
4
50Hz
200Hz
• When using two or more subwoofers together,
CROSSOVER
5
OFF
ON
BYPASS
make sure that the phase switch of all of them are
CINEMA
MUSIC
BASS MODE
6
180∞
0∞
set to the same position.
PHASE
AUTO STANDBY
OFF
ON
7
LINE LEVEL
OUTPUT
INPUT
8
AC IN
6
En
9 11
10
