JVC KD-R901: Menu operations
Menu operations: JVC KD-R901
ENGLISH
27
SETTINGS
Continued on the next page
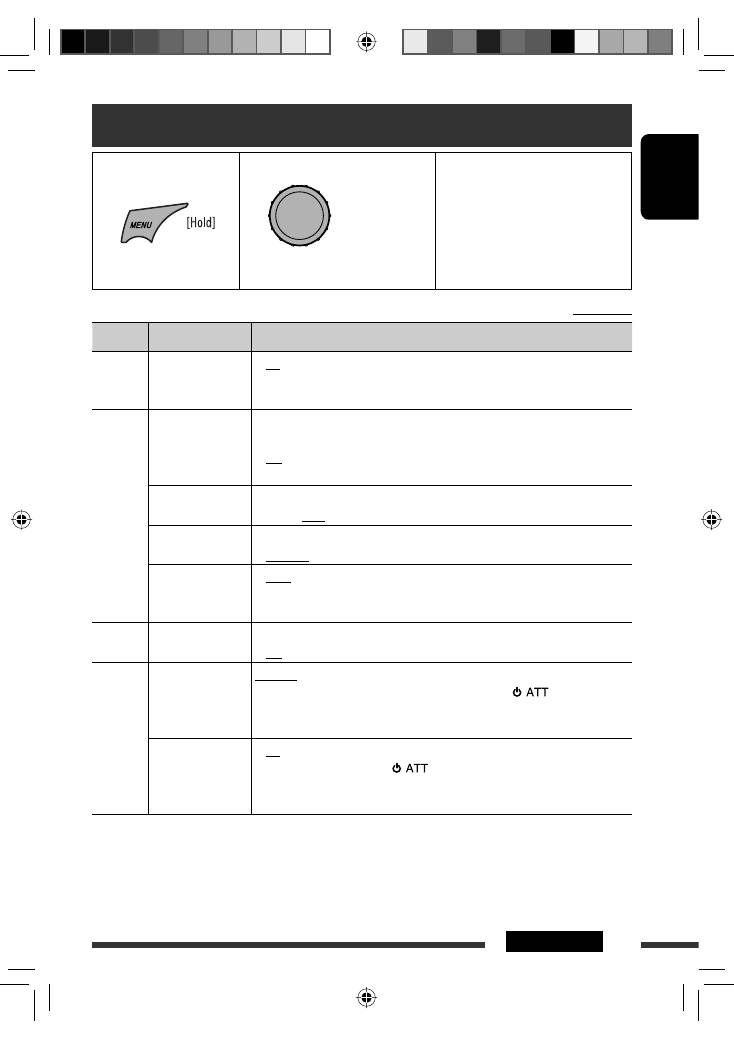
Menu operations
1
Call up the <SET UP>
menu.
2
Select the desired item.
3
Repeat step 2 if necessary.
• To confirm the setting, press the
control dial.
• To return to the previous menu,
press BACK.
• To exit from the menu, press
DISP or MENU.
[Turn]
=
[Press]
Initial:
Underlined
Category Menu items
Selectable settings, [reference page]
DEMO
DEMO
Display
demonstration
•
On
•
Off
: Display demonstration will be activated automatically if
no operation is done for about 20 seconds, [4].
: Cancels.
Clock
Clock Display
*
1
•
On
•
Off
: Clock time is shown on the display at all times when the
power is turned off.
: Cancels; pressing DISP will show the clock time for about
5 seconds when the power is turned off.
Set Clock
: Adjust the hour, then the minute, [4].
(Initial:
0:00
)
24H/12H
•
12Hours
•
24Hours
: Select the time display mode, [4].
Clock Adjust
*
2
•
Auto
•
Off
: The built-in clock is automatically adjusted using the CT
(clock time) data in the Radio Data System signal.
: Cancels.
EQ
EQ
Equalizer
: Select a preset sound mode suitable to the music genre, [26].
Off, User, Rock, Classic, Pops, Hip Hop, Jazz
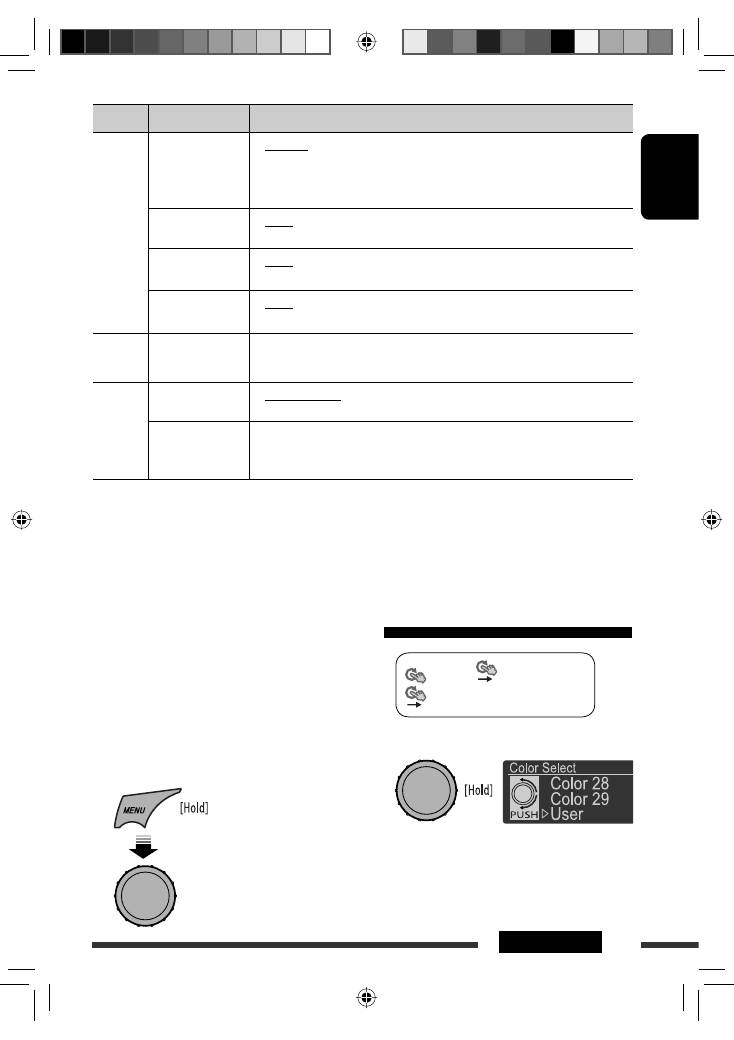
Color
Color Select
Color 01
— Color 29,
User
: Select one of the preset or user color for display and
button (except
T/P
/
DISP
/
OPEN
/
) illumination.
(For customized color settings, <
User
>, see pages 31
and 32.)
Menu Color
•
On
•
Off
: Changes the display and button (except
T/P
/
DISP
/
OPEN
/
) illumination during menu, list search and
playback mode operations.
: Cancels.
*
1
If the power supply is not interrupted by turning off the ignition key of your car, it is recommended to select <
Off
>
to save the car’s battery.
*
2
Takes effect only when CT data is received.
EN20-27_KD-R901_003A_f.indd 27
EN20-27_KD-R901_003A_f.indd 27
10/3/09 5:26:22 PM
10/3/09 5:26:22 PM
ENGLISH
28
Category Menu items
Selectable settings, [reference page]
Color
Ring Color
*
3
•
On
•
Off
: When a call comes in, the display will flash in blue.
• The display will change to the original color when you
answer the call or the incoming call stops.
When the unit receive a SMS, the display only illuminate
in blue.
: Cancels.
Audio
Fad/Bal
*
4,
*
5
Fader/Balance
R6 – F6
L6 – R6
:
Fad:
Press
5
/
∞
to adjust the front and rear speaker
output balance. (Initial:
0
)
:
Bal:
Press
4
/
¢
to adjust the left and right
speaker output balance. (Initial:
0
)
Loud
Loudness
•
Loud1/Loud2/
Loud3
•
Off
: Boost low and high frequencies to produce a
well-balanced sound at a low volume level.
: Cancels.
Volume Adjust
Level –5 —
Level +5
(Initial:
Level 0
)
: Preset the volume adjustment level of each source
(except FM), compared to the FM volume level. The
volume level will automatically increase or decrease
when you change the source.
• Before making an adjustment, select the source you
want to adjust.
• “FIX” appears on the display if “
FM
” is selected as the
source.
Subwoofer
•
LPF/Level
•
Phase
: Press
4
/
¢
to select the cutoff frequency to
the subwoofer.
Off:
All signals are sent to the subwoofer.
LPF 55Hz/LPF 85Hz/LPF 120Hz:
Frequencies higher
than 55 Hz/85 Hz/120 Hz are cut off.
Turn the control dial to adjust the subwoofer output level.
Level 00
to
Level 08
(Initial:
Level 04
)
: Turn the control dial to select the subwoofer phase.
0deg
(normal) or
180deg
(reverse)
HPF
High pass filter
Select the cutoff frequency to the front/rear speakers. Set this to match the LPF
settings.
•
62Hz/95Hz/
135Hz
•
Off
: Frequencies lower than 62 Hz/95 Hz/135 Hz are cut off.
: All signals are sent to the front/rear speakers.
Beep
Key touch tone
•
On
•
Off
: Activates the key touch tone.
: Deactivates the key touch tone.
*
3
Displayed only when USB Bluetooth Adapter (KS-UBT1) is connected.
*
4
If you are using a two-speaker system, set the fader level to <
0
>.
*
5
This adjustment will not affect the subwoofer output.
EN28-37_KD-R901_003A_3.indd 28
EN28-37_KD-R901_003A_3.indd 28
17/2/09 4:01:26 PM
17/2/09 4:01:26 PM
ENGLISH
29
SETTINGS
Category Menu items
Selectable settings, [reference page]
Audio
Amplifier Gain
*
6
•
High Power
•
Low Power
: Vol 00 – Vol 50
: Vol 00 – Vol 30 (Select if the maximum power of each
speaker is less than 50 W to prevent damaging the
speaker.)
Display
Dimmer
•
On
•
Off
•
Auto
•
Time Set
: Dims the display and button illumination.
: Cancels.
: Dims the display when you turn on the headlights.
*
7
: Set the timer for dimmer, [32].
Any hour – Any hour (Initial:
18–07
)
Level Meter
•
Meter 1
•
Meter 2
: Select the different level meter patterns, [4].
• Press DISP to show the selected level meter.
Scroll
*
8
•
Once
•
Auto
•
Off
: For track information: scrolls the track information only
once.
For DAB text: scrolls the detailed DAB text.
: For track information: repeats the scroll (in 5-second
intervals).
For DAB text: scrolls the detailed DAB text.
: For track information: cancels.
For DAB text: shows only headline if any.
Pressing DISP for more than one second can scroll the display regardless of the
setting.
Tag Display
•
On
•
Off
: Shows the Tag information while playing MP3/WMA/
AAC/WAV tracks.
: Cancels.
LCD Type
•
Negative
•
Positive
•
Auto
: Negative pattern of the display.
: Positive pattern of the display.
: Positive pattern will be selected during the day time
*
9
;
while negative pattern will be used during the night
time
*
9
.
Contrast
Level 01
— Level 08
: Adjust the display contrast to make the display
indications clear and legible. (Initial:
Level 05
)
*
6
The volume level automatically changes to “Vol 30” if you change to <
Low Power
> with the volume level set
higher than “Vol 30.”
*
7
The illumination control lead connection is required. (See “Installation/Connection Manual.”)
*
8
Some characters or symbols will not be shown correctly (or will be blanked) on the display.
*
9
Depends on the <
Dimmer
> setting.
Continued on the next page
EN28-37_KD-R901_003A_f.indd 29
EN28-37_KD-R901_003A_f.indd 29
10/3/09 5:27:39 PM
10/3/09 5:27:39 PM
ENGLISH
30
Category Menu items
Selectable settings, [reference page]
Bluetooth
Device
(See pages 15 – 17 for settings.)
Settings
(See pages 33 and 34 for settings.)
Tuner
IF Band
Intermediate
frequency band
•
Auto
•
Wide
: Increases the tuner selectivity to reduce interference
noises between adjacent stations. (Stereo effect may be
lost.)
: Subject to interference noises from adjacent stations, but
sound quality will not be degraded and the stereo effect
will remain.
AF Regional
*
10
Alternative
frequency/
regionalization
reception
•
AF
•
AF REG
•
Off
: When the currently received signals become weak, the
unit switches to another station (the programme may
differ from the one currently received), [11].
• The AF indicator lights up.
: When the currently received signals become weak, the
unit switches to another station broadcasting the same
programme.
• The REG indicator lights up.
: Cancels (not selectable when <
DAB AF
> is set to <
On
>).
P-Search
*
10
Programme search
•
On
•
Off
: Activates Programme Search, [11].
: Cancels.
DAB AF
*
11
Alternative
frequency reception
•
On
•
Off
: Traces the programme among DAB services and FM Radio
Data System stations, [24].
: Cancels.
TA Volume
*
10
Traffic
announcement
volume
Vol 00
–
Vol 50
(or
Vol 00
– Vol 30
)
*
12
: (Initial:
Vol 15
)
PTY-Standby
*
10
PTY standby
Off, PTY codes
: Activates PTY Standby Reception with one of the PTY
codes, [10].
Stereo/Mono
*
13
•
Stereo
•
Mono
: Restore the stereo effect.
: Activate monaural mode to improve FM reception, but
stereo effect will be lost, [9].
*
10
Only for FM Radio Data System stations.
*
11
Displayed only when DAB tuner is connected.
*
12
Depends on the amplifier gain control.
*
13
Displayed only when the source is “
FM
.”
EN28-37_KD-R901_003A_3.indd 30
EN28-37_KD-R901_003A_3.indd 30
17/2/09 4:01:41 PM
17/2/09 4:01:41 PM
ENGLISH
31
SETTINGS
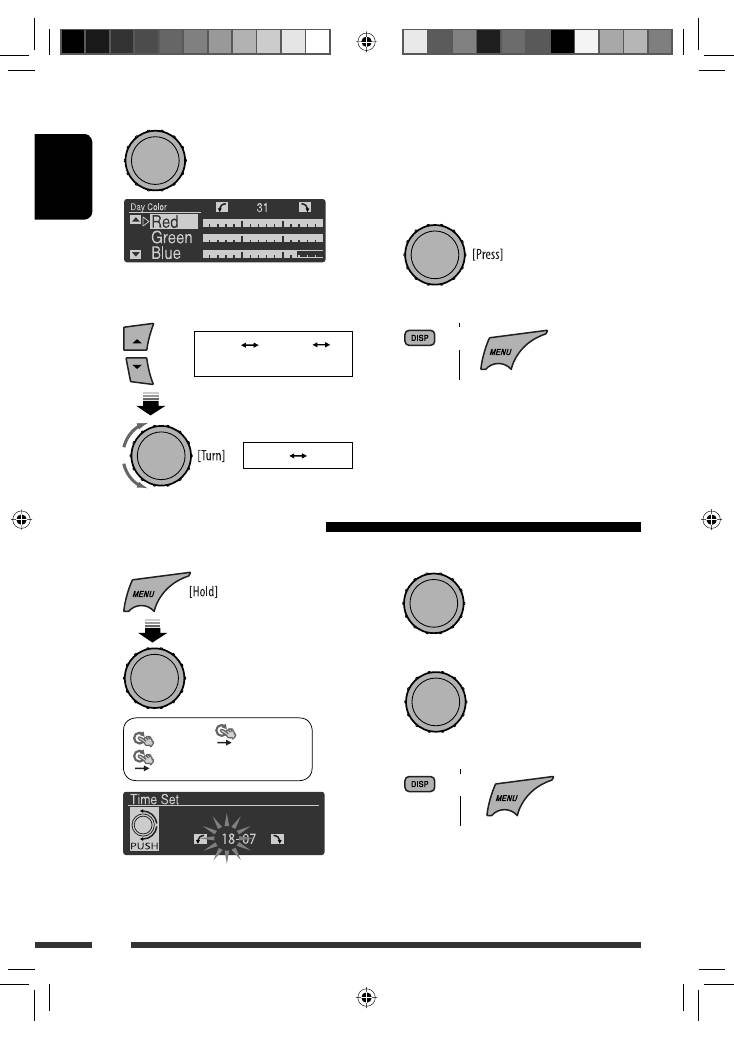
You can create your own colors—<
Day Color
> or
<
Night Color
>.
<
Day Color
> : Color for the display and buttons.
<
Night Color
> : Color for the display and buttons
when the display is dimmed.
To dim the display, see <
Dimmer
>
on page 29.
1
Category Menu items
Selectable settings, [reference page]
Source Select
Ext Input
*
14,
*
15
External input
•
Changer
•
Ext In
: To use a JVC CD changer, [20], an Apple iPod/iPhone,
[21], or DAB tuner, [23].
: To listen to a portable audio player (connected to the CD
changer jack), [25].
AM Source
*
16
•
Show
•
Hide
: Enable “
AM
” in source selection, [6].
: Disable “
AM
” in source selection.
AUX Source
*
17
•
Show
•
Hide
: Enable “
AUX IN
” in source selection, [6].
: Disable “
AUX IN
” in source selection.
Bluetooth
Audio
*
18
•
Show
•
Hide
: Enable “
BT FRONT/BT REAR
” in source selection, [6].
: Disable “
BT FRONT/BT REAR
” in source selection.
USB
*
19
Drive Change
: Select to change the drive when a multiple drives device is connected to the
USB input terminal (FRONT/REAR).
iPod
*
20
iPod Switch
iPod/iPhone control
•
Headunit Mode
•
iPod Mode
: Controls iPod playback through the unit.
: Controls iPod playback through the iPod/iPhone.
Audiobooks
Speed control of
“Audiobooks”
•
Normal
•
Faster
•
Slower
: You can select the playback speed of the “Audiobooks”
sound file in your iPod/iPhone.
• Initial selected item depends on your iPod/iPhone setting.
*
14
Displayed only if any source other than “
CD-CH/iPod/EXT IN
” is selected.
*
15
Not required for Bluetooth.
*
16
Displayed only when any source other than “
AM
” is selected.
*
17
Displayed only when any source other than “
AUX IN
” is selected.
*
18
Displayed only when any source other than “
BT FRONT/BT REAR
” is selected.
*
19
Displayed only when the source is “
USB FRONT/USB REAR
.”
*
20
Displayed only when the source is “
iPod FRONT/iPod REAR
.”
<
Color
>
<
Color Select
>
<
User
>
2
Enter <User> setting mode.
[Turn]
=
[Press]
Creating your own color—User Color
Continued on the next page
EN28-37_KD-R901_003A_1.indd 31
EN28-37_KD-R901_003A_1.indd 31
5/2/09 11:13:47 AM
5/2/09 11:13:47 AM
ENGLISH
32
3
Select <Day Color> or <Night Color>.
4
Select a primary color, then adjust the level.
<
Red
>
<
Green
>
<
Blue
>
<
00
>
<
31
>
Repeat this procedure until you have adjust all the
three primary colors.
If <
00
> is selected for all the primary colors,
nothing appear on the display.
5
Confirm the settings.
6
Exit from the setting.
Select <
User
> to show your own colors for the
buttons and display.
or
You can set the start/end time for dimmer.
1
<
Display
>
<
Dimmer
>
<
Time Set
>
Setting the time for dimmer
[Turn]
=
[Press]
[Turn]
=
[Press]
2
Adjust the dimmer start time.
3
Adjust the dimmer end time.
4
Exit from the setting.
[Turn]
=
[Press]
or
[Turn]
=
[Press]
Ex.: When <
Day Color
> is selected
EN28-37_KD-R901_003A_1.indd 32
EN28-37_KD-R901_003A_1.indd 32
10/2/09 5:32:35 PM
10/2/09 5:32:35 PM
ENGLISH
33
SETTINGS
<Settings> menu
( : Initial)
Quick Call
You can preset the Quick Call method. Hold
to enter
the selected method.
• Appears only when a Bluetooth phone is connected.
Dialed Calls:
Show the list of the numbers you have
dialed.
Received Calls:
Show the list of the numbers you have
received.
Missed Calls:
Show the list of the numbers you have
missed.
Phonebook:
Show the list of the phonebook.
Dial Number:
Display the “Dial Number” screen.
Voice Dial:
Display the voice dialling screen.
Auto Connect
When the unit is turned on, the connection is
established automatically with...
Last:
The last connected Bluetooth device.
Off:
No Bluetooth device.
Auto Answer
Only for the device being connected for “
BT FRONT
(Phone)
/BT REAR
(Phone).”
On:
The unit answers the incoming calls
automatically.
Off:
The unit does not answer the calls
automatically. Answer the calls manually.
Reject:
The unit rejects all incoming calls.
Message Notice
Only for the device being connected for “
BT FRONT/
BT REAR
(Phone).”
On:
The unit informs you of the arrival of
a message by ringing and displaying
“Received Message.”
• The display illuminates in blue (see
<
Ring Color
> on page 28).
Off:
The unit does not inform you of the arrival of
a message.
You can change the settings listed on the following
according to your preference.
Preparation:
• Connect the supplied
USB
Bluetooth Adapter
(KS-UBT1) to one of the USB input terminals of the
unit.
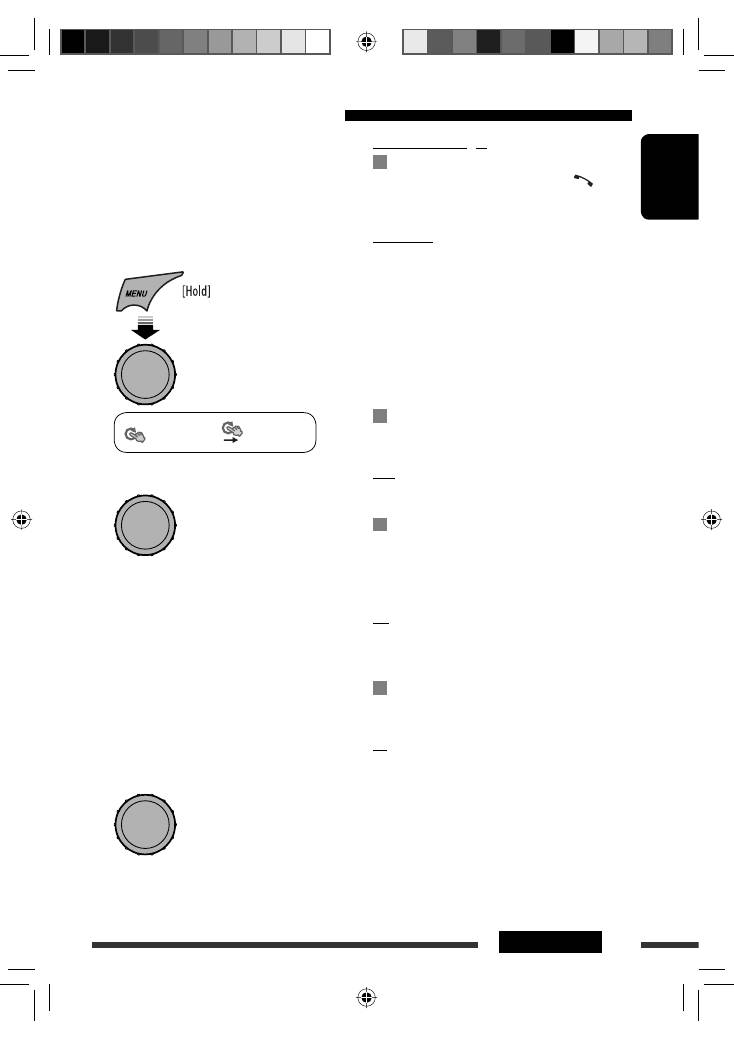
1
<
Bluetooth
>
<
Settings
>
2
Select a setting item.
<
Quick Call
>
Ô
<
Auto Connect
>
Ô
<
Auto Answer
>
Ô
<
Message Notice
>
*
Ô
<
MIC Setting
>
Ô
<
Ringing Tone
>
Ô
<
Phonebook Trans
>
Ô
<
Phonebook Select
>
Ô
<
Initialize
>
Ô
<
Information
>
Ô
(back to the beginning)
*
If the connected Bluetooth phone does not support
SMS notification (via Bluetooth), the unit will not
receive any notification upon the arrival of a SMS
even when <
Message Notice
> is set to <
On
>.
3
Change the setting accordingly.
[Turn]
=
[Press]
[Turn]
=
[Press]
[Turn]
=
[Press]
Changing the Bluetooth setting
Continued on the next page
EN28-37_KD-R901_003A_pre.indd 33
EN28-37_KD-R901_003A_pre.indd 33
5/2/09 10:39:07 AM
5/2/09 10:39:07 AM
Оглавление
- Preparation
- Basic operations
- Listening to the radio
- Disc operations
- USB operations
- Using the Bluetooth ® devices
- Listening to the CD changer
- Listening to the iPod/iPhone
- Listening to the DAB tuner
- Listening to the other external components
- Selecting a preset sound mode
- Menu operations
- More about this unit
- Troubleshooting
- Maintenance
- Specifications
- Vorbereitung
- Grundlegende Bedienung
- Rundfunkempfang
- Bedienung der Disc
- USB-Vorgänge
- Verwendung von Bluetooth ®-Geräten
- Hören vom CD-Wechsler
- Von einem iPod/iPhone hören
- DAB-Tuner-Empfang
- Hören von den anderen externen Komponenten
- Wählen eines Vorgabe-Klangmodus
- Menü-Bedienungen
- Weitere Informationen zu Ihrem Receiver
- Störungssuche
- Wartung
- Technische Daten
- Подготовка
- Основные операции
- Прослушивание радио
- Операции с дисками
- Операции с устройством USB
- Использование устройств Bluetooth ®
- Прослушивание с устройства автоматической смены компакт-дисков
- Прослушивание проигрывателя iPod или iPhone
- Прослушивание тюнера DAB
- Прослушивание с других внешних устройств
- Выбор запрограммированного режима звучания
- Операции с меню
- Дополнительная информация о приемнике
- Устранение проблем
- Обслуживание
- Технические характеристики
- Προετοιμασία
- Βασικές λειτουργίες
- Ακρόαση ραδιοφωνικών σταθµών
- Λειτουργίες δίσκου
- Λειτουργίες USB
- Χρήση των συσκευών Bluetooth ®
- Ακρόαση συσκευής αναπαραγωγής πολλαπλών δίσκων CD
- Ακρόαση iPod/iPhone
- Ακρόαση του δέκτη DAB
- Ακρόαση άλλων εξωτερικών συσκευών
- Επιλογή προεπιλεγμένης κατάστασης ήχου
- Λειτουργίες μενού
- Περισσότερα σχετικά µε το δέκτη αυτό
- Αντιµετώπιση προβληµάτων
- Συντήρηση
- Προδιαγραφές
