JVC KD-G631: инструкция

JVC
KD-G631

Раздел: Авто, мото оборудование и транспорт

Тип: Автомагнитола

Характеристики, спецификации

Проигрыватель:
CD
Форм фактор:
1 DIN
Воспроизведение MP3:
есть
Встроенный усилитель:
есть
Эквалайзер:
есть, 3-полосн.
Поддерживаемые аудиоформаты:
MP3, WMA
Поддержка тегов ID3:
есть
Поддержка CD-текст:
есть
Поддержка носителей:
CD, CD-R, CD-RW
Мощность:
4x50 Вт (пиковая)
Диммер:
есть
Диапазоны:
FM, ДВ, СВ
Количество предустановок FM:
18
Количество предустановок AM:
6
Поддержка технологии "RDS":
есть
USB-хост:
есть
Возможность подключения устройств:
CD-чейнджер, DAB-тюнер, плеер iPod
Безопасность:
съемная панель
Аксессуары в комплекте:
инфракрасный пульт

Инструкция к Автомагнитоле JVC KD-G631

ENGLISHDEUTSCHРУCCKИЙ

CD RECEIVER

CD-RECEIVER

РЕСИВЕР С ПРОИГРЫВАТЕЛЕМ КОМПАКТ-ДИСКОВ
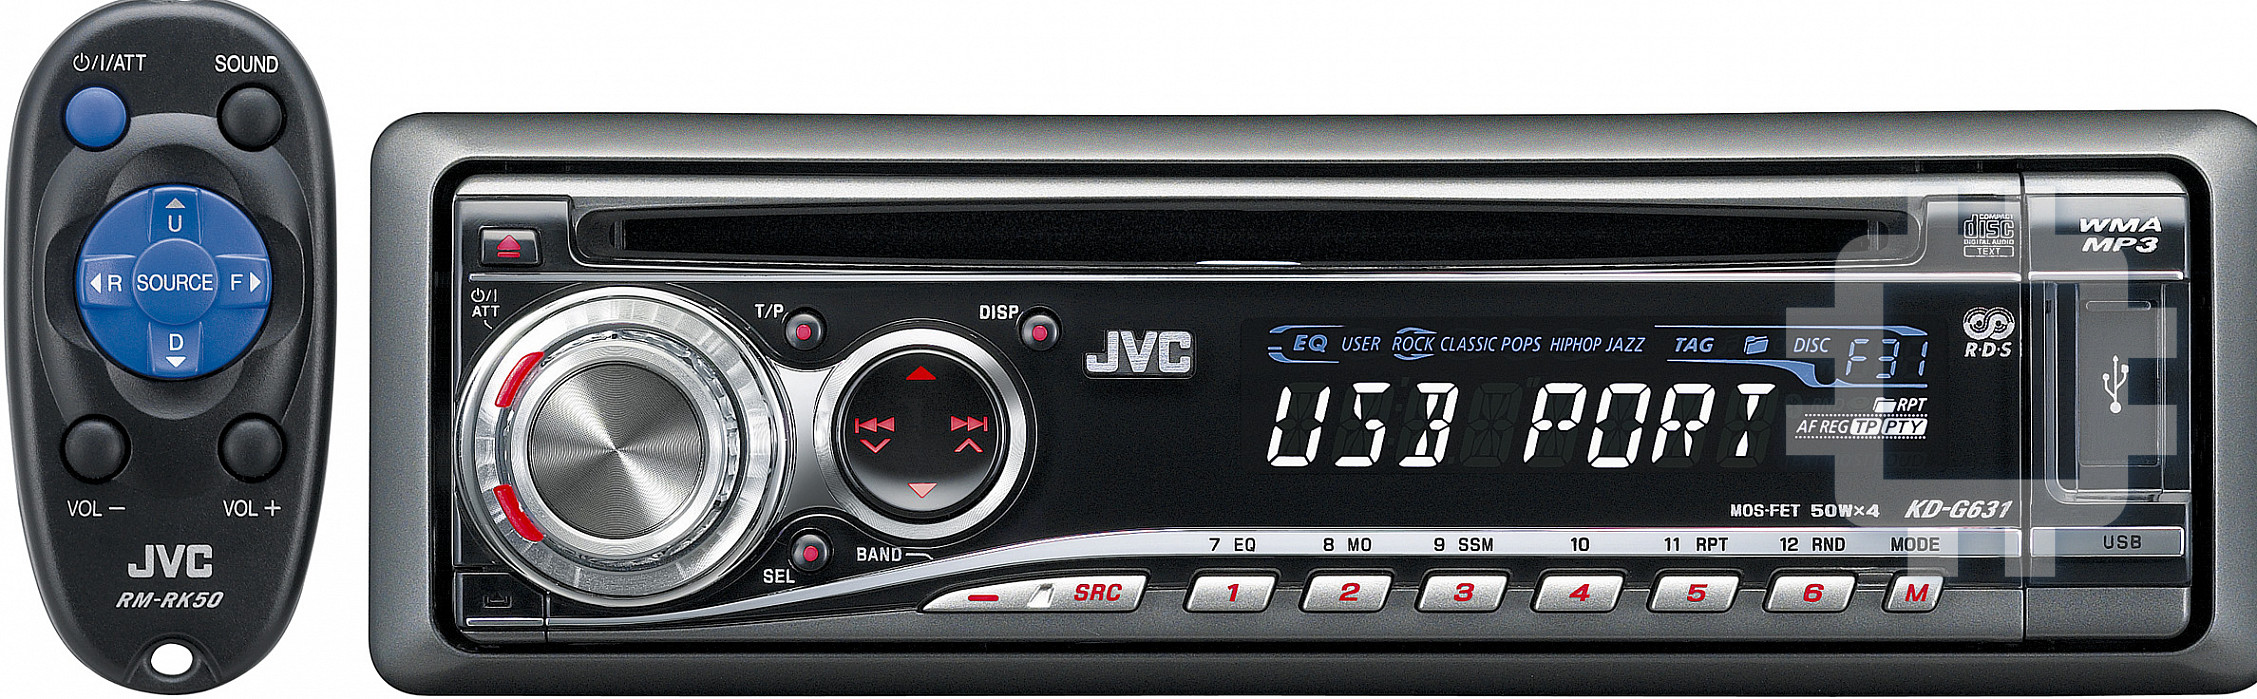
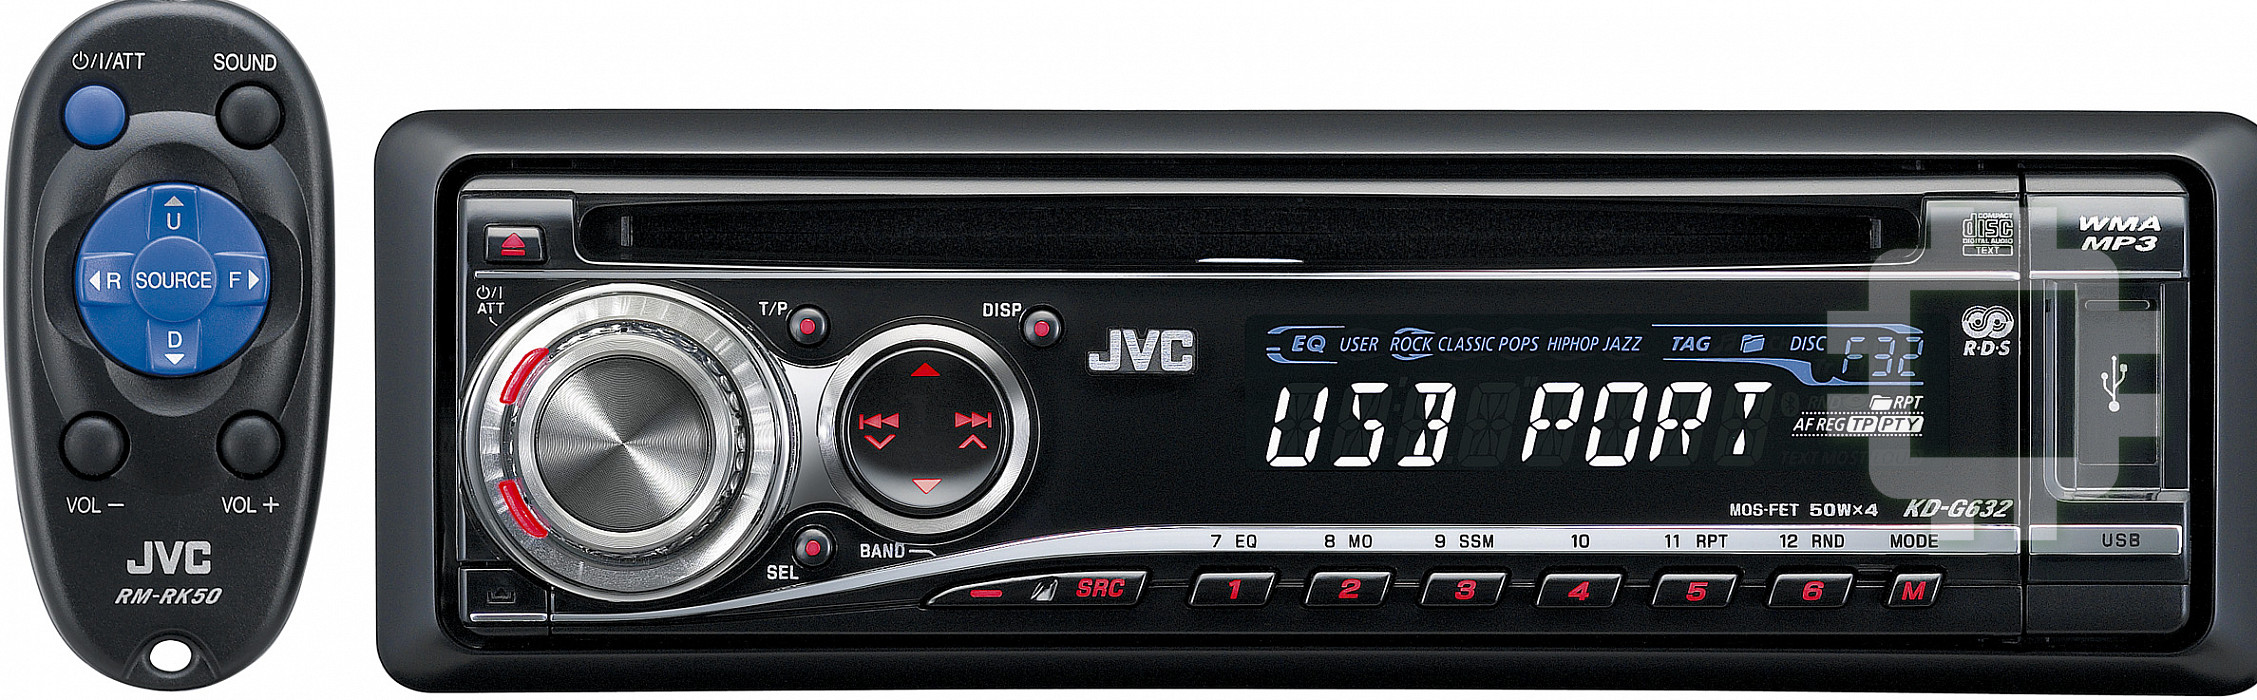
KD-G632/KD-G631

For canceling the display demonstration, see page 7.

Zum Abbrechen der Displaydemonstration siehe Seite 7.

Информацию об отмене демонстрации функций дисплея см. на стр. 7.

For installation and connections, refer to the separate manual.

Für den Einbau und die Anschlüsse siehe das eigenständige Handbuch.

Указания по установке и выполнению соединений приводятся в отдельной инструкции.

INSTRUCTIONS

BEDIENUNGSANLEITUNG

ИНСТРУКЦИИ ПО ЭКСПЛУАТАЦИИ

GET0424-006A

[EY]

Cover_KD-G632_1_006A_1.indd 2Cover_KD-G632_1_006A_1.indd 2 10/5/06 3:49:38 PM10/5/06 3:49:38 PM

Thank you for purchasing a JVC product.

Please read all instructions carefully before operation, to ensure your complete understanding and to obtain the best

possible performance from the unit.

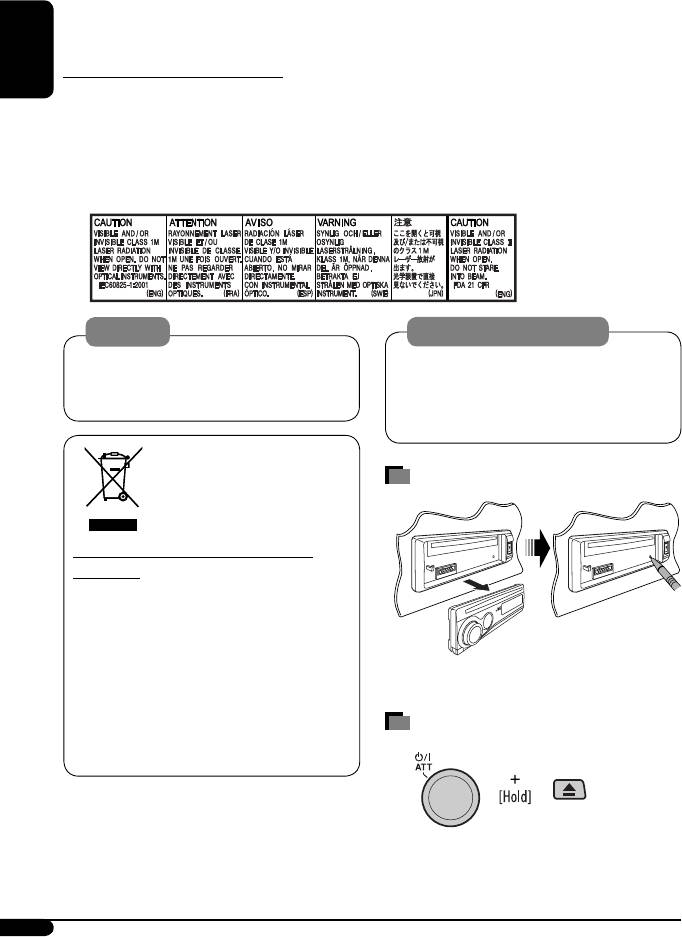
IMPORTANT FOR LASER PRODUCTS

ENGLISH

1. CLASS 1 LASER PRODUCT

2. CAUTION: Do not open the top cover. There are no user serviceable parts inside the unit; leave all servicing to

qualified service personnel.

3. CAUTION: Visible and/or invisible class 1M laser radiation when open. Do not view directly with optical

instruments.

4. REPRODUCTION OF LABEL: CAUTION LABEL, PLACED OUTSIDE THE UNIT.

Warning:

Caution on volume setting:

If you need to operate the unit while driving, be

Discs produce very little noise compared with other

sure to look ahead carefully or you may be involved

sources. Lower the volume before playing a disc

in a traffic accident.

to avoid damaging the speakers by the sudden

increase of the output level.

How to reset your unit

This symbol is only valid in

the European Union.

Information for Users on Disposal of Old

Equipment

This symbol indicates that the product with

this symbol should not be disposed as general

household waste at its end-of-life. If you wish to

dispose of this product, please do so in accordance

with applicable national legislation or other rules in

Your preset adjustments will also be erased.

your country and municipality. By disposing of this

product correctly, you will help to conserve natural

How to forcibly eject a disc

resources and will help prevent potential negative

effects on the environment and human health.

For security reasons, a numbered ID card is provided

with this unit, and the same ID number is imprinted on

the unit’s chassis. Keep the card in a safe place, as it will

Be careful not to drop the disc when it ejects.

help the authorities to identify your unit if stolen.

If this does not work, reset your unit.

2

EN02-05_KD-G632_1_006A_f.indd 2EN02-05_KD-G632_1_006A_f.indd 2 11/29/06 12:22:17 PM11/29/06 12:22:17 PM

The following marks are used to indicate...

CONTENTS

: Built-in CD player operations.

Control panel — KD-G632/KD-G631 ....... 4

: External CD changer operations.

Remote controller —

RM-RK50 ........... 5

: External USB memory operations.

ENGLISH

Getting started ................................ 6

: Indicator displayed for the

Basic operations ................................................... 6

corresponding operation.

Radio operations ............................. 7

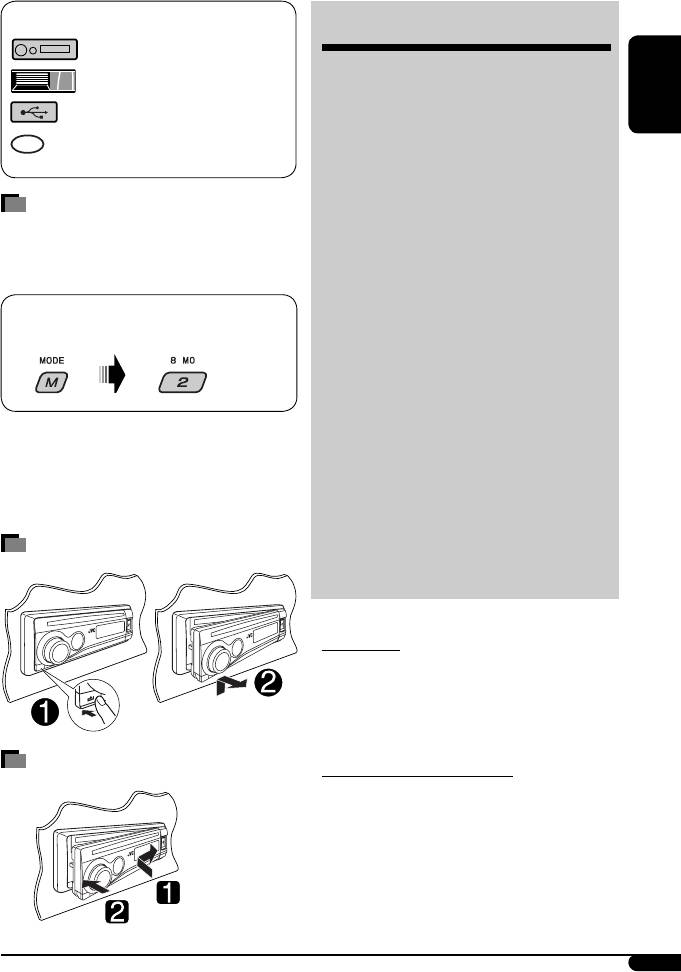
How to use the M MODE button

FM RDS operations ........................... 8

Searching for your favorite FM RDS programme

... 8

If you press M MODE, the unit goes into functions mode,

then the number buttons and 5/ buttons work as

Disc / USB memory operations ........... 11

different function buttons.

Playing a disc in the unit ..................................... 11

Playing discs in the CD changer ........................... 11

Ex.: When number button 2 works as

Playing from a USB memory ................................ 11

MO (monaural) button.

Sound adjustments .......................... 14

General settings — PSM .................. 15

DAB tuner operations ....................... 18

iPod/D. player operations ................. 19

To use these buttons for their original functions

again after pressing M MODE, wait for 5 seconds

Other external component operations

... 21

without pressing any of these buttons until the

Maintenance ................................... 22

functions mode is cleared or press M MODE again.

More about this unit ........................ 23

Detaching the control panel

Troubleshooting .............................. 26

Specifications .................................. 29

For safety...

Do not raise the volume level too much, as this will

block outside sounds, making driving dangerous.

Stop the car before performing any complicated

operations.

Attaching the control panel

Temperature inside the car...

If you have parked the car for a long time in hot or cold

weather, wait until the temperature in the car becomes

normal before operating the unit.

3

EN02-05_KD-G632_1_003A_pre.indd 3EN02-05_KD-G632_1_003A_pre.indd 3 10/18/06 4:07:48 PM10/18/06 4:07:48 PM

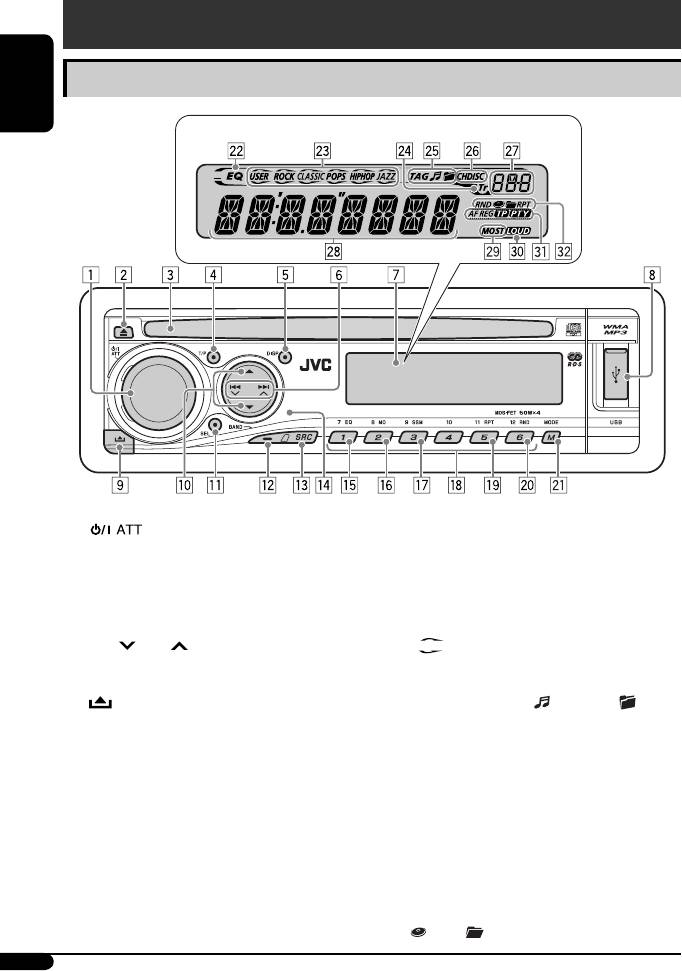
Control panel — KD-G632 / KD-G631

Parts identification

ENGLISH

Display window

1 (standby/on attenuator) button /

; RND (random) button

Control dial

a M MODE button

2 0 (eject) button

s EQ (equalizer) indicator

3 Loading slot

d Sound mode (iEQ: intelligent equalizer)

4 T/P (traffic programme/programme type) button

indicators—USER, ROCK, CLASSIC, POPS, HIP HOP,

5 DISP (display) button

JAZZ

6 4 /¢ buttons

lights up for the selected item.

7 Display window

f Tr (track) indicator

8 USB (Universal Serial Bus) input terminal

g Disc information indicators—

9 (control panel release) button

TAG (Tag information), (track/file), (folder)

p 5 (up) / (down) buttons

h Playback source indicators—

q SEL (select) button

CH: Lights up only when CD-CH is selected as the

w BAND button

playback source.

e SRC (source) button

DISC: Lights up for the built-in CD player.

r Remote sensor

j Source display / Time countdown indicator

DO NOT expose the remote sensor to strong light (direct

k Main display

sunlight or artificial lighting).

l Tuner reception indicators—MO (monaural),

t

EQ (equalizer) button

ST (stereo)

y MO (monaural) button

/ LOUD (loudness) indicator

u SSM (Strong-station Sequential Memory) button

z RDS indicators—AF, REG, TP, PTY

i Number buttons

x Playback mode / item indicators—RND (random),

o RPT (repeat) button

(disc), (folder), RPT (repeat)

4

EN02-05_KD-G632_1_003A_pre.indd 4EN02-05_KD-G632_1_003A_pre.indd 4 10/26/06 10:50:40 AM10/26/06 10:50:40 AM

Main elements and features

Remote controller — RM-RK50

Installing the lithium coin battery

(CR2025)

ENGLISH

1 (standby/on/attenuator) button

Aim the remote controller directly at the remote

Turns the power on if pressed briefly or

sensor on the unit. Make sure there is no obstacle

attenuates the sound when the power is on.

in between.

Turns the power off if pressed and held.

2 5 U (up) / D (down) buttons

Warning:

Changes the FM/AM/DAB bands with 5 U.

Changes the preset stations (or DAB services)

Do not install any battery other than CR2025 or its

with D .

equivalent; otherwise, it may explode.

Changes the folder of the MP3/WMA/USB.

Do not leave the remote controller in a place

While playing an MP3 disc on an

(such as dashboards) exposed to direct sunlight

MP3-compatible CD changer:

for a long time; otherwise, it may explode.

Changes the disc if pressed briefly.

Store the battery in a place where children cannot

Changes the folder if pressed and held.

reach to avoid risk of accident.

While listening to an Apple iPod or a JVC

To prevent the battery from over-heating,

D. player:

cracking, or starting a fire:

Pauses/stops or resumes playback with D .

Do not recharge, short, disassemble, heat the

Enters the main menu with 5 U.

battery, or dispose of it in a fire.

(Now 5 U/D /2 R/F 3 work as the menu

Do not leave the battery with other metallic

selecting buttons.)*

materials.

3

VOL – / VOL + buttons

Do not poke the battery with tweezers or

Adjusts the volume level.

similar tools.

4 SOUND button

Wrap the battery with tape and insulate when

Selects the sound mode (iEQ: intelligent

throwing away or saving it.

equalizer).

5 SOURCE button

Selects the source.

This unit is equipped with the steering wheel

remote control function.

* 5 U : Returns to the previous menu.

See the Installation/Connection Manual (separate

D : Confirms the selection.

volume) for connection.

Continued on the next page

5

EN02-05_KD-G632_1_003A_pre.indd 5EN02-05_KD-G632_1_003A_pre.indd 5 10/17/06 12:29:35 PM10/17/06 12:29:35 PM

6 2 R (reverse) / F (forward) 3 buttons

!

Searches for stations (or DAB services) if pressed

briefly.

For FM/AM tuner

Searches for DAB ensembles if pressed and held.

Fast-forwards or reverses the track if pressed and

held.

ENGLISH

Changes the tracks if pressed briefly.

For DAB tuner

While listening to an iPod or a D. player (in menu

selecting mode):

Selects an item if pressed briefly. (Then, press

D

to confirm the selection.)

Skips 10 items at a time if pressed and held.

Adjust the volume.

Volume level appears.

Getting started

VOL 20

Basic operations

~ Turn on the power.

@ Adjust the sound as you want. (See

pages 14 and 15.)

To drop the volume in

a moment (ATT)

To restore the sound, press

the button again.

Ÿ

To turn off the power

1

*

You cannot select these sources if they are not

ready or not connected.

2

*

“NO USB” appears if USB memory is not

attached.

6

EN06-15_KD-G632_1_003A_2.indd 6EN06-15_KD-G632_1_003A_2.indd 6 11/22/06 9:14:33 AM11/22/06 9:14:33 AM

Basic settings

Radio operations

See also “General settings — PSM” on

pages 15 – 17.

~

1

ENGLISH

Ÿ

2

88.3

Lights up when receiving an FM stereo

broadcast with sufficient signal strength.

1 Canceling the display demonstrations

Select “DEMO,” then “DEMO OFF.”

! Start searching for a station.

2 Setting the clock

When a station is received,

Select “CLOCK H” (hour), then adjust the hour.

searching stops.

Select “CLOCK M” (minute), then adjust the

To stop searching, press the

minute.

same button again.

Select “24H/12H,” then “24H” (hour) or “12H”

(hour).

To tune in to a station manually

In step ! above...

3 Finish the procedure.

1

M

2 Select a desired station frequency.

To check the current clock time while the

power is turned off

Clock time is shown on the

display for about 5 seconds. See

also page 16.

When an FM stereo broadcast is hard to receive

MONO

Lights up when monaural mode is activated.

Reception improves, but stereo effect will be lost.

To restore the stereo effect, repeat the same

procedure. “MONO OFF” appears and the MO indicator

goes off.

7

EN06-15_KD-G632_1_003A_pre.indd 7EN06-15_KD-G632_1_003A_pre.indd 7 10/17/06 12:29:47 PM10/17/06 12:29:47 PM

Storing stations in memory

Listening to a preset station

You can preset six stations for each band.

1

FM station automatic presetting

2 Select the preset station (1 – 6) you want.

ENGLISH

SSM (Strong-station Sequential

Memory)

1 Select the FM band (FM1 – FM3) you want to

To check the current clock time while

store into.

listening to an FM (non-RDS) or AM station

For FM RDS stations, see page 10.

Frequency Ô Clock

2

3

FM RDS operations

SSM

What you can do with RDS

“SSM” flashes, then disappears when automatic

RDS (Radio Data System) allows FM stations to send an

presetting is over.

additional signal along with their regular programme

signals.

Local FM stations with the strongest signals are

By receiving the RDS data, this unit can do the

searched and stored automatically in the FM band.

following:

Programme Type (PTY) Search (see the following)

TA (Traffic Announcement) and PTY Standby

Manual presetting

Receptions (see pages 9 and 16)

Ex.: Storing FM station of 92.5 MHz into preset

Tracing the same programme automatically

number 4 of the FM1 band.

—Network-Tracking Reception (see page 10)

1

Programme Search (see pages 10 and 16)

2

Searching for your favorite

92.5

FM RDS programme

You can tune in to a station broadcasting your favorite

programme by searching for a PTY code.

3

Preset number flashes for a while.

To store your favorite programme types, see the

P4

following.

~ The last selected PTY code

appears.

8

EN06-15_KD-G632_1_003A_pre.indd 8EN06-15_KD-G632_1_003A_pre.indd 8 10/17/06 12:29:48 PM10/17/06 12:29:48 PM

3 Repeat steps 1 and 2 to store other PTY

Ÿ Select one of your favorite programme

codes into other preset numbers.

types.

4 Finish the procedure.

or

ENGLISH

Select one of the PTY codes (see

page 10).

Using the standby receptions

TA Standby Reception

TA Standby Reception allows the unit to switch

temporarily to Traffic Announcement (TA) from any

source other than AM.

! Start searching for your favorite

The volume changes to the preset TA volume level if

the

programme.

current level is lower than the preset level (see page 16).

If there is a station broadcasting

a programme of the same PTY

To activate TA Standby Reception

code as you have selected, that

The TP (Traffic Programme) indicator

station is tuned in.

either lights up or flashes.

If the TP indicator lights up, TA Standby Reception is

Storing your favorite programme

activated.

types

If the TP indicator flashes, TA Standby Reception is

not yet activated. (This occurs when you are listening

You can store six favorite programme types.

to an FM station without the RDS signals required for

TA Standby Reception.)

Preset programme types in the number buttons

To activate TA Standby Reception, tune in to another

(1 to 6):

station providing these signals. The TP indicator will

stop flashing and remain lit.

To deactivate the TA Standby Reception

1 Select a PTY code (see above).

The TP indicator goes off.

2 Select the preset number (1 – 6) you want to

store into.

Ex.: When “ROCK M” is selected

Continued on the next page

9

EN06-15_KD-G632_1_003A_pre.indd 9EN06-15_KD-G632_1_003A_pre.indd 9 10/17/06 12:29:49 PM10/17/06 12:29:49 PM

PTY Standby Reception

Automatic station selection—

PTY Standby Reception allows the unit to switch

Programme Search

temporarily to your favorite PTY programme from any

source other than AM.

Usually when you press the number buttons, the preset

station is tuned in.

ENGLISH

To activate and select your favorite PTY code for

If the signals from the FM RDS preset station are not

PTY Standby Reception, see page 16.

sufficient for good reception, this unit, using the AF data,

The PTY indicator either lights up or flashes.

tunes in to another frequency broadcasting the same

If the PTY indicator lights up, PTY Standby Reception

programme as the original preset station is broadcasting.

is activated.

The unit takes some time to tune in to another

If the PTY indicator flashes, PTY Standby Reception is

station using programme search.

not yet activated.

See also page 16.

To activate PTY Standby Reception, tune in to another

station providing these signals. The PTY indicator will

To check the current clock time while

stop flashing and remain lit.

listening to an FM RDS station

To deactivate the PTY Standby Reception, select

Station name (PS) = Station

“OFF” for the PTY code (see page 16). The PTY indicator

Frequency = Programme type

goes off.

(PTY) = Clock = (back to the

beginning)

Tracing the same programme—

Network-Tracking Reception

PTY codes

When driving in an area where FM reception is not

NEWS, AFFAIRS, INFO, SPORT, EDUCATE, DRAMA,

sufficient enough, this unit automatically tunes in to

CULTURE, SCIENCE, VARIED, POP M (music), ROCK M

another FM RDS station of the same network, possibly

(music), EASY M (music), LIGHT M (music), CLASSICS,

broadcasting the same programme with stronger

OTHER M (music), WEATHER, FINANCE, CHILDREN, SOCIAL,

signals (see the illustration below).

RELIGION, PHONE IN, TRAVEL, LEISURE, JAZZ, COUNTRY,

NATION M (music), OLDIES, FOLK M (music), DOCUMENT

When shipped from the factory, Network-Tracking

Reception is activated.

To change the Network-Tracking Reception

setting, see “AF-REG” on page 16.

Programme A broadcasting on different frequency areas

(01 – 05)

10

EN06-15_KD-G632_1_003A_2.indd 10EN06-15_KD-G632_1_003A_2.indd 10 11/3/06 2:59:04 PM11/3/06 2:59:04 PM

Playing from a USB memory

Disc / USB memory

This unit can play MP3/WMA tracks stored in a USB

operations

memory.

All tracks in the USB memory will be played repeatedly

Playing a disc in the unit

until you change the source.

ENGLISH

Removing the USB memory will also stop playback.

All tracks will be played repeatedly until you change the

Then, press SRC to listen to another playback source.

source or eject the disc.

~

To stop play and eject the disc

Press SRC to listen to another playback

source.

USB input terminal

Ÿ

Playing discs in the CD changer

All discs in the magazine will be played repeatedly until

you change the source.

Ejecting the magazine will also stop playback.

~

USB memory

* If you have changed the external input setting

to “EXT IN” (see page 17), you cannot select the

If a USB memory has been attached...

CD changer.

Ÿ Select a disc.

For disc number from 01 – 06:

Playback starts from where it has been stopped

previously.

If a different USB memory is currently attached,

playback starts from the beginning.

For disc number from 07 – 12:

To detach the USB memory, straightly pull it out

from the unit.

Continued on the next page

11

EN06-15_KD-G632_1_003A_pre.indd 11EN06-15_KD-G632_1_003A_pre.indd 11 10/18/06 4:08:12 PM10/18/06 4:08:12 PM

To go to the next or previous tracks

Cautions:

Avoid using the USB memory if it might hinder

your safety driving.

Do not pull out or attach the USB memory

repeatedly while “CHECK” appears on the display.

ENGLISH

Operation and power supply may not work as

intended for some USB memories.

To go to the next or previous folders (only for

You cannot connect a computer to the USB input

MP3/WMA/USB)

terminal of the unit.

Make sure all important data has been backed up

For MP3 discs:

to avoid losing the data.

Some USB memories may not work immediately

For WMA discs:

after you turn on the power.

About MP3 and WMA tracks

MP3 and WMA “tracks” (words “file” and “track” are

To locate a particular track (for CD) or folder

used interchangeably) are recorded in “folders.”

(for MP3/WMA) directly

About the CD changer

It is recommended to use a JVC MP3-compatible CD

To select a number from 01 – 06:

changer with your unit.

You can also connect MP3-incompatible CD changers.

However, these units are not compatible with MP3

discs.

To select a number from 07 – 12:

You cannot use the CH-X99, CH-X100, and KD-MK

series CD changers with this unit.

You cannot play any WMA disc in the CD changer.

Disc text information recorded in the CD Text can be

displayed when a JVC CD Text compatible CD changer

To use direct folder access on MP3/WMA, it is

is connected.

required that folders are assigned with 2-digit

For connection, see Installation/Connection Manual

numbers at the beginning of their folder names—

(separate volume).

01, 02, 03, and so on.

To fast-forward or reverse the track

To select a particular track in a

folder (for MP3/WMA):

12

EN06-15_KD-G632_1_003A_2.indd 12EN06-15_KD-G632_1_003A_2.indd 12 11/10/06 2:17:07 PM11/10/06 2:17:07 PM

Other main functions

Changing the display information

Skipping tracks quickly during play

ENGLISH

While playing an audio CD or a CD

Only possible on JVC

MP3-compatible CD changer

Text

For MP3/WMA/USB, you can skip tracks within the

same folder.

Ex.: To select track 32 while playing a track whose

2

While playing an MP3/WMA*

disc or

number is a single digit (1 to 9)

USB memory

1

When “TAG DISP” is set to “TAG ON” (see

page 17)

2

Each time you press the button, you can skip 10

tracks.

When “TAG DISP” is set to “TAG OFF”

After the last track, the first track will be selected

and vice versa.

3

: Elapsed playing time with the current

track number

: Clock with the current track number

Prohibiting disc ejection

You can lock a disc in the loading slot.

1

*

If the current disc is an audio CD, “NO NAME” appears.

2

*

Only for the built-in CD player and external USB

memory.

3

*

If an MP3/WMA file does not have Tag information,

folder name and file name appear. In this case, the

TAG indicator will not light up.

NO EJECT

To cancel the prohibition, repeat the same

procedure.

13

EN06-15_KD-G632_1_003A_pre.indd 13EN06-15_KD-G632_1_003A_pre.indd 13 10/17/06 12:29:52 PM10/17/06 12:29:52 PM

Selecting the playback modes

Sound adjustments

You can use only one of the following playback modes

You can select a preset sound mode suitable to the

at a time.

music genre (iEQ: intelligent equalizer).

ENGLISH

1

1

2 Select your desired playback mode.

2

7 Repeat play

Preset values

Mode Plays repeatedly

1

2

3

4

BAS*

MID*

TRE*

LOUD*

TRK RPT : The current track.

Indication (For)

1

FLDR RPT *

: All tracks of the current folder.

USER

00 00 00 OFF

2

(Flat sound)

DISC RPT *

: All tracks of the current disc.

ROCK

+03 00 +02 ON

RPT OFF : Cancels.

(Rock or disco music)

7 Random play

CLASSIC

+01 00 +03 OFF

(Classical music)

POPS

Mode Plays at random

+02 +01 +02 OFF

(Light music)

1

FLDR RND *

: All tracks of the current folder,

then tracks of the next folder and

HIP HOP

+04 –02 +01 ON

so on.

(Funk or rap music)

DISC RND : All tracks of the current disc or USB

JAZZ

memory.

+03 00 +03 OFF

2

(Jazz music)

MAG RND *

: All tracks of the inserted discs.

1

*

Bass

RND OFF : Cancels.

2

*

Mid-range

3

*

Treble

1

*

Only while playing a media (MP3/WMA/USB).

4

*

Loudness

2

*

Only while playing discs in the CD changer.

14

EN06-15_KD-G632_1_003A_pre.indd 14EN06-15_KD-G632_1_003A_pre.indd 14 10/17/06 12:29:53 PM10/17/06 12:29:53 PM

Adjusting the sound

General settings — PSM

You can adjust the sound characteristics to your

You can change PSM (Preferred Setting Mode) items

preference.

listed in the table that follows.

ENGLISH

1

1

2

2 Select a PSM item.

Indication, [Range]

3 Adjust the PSM item selected.

1

BAS*

(bass), [–06 to +06]

Adjust the bass.

1

MID*

(mid-range), [–06 to +06]

Adjust the mid-range frequencies sound level.

1

4 Repeat steps 2 and 3 to adjust other PSM

TRE*

(treble), [–06 to +06]

items if necessary.

Adjust the treble.

2

FAD*

(fader), [R06 to F06]

5 Finish the procedure.

Adjust the front and rear speaker balance.

BAL (balance), [L06 to R06]

Adjust the left and right speaker balance.

1

LOUD*

(loudness), [LOUD ON or LOUD OFF]

Boost low and high frequencies to produce a well-

balanced sound at low volume level.

3

VOL (volume), [00 to 30 or 50*

]

Adjust the volume.

1

*

When you adjust the bass, mid-range, treble, or

loudness, the adjustment you have made is stored

for the currently selected sound mode (iEQ) including

“USER.”

2

*

If you are using a two-speaker system, set the fader

level to “00.”

3

*

Depending on the amplifier gain control setting. (See

page 17 for details.)

Continued on the next page

15

EN06-15_KD-G632_1_003A_pre.indd 15EN06-15_KD-G632_1_003A_pre.indd 15 10/17/06 12:29:54 PM10/17/06 12:29:54 PM

Indications Item

Selectable settings, [reference page]

( : Initial)

DEMO

DEMO ON

: Display demonstration will be activated automatically if no

Display

operation is done for about 20 seconds, [7].

ENGLISH

demonstration

DEMO OFF

: Cancels.

1

CLK DISP *

ON

:

Clock time is shown on the display at all times when the power is

Clock display

turned off

.

OFF

: Cancels; pressing DISP will show the clock time for about 5 seconds

when the power is turned off, [7].

CLOCK H

0 – 23 (1 – 12) [Initial: 0 (0:00)], [7].

Hour adjustment

CLOCK M

00 – 59 [Initial: 00 (0:00)], [7].

Minute adjustment

24H/12H

24H

: See also page 7 for setting.

Time display mode

12H

2

CLK ADJ *

AUTO

: The built-in clock is automatically adjusted using the CT (clock

Clock adjustment

time) data in the RDS signal.

OFF

: Cancels.

2

AF-REG *

AF

: When the currently received signals become weak, the unit

Alternative frequency/

switches to another station (the programme may differ from the

regionalization

one currently received), [10].

reception

The AF indicator lights up.

AF REG

: When the currently received signals become weak, the unit

switches to another station broadcasting the same programme.

The AF and REG indicators light up.

OFF

: Cancels (not selectable when “DAB AF“ is set to “AF ON“).

2

PTY-STBY*

OFF, PTY codes : Activates PTY Standby Reception with one of the PTY codes, [10].

PTY standby

2

TA VOL*

VOL 00 –

[Initial: VOL 15]

3

Traffic announcement

VOL 30 or 50 *

volume

2

P-SEARCH*

ON

: Activates Programme Search, [10].

Programme search

OFF

: Cancels.

4

DAB AF*

AF ON

: Traces the programme among DAB services and FM RDS stations,

Alternative frequency

[10, 18].

reception

AF OFF

: Cancels.

16

EN16-29_KD-G632_1_003A_pre.indd 16EN16-29_KD-G632_1_003A_pre.indd 16 10/17/06 12:29:15 PM10/17/06 12:29:15 PM

Indications Item

Selectable settings, [reference page]

( : Initial)

4

DAB VOL*

VOL –12

: [Initial: VOL 00]; You can adjust the volume level of DAB tuner to

DAB volume

— VOL +12

match the FM sound level and store it in memory.

adjustment

ENGLISH

DIMMER

AUTO

: Dims the display when you turn on the headlights.

Dimmer

ON

: Activates dimmer.

OFF

: Cancels.

TEL

MUTING 1/

: Select either one which mutes the sounds while using a cellular

Telephone muting

MUTING 2

phone.

OFF

: Cancels.

5

SCROLL *

ONCE

: Scrolls the track information once.

Scroll

AUTO

:

Repeats scrolling (at 5-second intervals).

OFF

: Cancels.

Pressing DISP for more than one second can scroll the display

regardless of the setting.

6

EXT IN*

CHANGER

: To use a JVC CD changer, [11], JVC DAB tuner, [18], an Apple iPod or a

External input

JVC D. player, [19].

EXT IN

: To use any other external component than the above, [21].

TAG DISP

TAG ON

: Shows the Tag information while playing MP3/WMA tracks, [13].

Tag display

TAG OFF

: Cancels.

AMP GAIN

LOW PWR

: VOL 00 – VOL 30 (Select this if the maximum power of the speaker is

Amplifier gain

less than 50 W to prevent damaging the speaker.)

control

HIGH PWR

: VOL 00 – VOL 50

IF BAND

AUTO

: Increases the tuner selectivity to reduce interference noises between

Intermediate

close stations. (Stereo effect may be lost.)

frequency band

WIDE

: Subject to interference noises from adjacent stations, but sound

quality will not be degraded and the stereo effect will remain.

1

*

If the power supply is not interrupted by turning off the ignition key of your car, it is recommended to select “OFF” to

save the car’s battery.

2

*

Only for FM RDS stations.

3

*

Depends on the amplifier gain control.

4

*

Displayed only when DAB tuner is connected.

5

*

Some characters or symbols will not be shown correctly (or will be blanked) on the display.

6

*

Displayed only when one of the following sources is selected—FM, AM, CD, or USB.

17

EN16-29_KD-G632_1_003A_2.indd 17EN16-29_KD-G632_1_003A_2.indd 17 10/30/06 9:17:10 AM10/30/06 9:17:10 AM

To tune in to an ensemble manually

DAB tuner operations

Start searching for an ensemble, as in step ! on the

left column.

What is DAB system?

1

Digital Audio Broadcasting (DAB) can deliver digital

quality sound without any annoying interference

ENGLISH

and signal distortion. Furthermore, it can carry text,

pictures, and data. When transmitting, DAB combines

2

Select a desired ensemble frequency.

several programmes (called “services”) to form one

“ensemble.” In addition, each “service”—called

“primary service”—can also be divided into its

components (called “secondary service”). A typical

ensemble has six or more programmes (services)

broadcast at the same time.

Storing DAB services in memory

By connecting the DAB tuner, this unit can do the

You can preset six DAB services (primary) for each band.

following:

Tracing the same programme automatically

—Alternative Frequency Reception (see “DAB AF” on

1 Select a service you want (see steps ~ to

page 16).

on the left column).

It is recommended to use DAB tuner KT-DB1000

with your unit. If you have another DAB tuner,

2 Select the preset number (1 – 6) you want to

consult your JVC IN-CAR ENTERTAINMENT dealer.

store into.

Refer also to the Instructions supplied for your DAB

tuner.

~

Preset number flashes for a while.

P4

Ÿ

! Start searching for an ensemble.

Tuning in to a preset DAB service

When an ensemble is received,

searching stops.

1

To stop searching, press the

same button again.

2 Select the preset DAB service (primary)

number (1 – 6) you want.

Select a service (either primary or

secondary) to listen to.

If the selected primary service has some secondary

services, pressing the same button again will tune

in to the secondary services.

18

EN16-29_KD-G632_1_003A_pre.indd 18EN16-29_KD-G632_1_003A_pre.indd 18 10/17/06 12:29:18 PM10/17/06 12:29:18 PM

Tracing the same programme—

iPod / D. player operations

Alternative Frequency Reception

This unit is ready for operating an Apple iPod or a JVC

D. player from the control panel.

You can keep listening to the same programme by

activating the Alternative Frequency Reception.

ENGLISH

Before operating your iPod or D. player:

While receiving a DAB service:

Connect either one of the following (separately

When driving in an area where a service cannot be

purchased) to the CD changer jack on the rear of this

received, this unit automatically tunes in to another

unit.

ensemble or FM RDS station, broadcasting the same

Interface adapter for iPod—KS-PD100 for

programme.

controlling an iPod.

While receiving an FM RDS station:

D. player interface adapter—KS-PD500 for

When driving in an area where a DAB service is

controlling a D. player.

broadcasting the same programme as the FM RDS

station is broadcasting, this unit automatically tunes

For connection, see Installation/Connection Manual

in to the DAB service.

(separate volume).

For details, refer also to the manual supplied with the

When shipped from the factory, Alternative Frequency

interface adapter.

Reception is activated.

To deactivate the Alternative Frequency

Reception, see page 16.

Preparations:

Make sure “CHANGER” is selected for the external input

To change the display information while

setting, see page 17.

tuning to an ensemble

~

Service name = Ensemble name

= Channel number = Frequency

= Clock = (back to the beginning)

Ÿ

Playback starts automatically from where it has

1

2

been paused*

or stopped*

previously.

Continued on the next page

19

EN16-29_KD-G632_1_003A_2.indd 19EN16-29_KD-G632_1_003A_2.indd 19 10/31/06 9:22:09 AM10/31/06 9:22:09 AM

! Adjust the volume.

Selecting a track from the menu

1 Enter the main menu.

ENGLISH

Adjust the sound as you want. (See

Now the

5//4 /¢ buttons work as

the menu selecting buttons*.

pages 14 and 15.)

Make sure the equalizer on the iPod or

2 Select the desired menu.

D. player is deactivated.

1

2

To pause*

or stop*

playback

To resume playback, press

For iPod:

the button again.

PLAYLIST Ô ARTISTS Ô ALBUMS Ô

SONGS Ô GENRES Ô COMPOSER Ô

To fast-forward or

(back to the beginning)

reverse the track

For D. player:

PLAYLIST

Ô ARTIST Ô ALBUM Ô

To go to the next or

GENRE Ô TRACK Ô (back to the beginning)

previous tracks

3 Confirm the selection.

1

*

For iPod

To move back to the previous

2

*

For D. player

menu, press

5.

If a track is selected, playback starts

automatically.

If the selected item has another layer, you will

enter the layer. Repeat steps 2 and 3 until the

desired track is played.

Holding 4 /¢ can skip 10 items at

a time.

*

The menu selecting mode will be canceled:

If no operations are done for about 5 seconds.

When you confirm the selection of a track.

20

EN16-29_KD-G632_1_003A_pre.indd 20EN16-29_KD-G632_1_003A_pre.indd 20 10/17/06 12:29:20 PM10/17/06 12:29:20 PM

Оглавление

    Аннотации для Автомагнитолы JVC KD-G631 в формате PDF