Pioneer DEH-P8100BT: Installing the unit on a left-hand drive car
Installing the unit on a left-hand drive car: Pioneer DEH-P8100BT
Table of contents
- Contents Connecting the units
- Connecting the units
- Connecting the power cord
- Connecting the units
- When connecting to separately sold power amp
- Connecting the units
- Installation DIN Front/Rear-mount Removing or attaching the trim ring DIN Front-mount
- Removing the Unit Installing the microphone When installing the microphone on the sun visor DIN Rear mount
- When installing the microphone Installing the steering remote on the steering column control Adjusting the microphone angle
- Installing the unit on a left-hand drive car
Installation
English
3.
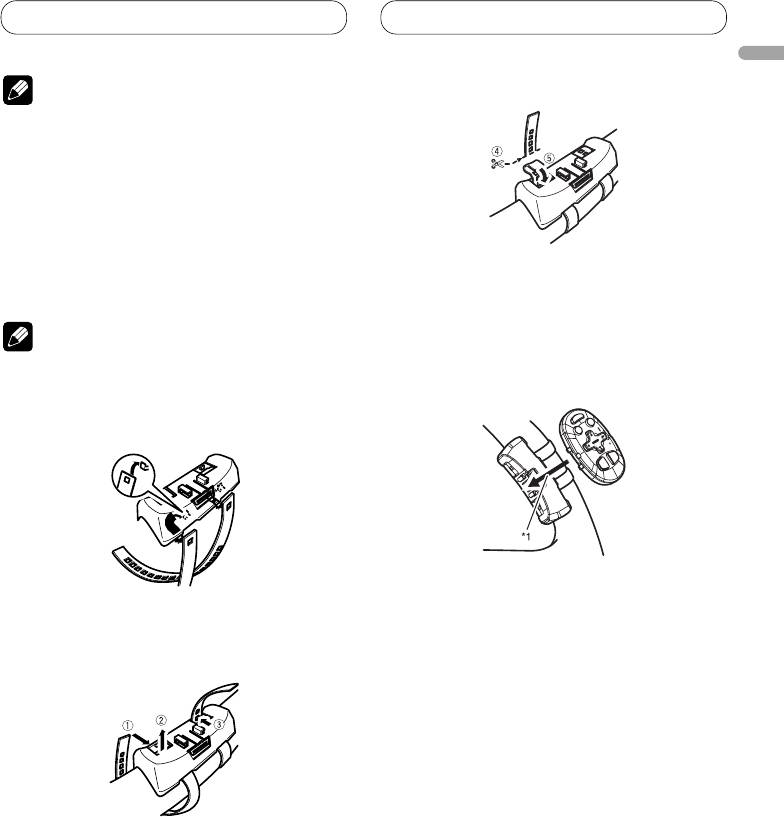
Cut off the extra portion of the belt.
Note
4
• Do not install this unit in such a place as may
obstruct the driver’s view.
• Since interior layout differs depending on the type
of vehicle, the ideal installation location for the
unit also differs. When installing the unit, select
a location that assures optimum transmission of
signals from the unit to the car stereo.
Installing the unit on a left-hand
• 5 If some of the belt still protrudes, fold it back
drive car
into the slot so that it does not interfere with
driving.
Note
4. Fasten the other belt in the same way.
5. Install the remote control unit in the
• When the unit is installed on a right-hand-drive
holder.
car, the horizontal positions are inverted.
1. Hook the belt on to the holder.
• When removing the remote control unit from
the holder, move the corrugated release section
2. Fix the holder to the inside edge of
toward the steering wheel and slide the remote
the steering wheel so that the holder
control unit toward you.
is facing the driver.
• 12 Wrap the belt around the outside edge of the
steering wheel, passing the end through the slot
in the holder.
3 Pull on the belt to tighten it then secure it using
the other two hooks on the holder.
11
