Pioneer DEH-P8100BT: Connecting the units
Connecting the units: Pioneer DEH-P8100BT
Table of contents
- Contents Connecting the units
- Connecting the units
- Connecting the power cord
- Connecting the units
- When connecting to separately sold power amp
- Connecting the units
- Installation DIN Front/Rear-mount Removing or attaching the trim ring DIN Front-mount
- Removing the Unit Installing the microphone When installing the microphone on the sun visor DIN Rear mount
- When installing the microphone Installing the steering remote on the steering column control Adjusting the microphone angle
- Installing the unit on a left-hand drive car
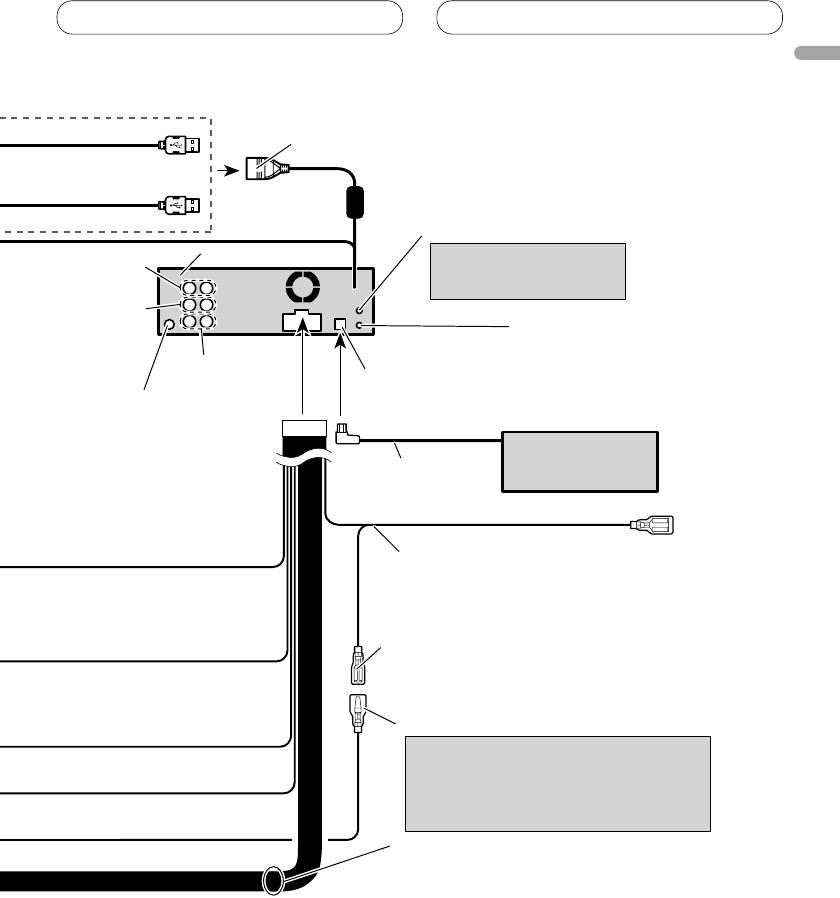
Connecting the units
English
1.5 m
USB1/USB2 input jack
20 cm
50 cm
AUX jack (3.5 φ)
Use a stereo mini plug cable
This product
Rear output
to connect with auxiliary
device.
Front output
Wired remote input
Hard-wired remote control
adaptor can be connected
Subwoofer output
(sold separately).
IP-BUS input (Blue)
Antenna jack
Multi-CD player
(sold separately)
IP-BUS cable
Blue/white
Connect to system control terminal of the
power amp (max. 300 mA 12 V DC).
Blue/white (7*)
Connect to auto-antenna relay control
terminal (max. 300 mA 12 V DC).
Blue/white (6*)
The pin position of the ISO connector will
differ depends on the type of vehicle.
Connect 6* and 7* when Pin 5 is an
antenna control type. In another type of
vehicle, never connect 6* and 7*.
Speaker leads
White: Front left
White/black: Front left
Gray: Front right
Gray/black: Front right
Green: Rear left or subwoofer
Green/black: Rear left or subwoofer
Violet: Rear right or subwoofer
Violet/black: Rear right or subwoofer
5
