Pioneer DEH-P8100BT: Connecting the power cord
Connecting the power cord: Pioneer DEH-P8100BT
Table of contents
- Contents Connecting the units
- Connecting the units
- Connecting the power cord
- Connecting the units
- When connecting to separately sold power amp
- Connecting the units
- Installation DIN Front/Rear-mount Removing or attaching the trim ring DIN Front-mount
- Removing the Unit Installing the microphone When installing the microphone on the sun visor DIN Rear mount
- When installing the microphone Installing the steering remote on the steering column control Adjusting the microphone angle
- Installing the unit on a left-hand drive car
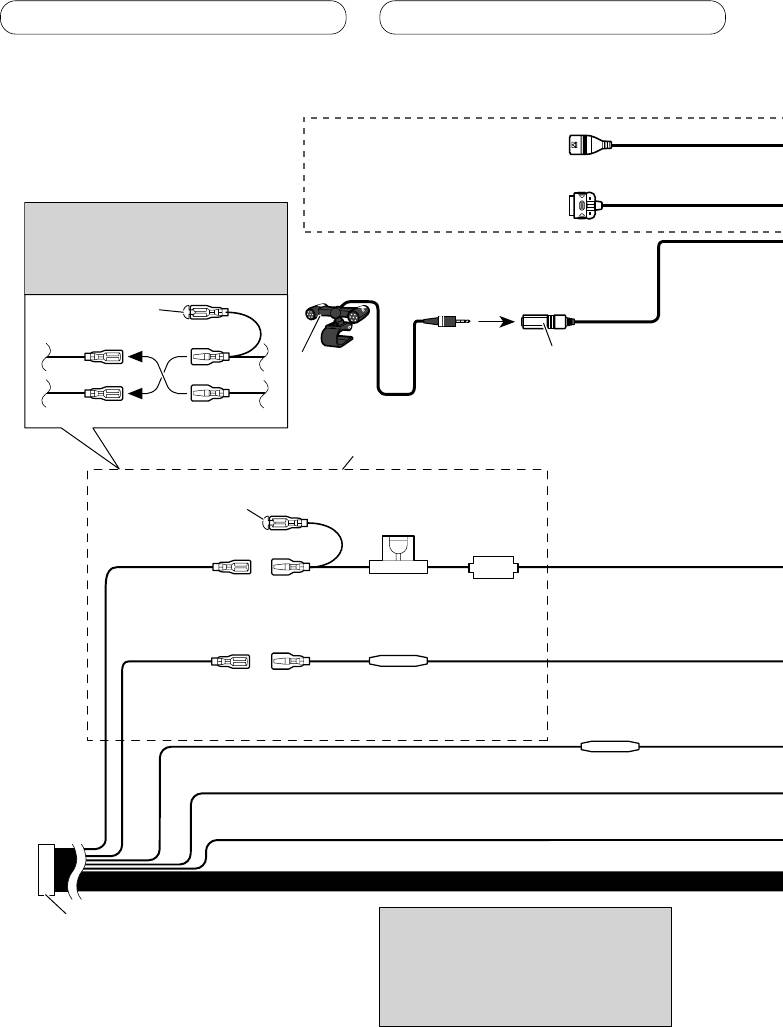
Connecting the units
Connecting the power cord
USB cable
Use supplied USB cable or separately
sold USB cable (CD-U150E).
iPod to USB connection cable
Use separately sold iPod to USB
Note
connection cable (CD-IU50).
Depending on the kind of vehicle,
the function of 3* and 5* may be
different. In this case, be sure to
connect 2* to 5* and 4* to 3*.
1*
15 cm
3* 2*
Microphone input
Microphone
4 m
4*5*
Connect leads of the same
color to each other.
Cap (1*)
Do not remove cap if
this terminal is not in
Fuse (10 A)
use.
Yellow (3*)
Yellow (2*)
Back-up (or
Connect to the constant 12 V
accessory)
supply terminal.
Fuse resister
Red (5*)
Red (4*)
Accessory (or
Connect to terminal controlled by
back-up)
ignition switch (12 V DC).
Fuse resister
Orange/white
Connect to lighting switch terminal.
Black (chassis ground)
Connect to a clean, paint-free metal location.
ISO connector
Note
Note
When using a subwoofer of 70 W (2
In some vehicles, the ISO connector may
Ω), be sure to connect with Violet
be divided into two. In this case, be sure to
and Violet/black leads of this unit.
connect to both connectors.
Do not connect anything with Green
and Green/black leads.
4
