JVC KD-DV7402: Listening to the Bluetooth ® devices
Listening to the Bluetooth ® devices: JVC KD-DV7402
Listening to the Bluetooth ® devices
For Bluetooth operations, it is required to connect the
Registering using “Open”
Bluetooth Adapter (KS-BTA200) to the CD changer
Preparation: Operate the device to turn on its
jack on the rear of this unit.
ENGLISH
Bluetooth function.
• Refer also to the instructions supplied with the
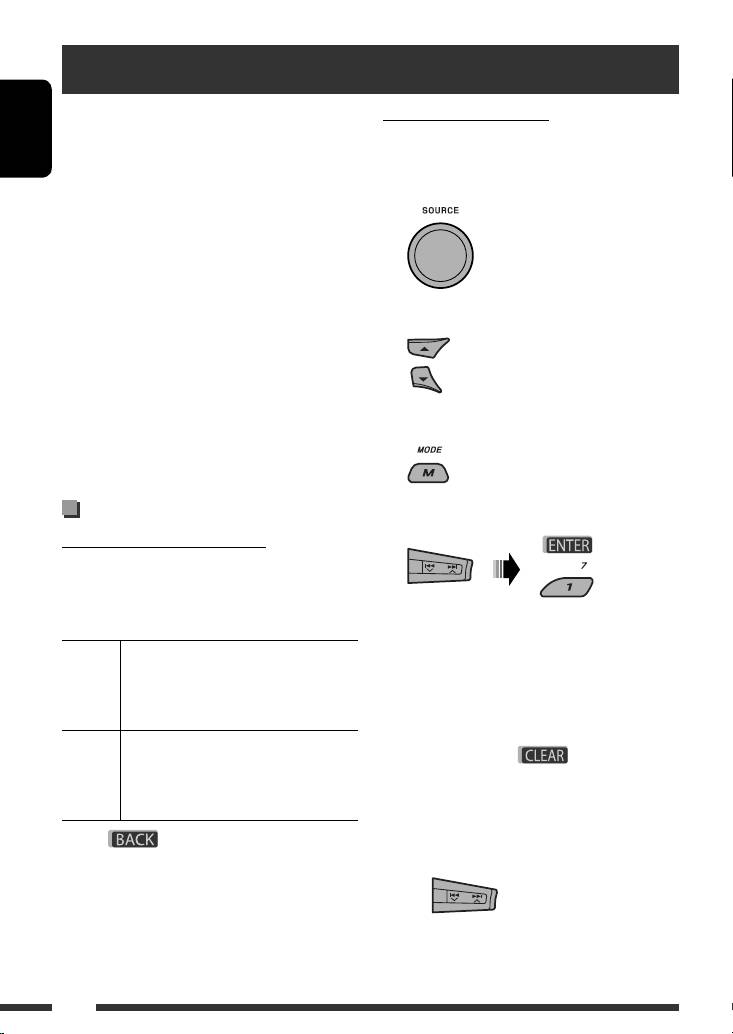
1 Select “BT-PHONE” or “BT-AUDIO.”
Bluetooth adapter and the Bluetooth device.
• Refer to the list (included in the box) to check
the countries where you may use the Bluetooth ®
function.
To use a Bluetooth device through the unit
(“BT-PHONE” and “BT-AUDIO”) for the first time,
2 Select “New.”
you need to establish Bluetooth wireless connection
between the unit and the device.
• Once the connection is established, it is registered in
the unit even if you reset your unit. Up to five devices
can be registered in total.
3 Enter setting menu.
• Only one device can be connected at a time for each
source (“BT-PHONE” and “BT-AUDIO”).
Registering a Bluetooth device
4 Select “Open.”
Registration (Pairing) methods
Use either of the following items in the Bluetooth menu
to register and establish the connection with a device.
• Select “BT-PHONE” or “BT-AUDIO” as the source to
operate the Bluetooth menu.
5 Enter a PIN (Personal Identification Number)
code to the unit.
Open Make the unit ready to establish a new
• You can enter any number you like (1-digit to
Bluetooth connection.
16-digit number). [Initial: 0000]
Connection is established by operating the
• To enter a PIN code less than 4-digit, firstly
Bluetooth device.
delete the initial PIN code (0000) by pressing
Search Make the unit ready to establish a new
number button 5 ( ) .
Bluetooth connection.
* Some devices have their own PIN code. Enter the
Connection is established by operating
specified PIN code to the unit.
the unit.
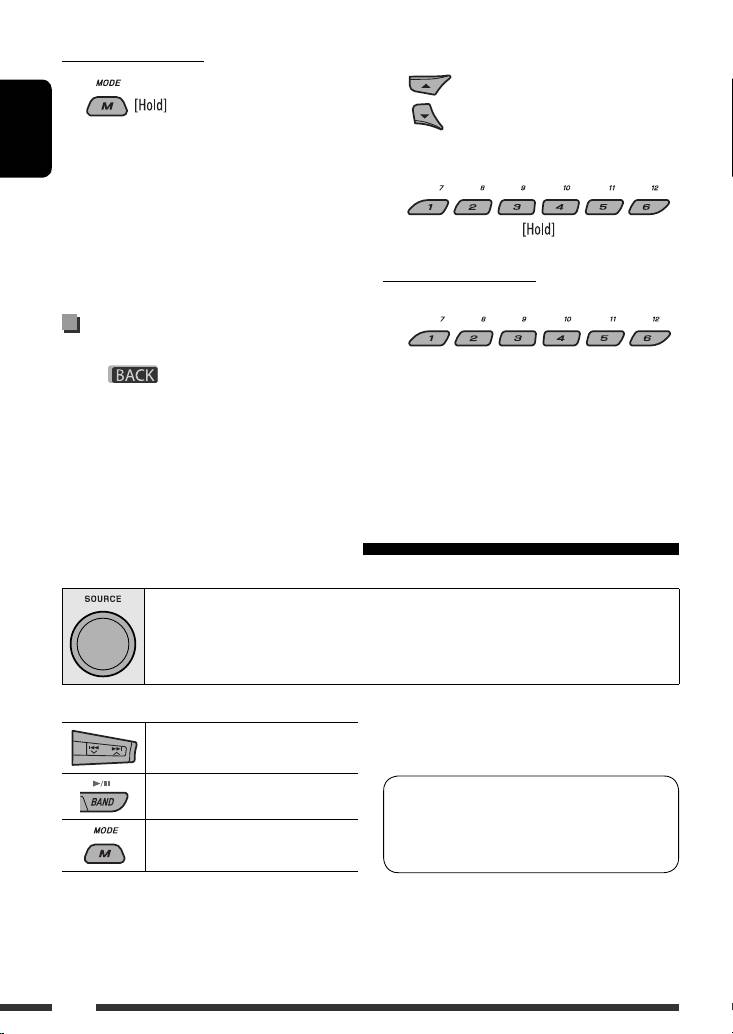
• When
is shown on the display, you can
1 Move to the next (or previous) number
move back to the previous screen by pressing number
position.
button 3.
28
EN28-33_KD-DV7402_003A_5.indd 28EN28-33_KD-DV7402_003A_5.indd 28 1/22/08 11:14:28 AM1/22/08 11:14:28 AM
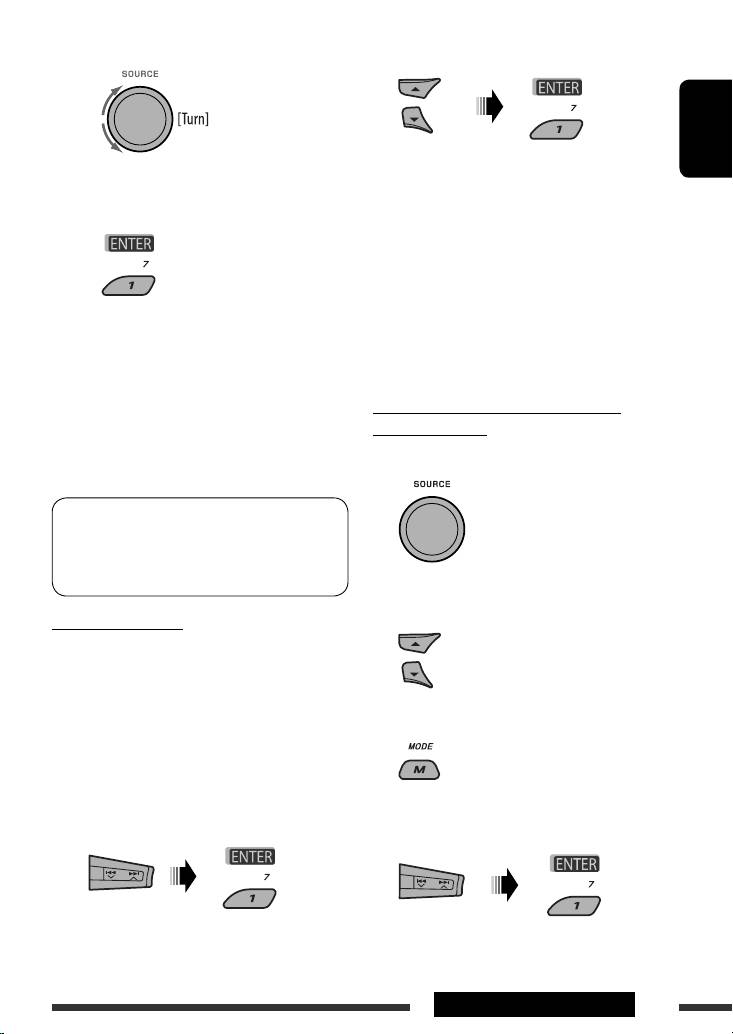
2 Select a number or blank space.
2 Select a device you want to connect.
ENGLISH
3 • For available devices...
3 Repeat steps 1 and 2 until you finish
1 Enter the specific PIN code of the device to
entering a PIN code.
the unit.
4 Confirm the entry.
Refer to the instructions supplied with the
“Open...” flashes on the display.
device to check the PIN code.
2 Use the Bluetooth device to connect.
Now connection is established and you can
use the device through the unit.
6 Use the Bluetooth device to search and
• For special device...
connect.
Use “Open” or “Search” to connect.
On the device to be connected, enter the same
PIN code you have just entered for this unit.
Connecting/disconnecting/deleting a
“Connected (and device name)” appears on the
registered device
display.
Now connection is established and you can use the
1 Select “BT-PHONE” or “BT-AUDIO.”
device through the unit.
The device remains registered even after you
disconnect the device. Use “Connect“ (or activate
“Auto Connect”) to connect the same device from
next time on. (See the following and page 52.)
2 Select a registered device you want to
connect/disconnect/delete.
Connecting a device
Perform steps 1 – 3 on page 28, then...
1 • Select “Search” to search for available
devices.
The unit searches and displays the list of the
3 Enter setting menu.
available devices.
If no available device is detected, “Device not
found” appears.
• Select “Special” to connect a special device.
4 • Select “Connect” or “Disconnect” to
The unit displays the list of the preset devices.
connect/disconnect the selected device.
Continued on the next page
EXTERNAL DEVICES
29
EN28-33_KD-DV7402_003A_5.indd 29EN28-33_KD-DV7402_003A_5.indd 29 1/22/08 11:14:33 AM1/22/08 11:14:33 AM
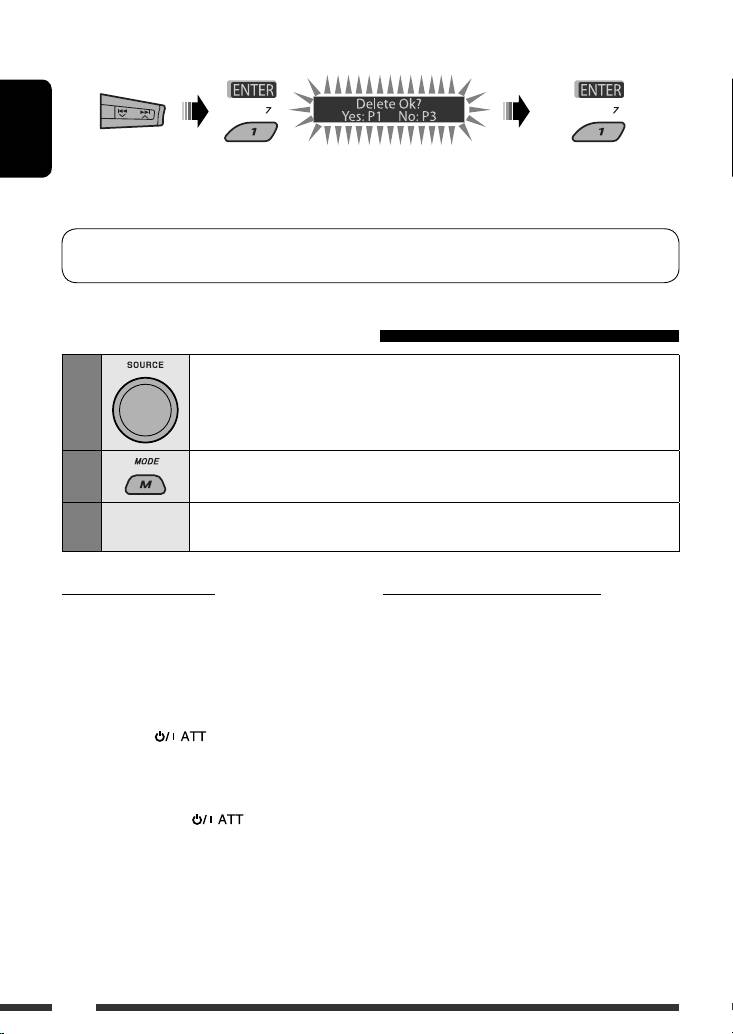
• Select “Delete,” then confirm the selection.
ENGLISH
Press number button 3 to
select “No” or return to the
previous screen.
You can set the unit to connect the Bluetooth device automatically when the unit is turned on. (See
“Auto Connect” on page 52.)
Using the Bluetooth cellular phone
Select “BT-PHONE.”
1
Enter Bluetooth menu.
2
Establish the connection with a device, then make a call (or settings
3
—
using the Bluetooth menu). (See pages 31 and 52.)
When a call comes in....
When a text message comes in....
The source is automatically changed to “BT-PHONE.”
If the cellular phone is compatible with Text Message
(notified through JVC Bluetooth adapter) and “Message
When “Auto Answer” is activated....
Info” is set to “Auto” (see page 52), the unit rings and
The unit answers the incoming calls automatically, see
“Received Message” appears on the display to inform
page 52.
you of the message arrival.
• When “Auto Answer” is deactivated, press any
button (except /control dial) to answer the
incoming call.
To end the call
Hold any button (except /control dial).
• You can adjust the microphone volume level (see
page 52).
30
EN28-33_KD-DV7402_003A_f.indd 30EN28-33_KD-DV7402_003A_f.indd 30 1/28/08 3:36:22 PM1/28/08 3:36:22 PM
Making a call
* Displayed only when your cellular phone is
You can make a call using one of the Dial Menu items.
equipped with these functions.
• When is shown on the display, you can
– If not displayed, try to transfer the phone book
move back to the previous screen by pressing number
memory of the cellular phone to this unit.
button 3.
(Refer to the instruction manual supplied with
ENGLISH
your cellular phone.)
1 Select “BT-PHONE.”
– With some cellular phones, the phone book
memory is transferred automatically.
5 Select the name/phone number you want to
call.
2 Enter setting menu.
3 Select “Dial Menu.”
How to enter phone number
Select a number.
4 Select the method to make a call.
Move the entry position.
• Redial *: Shows the list of the phone numbers
you have dialed. Go to the following step.
Confirm the entry.
• Received *: Shows the list of the received calls.
Go to the following step.
• Phonebook *: Shows the phone book of the
connected cellular phone. Go to the following
step.
• Missed *: Shows the list of the missed calls. Go
to the following step.
• Number: Shows the phone number entry
screen. See “How to enter phone number” on the
right column.
• Voice Dial (Only accessible when the connected
cellular phone has the voice recognition system):
Speak the name (registered words) you want to
call.
Continued on the next page
EXTERNAL DEVICES
31
EN28-33_KD-DV7402_003A_5.indd 31EN28-33_KD-DV7402_003A_5.indd 31 1/22/08 11:14:35 AM1/22/08 11:14:35 AM
Using voice command
2 Select a phone number.
You can also enter a new phone
1 “Say...” appears on the display.
number (see also “How to enter
phone number” on page 31) to store.
2 Speak the name (registered words) you want
ENGLISH
3 Select a preset number to store.
to call.
• You can also use voice command from the Dial
Menu. Select “Voice Dial” from the Dial Menu.
• If your cellular phone does not support the voice
recognition system, “Error” appears on the
To call a preset number
display.
While in Bluetooth phone....
Presetting the phone number
You can preset up to six phone numbers.
• When is shown on the display, you can
move back to the previous screen by pressing number
button 3.
1 Display the phone number you want to
preset by using one of the “Dial Menu” items.
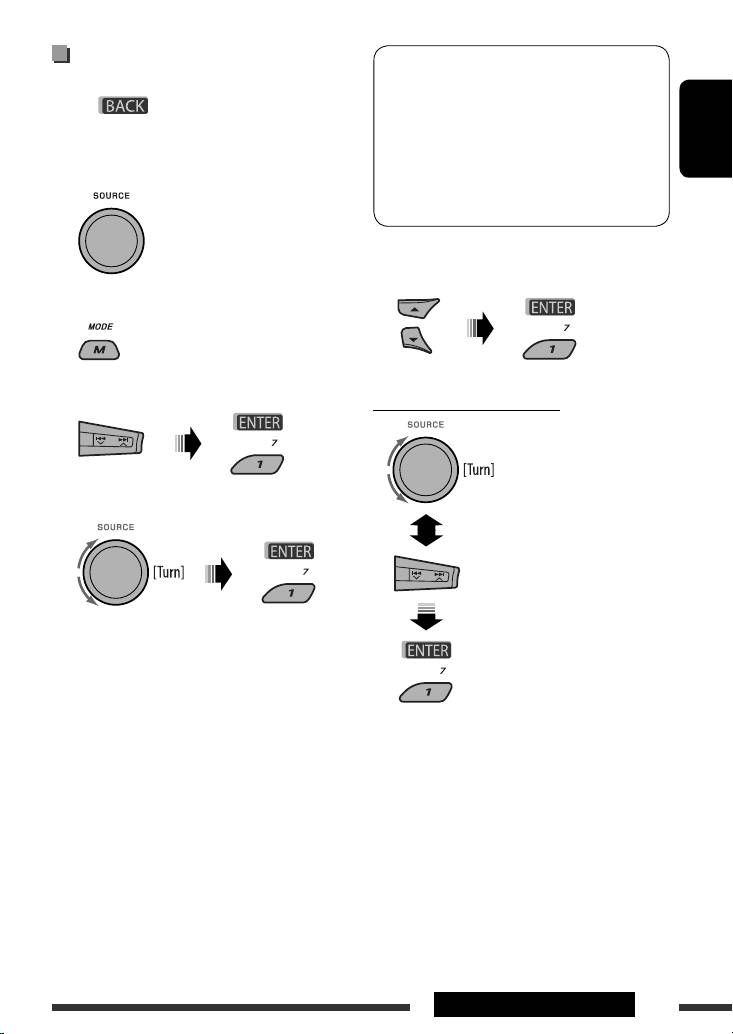
Using the Bluetooth audio player
• Operations and display indications differ depending on their availability on the connected audio player.
Select “BT-AUDIO.”
If playback does not start automatically, operate the Bluetooth audio player to start playback.
• If playback does not pause when you change the source, operate the Bluetooth audio player to
pause playback.
• Refer also to pages 29 and 30 for connecting/
Reverse skip/forward skip
disconnecting/deleting a registered device.
Start/pause playback
Bluetooth Information:
If you wish to receive more information about
Enter setting menu (Device list)
Bluetooth, visit the following JVC web site: <http://
www.jvc-victor.co.jp/english/car/>.
32
EN28-33_KD-DV7402_003A_f.indd 32EN28-33_KD-DV7402_003A_f.indd 32 1/28/08 3:38:30 PM1/28/08 3:38:30 PM
Оглавление
- Playable disc type
- Preparation
- Basic operations
- Listening to the radio
- Disc operations
- Listening to the USB device
- Dual Zone operations
- Listening to the Bluetooth ® devices
- Listening to the CD changer
- Listening to the DAB tuner
- Listening to the iPod
- Listening to the other external components
- Selecting a preset sound mode
- General settings — PSM
- Disc setup menu
- Bluetooth settings
- Maintenance
- More about this unit
- Troubleshooting
- Specifications
- Type de disque compatible
- Préparation
- Opérations de base
- Écoute de la radio
- Opérations des disques
- Écoute du périphérique USB
- Fonctionnement sur Deux Zones
- Écoute d’un périphérique Bluetooth ®
- Écoute du changeur de CD
- Écoute du tuner DAB
- Écoute de iPod
- Écoute d’un autre appareil extérieur
- Sélection d’un mode sonore préréglé
- Réglages généraux—PSM
- Menu de réglage du disque
- Réglages Bluetooth
- Entretien
- Pour en savoir plus à propos de cet autoradio
- Guide de dépannage
- Spécifications
- Тип воспроизводимых дисков
- Подготовка
- Основные операции
- Прослушивание радио
- Операции с дисками
- Прослушивание устройства USB
- Операции в режиме “Dual Zone”
- Прослушивание устройств Bluetooth®
- Прослушивание с устройства автоматической смены компакт-дисков
- Прослушивание тюнера DAB
- Прослушивание проигрывателя iPod
- Прослушивание с других внешних устройств
- Выбор запрограммированного режима звучания
- Общие настройки—PSM
- Меню настройки диска
- Настройки Bluetooth
- Обслуживание
- Дополнительная информация о приемнике
- Устранение проблем
- Технические характеристики
