Asus ROG Xonar Phoebus: 2. Hardware
2. Hardware: Asus ROG Xonar Phoebus
English
4
ASUS Xonar Phoebus Quick Start Guide
2. Hardware
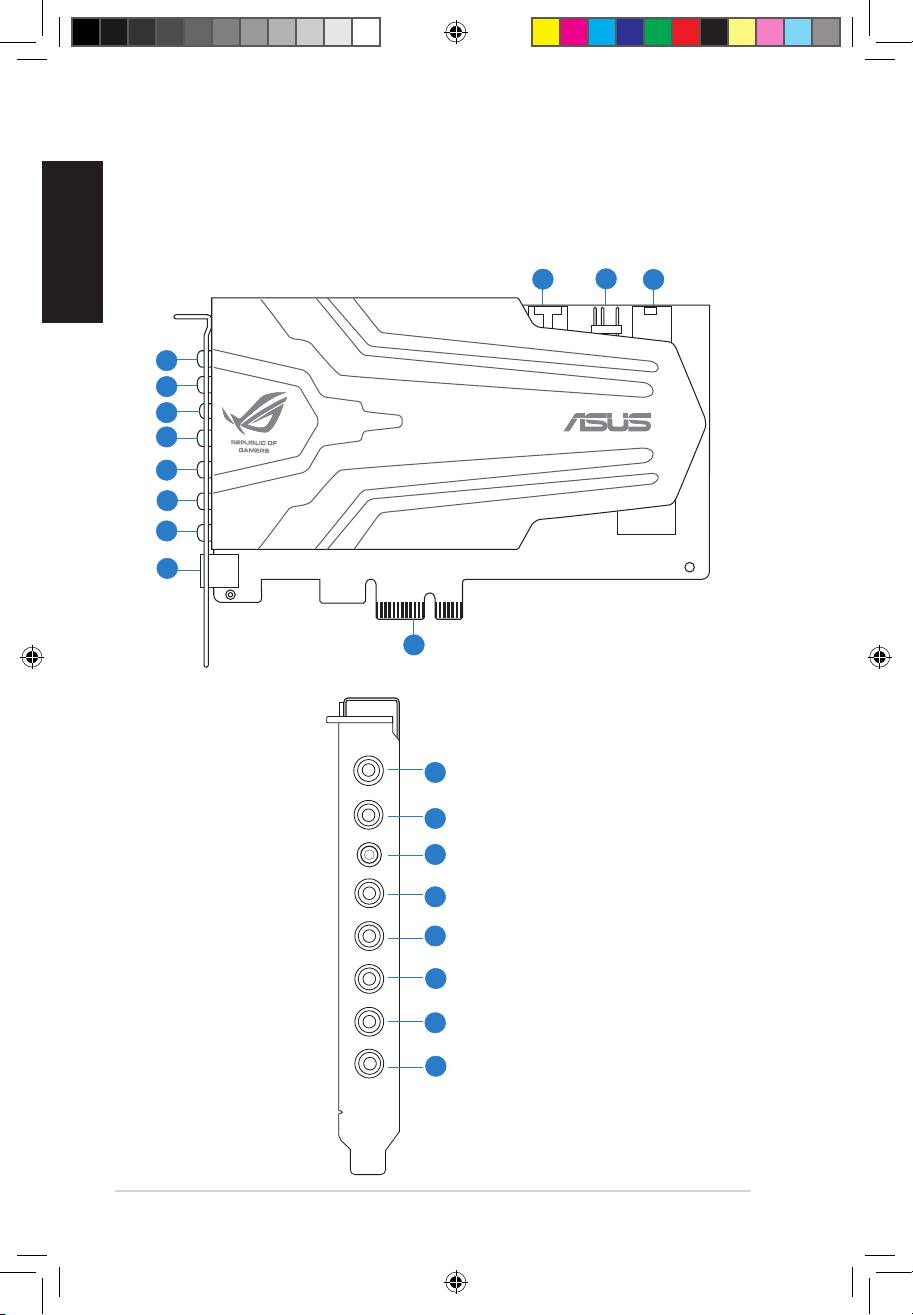
2.1 Xonar Phoebus Audio Processing Card
Mic in
HP out
Box link
Line in
Front
Ctr / Sbw
Rear
Side /
SPDIF out
9
10
11
1
2
3
4
5
6
7
8
12
1
2
3
4
5
6
7
8
U7062_Xonar-Phoebus_QSG.indb 4 18.01.2012 16:12:18 Uhr
English
ASUS Xonar Phoebus Quick Start Guide
5
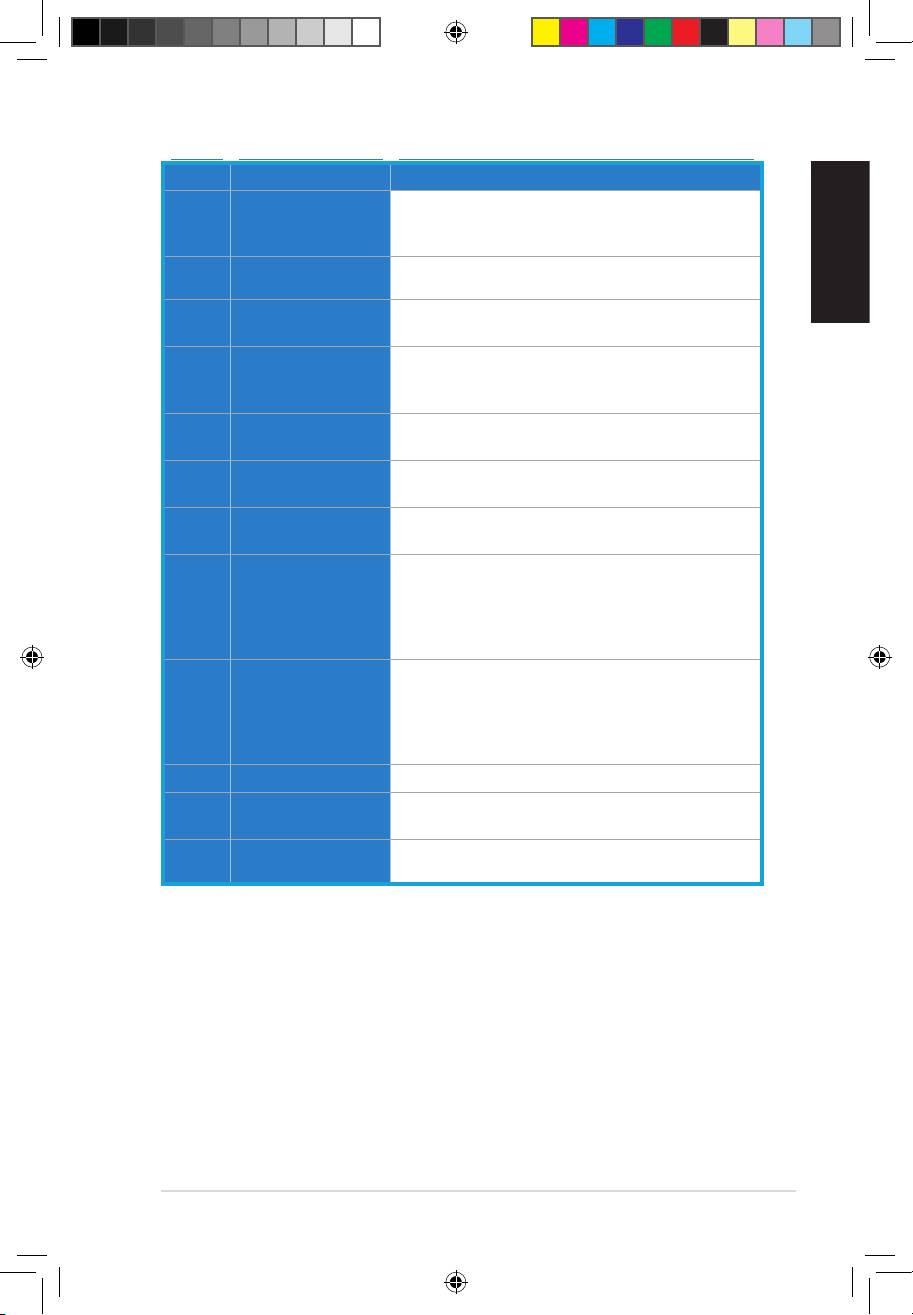
No Item Description
Connect your external PC microphone to this 3.5mm port
1 Microphone In port
for voice input. Built-in high-quality Microphone pre-
amplier.
Headphone Out
Connect your headphone to this port.
2
port
Connect the Xonar Phoebus Control Box to this 2.5mm
3 Box Link
port.
Connect analog devices like MP3 players, CD players, music
4 Line In port
synthesizers, and other line-level sound sources to this
3.5mm port for audio recording or processing.
For 2 channel speaker systems, connects to the front
5 Front Out port
left/right input on the powered speakers.
Center/Subwoofer
Connect to the center/subwoofer input on 5.1/7.1 powered
6
Out port
analog speakers.
Connect to the back surround input on 7.1 powered analog
7 Rear Out port
speakers.
Digital output port. Connect to an external digital decoder
or digital speaker systems, Home Theater systems, AV
S/PDIF Out/Side
8
receivers for outputting digital audio including PCM,
Out port
Dolby Digital, DTS, WMA-Pro, etc. Connect to the surround
channel input on 5.1 powered analog speakers.
4-pin header. Usually connects to the Analog Audio output
of TV tuner card or other sound source inside your PC
9 Aux Input Header
system. (To monitor your TV tuner card’s audio from this
Aux-In, you must enable the “monitor” function for Aux-In
in the Xonar Audio Center software’s recording mixer.)
10 S/PDIF Out Header
Connect to the graphics card with HDMI support.
Connect to the 6-pin power cable of your power supply
11 Power Connector
unit.
PCI Express Bus
Insert into the PCI Express slot on your motherboard.
12
Golden Fingers
U7062_Xonar-Phoebus_QSG.indb 5 18.01.2012 16:12:19 Uhr
English
6
ASUS Xonar Phoebus Quick Start Guide
2.1 Card Installation
Before you proceed with the following installation steps, it’s recommended that you
disable your onboard audio device in your BIOS settings, or uninstall any other sound
cards on your PC. (For BIOS setting or uninstallation of other sound cards, please refer
to the user manuals of your motherboard and sound card)
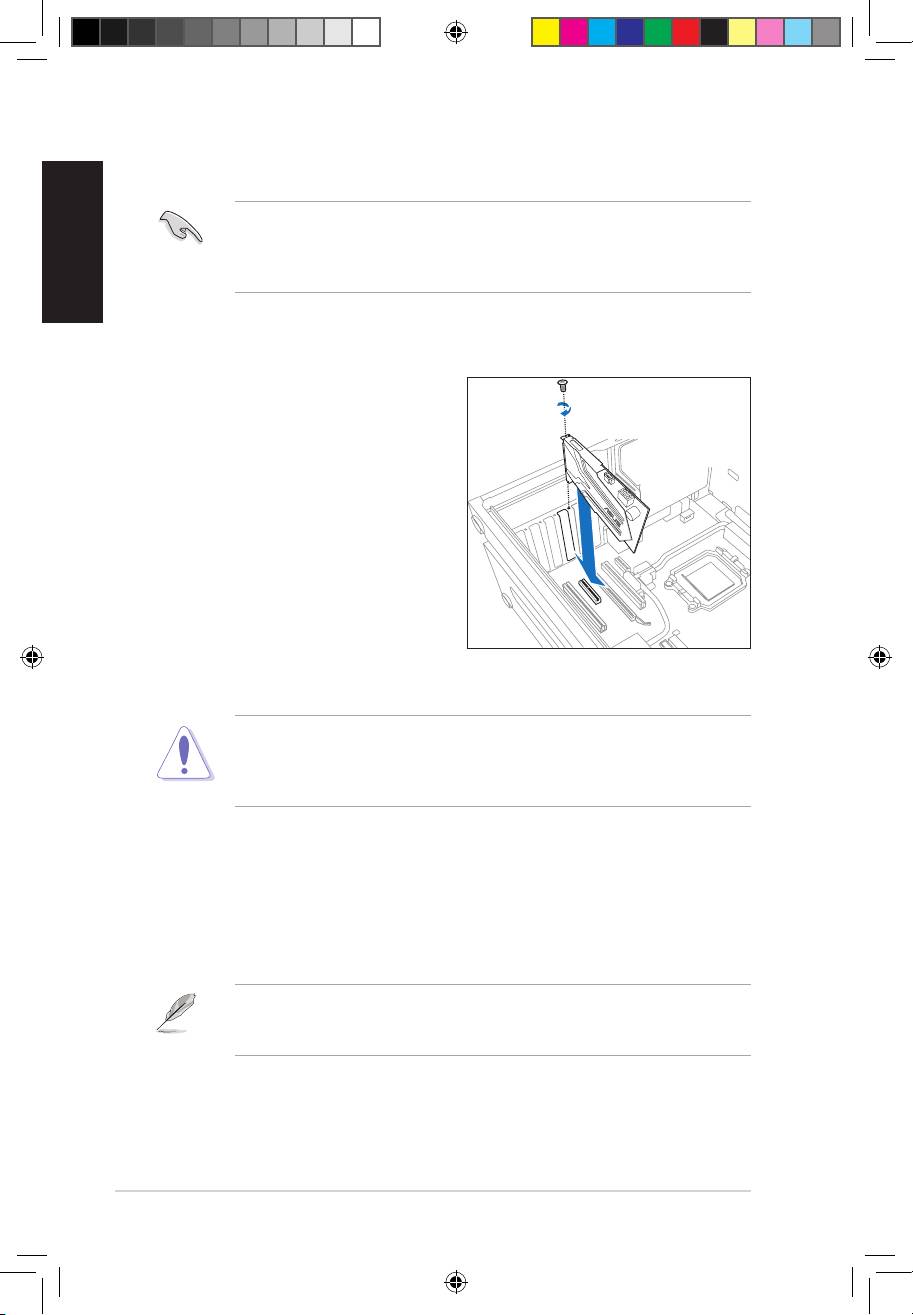
2.1.1 Installing the Xonar Phoebus Card
To install the Xonar Phoebus audio card:
1. Power OFF the computer, the monitor,
and all other peripheral devices
connected to your computer.
2. Unplug the computer power cord from
your computer and power outlet.
3. Touch the metal back or side panel of
the computer to avoid static electricity.
4. Remove the chassis cover.
5. Remove the metal bracket from
an available PCIE slot for the Xonar
Phoebus audio card.
6. Carefully insert the audio card into the PCIE slot. Ensure the audio card sits
properly in place.
Do not force the audio card into the slot. Make sure that the gold pins of the card’s
PCI Express connector are aligned with the motherboard’s PCI Express connector
before you insert the card into the PCI Express slot. If it does not t properly, gently
remove it and try again.
7. Secure the audio card with screws and the metal bracket.
8. Put back the chassis cover.
9. Reconnect all cables.
10. Plug the power cord to the computer and to a power outlet.
11. Power ON the computer.
The PCI Express high-quality audio card requires additional power from your
computer. If the power cable is not connected properly, the audio card will not work
at all.
U7062_Xonar-Phoebus_QSG.indb 6 18.01.2012 16:12:22 Uhr

English
ASUS Xonar Phoebus Quick Start Guide
7
2.1.2 Connecting the TV Tuner Card
If you have a traditional PCI or PCI Express TV tuner card on your computer, you may
need to connect it to the audio card to send the tuner card’s sound to your computer’s
speakers.
1. Secure the PCI/PCI Express TV tuner card and screw it into the back panel.
2. Connect the audio output header from the TV tuner card to the Aux-In header of
the audio card, as shown in the gure below.
For optimum TV audio quality, Xonar uses ADC recording to digitize the signal and
loops it back to DAC playback. Please select Aux-In as the recording source in the
Xonar Audio Center’s recording mixer and enable the monitoring button to pass this
signal to the audio output. Using this setup, you can even turn on sound eects such
as Pro-Logic IIx to expand the stereo TV audio to 5.1 or 7.1 channel surround sound.
TV audio on your PC will become even better than on your TV set!
U7062_Xonar-Phoebus_QSG.indb 7 18.01.2012 16:12:23 Uhr
Оглавление
- Table of content
- 1. Introduction
- 2. Hardware
- 3. Driver Installation
- 4. Connecting Speakers and Peripherals
- 1. Introduction
- 2. Matériel
- 3. Installation du pilote de la carte son
- 4. Connexion de haut-parleurs et de périphériques
- 1. Einführung
- 2. Hardware
- 3. Treiberinstallation
- 4. Anschluß der Lautsprecher und Peripheriegeräte
- 1. Introduzione
- 2. Hardware
- 3. Installazione Driver
- 4. Connessione di altoparlanti e periferiche
- 1. Introducción
- 2. Hardware
- 3. Driver Installation
- 4. Conectar altavoces y periféricos
- 1.Introdução
- 2. Hardware
- 3. Instalação do controlador
- 4. Ligar altifalantes e periféricos
- 1. Введение
- 2. Аппаратное обеспечение
- 3. Установка драйвера
- 4. Подключение колонок и периферии
- 1. Giriş
- 2. Donanım
- 3. Sürücü kurulumu
- 4. Hoparlör ve Çevre Birimlerinin Bağlanması
 P2-P5945G")