Asus P4P8X: 2.2 BIOS Setup program
2.2 BIOS Setup program: Asus P4P8X

2.2 BIOS Setup program
This motherboard supports a programmable firmware hub (FWH) that you can
update using the provided utility described in section “2.1 Managing and updating
your BIOS.”
Use the BIOS Setup program when you are installing a motherboard, reconfiguring
your system, or prompted to “Run Setup”. This section explains how to configure
your system using this utility.
Even if you are not prompted to use the Setup program, you may want to change
the configuration of your computer in the future. For example, you may want to
enable the security password feature or make changes to the power management
settings. This requires you to reconfigure your system using the BIOS Setup
program so that the computer can recognize these changes and record them in the
CMOS RAM of the firmware hub.
The firmware hub on the motherboard stores the Setup utility. When you start up
the computer, the system provides you with the opportunity to run this program.
Press <Delete> during the Power-On Self Test (POST) to enter the Setup utility,
otherwise, POST continues with its test routines.
If you wish to enter Setup after POST, restart the system by pressing <Ctrl> +
<Alt> + <Delete>, or by pressing the reset button on the system chassis. You can
also restart by turning the system off and then back on. Do this last option only if
the first two failed.
The Setup program is designed to make it as easy to use as possible. It is a menu-
driven program, which means you can scroll through the various sub-menus and
make your selections among the predetermined choices.
Because the BIOS software is constantly being updated, the following BIOS
setup screens and descriptions are for reference purposes only, and may not
exactly match what you see on your screen.
ASUS P4P8X motherboard user guide
2-7
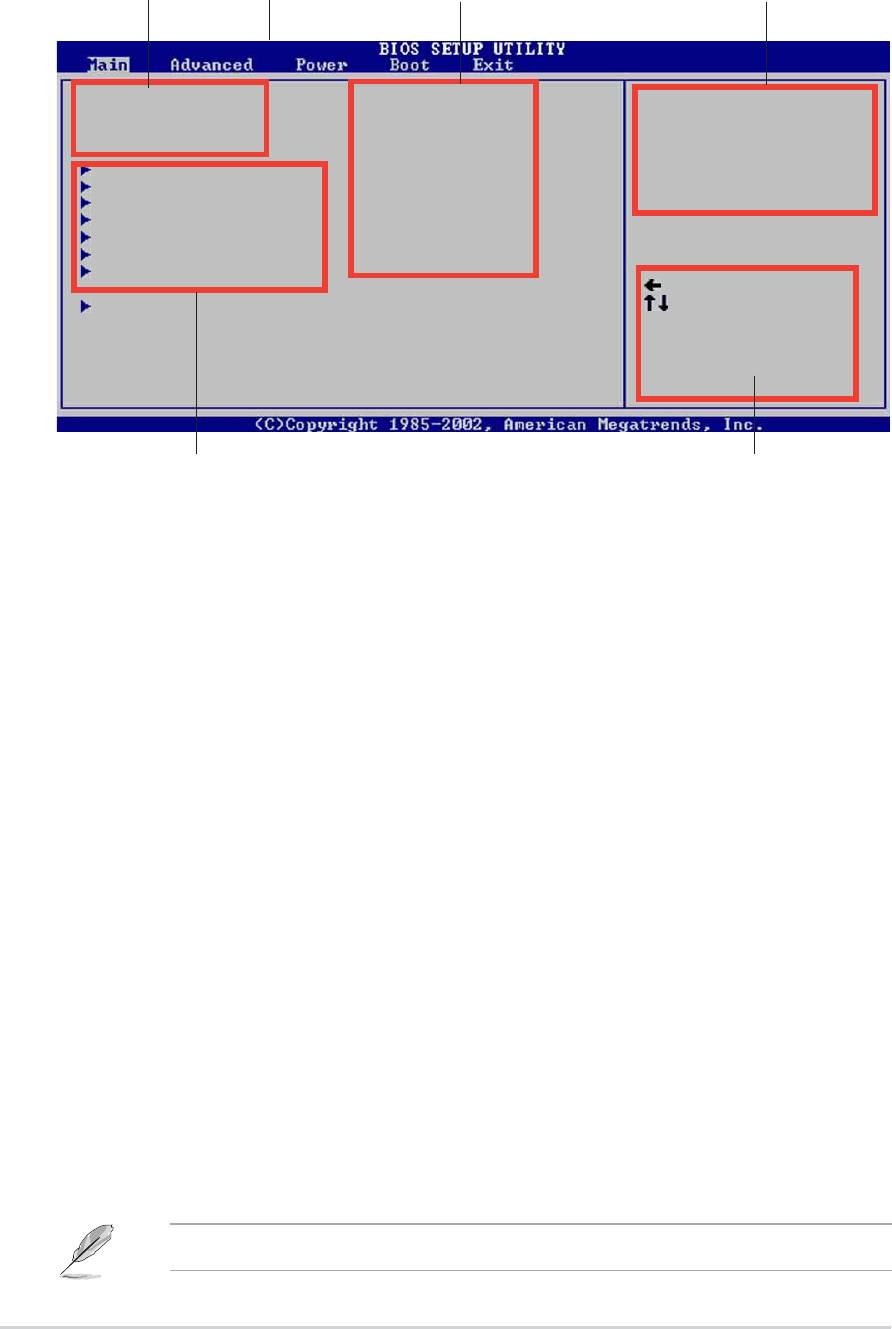
2.2.1 BIOS menu screen
Menu items
Configuration fields
General helpMenu bar
System Time [11:10:19]
Use [ENTER], [TAB]
System Date [Thu 03/27/2003]
or [SHIFT-TAB] to
Legacy Diskette A [1.44M, 3.5 in]
select a field.
Primary IDE Master :[ST320413A]
Use [+] or [-] to
Primary IDE Slave :[ASUS CD-S340]
configure system time.
Secondary IDE Master :[Not Detected]
Secondary IDE Slave :[Not Detected]
Third IDE Master :[Not Detected]
Fourth IDE Master :[Not Detected]
IDE Configuration
Select Screen
System Information
Select Item
+- Change Field
Tab Select Field
F1 General Help
F10 Save and Exit
ESC Exit
Sub-menu items
Navigation keys
2.2.2 Menu bar
The menu bar on top of the screen has the following main items:
Main For changing the basic system configuration
Advanced For changing the advanced system settings
Power For changing the advanced power management (APM)
configuration
Boot For changing the system boot configuration
Exit For selecting the exit options and loading default settings
To select an item on the menu bar, press the right or left arrow key on the keyboard
until the desired item is highlighted.
2.2.3 Navigation keys
At the bottom right corner of a menu screen are the navigation keys for that
particular menu. Use the navigation keys to select items in the menu and change
the settings.
Some of the navigation keys differ from one screen to another.
2-8
Chapter 2: BIOS information
2.2.4 Menu items
The highlighted item on the menu bar
System Time [11:10:19]
Use [ENTER], [TAB]
System Date [Thu 03/27/2003]
or [SHIFT-TAB] to
Legacy Diskette A [1.44M, 3.5 in]
select a field.
displays the specific items for that menu. For
Primary IDE Master :[ST320413A]
Use [+] or [-] to
Primary IDE Slave :[ASUS CD-S340]
configure system time.
Secondary IDE Master :[Not Detected]
example, selecting Main shows the Main
Secondary IDE Slave :[Not Detected]
Third IDE Master :[Not Detected]
Fourth IDE Master :[Not Detected]
IDE Configuration
Select Screen
menu items.
System Information
Select Item
+- Change Field
Tab Select Field
F1 General Help
F10 Save and Exit
ESC Exit
The other items (Advanced, Power, Boot, and
Exit) on the menu bar have their respective
Main menu items
menu items.
2.2.5 Sub-menu items
An item with a sub-menu on any menu screen is distinguished by a solid triangle
before the item. To display the sub-menu, select the item and press Enter.
2.2.6 Configuration fields
These fields show the values for the menu items. If an item is user- configurable,
you may change the value of the field opposite the item. You can not select an item
that is not user-configurable.
A configurable field is enclosed in brackets, and is highlighted when selected. To
change the value of a field, select it then press Enter to display a list of options.
Refer to “2.2.7 Pop-up window.”
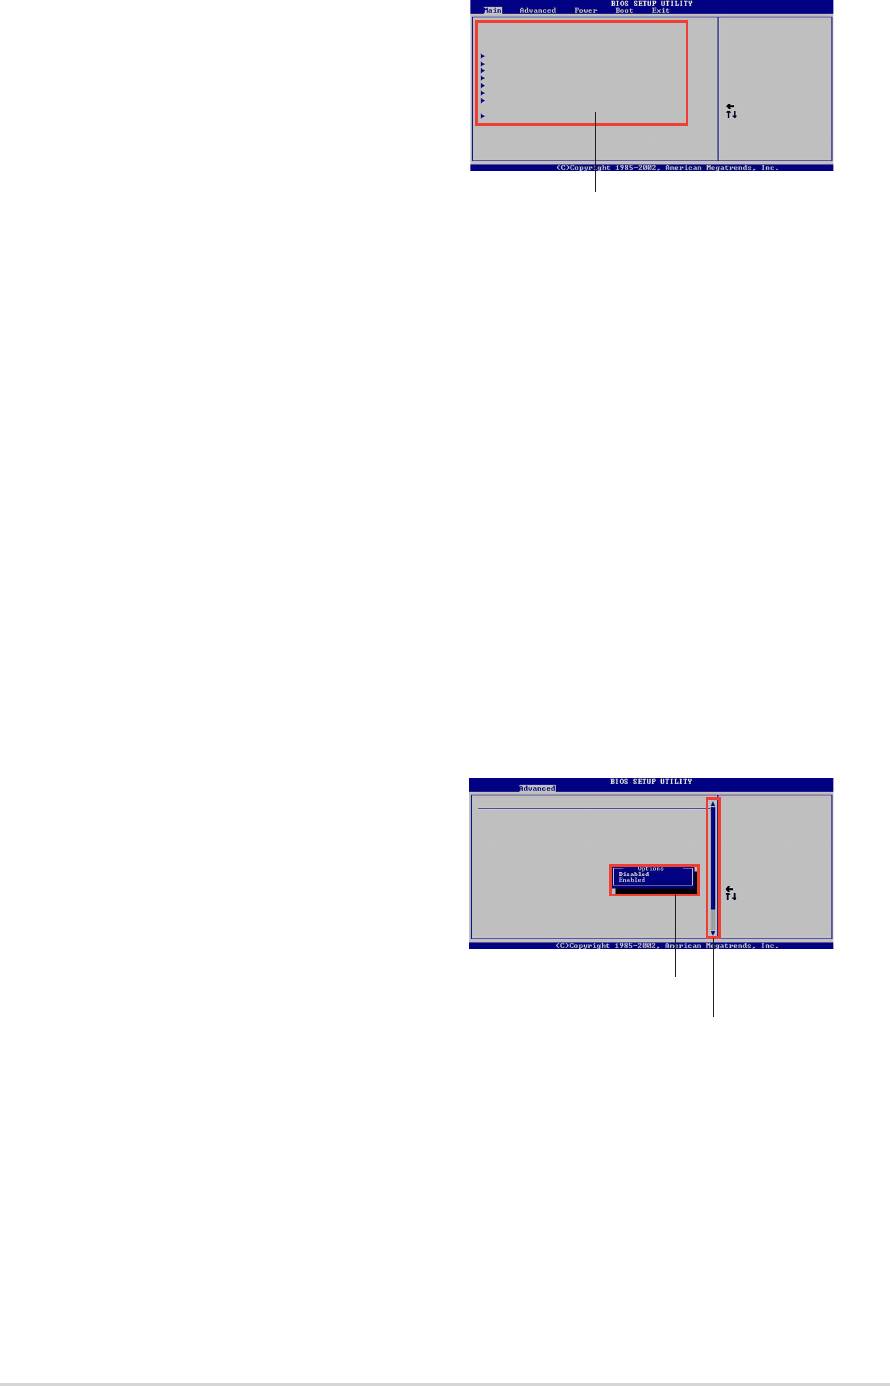
2.2.7 Pop-up window
Select a menu item then press Enter to
Configure System Frequency/Voltage
display a pop-up window with the
AI Overclock Tuner [Manual]
CPU External Frequency (MHz) [100]
CPU Ratio [12]
configuration options for that item.
DRAM Frequency [Auto]
AGP/PCI Frequency (MHz) [Auto]
CPU VCore Offset to .IV [Disabled]
DDR Reference Voltage [Auto]
AGP VDDQ Voltage [1.50V]
Select Screen
Select Item
+- Change Option
2.2.8 Scroll bar
F1 General Help
F10 Save and Exit
ESC Exit
A scroll bar appears on the right side of a
menu screen when there are items that do
Pop-up window
not fit on the screen. Press Up/Down arrow
keys or PageUp/PageDown keys to display
Scroll bar
the other items on the screen.
2.2.9 General help
At the top right corner of the menu screen is a brief description of the selected
item.
ASUS P4P8X motherboard user guide
2-9
Оглавление
- Contents
- Notices
- Safety information
- About this guide
- ASUS contact information
- P4P8X specifications summary
- P4P8X specifications summary
- 1.1 Welcome!
- 1.3 Special features
- 1.4 Motherboard components
- 1.5 Motherboard layout
- 1.6 Before you proceed
- 1.7 Motherboard installation
- 1.8 Central Processing Unit (CPU)
- 1.9 System memory
- 1.10 Expansion slots
- 1.11 Jumpers
- 1.12 Connectors
- 2.1 Managing and updating your BIOS
- 2.2 BIOS Setup program
- 2.3 Main menu
- 2.4 Advanced menu
- 2.5 Power menu
- 2.6 Boot menu
- 2.7 Exit menu
- 3.1 Install an operating system
- 3.3 Software information
