Pioneer S-8EX-QL: Installation and Placement How to install
Installation and Placement How to install: Pioneer S-8EX-QL
Table of contents
- Contents
- Before you start What’s in the box
- About the EX series Technology behind the S-8EX
- Crossover Networks
- Installation and Placement How to install
- Using the Pioneer Speaker Stand CP-7EX Choosing Where To Place The Speaker Systems
- Connections Connecting to an amplifier Connecting the cables
- Single-Wire Connections Bi-Wire Connections
- Bi-Amplification Connections Vertical Bi-Amping Horizontal Bi-Amping
- Other Information Using the foam plugs Attaching/Removing the Grille Cover
- Specifications
6
En
Installation and Placement
How to install
Select a desired installation setup from the following.
When installing directly on the floor
Use the furnished spikes when installing the speaker directly on a
floor surface.
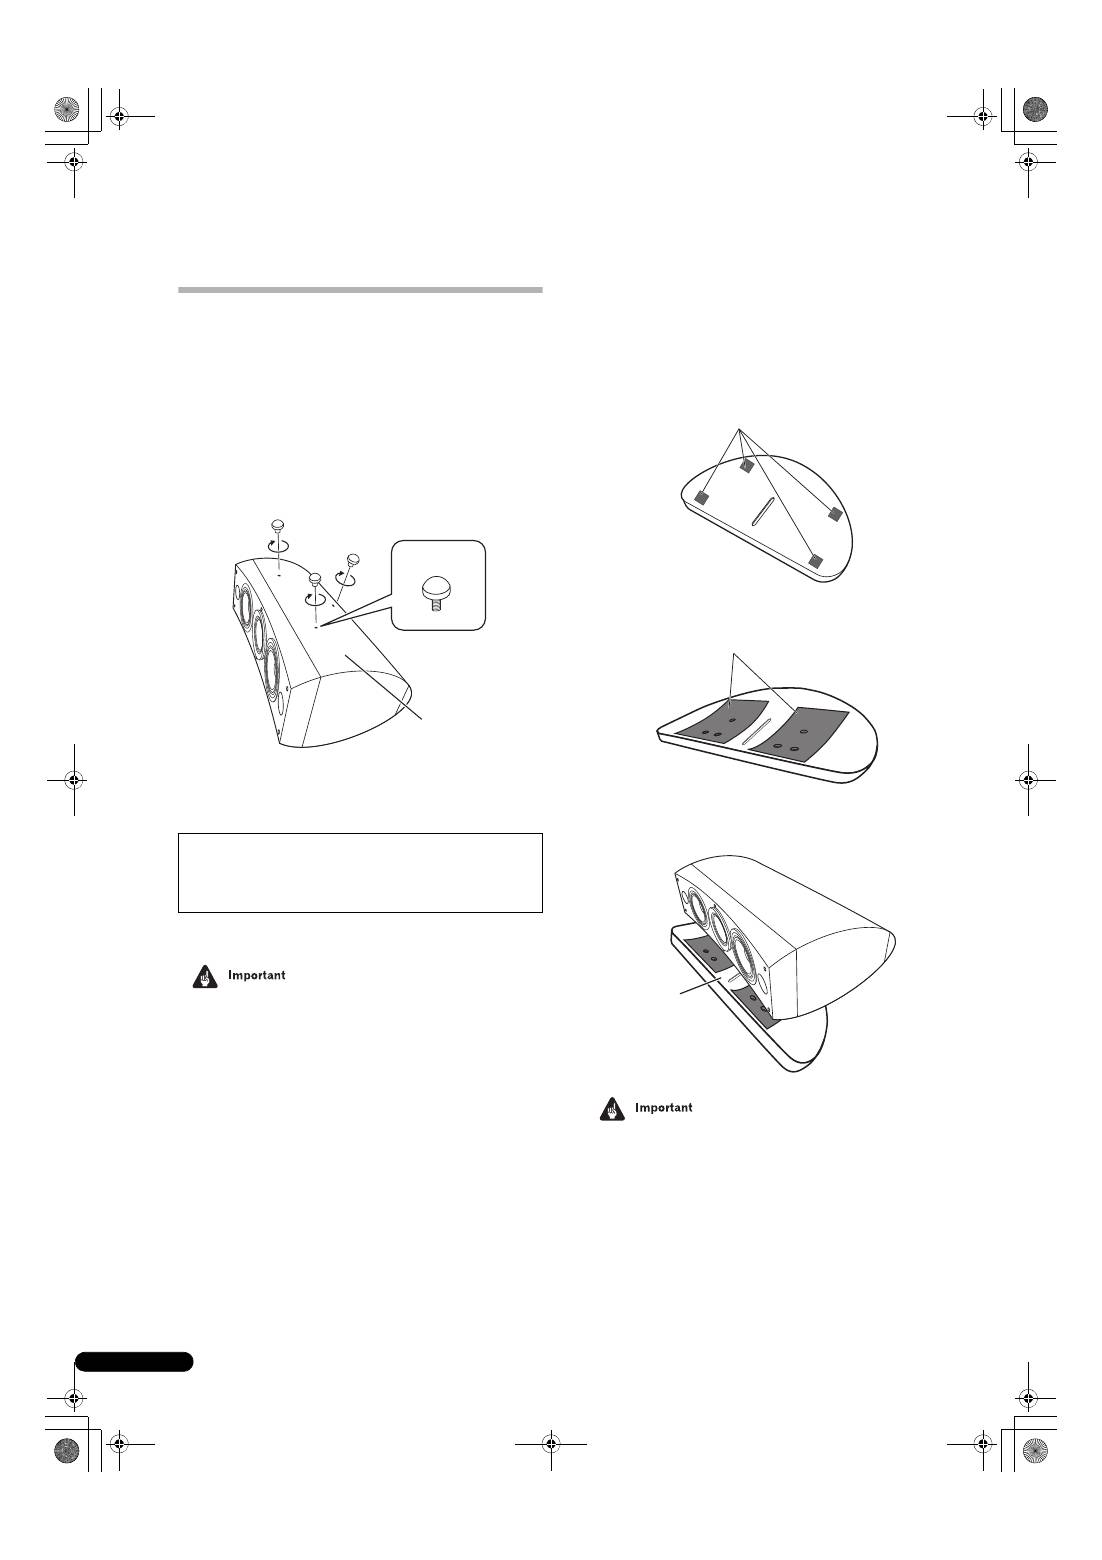
Installation
1
Twist the spikes into the threads of the three threaded
metal inserts (M6) embedded in the bottom of the speaker,
and screw down securely.
2
Set the cork pads in the positions where the points of the
three spikes will strike when the speaker is set down.
3
Set the speaker on top of the cork pads.
• As this unit weighs some 28 kg, it is very dangerous to try and
set the spike nut while tilting the speaker. Be sure to place the
unit on a soft area (such as a blanket) so that it does not
damage the floor, and carry out the installation with at least
two people.
Using the furnished speaker base
When using the furnished speaker base, the use of the furnished
spikes is not required.
Installation
1
Affix the furnished non-skid pads (small) to the four
locations on the bottom of the base.
2
Affix the furnished non-skid pads (large) to the two
places on the top surface of the speaker base.
3
Place the speaker on top of the base.
Use of the furnished speaker base allows fine adjustment of
the speaker angle.
• When using the furnished speaker base, do not fix the speaker
in position with screws. The speaker may fall and cause injury.
If you do not use the cork pads when placing the
speakers, the spikes may cause damage to the floor. If
you plan on using the spikes we highly recommend to
use the cork pads.
Bottom of
speaker
Spike
Small non skid-
p
ads
La
r
ge non-skid
p
ads
S
p
eake
r
base
S-8EX_EN.book 6 ページ 2008年7月16日 水曜日 午後2時20分
