Olympus C-25: Using OLYMPUS Master 2
Using OLYMPUS Master 2: Olympus C-25
Using OLYMPUS Master 2
Windows
System requirements and
After the computer detects the camera, a
installation of OLYMPUS
message indicating the completion of the
Master 2
setting appears. Confi rm the message and
click “OK”. The camera is recognized as a
Install the OLYMPUS Master 2 software by
removable disk.
referring to the included installation guide.
Macintosh
When iPhoto has started, exit iPhoto and start
Connecting the camera to a
OLYMPUS Master 2.
computer
While the camera is connected to the
computer, shooting functions are disabled.
1
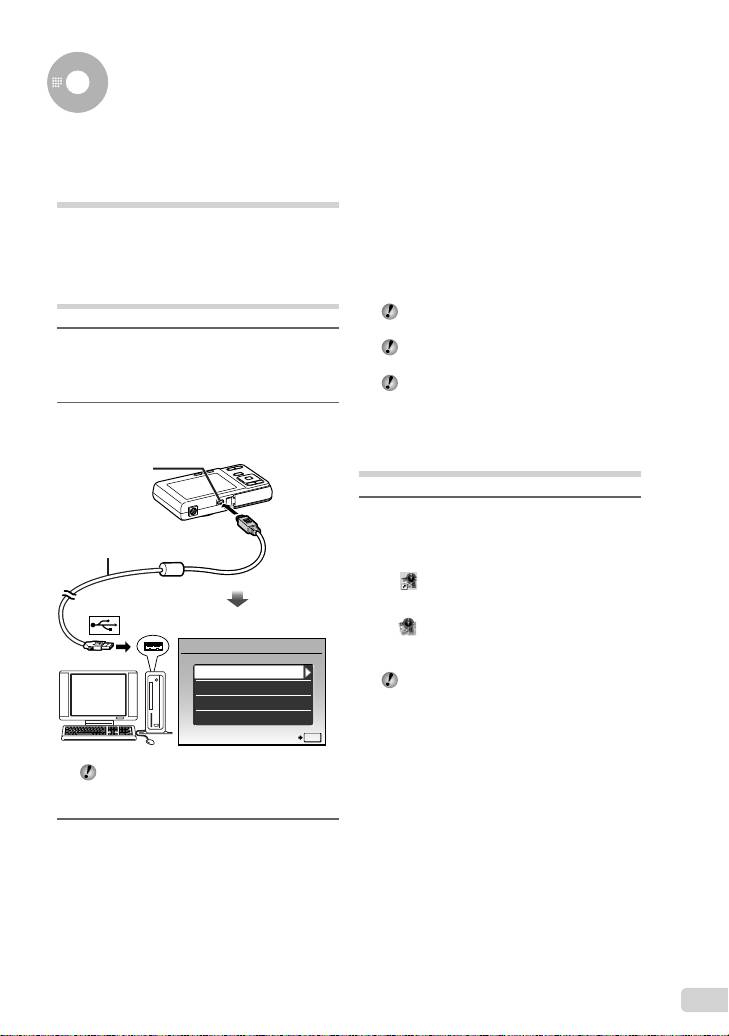
Make sure the camera is turned off.
Connecting the camera to a computer via a
USB hub may cause unstable operation.
●
The monitor is off.
●
The lens is retracted.
When [MTP] is set for the submenu that
appears by pressing n after selecting [PC]
in Step 3, images cannot be transferred to a
2
Connect the camera to a computer.
computer using OLYMPUS Master 2.
●
The camera automatically turns on.
Multi-connector
Starting OLYMPUS Master 2
1
Double-click the OLYMPUS Master 2
icon.
USB cable (supplied)
Windows
appears on the desk top.
Macintosh
appears in the OLYMPUS Master 2 folder.
USB
●
Browse window appears after starting the
software.
PC
When you start OLYMPUS Master 2 for the
EASY PRINT
fi rst time after installation, “Default Settings”
CUSTOM PRINT
and “Registration” screen appear. Follow the
EXIT
instructions on the screen.
SET
OK
Locate the position of the USB port by
referring to your computer’s instructions
manual.
3
Use kl to select [PC], and
press the B button.
●
The computer automatically detects the camera as
a new device on the fi rst connection.
EN
15
Book_Basic_FE360.indb 15Book_Basic_FE360.indb 15 6/20/2008 9:09:54 PM6/20/2008 9:09:54 PM
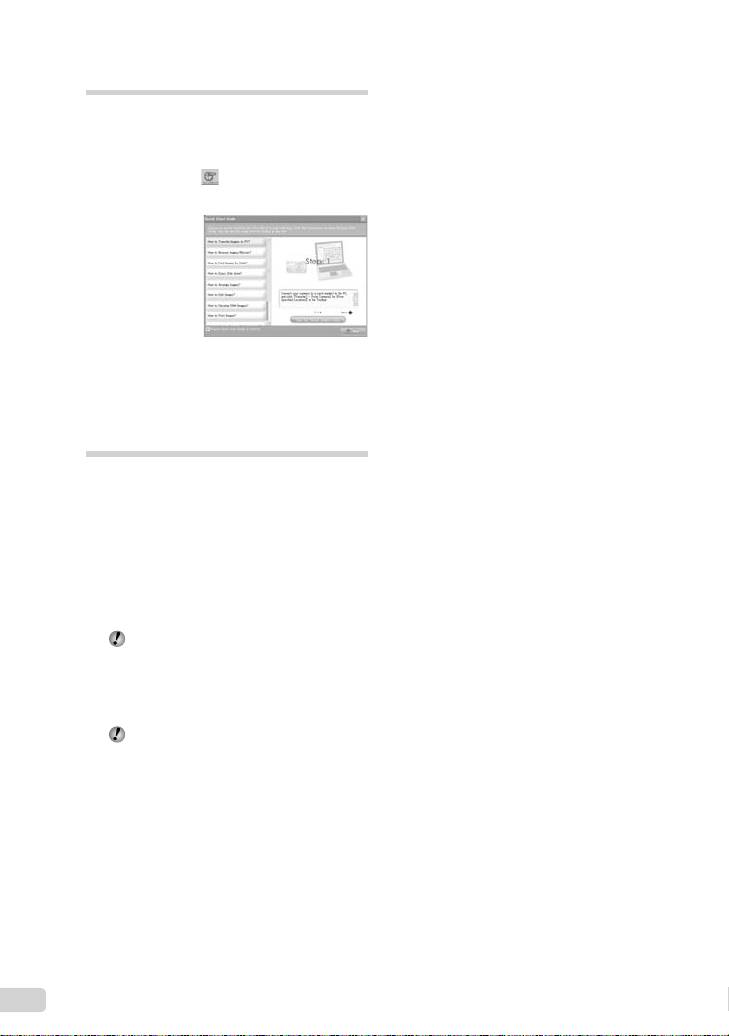
Operating OLYMPUS Master 2
When OLYMPUS Master 2 is started, Quick
Start Guide appears on the screen that
helps you to handle the camera without any
question. When the Quick Start Guide is not
displayed, click
in the tool bar to show
the Guide.
For details on the operation, refer to the help
guide of the software.
Transferring and saving
images without using
OLYMPUS Master 2
This camera is compatible with the USB Mass
Storage Class. You can transfer and save the
image data on your computer while the camera
and the computer are connected.
System requirements
Windows : Windows 2000 Professional/
XP Home Edition/
XP Professional/Vista
Macintosh : Mac OS X v10.3 or later
On a computer running Windows Vista, if
[MTP] is set for the submenu that appears
by pressing n after selecting [PC] in
Step 3 of “Connecting the camera to a
computer” (p. 39), Windows Photo Gallery
will become available.
Even if a computer has USB ports, proper
operation is not guaranteed in the following
cases.
●
computers with USB ports installed using an
expansion card, etc.
●
computers without a factory-installed OS and
home-built computers
16
EN
Book_Basic_FE360.indb 16Book_Basic_FE360.indb 16 6/20/2008 9:09:56 PM6/20/2008 9:09:56 PM
Оглавление
- Preparing the Camera
- Shooting, Playback, and Erasing
- Using Shooting Modes
- Using Shooting Functions
- Printing
- Using OLYMPUS Master 2
- Appendix
- Préparer l’appareil photo
- Prise de vue, affi chage et effacement
- Utiliser les modes prise de vue
- Utiliser les fonctions de prise de vue
- Imprimer
- Utiliser OLYMPUS Master 2
- Appendice
- Preparación de la cámara
- Toma, reproducción y borrado
- Uso de los modos de toma
- Uso de las funciones de toma
- Impresión
- Uso del programa OLYMPUS Master 2
- Apéndice
- Vorbereiten der Kamera
- Aufnahme, Wiedergabe und Löschen von Bildern
- Verwenden der verschiedenen Aufnahmemodi
- Verwenden der Aufnahmefunktionen
- Verwenden der Software OLYMPUS Master 2
- Anhang
- Подготовка фотокамеры
- Съемка, воспроизведение и удаление
- Использование режимов съемки
- Использование функций съемки
- Печать
- Использование OLYMPUS Master 2
- Приложение
