Melissa 653-082: OPERATING PANEL:
OPERATING PANEL:: Melissa 653-082
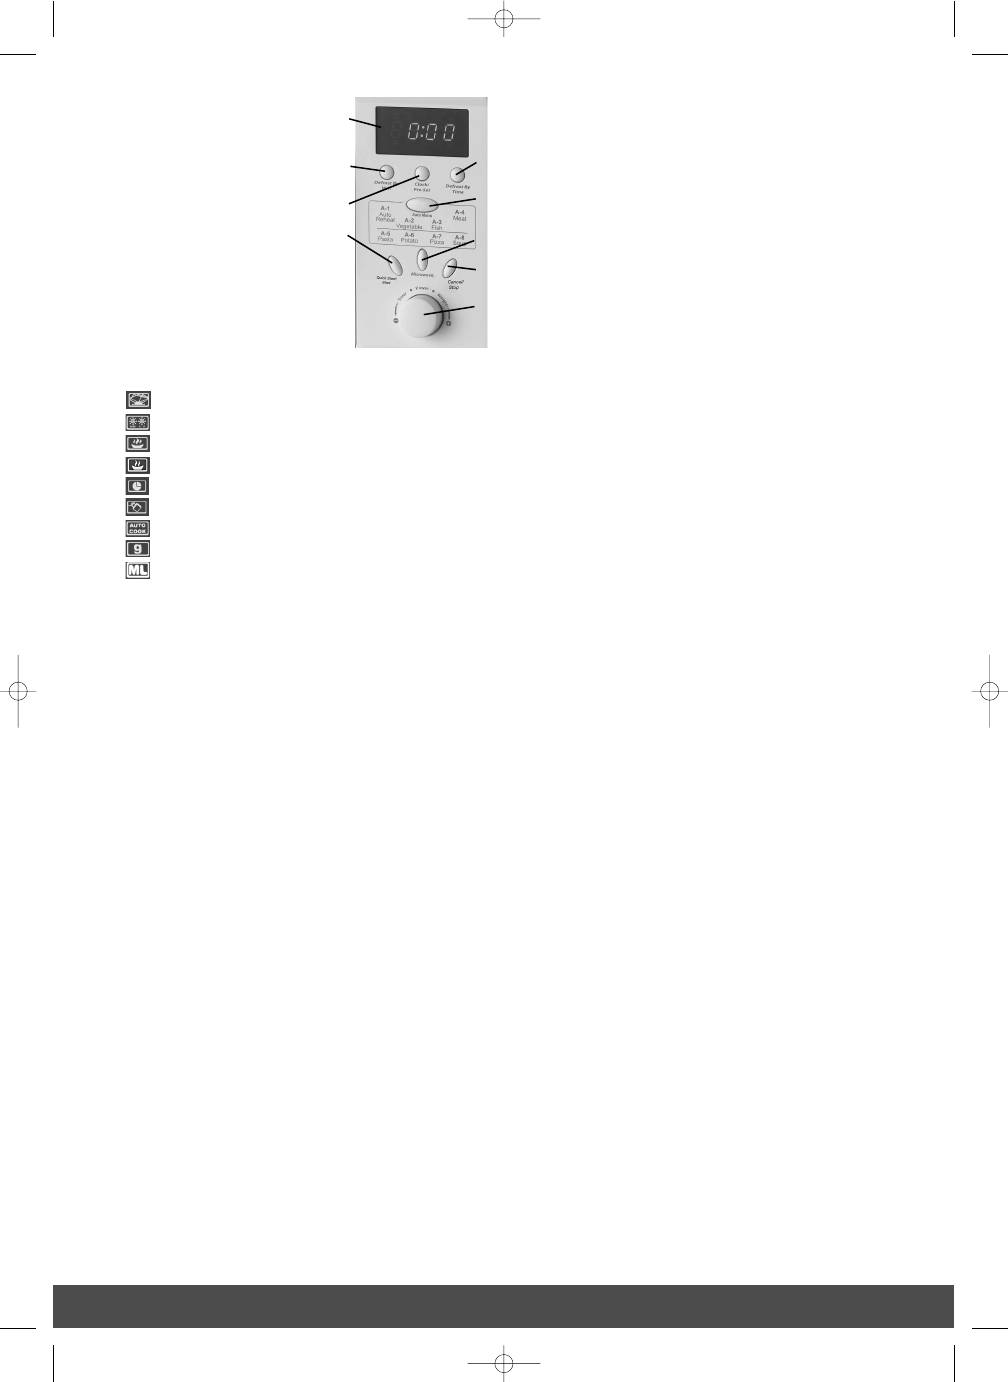
OPERATING PANEL:
1.
Display
2.
Button for automatic
defrosting (Defrost By W.T)
3.
Button for setting clock/timer
(Clock/Pre-Set)
4.
Button for defrosting by time
(Defrost By Time)
5.
Button for selecting auto-menu
(Auto Cook)
6.
Start button (Quick Start/Start)
7.
Function button (Micro)
8.
Stop button (Stop/Cancel)
9.
Knob for setting time, power
and weight (Time/Power/Weight)
SYMBOLS
Microwaves
Defrosting
High power
Low power
Clock/timer
Child lock
Pre-set programs
Grams (g)
Millilitres (ml)
PREPARING THE MICROWAVE OVEN
Each individual microwave oven is checked at the factory, but for
safety’s sake, after unpacking the oven, you should check
carefully that the microwave oven has not been damaged during
transport. Check whether there is any visible damage (e.g. in the
form of dents or similar), if the door closes properly, and if the
hinges are in order. If it appears that the microwave oven has
been damaged, you must contact the shop where you bought it,
and do not use it until it has been checked by an authorised
specialist.
You should check before use that you have removed all
packaging from the microwave oven both inside and out.
Positioning the microwave
The microwave oven should be placed on a flat surface, with
clearance of at least 10 cm at the rear, 5 cm at the sides and 20
cm above to ensure sufficient ventilation. Do not remove the feet
of the microwave. This microwave oven is not suitable for fitting
in, and you must check that the vent holes on top of the cabinet
are not covered. If they are covered while the microwave oven is
in use, there is a risk of it overheating. The microwave oven
cannot then be used until it has cooled down.
Do not place the microwave oven or the cord near hot areas, for
example, gas rings and electric hotplates.
Connecting the microwave oven
The microwave oven must be connected to a 230-volt AC
current, 50 Hz. The guarantee is not valid if the microwave oven
is connected to the wrong voltage.
Installation of the glass turntable
Before using the microwave ensure that:
•
the turning ring (C) is in the recess around the spindle (B),
and that
•
the glass turntable (D) is fitted to the turning ring.
Electromagnetic interference
When the microwave oven is in use, the microwaves may affect
television, radio or similar equipment in the vicinity. The
interference may be reduced or prevented entirely using the
following methods.
•
Clean the door (F) and the microwave’s sealing surface.
•
Turn the radio or television aerial.
•
Move the microwave oven away from the radio or television.
•
Plug the microwave oven in to a socket in a different branch
circuit or fuse cluster.
Setting the clock
When you have lugged the microwave oven in, the display shows
"0:00".
1.
Press the button to set the time (3) once. The hour number
now flashes.
2.
Turn the knob (9) until the display shows the required hour.
3.
Press the button to set the time (3) again. The minute
number now flashes.
4.
Turn the knob (9) until the display shows the required
minute.
5.
Press the button to set the time (3) again to enter the
setting.
OPERATING THE MICROWAVE OVEN
The microwave oven is operated in the following way.
•
Place the food to be cooked in the microwave oven and
close the door (F).
•
Select the cooking function and any power and preparation
time (described in detail below). The microwave oven starts
automatically.
•
Cooking can be interrupted at any time by pressing the stop
button (8). One press temporarily interrupts cooking, two
presses permanently interrupts cooking. Cooking can also
be interrupted temporarily by opening the door. A temporary
interruption to cooking can be cancelled by pressing the
start button (6).
•
Once the cooking time has passed, the microwave oven
stops automatically and 5 beeps are heard.
Each time one of the microwave oven buttons is pressed or the
knob is turned, a beep is heard.
Selecting function and power
1.
Press the function button (7), and turn the knob (9) to select
the function and/or power. See the various functions in the
table below.
2.
Press the function button (7) again when the display shows
the required function (see "Indication in the display" in the
table below).
3.
You can now set the required cooking time using the knob
(9).
4.
Press the start button (6) in order to start the cooking once
you have entered the required cooking time.
Function
Indication Microwave
Grill
in the display
power
power
1
P 100
100 %
2
P 80
80 %
3
P 50
50 %
4
P 30
30 %
5
P 10
10 %
23
1.
2.
3.
4.
5.
6.
7.
8.
9.
653082_IM 31/05/05 12:55 Side 23
Оглавление
- INTRODUKTION
- KONTROLLPANEL:
- Exempel:
- TIPS FÖR TILLAGNING AV MAT
- OBS!
- INTRODUKTION
- BETJENINGSPANEL:
- Eksempel:
- GODE RÅD OM TILBEREDNING AF MAD
- Vigtigt!
- INNLEDNING
- KONTROLLPANEL:
- Tilberedning ved hjelp av program
- TILBEREDNINGSTIPS
- Viktig!
- JOHDANTO
- MERKIT
- Esimerkki:
- Koska kypsennysaika on mikroaaltouunia käytettäessälyhyt, ruoka ei kuivu ja kypsy liikaa.
- Tärkeää:
- INTRODUCTION
- OPERATING PANEL:
- Example:
- TIPS FOR FOOD PREPARATION
- Important!
- EINLEITUNG
- BEDIENBLENDE:
- Funktion und Leistungsstufe wählen
- Schnellstart
- VERWENDUNG VON UTENSILIEN BEI DER ZUBEREI-TUNG VON LEBENSMITTELN
- BEVOR SIE DAS GERÄT ZUM KUNDENDIENST BRINGEN
- WST¢P
- PANEL STEROWANIA:
- Wybór funkcji i poziomu mocy
- Gotowanie przy u˝yciu timera
- KORZYSTANIE Z NACZY¡ PODCZAS PRZYGOTOWA-NIA JEDZENIA
- ZANIM PÓJDZIESZ DO PUNKTU SERWISOWEGO
- ВВЕДЕНИЕ
- ПАНЕЛЬ УПРАВЛЕНИЯ:
- Выбор функции и установка мощности
- Быстрый запуск
- ПРОДУКТОВ
- СОВЕТЫ ПО ОХРАНЕ ОКРУЖАЮЩЕЙ СРЕДЫ
