Dell Precision 650: Cards
Cards : Dell Precision 650
Back to Contents Page
Cards
DellPrecision™Workstation650andDellPrecisionWorkstation450ServiceManual
Installing a Card
Removing a Card
YourDell™computerprovidesslotsforPCI/PCI-X and AGP cards. For more information, see "Specifications" in your User's Guide or the system board
components illustration for your computer.
If you are installing or replacing a card, follow the procedures in the next section. If you are removing but not replacing a card, see "Removing a Card."
Installing a Card
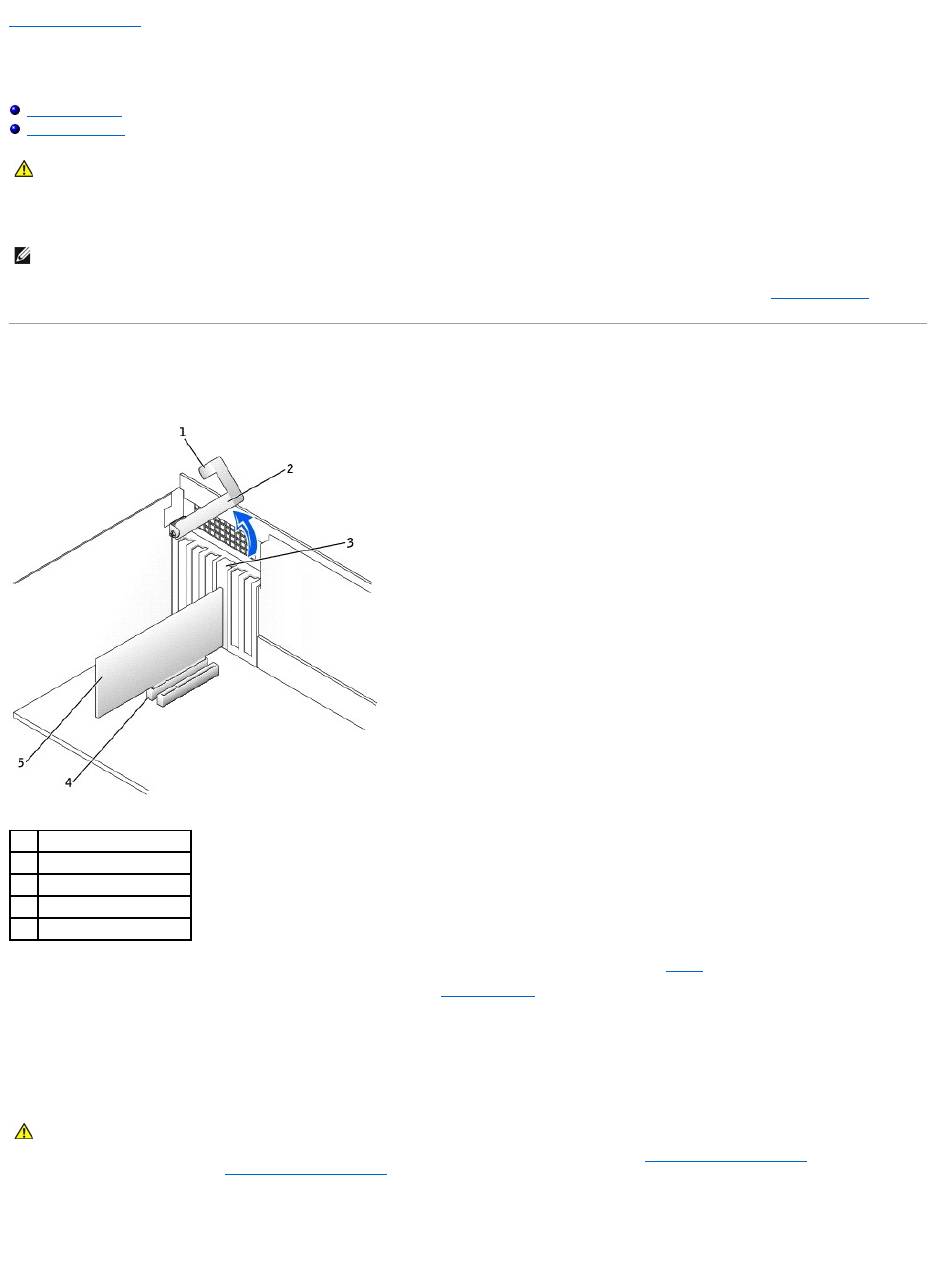
1. Press the lever on the card retention arm and raise the retention arm.
2. If you are installing a new card, remove the filler bracket to create a card-slot opening. Then continue with step 4.
3. If you are replacing a card that is already installed in the computer, remove the card.
If necessary, disconnect any cables connected to the card. Grasp the card by its top corners, and ease it out of its connector.
4. Prepare the card for installation.
See the documentation that came with the card for information on configuring the card, making internal connections, or otherwise customizing it for your
computer.
5. Place the card in the connector and press down firmly. Ensure that the card is fully seated in the slot.
If the card is full-length, insert the end of the card into the card guide bracket as you lower the card toward its connector on the system board. Insert
the card firmly into the card connector on the system board.
CAUTION: Before you begin any of the procedures in this section, follow the safety instructions in the System Information Guide.
NOTE: To meet PC99 requirements, your Dell computer uses only PCI slots. ISA cards are not supported.
1
lever
2
retention arm
3
card bracket
4
card connector
5
card
CAUTION: Some network connectors automatically start the computer when they are connected to a network. To guard against electrical shock,
be sure to unplug your computer from its electrical outlet before installing any cards. Verify that the standby power light on the system board is
off. To locate this light, see the system board illustration (for the Dell Precision 450 computer, see "System Board Components" or for the Dell
Precision 650 computer, see "System Board Components" ).
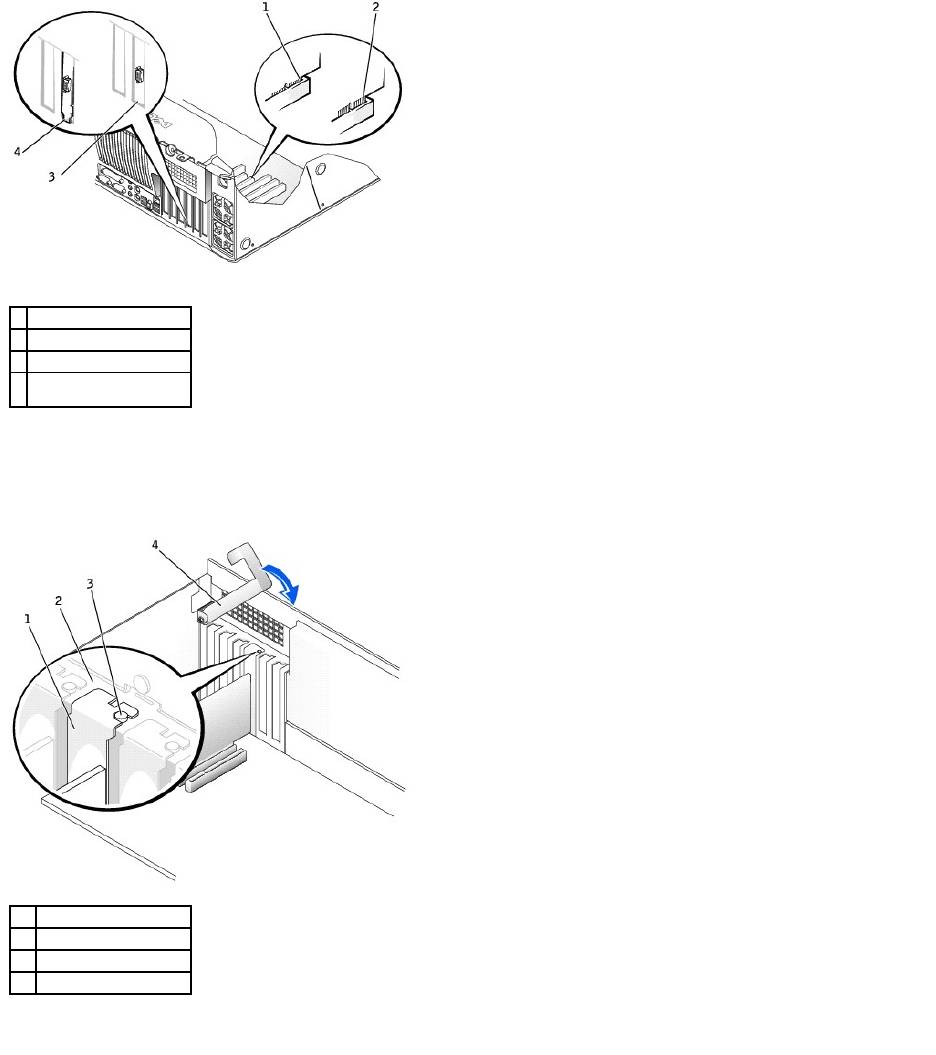
6. Before you lower the retention arm, ensure that:
l The tops of all cards and filler brackets are flush with the alignment bar.
l The notch in the top of the card or filler bracket fits around the alignment guide.
Press the arm into place, securing the card(s) in the computer.
7. If you are replacing an AGP card, align the AGP card guide with the base and press down on the indentation until the guide stops at the top of the AGP
card.
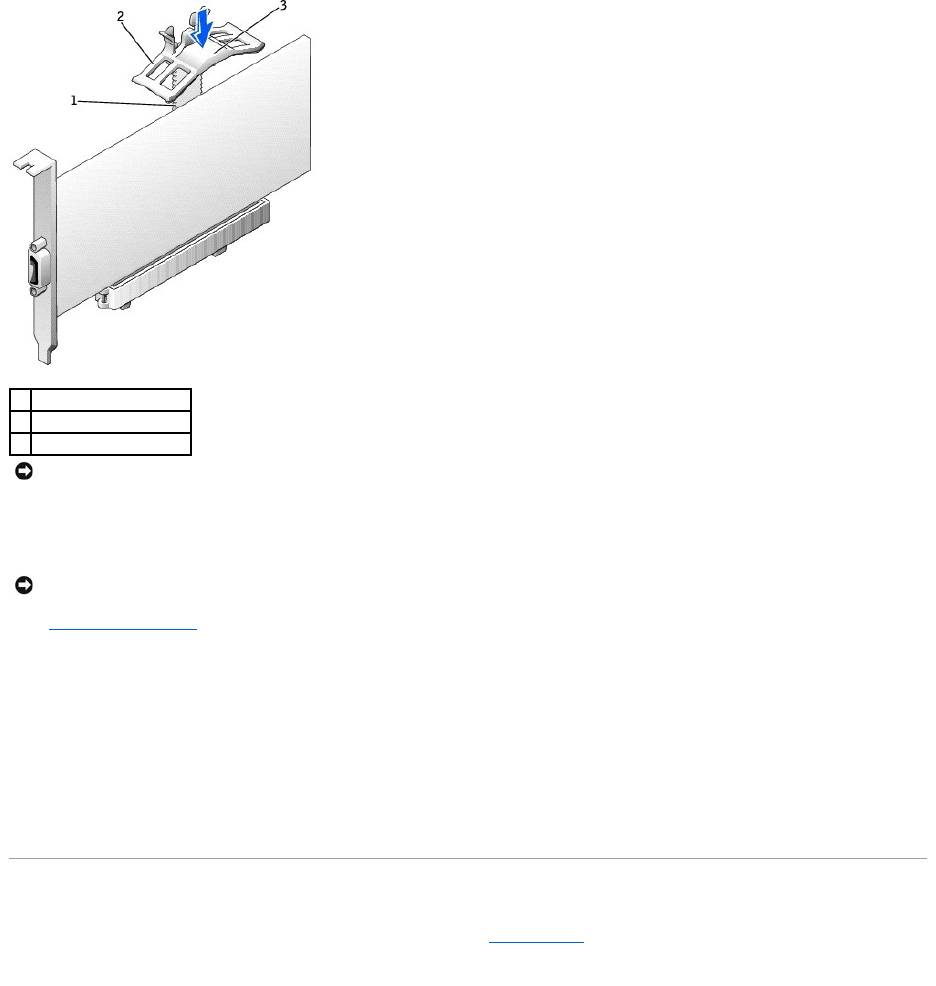
1
fully seated card
2
not fully seated card
3
bracket within slot
4
bracket caught outside of
slot
1
filler bracket
2
alignment bar
3
alignment guide
4
retention arm
8. Connect any cables that should be attached to the card.
See the documentation for the card for information about the card's cable connections.
9. Close the computer cover, reconnect the computer and devices to electrical outlets, and turn them on.
10. If you installed a sound card:
a. Enter system setup, select Integrated Devices, and then change the setting for Sound to Off.
b. Connect external audio devices to the sound card's connectors. Do not connect external audio devices to the microphone, speaker/headphone,
or line-in connectors on the back panel.
11. If you installed an add-in network connector:
a. Enter system setup, select Integrated Devices, and then change the setting for Network Interface Card to Off.
b. Connect the network cable to the add-in network connector's connectors. Do not connect the network cable to the integrated connector on the
back panel.
12. Install any drivers required for the card as described in the card documentation.
Removing a Card
1. Press the lever on the card retention arm and raise the retention arm (see "Installing a Card").
2. If you are removing an AGP card, press out on the release tabs and pull the AGP card guide up and off of the base.
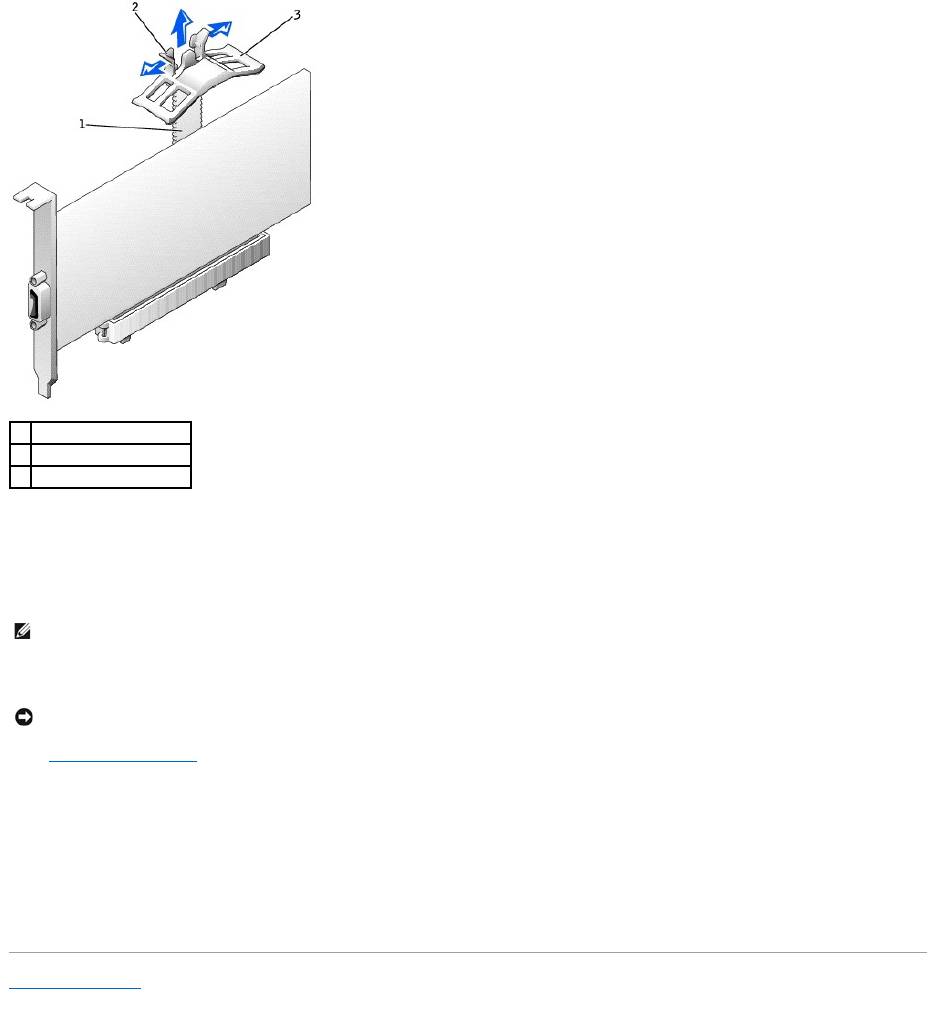
1
base
2
AGP retention spring
3
indentation
NOTICE: Do not route card cables over or behind the cards. Cables routed over the cards can prevent the computer cover from closing properly or
cause damage to the equipment.
NOTICE: To connect a network cable, first plug the cable into the network wall jack and then plug it into the computer.
3. If necessary, disconnect any cables connected to the card.
4. Grasp the card by its top corners, and ease it out of its connector.
5. If you are removing the card permanently, install a filler bracket in the empty card-slot opening.
If you need a filler bracket, contact Dell.
6. Lower the retention arm and press it into place, securing the card(s) in the computer.
7. Close the computer cover, reconnect the computer and devices to electrical outlets, and turn them on.
8. Remove the card's driver from the operating system.
9. If you removed a sound card:
a. Enter system setup, select Integrated Devices, and then change the setting for Sound to On.
b. Connect external audio devices to the audio connectors on the computer back panel.
10. If you removed an add-in network connector, enter system setup, select Integrated Devices, and then change the setting for Network Interface Card
to Off.
11. Connect the network cable to the integrated connector on the computer back panel.
Back to Contents Page
1
base
2
release tabs (2)
3
AGP retention spring
NOTE: Installing filler brackets over empty card-slot openings is necessary to maintain FCC certification of the computer. The brackets also keep dust
and dirt out of your computer.
NOTICE: To connect a network cable, first plug the cable into the network wall jack and then plug it into the computer.
Оглавление
- DellPrecision™Workstation650andDellPrecisionWorkstation450 Service Manual
- Battery
- Before You Begin
- Cards
- Chassis Intrusion Switch
- Control Panel
- Inside Your Computer — DellPrecision™450Computer
- Drives — DellPrecision™450Computer
- Power Supply — DellPrecision™450Computer
- Drive Door — DellPrecision™650Computer
- Microprocessor Airflow Shroud — DellPrecision™450Computer
- Card Fan and Guide — Dell Precision 650 Computer
- Front Panel
- I/O Panel
- Inside Your Computer — DellPrecision™650Computer
- Closing the Computer Cover
- Opening the Computer Cover
- Microprocessor
- Drives — DellPrecision™650Computer
- VRM
- Memory
- Microprocessor Airflow Shroud — DellPrecision™650Computer
- Power Supply — DellPrecision™650Computer
- System Board
