Pioneer S-LX70C: Placing on a shelves using the speaker stand
Placing on a shelves using the speaker stand: Pioneer S-LX70C
Table of contents
- Caution Before you start
- Confirm your accessories Installing the speaker Speaker system grill
- 2 Paste the supplied wall mounting template on the area of installation.
- 7 Secure brackets together with screws. 8 Secure speaker to wall with a cord. 6 Attach speaker onto bracket (for wall).
- Placing on a shelves using the speaker stand
- Specifications
01_S-LX70C_En.book 6 ページ 2007年9月12日 水曜日 午後2時48分
Placing on a shelves using the speaker stand
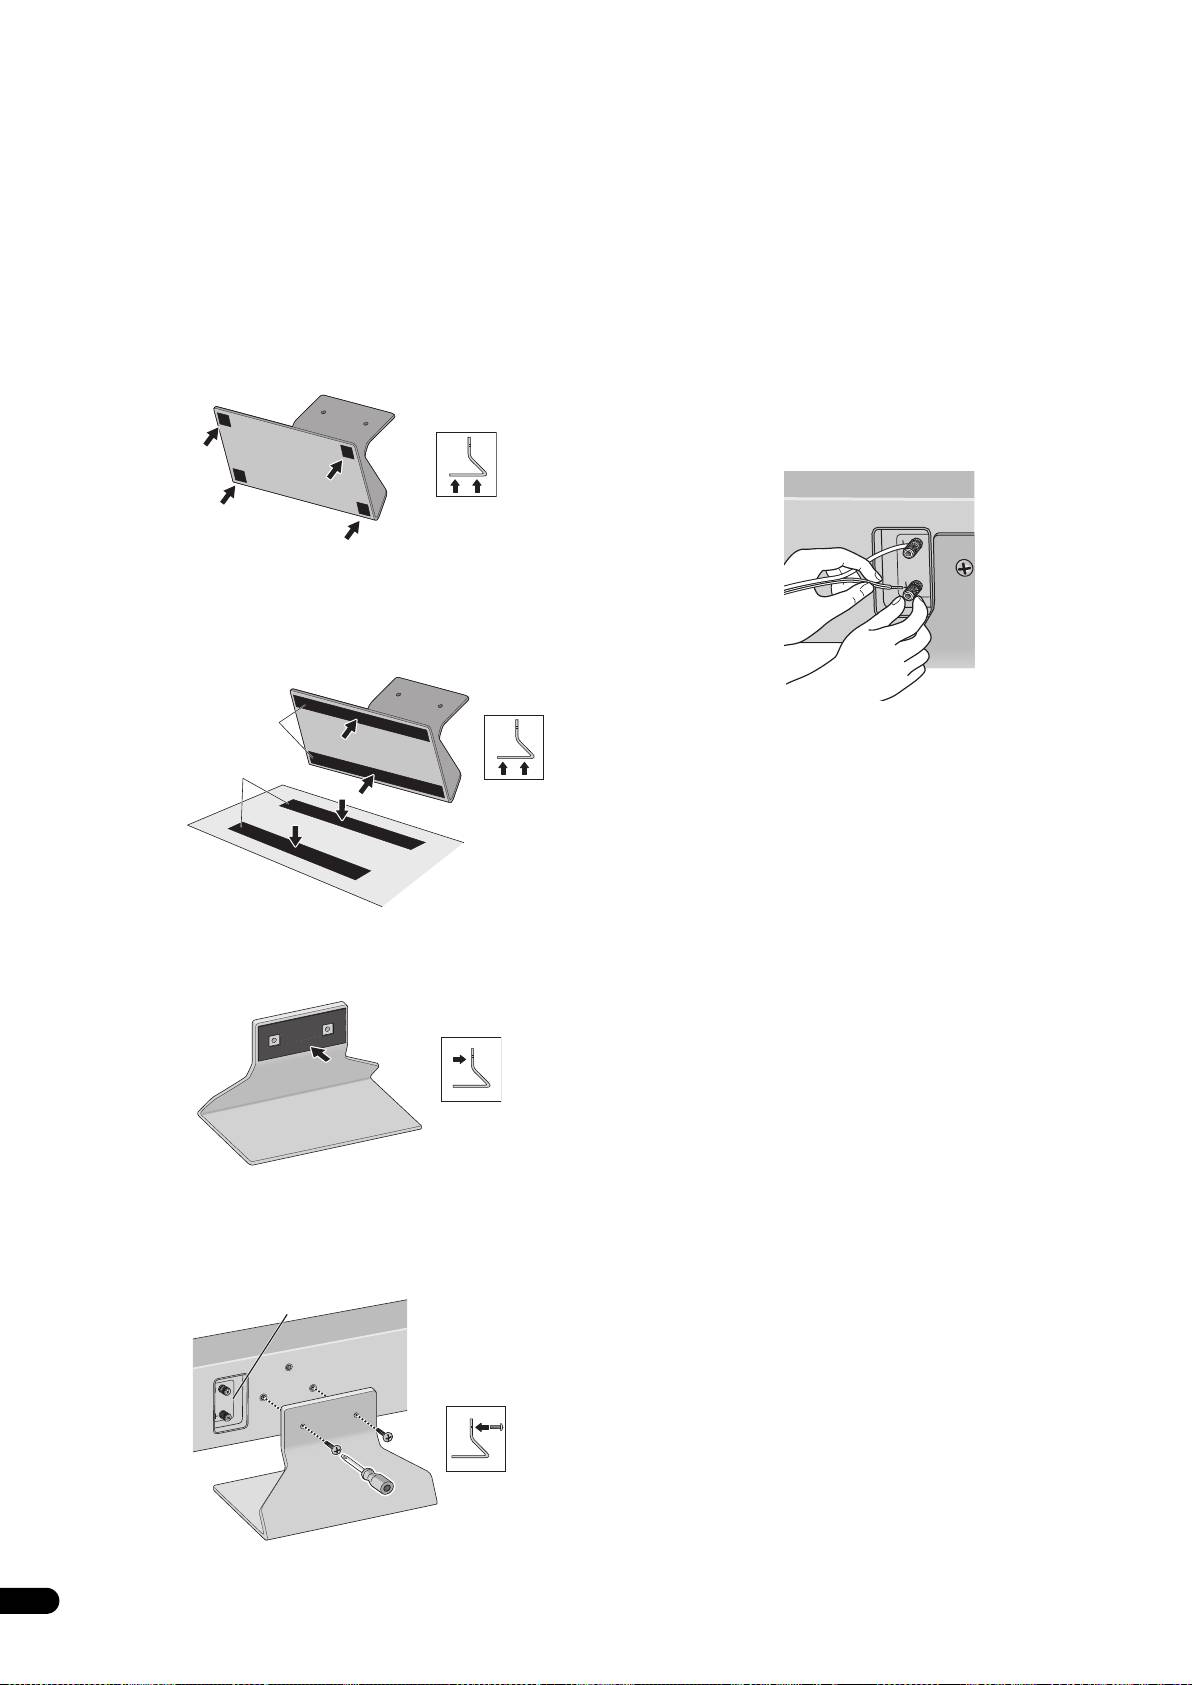
4 Connect the speaker cable.
This speaker system can be placed on surfaces such as shelves by
• Speaker cable is not included with this speaker system.
using the supplied speaker stand. Place on surfaces by using non-
This speaker does not include speaker cables used for connecting
skid pads or self-adhering fasteners on the speaker stand.
to an amplifier. Take the following factors into consideration when
Do not install speakers on slippery surfaces, as the strength of the
choosing speaker cables so that you can get the most from your
non-skid pads may be insufficient to prevent the speaker system
speaker system:
from sliding.
• Use heavy-gauge speaker cable if possible, and keep the cables
to the minimum necessary length.
1 Attach the non-skid pads or self-adhering fasteners on the
speaker stand.
• Cables have differing characteristics. Keep this in mind when
using any cable.
• When using the non-skid pads
• Connections at speaker and amplifier terminals should be
Paste the non-skid pads on each edge of the bottom of the speaker
made as tight and secure as possible to help reduce contact
stand.
resistance.
When mounting the speakers onto walls using the brackets,
connect the speaker cables before attaching speakers onto the
brackets.
• When using the self-adhering fasteners
Glue the self-adhering fastener (loop side) at two locations on the
bottom of the speaker stand.
Next, glue the self-adhering fastener (hook side) on the surface
where the speaker stand will be placed.
Self-adhering
fastener (loop)
• If the cables’ wires happen to be pushed out of the terminals,
allowing the wires to come into contact with each other, it
Self-adhering
places an excessive additional load on the amp. This may cause
fastener (hook)
the amp to stop functioning, and may even damage the amp.
• After connecting the plugs, pull lightly on the cables to make
sure that the ends of the cables are securely connected to the
terminals. Poor connections can create noise and interruptions
Speaker installation surface
in the sound.
• Be sure to connect wires to the correct terminal polarities
(+ , –) at the speaker and amplifier, or the proper surround
2 Affix the gasket to the speaker stand.
effect will not be produced.
Affix the gasket to the surface of the speaker stand where the
speaker will be mounted.
3 Attach the speaker stand to the speaker with screws.
Line up the screw holes in the speaker stand and the speaker, and
firmly screw in 2 of the supplied screws (long). Attach the speaker
stand so that the speaker terminal is on the left when viewing the
back of the speaker.
Speaker terminal
Top
Bottom
6
En
