Pioneer S-LX70C: 7 Secure brackets together with screws. 8 Secure speaker to wall with a cord. 6 Attach speaker onto bracket (for wall).
7 Secure brackets together with screws. 8 Secure speaker to wall with a cord. 6 Attach speaker onto bracket (for wall).: Pioneer S-LX70C
Table of contents
- Caution Before you start
- Confirm your accessories Installing the speaker Speaker system grill
- 2 Paste the supplied wall mounting template on the area of installation.
- 7 Secure brackets together with screws. 8 Secure speaker to wall with a cord. 6 Attach speaker onto bracket (for wall).
- Placing on a shelves using the speaker stand
- Specifications
01_S-LX70C_En.book 5 ページ 2007年9月12日 水曜日 午後2時48分
• When installing below the TV
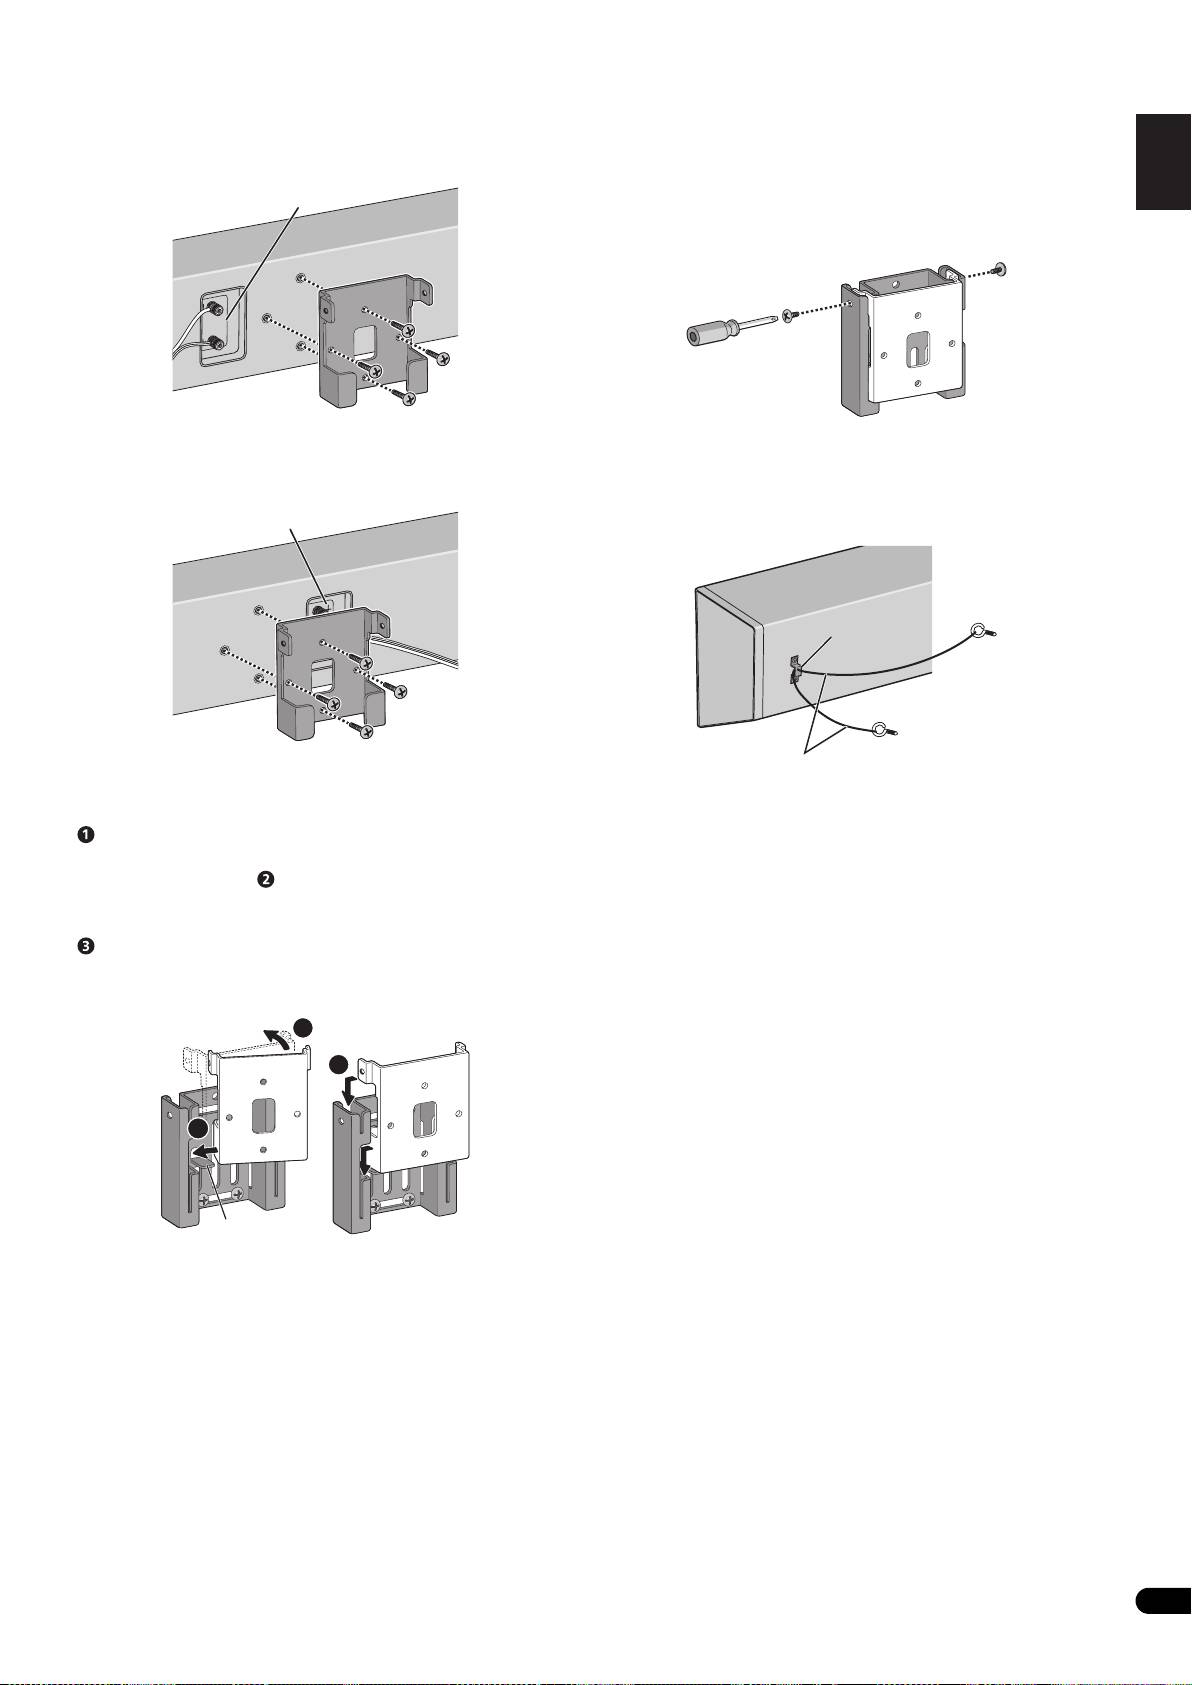
7 Secure brackets together with screws.
English Français Deutsch
Attach bracket so that the speaker terminal is on its left when
Secure the brackets together by using the supplied screws (short)
viewing the back of the speaker.
at the screw holes located on the top of the left and right side of the
brackets.
Speaker terminal
If you cannot secure both sides (due to such cases as lack of space
Top
to use a screwdriver), make sure that one side is secured with a
screw.
Bottom
• When installing above the TV
8 Secure speaker to wall with a cord.
Attach bracket so that the speaker terminal is on its right when
Screw two picture hooks or similar into the wall behind the speaker.
Italiano Español Português Dansk Norsk SuomiSvenska
viewing the back of the speaker.
Pass a thick cord (not provided) around the hooks and through the
metal catch so that the speaker is stabilized (make sure to test that
Speaker terminal
it supports the weight of the speaker).
Top
Nederlands
Metal catch
Bottom
Sufficiently thick
6 Attach speaker onto bracket (for wall).
cord (not provided)
Place the bottom left edge of the bracket (attached on the speaker)
on top of the guide of the bracket (for wall) from a diagonal angle
• Do not attach the metal catch directly to the wall. It should only
().
be used in conjunction with reinforced string to prevent the
speaker from falling.
Bring right side of both brackets together so that they become
horizontal to each other ( ).
Move slightly to the left and slide down until stops, while aligning
the left protruding section to the groove of the bracket (for wall)
().
• The following illustration does not show the speaker attached to
the bracket (for speaker) for description purposes.
2
3
1
Guide
5
En
