Pioneer S-LX70C: 2 Paste the supplied wall mounting template on the area of installation.
2 Paste the supplied wall mounting template on the area of installation.: Pioneer S-LX70C
Table of contents
- Caution Before you start
- Confirm your accessories Installing the speaker Speaker system grill
- 2 Paste the supplied wall mounting template on the area of installation.
- 7 Secure brackets together with screws. 8 Secure speaker to wall with a cord. 6 Attach speaker onto bracket (for wall).
- Placing on a shelves using the speaker stand
- Specifications
01_S-LX70C_En.book 4 ページ 2007年9月12日 水曜日 午後2時48分
• If the cables’ wires happen to be pushed out of the terminals,
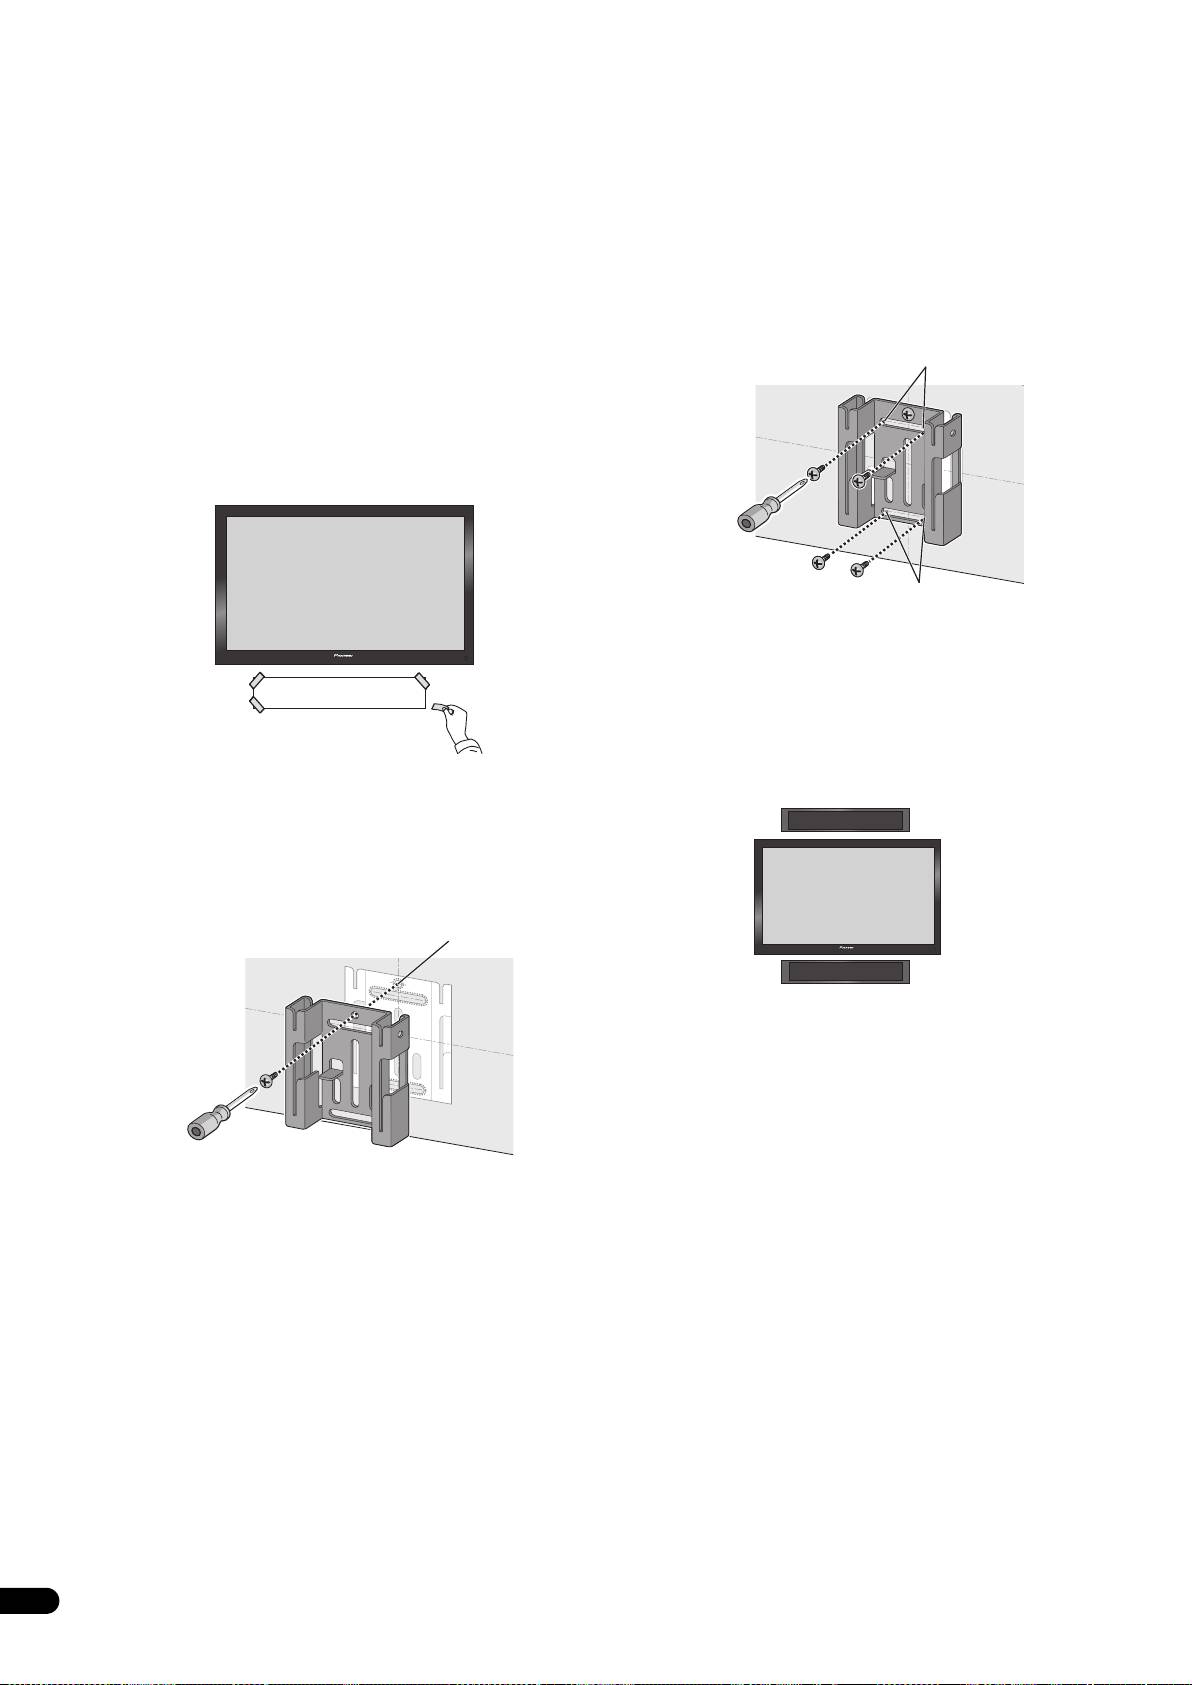
4 Attach the bracket (for wall).
allowing the wires to come into contact with each other, it
Attach bracket with screws (6 mm diameter screws recommended)
places an excessive additional load on the amp. This may cause
at the 4 locations [B] (recommended). Firmly tighten the screw [A]
the amp to stop functioning, and may even damage the amp.
that was used to temporarily attach the bracket to the wall as well.
To avoid speaker from wobbling or falling off, firmly attach bracket
• After connecting the plugs, pull lightly on the cables to make
at multiple locations.
sure that the ends of the cables are securely connected to the
• Afterwards, remove the template by tearing along the
terminals. Poor connections can create noise and interruptions
perforations.
in the sound.
• The following illustration is an example of attaching the bracket
• Be sure to connect wires to the correct terminal polarities
with screws at five locations: Screw location [A] and the 4
(+ , –) at the speaker and amplifier, or the proper surround
corners of screw location [B] (recommended).
effect will not be produced.
[B]
2 Paste the supplied wall mounting template on the area of
installation.
Attach the template level to the ground using an adhesive such as
tape. Make sure the template is straight to avoid mounting the
speaker crookedly. Pasting the template too close to the TV may
cause the TV to get in the way of the speaker when installing. Make
sure the template and TV do not overlap.
[B]
5 Attach the bracket (for speaker) onto speaker.
Attach the bracket on with supplied screws (long) at the 4 screw
holes.
This speaker system adopts a unique design that controls the
directionality of the sound. Due to this feature, this speaker system
Template
must be mounted differently depending on whether it is being
installed above or below the TV. Attach the brackets in the direction
described below.
3 Temporarily attach the bracket (for wall) to the specified
location on the template.
When installing above the TV
Align the bracket (for wall) to the specified location on the template,
and temporarily attach with a screw (6 mm diameter screw
recommended) at location [A].
Adjust the attachment position of the bracket so that it is aligned
with the template.
[A]
Television
When installing below the TV
4
En
