Pioneer S-4EX-W: Single-Wire Connections Bi-Wire Connections
Single-Wire Connections Bi-Wire Connections: Pioneer S-4EX-W
Table of contents
- Contents
- Before you start What’s in the box
- About the EX series Technology behind the S-4EX
- Installation and Placement How to install
- Choosing Where To Place The Speaker Systems
- Connections Connecting to an amplifier Connecting the cables
- Single-Wire Connections Bi-Wire Connections
- Bi-Amplification Connections Vertical Bi-Amping Horizontal Bi-Amping
- Other Information Attaching/Removing the Grille Cover Specifications Cleaning the speaker cabinet
S-4EX_EN.book 8 ページ 2008年7月16日 水曜日 午後2時2分
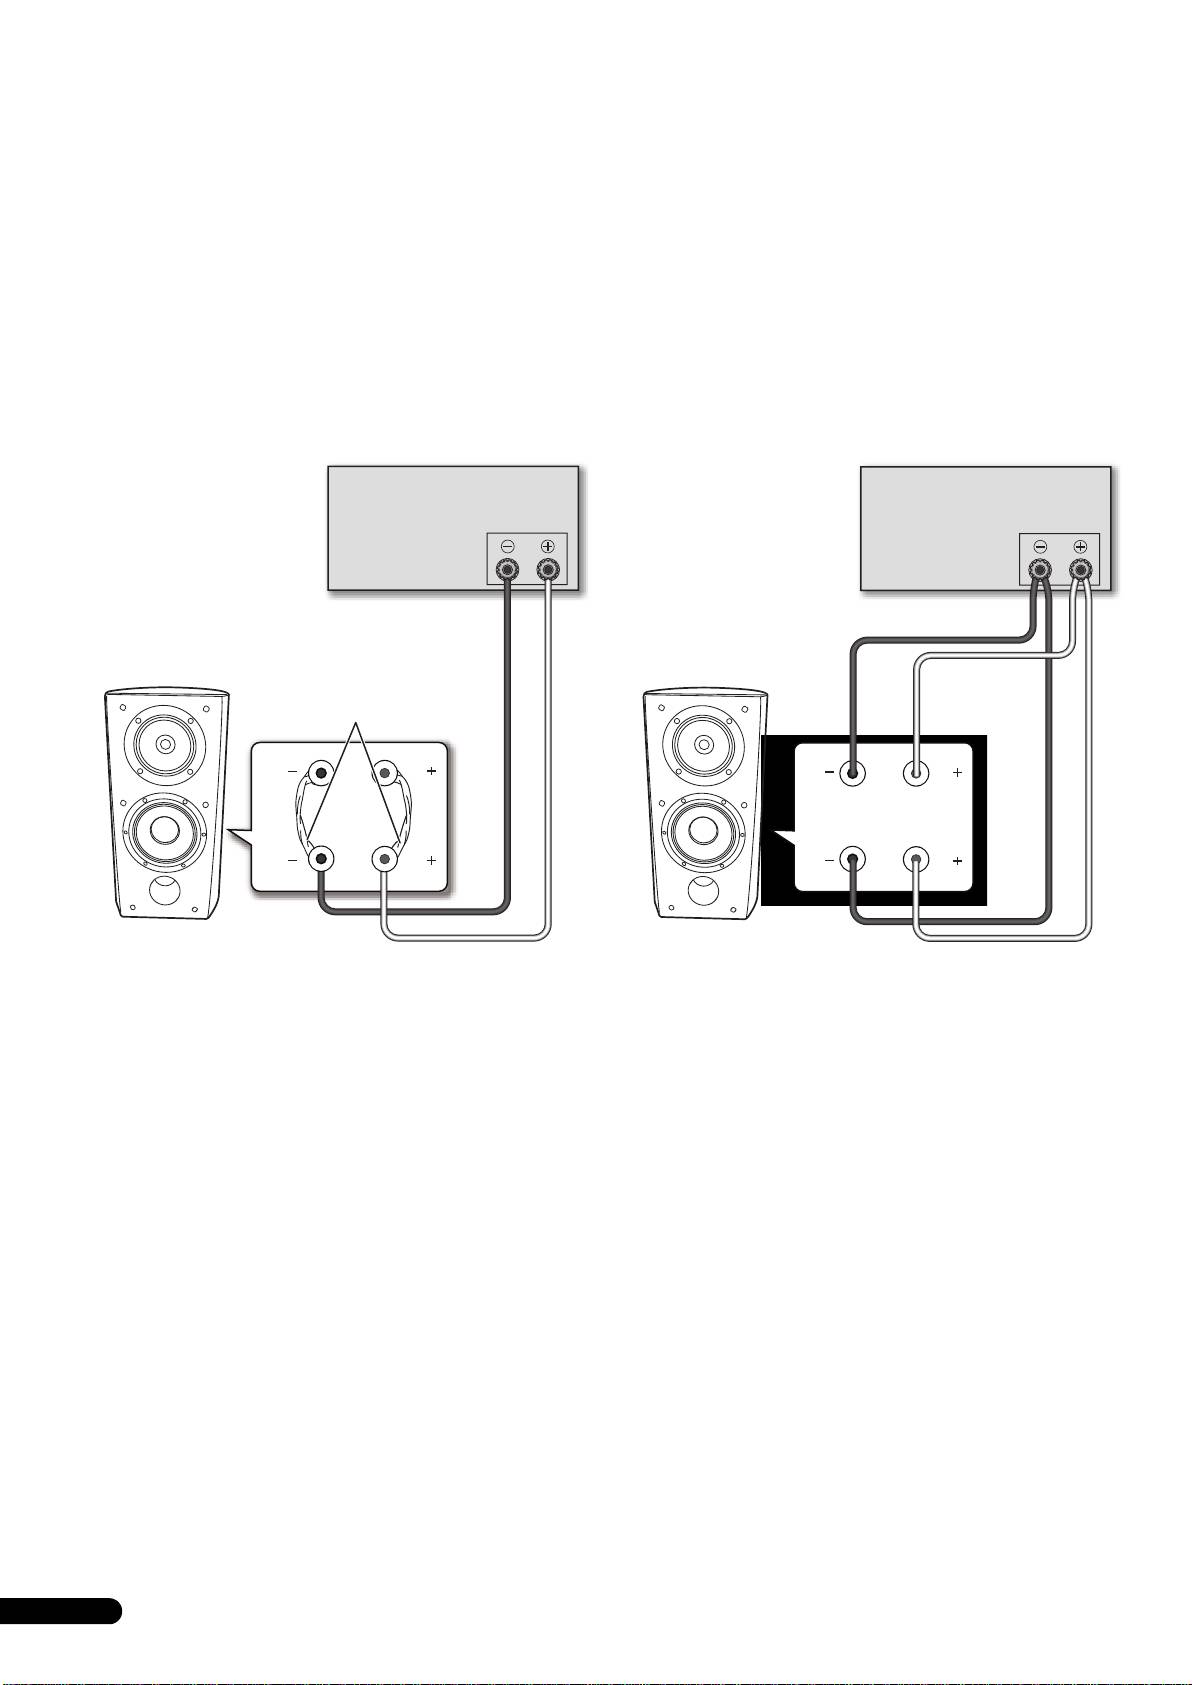
Single-Wire Connections
Bi-Wire Connections
For single-wire connections, connect the mid-to-high- and low-
In a bi-wiring connection, you independently plug in the speaker
frequency sections of the crossover network with the shorting link
systems running from the amp to their respective high- and low-
that was included with this unit, then connect the (+) wire from
frequency plugs. This results in the CST driver and bass drivers
your amplifier to either red binding post and the (–) wire from your
being independently connected directly to the amplifier, offering
amplifier to either black binding post, as shown in below.
you the freedom to optimize the cable type for each of the drivers.
Connect one set of wires to the bottom set of binding posts (bass
driver-specific network). Then connect a second set of wires to the
top binding posts (CST-specific network). Next, connect both sets
of wires to the appropriate terminals on your amplifier. Take care
to connect both (+) wires to the (+) amplifier terminals and both
(–) wires to the (–) amplifier terminals, as shown below.
Amplifier (rear)
Amplifier (rear)
SPEAKERS OUTPUT
SPEAKERS OUTPUT
(Only one channel shown)
(Only one channel shown)
Shorting link
connection
HF
HF
HF
HF
LF
LF
LF
LF
Speaker
Speaker
Speaker (rear): Input panel
Speaker (rear): Input panel
8
En
