Pioneer DEH-2400UB EU: Menu operations identical for set up menu/function settings/audio adjustments/ initial settings/lists Basic operations
Menu operations identical for set up menu/function settings/audio adjustments/ initial settings/lists Basic operations: Pioneer DEH-2400UB EU
Table of contents
- About this unit About this manual Demo mode In case of trouble
- Head unit Display indication Set up menu
- Menu operations identical for set up menu/function settings/audio adjustments/ initial settings/lists Basic operations
- CD/CD-R/CD-RW and USB storage devices iPod
- Operating this unit’s iPod function from your iPod Playing songs related to the currently playing song Displaying text information Advanced operations using special buttons
- Function settings Audio adjustments
- Initial settings Selecting the illumination color Selecting the key color from the illumination color list
- Selecting key and display color from the illumination color list Switching the dimmer setting Selecting the display color from the illumination color list
- Connections This unit Power cord
- Installation
- Troubleshooting Error messages
- Handling guidelines
- Compressed audio compatibility (disc, USB)
- iPod compatibility Russian character chart Sequence of audio files Copyright and trademark
- Specifications
Section
02
Operating this unit
Operating this unit
TITLE (multi-language)
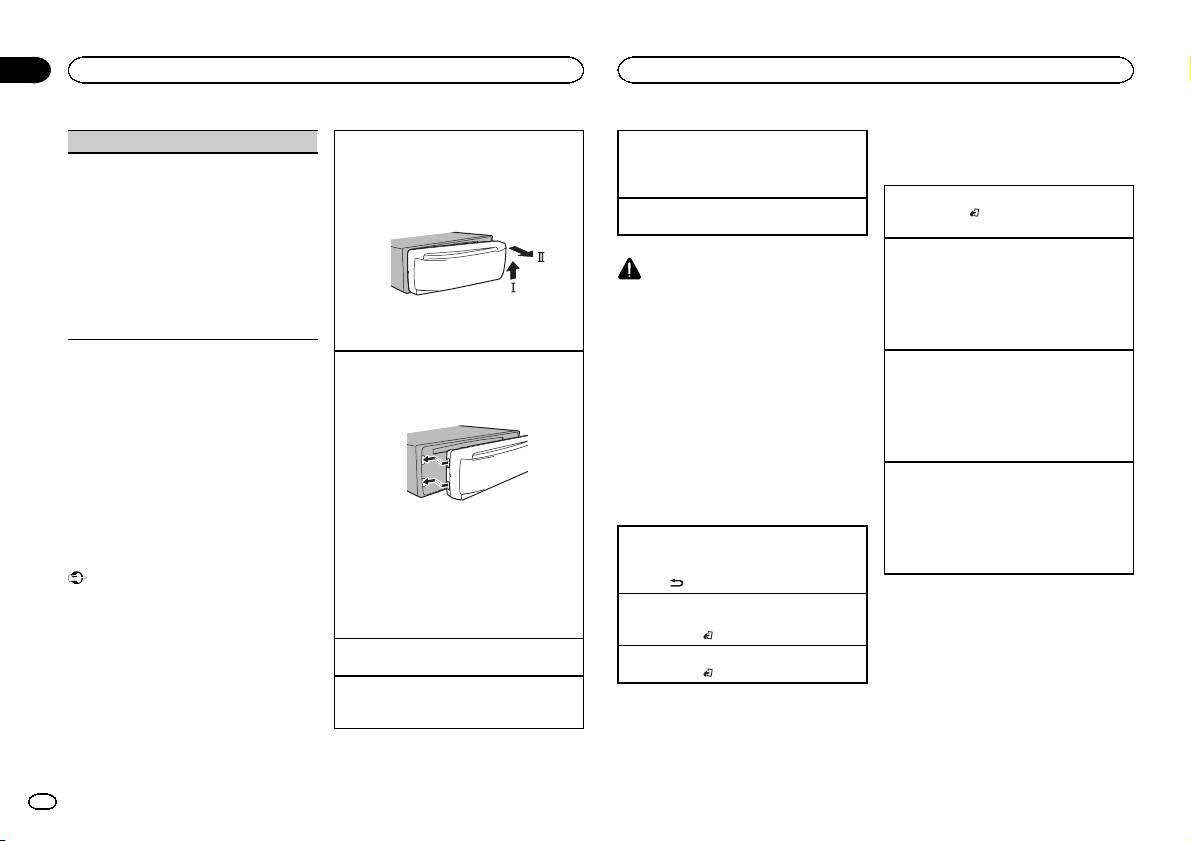
Removing the front panel to protect your unit from
Selecting a source
Tuner
theft
1 Press SRC/OFF to cycle between:
This unit can display the text information of a com-
Basic operations
1 Press the detach button to release the front
TUNER (tuner)—CD (built-in CD player)—USB
pressed audio file even if they are embedded in a
panel.
(USB)/iPod (iPod)—AUX (AUX)
Western European or Russian language.
Selecting a band
2 Push the front panel upward (M) and then pull
! If the embedded language and the selected
Adjusting the volume
1 Press BAND/
until the desired band (F1, F2,
it toward (N) you.
language setting are not the same, text infor-
1 Turn M.C. to adjust the volume.
F3 for FM or MW/LW) is displayed.
mation may not display properly.
Recalling preset stations
! Some characters may not be displayed prop-
1 Press c or d.
erly.
CAUTION
! If MAN (manual tuning) is selected in SEEK,
1 Turn M.C. to select the desired setting.
For safety reasons, park your vehicle when re-
you cannot recall preset stations. You need to
EUR (European)—RUS (Russian)
moving the front panel.
select PCH (preset channel) in SEEK. For de-
2 Press M.C. to confirm the selection.
3 Always keep the detached front panel in a pro-
QUIT appears.
Note
tails about the settings, refer to SEEK (left/right
tection device such as a protection case.
key setting) on page 6.
When this unit’s blue/white lead is connected to
Re-attaching the front panel
the vehicle’s auto-antenna relay control termi-
Manual tuning (step by step)
4 To finish your settings, turn M.C. to select
1 Slide the front panel to the left.
nal, the vehicle’s antenna extends when this
1 Press c or d.
YES. Press to select.
Make sure to insert the tabs on the left side of
unit’s source is turned on. To retract the anten-
! If PCH (preset channel) is selected in SEEK,
# If you prefer to change your setting again, turn
the head unit into the slots on the front panel.
na, turn the source off.
you cannot tune up or down manually. You
M.C. to switch to NO. Press to select.
need to select MAN (manual tuning) in SEEK.
Notes
For details about the settings, refer to SEEK
Menu operations identical
! You can set up the menu options in the initial
(left/right key setting) on page 6.
settings. For details about the settings, refer
for set up menu/function
Seeking
to Initial settings on page 9.
settings/audio adjustments/
1 Press and hold c or d, and then release.
! You can cancel set up menu by pressing
initial settings/lists
You can cancel seek tuning by briefly pressing
SRC/OFF.
c or d.
2 Press the right side of the front panel until it is
While pressing and holding c or d, you can
firmly seated.
Returning to the previous display
skip stations. Seek tuning starts as soon as
Basic operations
If you cannot attach the front panel to the
Returning to the previous list (the folder one level
you release c or d.
head unit successfully, make sure that you are
higher)
Important
placing the front panel onto the head unit cor-
1 Press
.
Note
! Handle gently when removing or attaching
rectly. Forcing the front panel into place may
the front panel.
Returning to the ordinary display
This unit’s AF (alternative frequencies search)
result in damage to the front panel or head
! Avoid subjecting the front panel to excessive
Canceling the initial setting menu/set up menu
function can be turned on and off. AF should be
unit.
shock.
1 Press BAND/
.
off for normal tuning operation (refer to AF (al-
! Keep the front panel out of direct sunlight
Turning the unit on
ternative frequencies search) on the next page).
Returning to the ordinary display from the list
and high temperatures.
1 Press SRC/OFF to turn the unit on.
1 Press BAND/
.
! To avoid damaging the device or vehicle inte-
Turning the unit off
rior, remove any cables and devices attached
1 Press and hold SRC/OFF until the unit turns
to the front panel before detaching it.
off.
4
En
