Pioneer DEH-2400UB EU: Head unit Display indication Set up menu
Head unit Display indication Set up menu: Pioneer DEH-2400UB EU
Table of contents
- About this unit About this manual Demo mode In case of trouble
- Head unit Display indication Set up menu
- Menu operations identical for set up menu/function settings/audio adjustments/ initial settings/lists Basic operations
- CD/CD-R/CD-RW and USB storage devices iPod
- Operating this unit’s iPod function from your iPod Playing songs related to the currently playing song Displaying text information Advanced operations using special buttons
- Function settings Audio adjustments
- Initial settings Selecting the illumination color Selecting the key color from the illumination color list
- Selecting key and display color from the illumination color list Switching the dimmer setting Selecting the display color from the illumination color list
- Connections This unit Power cord
- Installation
- Troubleshooting Error messages
- Handling guidelines
- Compressed audio compatibility (disc, USB)
- iPod compatibility Russian character chart Sequence of audio files Copyright and trademark
- Specifications
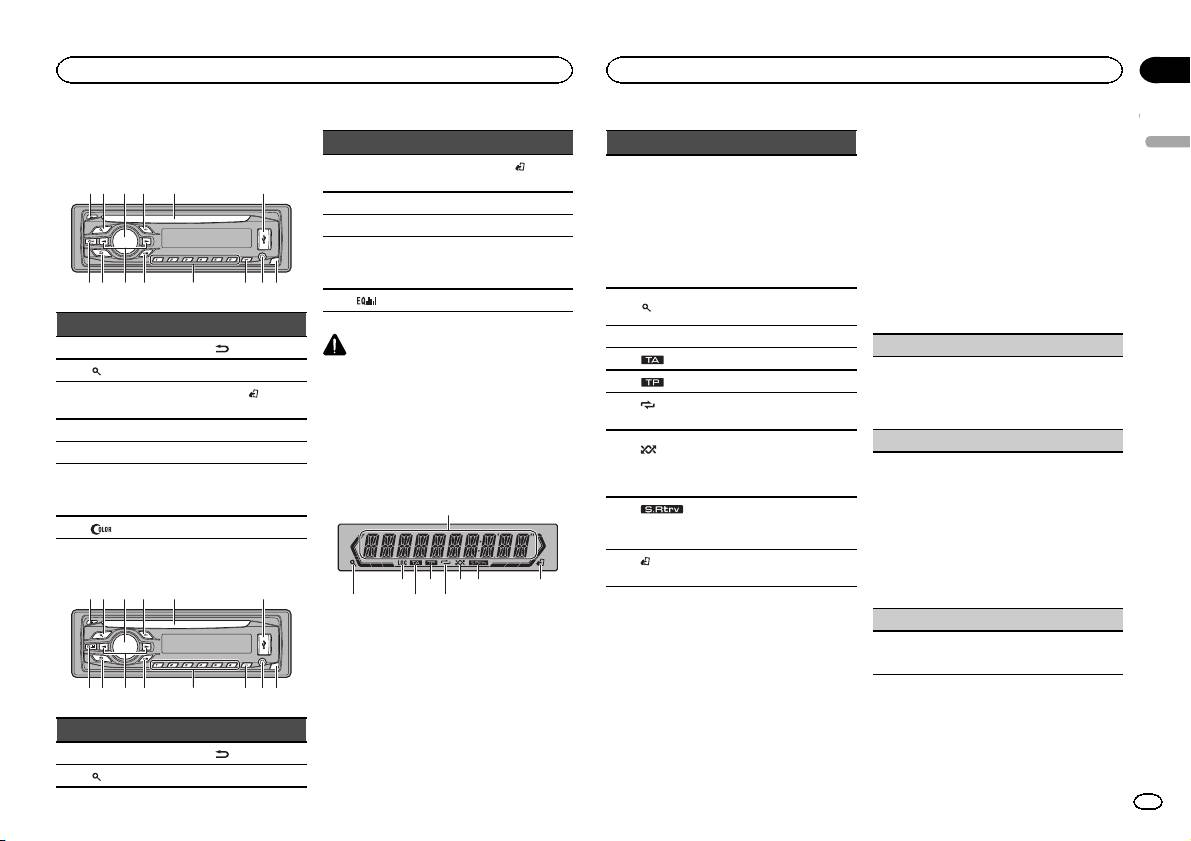
Head unit
DEH-3400UB
b c dea87
12 3 4 5 6
9
Part Part
1 h (eject) 8
(back/display)
2
(list) 9 c/d
MULTI-CONTROL
BAND/
(iPod
3
a
(M.C.)
control)
4 SRC/OFF b 1 to 6
5 Disc loading slot c PTY
AUX input jack
6 USB port d
(3.5 mm stereo
jack)
7
(color) e Detach button
DEH-2400UB
b c dea87
12 3 4 5 6
9
Part Part
MULTI-CONTROL
BAND/
(iPod
3
a
(M.C.)
control)
4 SRC/OFF b 1 to 6
5 Disc loading slot c PTY
AUX input jack
6 USB port d
(3.5 mm stereo
jack)
7
e Detach button
CAUTION
! Use an optional Pioneer USB cable (CD-
U50E) to connect the USB audio player/USB
memory as any device connected directly to
the unit will protrude out from the unit and
may be dangerous.
! Do not use unauthorized products.
Display indication
1
87 93 5
Part Part
1 h (eject) 8
(back/display)
2
(list) 9 c/d
2 4 6
Section
Operating this unit
Operating this unit
02
2 Turn M.C. to switch to YES. Press M.C. to
Indicator State
select.
English
# If you do not operate for 30 seconds, the set up
! Tuner: band and frequency
menu will not be displayed.
! RDS: program service
# If you prefer not to set up at this time, turn M.C.
name, PTY information and
Main dis-
to switch to NO. Press to select.
other literal information
1
play sec-
If you select NO, you cannot set up in the set up
! Built-in CD, USB storage
tion
menu.
device and iPod: elapsed
playback time and text in-
3 Perform the following procedures to set
formation
the menu.
The list function is being oper-
To proceed to the next menu option, you need to
2
(list)
ated.
confirm your selection.
3 LOC Local seek tuning is on.
CLOCK SET (setting the clock)
4
(TA) TA function is on.
1 Turn M.C. to adjust hour.
5
(TP) A TP station is tuned in.
2 Press M.C. to select minute.
(re-
3 Turn M.C. to adjust minute.
6
Track or folder repeat is on.
peat)
4 Press M.C. to confirm the selection.
Random play is on.
FM STEP (FM tuning step)
(ran-
The iPod source is selected
7
dom/shuf-
Normally, the FM tuning step employed by seek
and the shuffle or shuffle all
fle)
tuning is 50 kHz. When AF or TA is on, the tuning
function is on.
step automatically changes to 100 kHz. It may be
preferable to set the tuning step to 50 kHz when
The sound retriever function is
8
(sound re-
AF is on.
on.
triever)
! The tuning step remains at 50 kHz during man-
ual tuning.
(iPod
This unit’s iPod function is op-
9
1 Turn M.C. to select the FM tuning step.
control)
erated from your iPod.
50 (50 kHz)—100 (100 kHz)
2 Press M.C. to confirm the selection.
DEMO (demo display setting)
Set up menu
When you turn the ignition switch to ON after in-
1 Turn M.C. to set the demo display to on or off.
stallation, set up menu appears on the display.
2 Press M.C. to confirm the selection.
You can set up the menu options below.
1 After installation of this unit, turn the
ignition switch to ON.
SET UP appears.
En
3
