Dell Precision M70: Using the Module Bay
Using the Module Bay : Dell Precision M70
Back to Contents Page
Using the Module Bay
DellPrecision™MobileWorkstationM70User'sGuide
About the Module Bay
About the Device Security Screw
Removing and Installing Devices While the Computer Is Turned Off
Removing and Installing Devices While the Computer Is Running
About the Module Bay
You can install devices such as a floppy drive, optical drive, second battery, or second hard drive in the module bay.
About the Device Security Screw
YourDell™computershipswithaCD/DVDdriveinstalledinthemodulebayandadevicesecurityscrew,whichisnotinstalledintheCD/DVDdrivebut
packaged separately. When you install a module in the bay, you can install the device security screw to prevent the module from being easily removed.
Removing the Device Security Screw
If the device security screw is installed, you must remove the screw to remove the module from the bay:
1. Save and close any open files, exit any open programs, and shut down the computer.
2. If the computer is connected to a docking device (docked), undock it. See the documentation that came with your docking device for instructions.
3. Close the display and turn the computer over.
4. Use a #1 Phillips screwdriver to remove the device security screw from the bottom of the computer.
Removing and Installing Devices While the Computer Is Turned Off
1. If the device security screw is installed, remove it.
CAUTION: Before you begin any of the procedures in this section, follow the safety instructions located in the Product Information Guide.
NOTE: You do not need to install the device security screw unless you want to prevent the module from being easily removed.
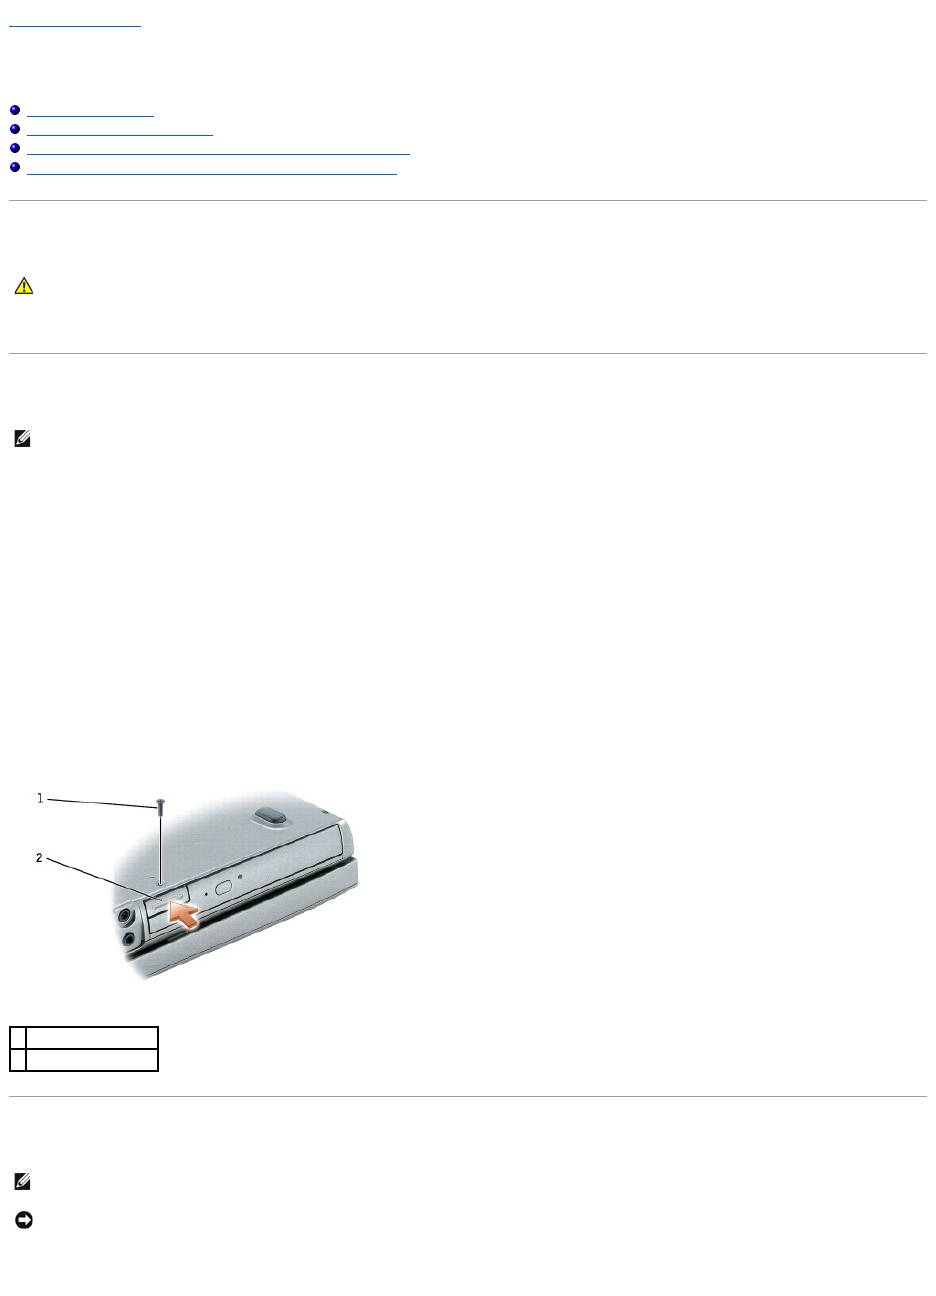
1
device security screw
2
device latch release
NOTE: If the device security screw is not installed, you can remove and install devices while the computer is running and connected to a docking device
(docked).
NOTICE: To prevent damage to devices, store them in a safe, dry place when they are not installed in the computer. Avoid pressing down on them or
placing heavy objects on top of them.
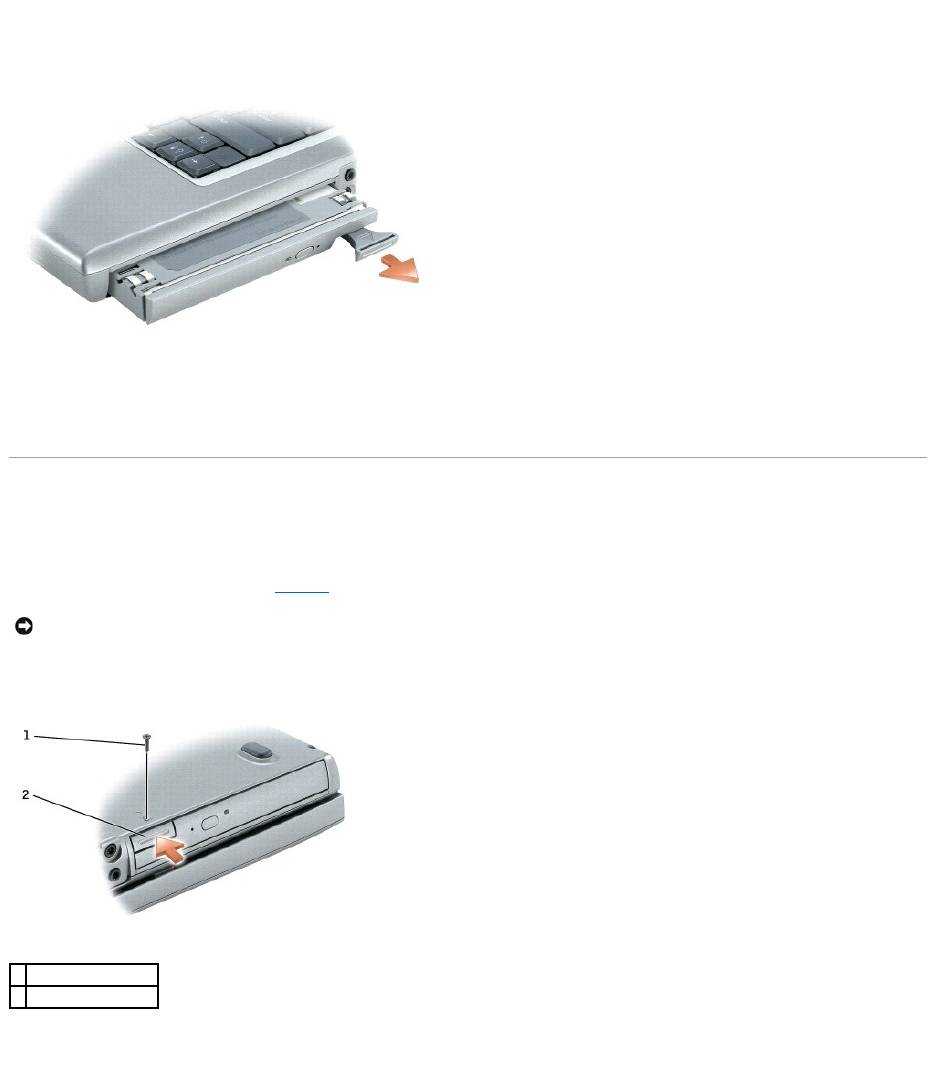
2. Press the device latch release.
3. Pull the device out of the module bay.
4. Push the new device into the bay until it clicks.
5. Press the device latch release.
Removing and Installing Devices While the Computer Is Running
1. Before ejecting the device, double-click the Safely Remove Hardware icon on the taskbar, click the device you want to eject, and click Stop.
2. If the device security screw is installed, remove it.
3. Press the device latch release.
4. Pull the device out of the module bay.
NOTICE: To prevent damage to devices, store them in a safe, dry place when they are not installed in the computer. Avoid pressing down on them or
placing heavy objects on top of them.
1
device security screw
2
device latch release
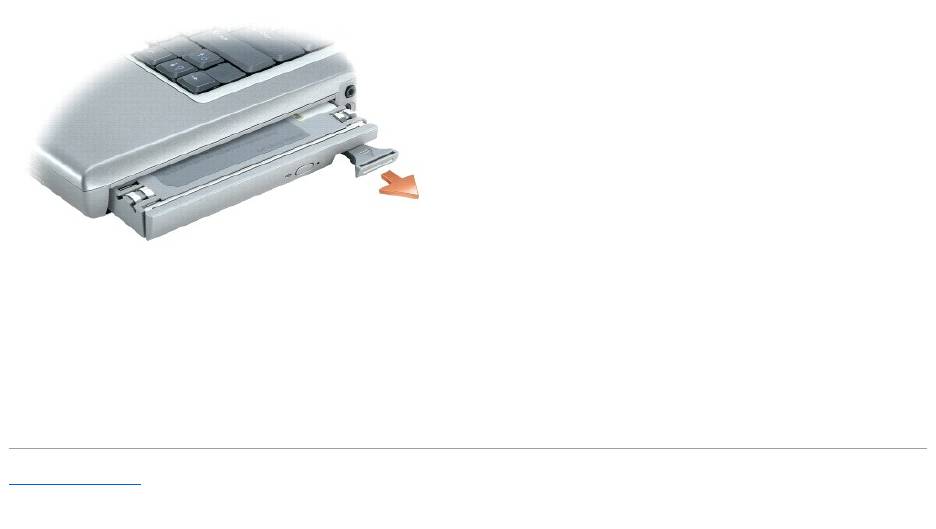
5. Push the new device into the bay until it clicks.
The operating system automatically recognizes the device.
6. Press the device latch release.
7. If necessary, enter your password to unlock your computer.
Back to Contents Page
Оглавление
- DellPrecision™MobileWorkstationM70User'sGuide
- About Your Computer
- Appendix
- Alert Standard Format (ASF)
- Using a Battery
- Using the Module Bay
- Using CDs, DVDs, and Other Module Bay Devices
- Cleaning Your Computer
- Using the Dell Diagnostics
- Using the Display
- Reinstalling Software
- Finding Information
- Getting Help
- Glossary
- Using the Keyboard and Touch Pad
- Passwords
- Using PC Cards
- Power Management
- Solving Problems
- Dell™QuickSetFeatures
- Adding and Replacing Parts
- Using the System Setup Program
- Using Smart Cards
- Specifications
- Traveling With Your Computer
- Connecting to a Wireless Local Area Network
- Using Microsoft®Windows®XP
")