Dell Precision M70: Using CDs, DVDs, and Other Module Bay Devices
Using CDs, DVDs, and Other Module Bay Devices : Dell Precision M70

Back to Contents Page
Using CDs, DVDs, and Other Module Bay Devices
DellPrecision™MobileWorkstationM70User'sGuide
Playing a CD or DVD
Adjusting the Volume
Adjusting the Picture
Connecting Your Computer to a TV or Audio Device
Playing a CD or DVD
1. Press the eject button on the front of the drive.
2. Pull the tray out.
3. Place the disc, label side up, in the center of the tray and snap the disc onto the spindle.
4. Push the tray back into the drive.
To format CDs for storing data, to create music CDs, or to copy CDs, see the CD software that came with your computer.
Adjusting the Volume
1. Click the Start button, point to All Programs (or Programs)® Accessories® Entertainment (or Multimedia), and then click Volume Control.
2. In the Volume Control window, click and drag the bar in the Volume Control column and slide it up or down to increase or decrease the volume.
For more information on volume control options, click Help in the Volume Control window.
NOTE: The Drivers and Utilities CD is optional and may not ship with all computers.
NOTICE: Do not press down on the CD or DVD tray when you open or close it. Keep the tray closed when you are not using the drive.
NOTICE: Do not move the computer when you are playing CDs or DVDs.
1
spindle
2
eject button
NOTE: If you use a module that shipped with another computer, you need to install the drivers and software necessary to play DVDs or write data. For
more information, see the Drivers and Utilities CD.
NOTE: Ensure that you follow all copyright laws when you create CDs.
NOTE: When the speakers are muted, you do not hear the CD or DVD playing.
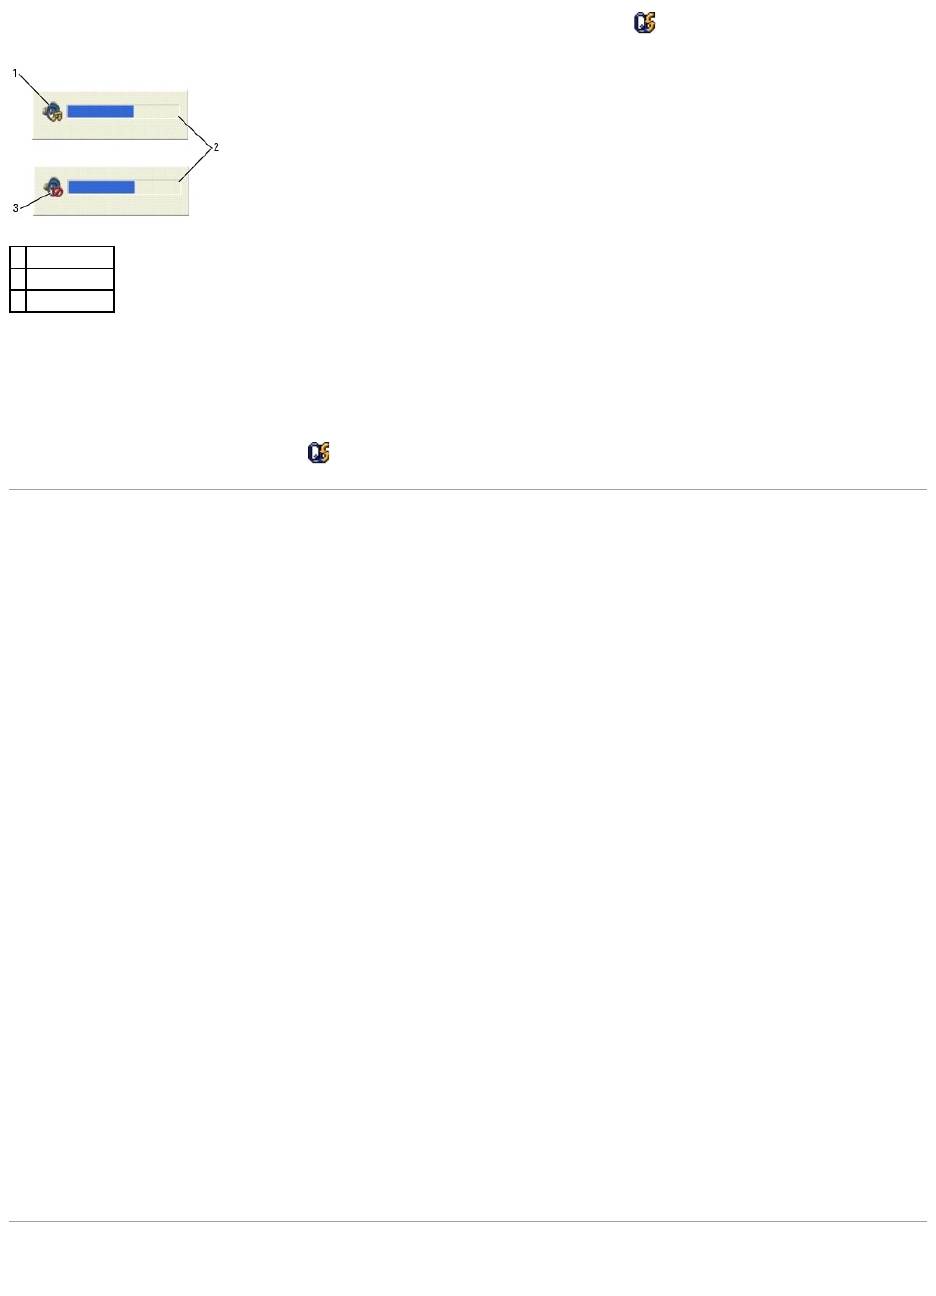
The Volume Meter displays the current volume level, including mute, on your computer. Either right-click the icon in the taskbar or press the volume
control buttons to enable or disable the Volume Meter on the screen.
When the meter is enabled, adjust the volume with the volume control buttons or by pressing the following keys:
l Press <Fn> <PageUp> to increase volume.
l Press <Fn> <PageDn> to decrease volume.
l Press <Fn> <End> to mute volume.
For more information about QuickSet, right-click the icon in the taskbar and click Help.
Adjusting the Picture
If an error message notifies you that the current resolution and color depth are using too much memory and preventing DVD playback, adjust the display
properties.
Microsoft®Windows®XP
1. Click the Start button and click Control Panel.
2. Under Pick a category, click Appearance and Themes.
3. Under Pick a task..., click Change the screen resolution.
4. In the Display Properties window, click and drag the bar in Screen resolution to change the setting to 1024 by 768 pixels.
5. Click the drop-down menu under Color quality, and then click Medium (16 bit).
6. Click OK.
Microsoft Windows 2000
1. Click the Start button, point to Settings, and then click Control Panel.
2. Double-click the Display icon and click the Settings tab.
3. Click and drag the bar in Screen area to change the setting to 1024 by 768 pixels.
4. Under Color quality, click the drop-down menu and click High Color (16 bit).
5. Click Apply.
6. Click OK to save the settings and close the window.
Connecting Your Computer to a TV or Audio Device
1
volume icon
2
Volume Meter
3
mute icon
Your computer has an S-video TV-out connector that, together with the TV/digital audio adapter cable (available from Dell), enables you to connect the
computer to a TV and/or stereo audio device. The TV/digital audio adapter cable provides connectors for an S-video cable, a composite video cable, and an
S/PDIF digital audio cable.
Your TV has either an S-video input connector or a composite video-input connector. Depending on what type of connector is available on your TV, you can use
a commercially available S-video cable or composite video cable to connect your computer to your TV. For audio devices without support for S/PDIF digital
audio, you can use the audio connector on the side of the computer to connect the computer to your audio device.
It is recommended that you connect video and audio cables to your computer in one of the following combinations.
l S-video and standard audio
l S-video and S/PDIF digital audio
l Composite video and standard audio
l Composite video and S/PDIF digital audio
When you finish connecting the video and audio cables between your computer and your TV, you must enable your computer to work with the TV. See
"Enabling the Display Settings for a TV in Microsoft® Windows® XP" to ensure that the computer recognizes and works properly with the TV. Additionally, if
you are using S/PDIF digital audio, see "Enabling S/PDIF Digital Audio."
S-Video and Standard Audio
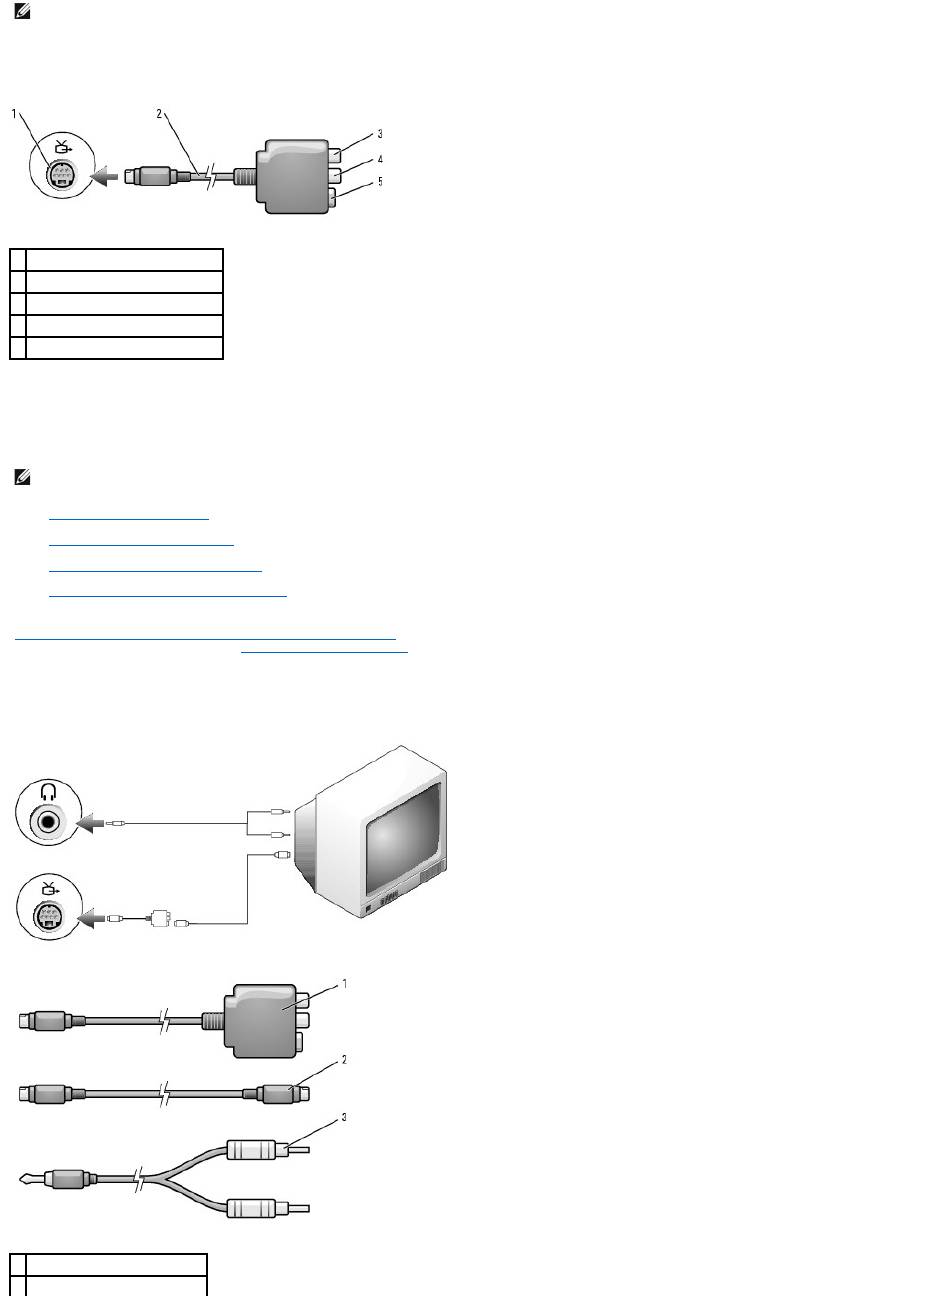
NOTE: Video and audio cables for connecting your computer to a TV or other audio device are not included with your computer. Cables may be
purchased at most consumer electronics stores. The TV/digital audio adapter cable is available for purchase from Dell.
1
S-video TV-out connector
2
TV/digital audio adapter cable
3
S/PDIF digital audio connector
4
composite video-input connector
5
S-video input connector
NOTE: See the diagrams at the beginning of each subsection to help you determine which method of connection you should use.
1
TV/digital audio adapter cable
2
S-video cable
1. Turn off the computer and the TV and/or audio device that you want to connect.
2. Connect the TV/digital audio adapter cable to the S-video TV-out connector on your computer.
3. Plug one end of the S-video cable in to the S-video input connector on the TV/digital audio adapter cable.
4. Plug the other end of the S-video cable in to the S-video input connector on your TV.
5. Plug the single-connector end of the audio cable in to the headphone connector on your computer.
6. Plug the two RCA connectors on the other end of the audio cable in to the audio input connectors on your TV or other audio device.
7. Turn on the TV and any audio device that you connected (if applicable), and then turn on the computer.
8. See "Enabling the Display Settings for a TV in Microsoft® Windows® XP" to ensure that the computer recognizes and works properly with the TV.
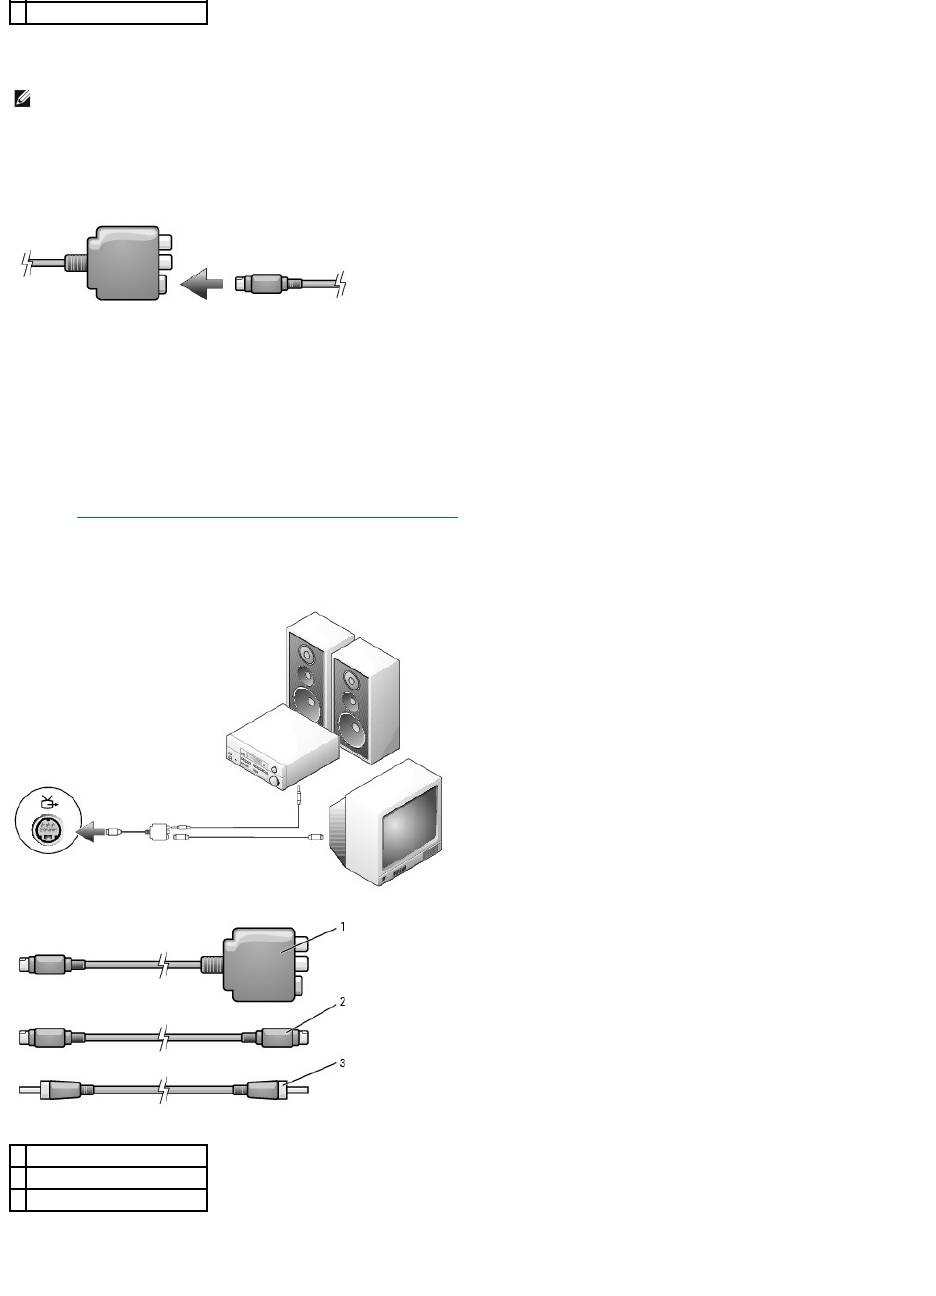
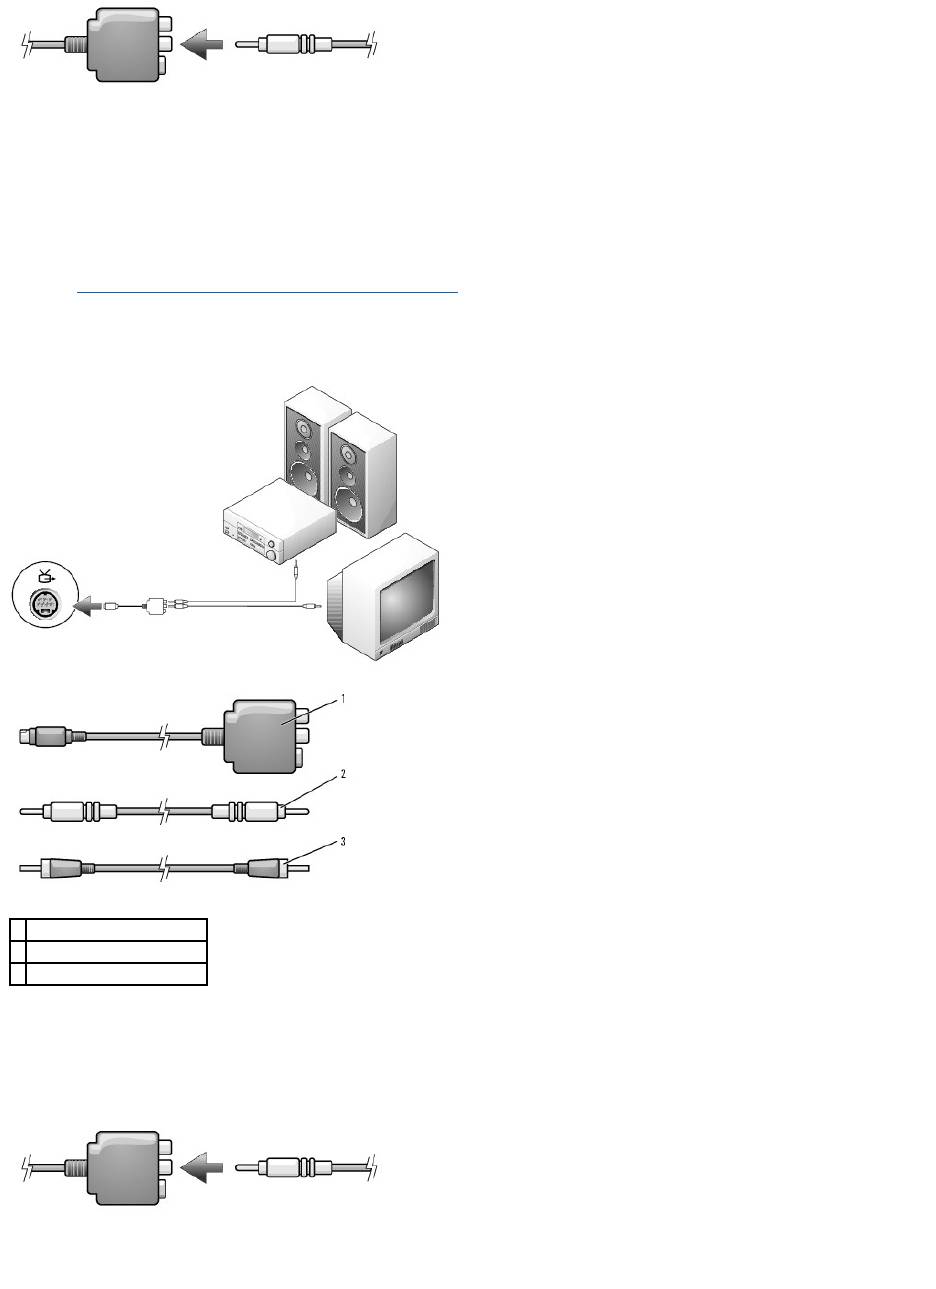
S-Video and S/PDIF Digital Audio
1. Turn off the computer and the TV and/or audio device that you want to connect.
2. Connect the TV/digital audio adapter cable to the S-video TV-out connector on your computer.
3
standard audio cable
NOTE: You can connect an S-video cable directly to the S-video TV-out connector on the computer (without the TV/digital audio adapter cable) if your TV
or audio device supports S-video but not S/PDIF digital audio.
1
TV/digital audio adapter cable
2
S-video cable
3
S/PDIF digital audio cable
3. Plug one end of the S-video cable in to the S-video input connector on the TV/digital audio adapter cable.
4. Plug the other end of the S-video cable in to the S-video input connector on the TV.
5. Plug one end of the S/PDIF digital audio cable in to the digital audio connector on the TV/digital audio adapter cable.
6. Plug the other end of the S/PDIF digital audio cable in to the audio input connector on your TV or other audio device.
7. Turn on the TV, turn on any audio device that you connected (if applicable), and then turn on the computer.
8. See "Enabling the Display Settings for a TV in Microsoft® Windows® XP" to ensure that the computer recognizes and works properly with the TV.
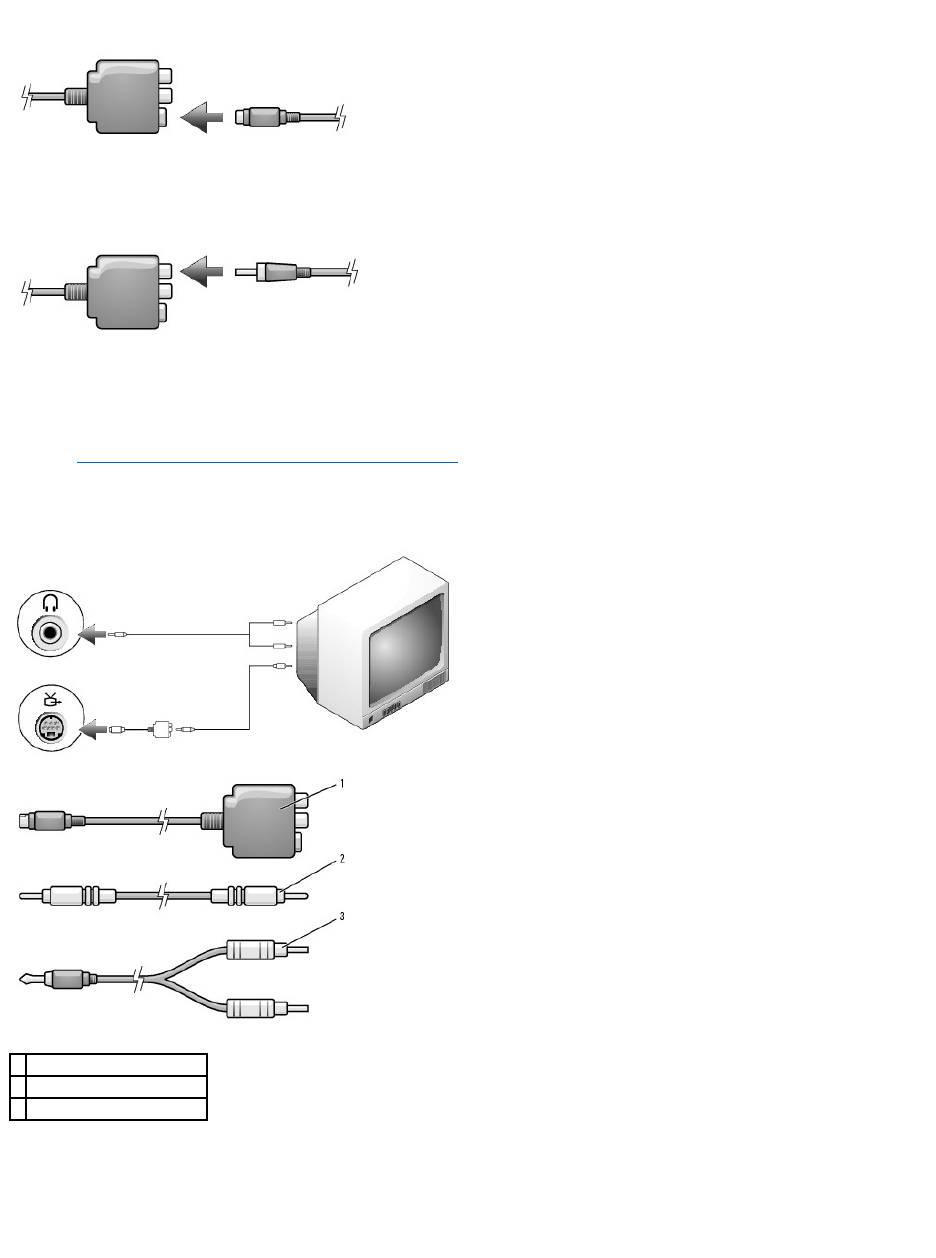
Composite Video and Standard Audio
1. Turn off the computer and the TV and/or audio device that you want to connect.
2. Connect the TV/digital audio adapter cable to the S-video TV-out connector on the computer.
3. Plug one end of the composite video cable in to the composite video-input connector on the TV/digital audio adapter cable.
1
TV/digital audio adapter cable
2
composite video cable
3
standard audio cable
4. Plug the other end of the composite video cable in to the composite video-input connector on the TV.
5. Plug the single-connector end of the audio cable in to the headphone connector on the computer.
6. Plug the two RCA connectors on the other end of the audio cable in to the audio input connectors on your TV or other audio device.
7. Turn on the TV, turn on any audio device that you connected (if applicable), and then turn on the computer.
8. See "Enabling the Display Settings for a TV in Microsoft® Windows® XP" to ensure that the computer recognizes and works properly with the TV.
Composite Video and S/PDIF Digital Audio
1. Turn off the computer and the TV and/or audio device that you want to connect.
2. Connect the TV/digital audio adapter cable to the S-video TV-out connector on the computer.
3. Plug one end of the composite video cable in to the composite video-input connector on the TV/digital audio adapter cable.
4. Plug the other end of the composite video cable in to the composite video-input connector on the TV.
1
TV/digital audio adapter cable
2
composite video cable
3
S/PDIF digital audio cable
5. Plug one end of the S/PDIF digital audio cable in to the S/PDIF audio connector on the TV/digital audio adapter cable.
6. Plug the other end of the digital audio cable in to the S/PDIF input connector on your TV or other audio device.
7. Turn on the TV, turn on any audio device that you connected (if applicable), and then turn on the computer.
8. See "Enabling the Display Settings for a TV in Microsoft® Windows® XP" to ensure that the computer recognizes and works properly with the TV.
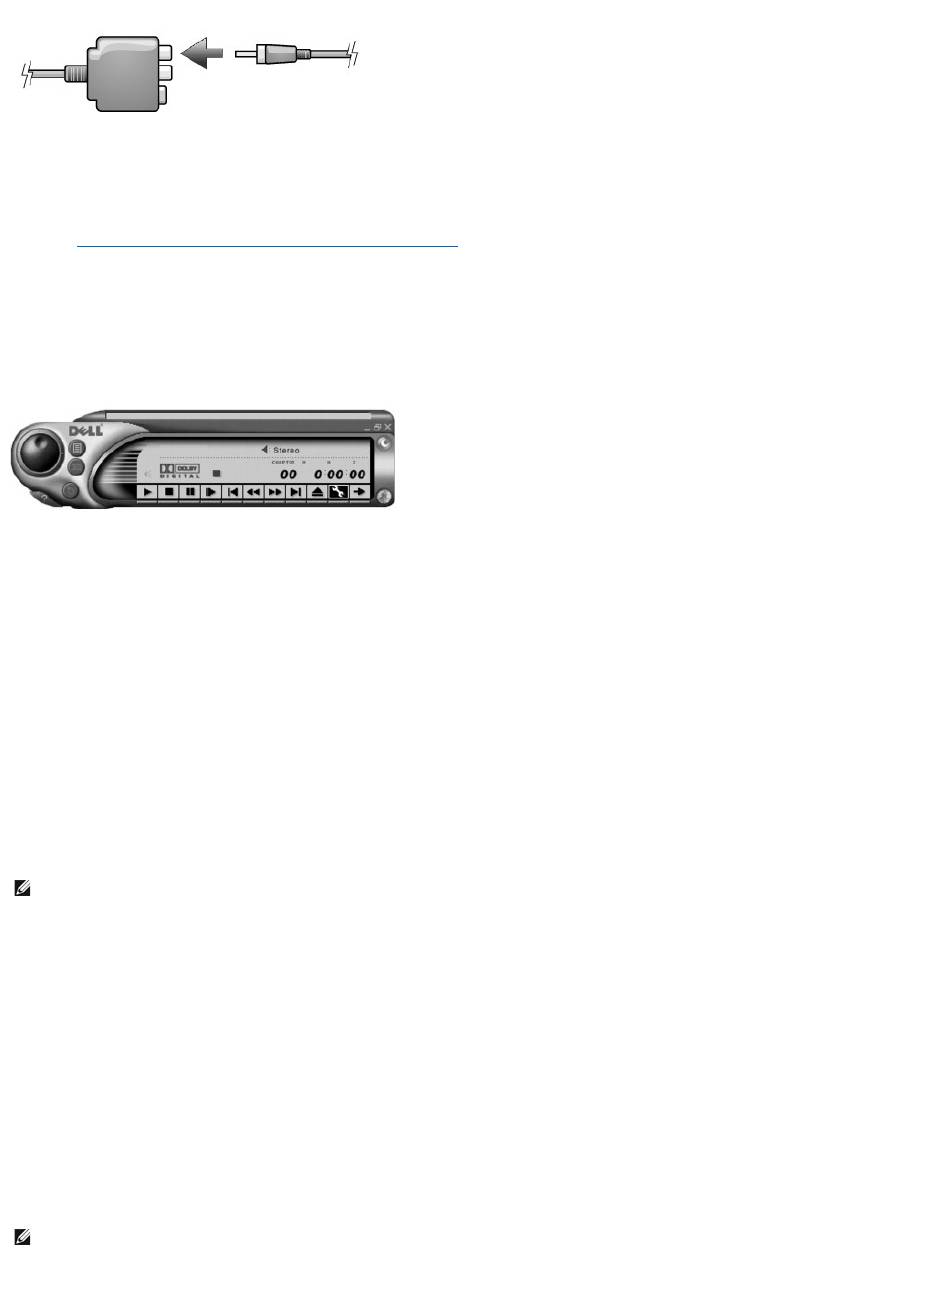
Enabling S/PDIF Digital Audio
If your computer has a DVD drive, you can enable Dolby Digital 5.1 audio for DVD playback.
1. Double-click the Cyberlink PowerDVD icon on the Microsoft®Windows®desktop.
2. Insert a DVD into the DVD drive.
If the DVD begins playing, click the stop button.
3. Click the Properties (wrench) icon.
4. Click the Audio tab.
5. Click Enable S/PDIF output.
6. Click Apply.
7. Click OK.
Enabling S/PDIF in the Windows Audio Driver
1. Double-click the speaker icon in the Windows notification area.
2. Click the Options menu and then click Advanced Controls.
3. Click Advanced.
4. Click Enable S/PDIF.
5. Click Close.
6. Click OK.
Setting Up the Dolby Headphone
1. Double-click the Intervideo Win DVD icon on the Windows desktop.
NOTE: Enabling S/PDIF in Windows disables the sound from the headphone connector.
NOTE: The Dolby headphone feature is available only if your computer has a DVD drive.

2. Click the Properties icon.
3. Click the Dolby Headphone tab.
4. Click Enable Dolby Headphone.
5. Select one of the four options to set the level of surround sound effects. Option 1 is a baseline stereo option and Options 2, 3, and 4 are surround
sound levels.
6. Click Apply, and then click OK to close the WinDVD Properties window.
7. Click Exit.
Enabling the Display Settings for a TV in Microsoft®Windows®XP
Your computer may have either an ATI video-controller card or an NVIDIA video-controller card. See the following subsection that corresponds to the video
controller installed in your computer.
ATI Video-Controller Card
1. Click the Start button and click Control Panel.
2. Click Appearances and Themes.
3. Under or pick a Control Panel icon, click Display.
4. Click the Settings tab and click Advanced.
5. Click the Displays tab.
6. Click the upper-left corner of the TV button to enable the TV.
7. Click OK.
NVIDIA Video-Controller Card
1. Click the Start button and click Control Panel.
2. Click Appearances and Themes.
3. Under or pick a Control Panel icon, click Display.
4. Click the Settings tab and click Advanced.
5. Click the Nvidia GeForce tab.
6. On the left side of the menu, click nView Display Mode.
7. Click Clone to enable the television.
8. Click Apply.
9. Click OK to confirm the settings change.
10. Click Yes to keep the new settings.
NOTE: Icon labels may be visible only when you place the cursor over the icon.
NOTE: Ensure that you properly connect the TV before you enable the display settings.
NOTE: Ensure that you properly connect the TV before you enable the display settings.

11. Click OK.
Back to Contents Page
Оглавление
- DellPrecision™MobileWorkstationM70User'sGuide
- About Your Computer
- Appendix
- Alert Standard Format (ASF)
- Using a Battery
- Using the Module Bay
- Using CDs, DVDs, and Other Module Bay Devices
- Cleaning Your Computer
- Using the Dell Diagnostics
- Using the Display
- Reinstalling Software
- Finding Information
- Getting Help
- Glossary
- Using the Keyboard and Touch Pad
- Passwords
- Using PC Cards
- Power Management
- Solving Problems
- Dell™QuickSetFeatures
- Adding and Replacing Parts
- Using the System Setup Program
- Using Smart Cards
- Specifications
- Traveling With Your Computer
- Connecting to a Wireless Local Area Network
- Using Microsoft®Windows®XP
")