Pioneer X-HM20-S: Setting the clock (Remote control only) (continued)
Setting the clock (Remote control only) (continued): Pioneer X-HM20-S
Table of contents
- Operating Environment VENTILATION CAUTION
- Condensation
- Introduction Accessories CONTENTS
- Precautions Controls and indicators
- Controls and indicators (continued)
- System connections
- System connections (continued) Remote control
- General control
- Setting the clock (Remote control only) (continued)
- Listening to the iPod, iPhone or iPad (X-HM20 only) (continued)
- Listening to the iPod, iPhone or iPad (X-HM20 only) (continued)
- Listening to a CD or MP3/WMA disc
- Advanced CD or MP3/WMA disc playback
l Charging terminal for iPod, iPhone and iPad:
Setting the clock (Remote control
only) (continued)
Docking
Condition
USB terminal
station
USB function NO YES
4 Press the or button to select 24-hour or 12-
hour display and then press the ENTER button.
Other function YES NO
Stand-by YES NO
The 24-hour display will appear.
(00:00 - 23:59)
l The message “This accessory is not made to work with
The 12-hour display will appear.
iPhone” or similar, may appear on the iPhone screen
(AM 12:00 - PM 11:59)
when:
5
To adjust the hour, press the or button and then
- battery is low.
press the ENTER button. Press the or button
- the iPhone is not properly docked (eg. slanting).
once to advance the time by 1 hour. Hold it down to
if this occure, remove and re-dock the iPhone.
advance continuously.
l
This product is made for iPhone. To prevent random
interference when iPod/iPhone is docked, the
6
To adjust the minutes, press the or button and
headphone output is disabled and "HP INVALID" will
then press the ENTER button. Press the or
be displayed.
button once to advance the time by 1 minute.
You may also experience brief audio interference
To confirm the time display:
during incoming calls.
Press the CLOCK/TIMER button. The time display will appear
for about 5 seconds.
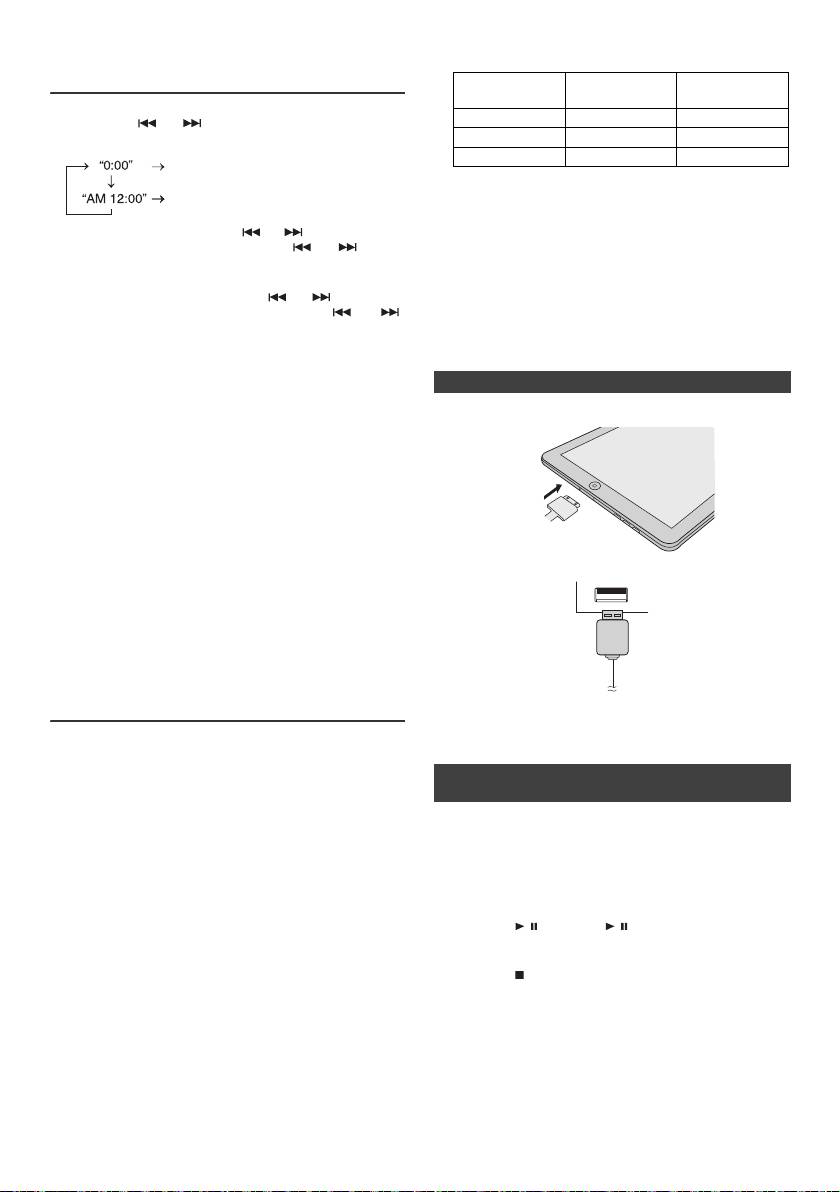
n iPad connection (USB Terminal)
Note:
1
Insert the connector to the the iPod, iPhone or iPad.
When power supply is restored after unit is plugged in again
or after a power failure, reset the clock (page 9).
To readjust the clock:
Perform “Setting the clock” from step 1. If the “Clock” does not
appear in step 2, step 4 (for selecting the 24-hour or 12-hour
display) will be skipped.
To change the 24-hour or 12-hour display:
1 Clear all the programmed contents. [Refer to “Factory
2 Connect the iPad to the unit via USB connector.
reset, clearing all memory” on page 25 for details.]
2 Perform “Setting the clock” from step 1 onwards.
Note:
The timer setting will reset if the power cord is pulled out
or when there is a blackout.
Listening to the iPod, iPhone or iPad
(X-HM20 only)
Note:
USB connector do not support VIDEO out.
Supported iPod, iPhone and iPad models:
l
iPad
l
iPhone 4
n iPod, iPhone or iPad Playback (USB
l
iPhone 3GS
Terminal)
l
iPhone 3G
l
iPhone
1 Press the STANDBY/ON button to turn the power on.
th
l
iPod touch (4
generation)
2 Press the USB button on the remote control or INPUT
rd
l
iPod touch (3
generation)
button repeatedly on the main unit to select USB
nd
l
iPod touch (2
generation)
fnction.
st
l
iPod touch (1
generation)
3 Connect iPod, iPhone or iPad to the unit. "iPod" will
l
iPod classic
th
appear.
l
iPod nano (6
generation)
th
4 Press the / (CD/USB / ) button to start playback.
l
iPod nano (5
generation)
th
l
iPod nano (4
generation)
rd
Note:
l
iPod nano (3
generation)
nd
Stop button ( ) is invalid during iPod, iPhone or iPad
l
iPod nano (2
generation)
playback.
Notes:
l This system has been developed and tested for the
software version of iPod/iPhone/iPad indicated on the
website of Pioneer (http://pioneer.jp/homeav/support/
ios/eu).
l Installing software versions other than indicated on the
website of Pioneer to your iPod/iPhone/iPad may result
in incompatibility with this system.
En-10
11/5/25 X-HM10_20_En.fm
