Pioneer HTP-SL100: What’s in the box Installation
What’s in the box Installation: Pioneer HTP-SL100
Table of contents
- Before you start
- What’s in the box Installation
- Wall mounting the speakers
- Connection Specifications Operation (S-SL100-LR/S-SL100CR)
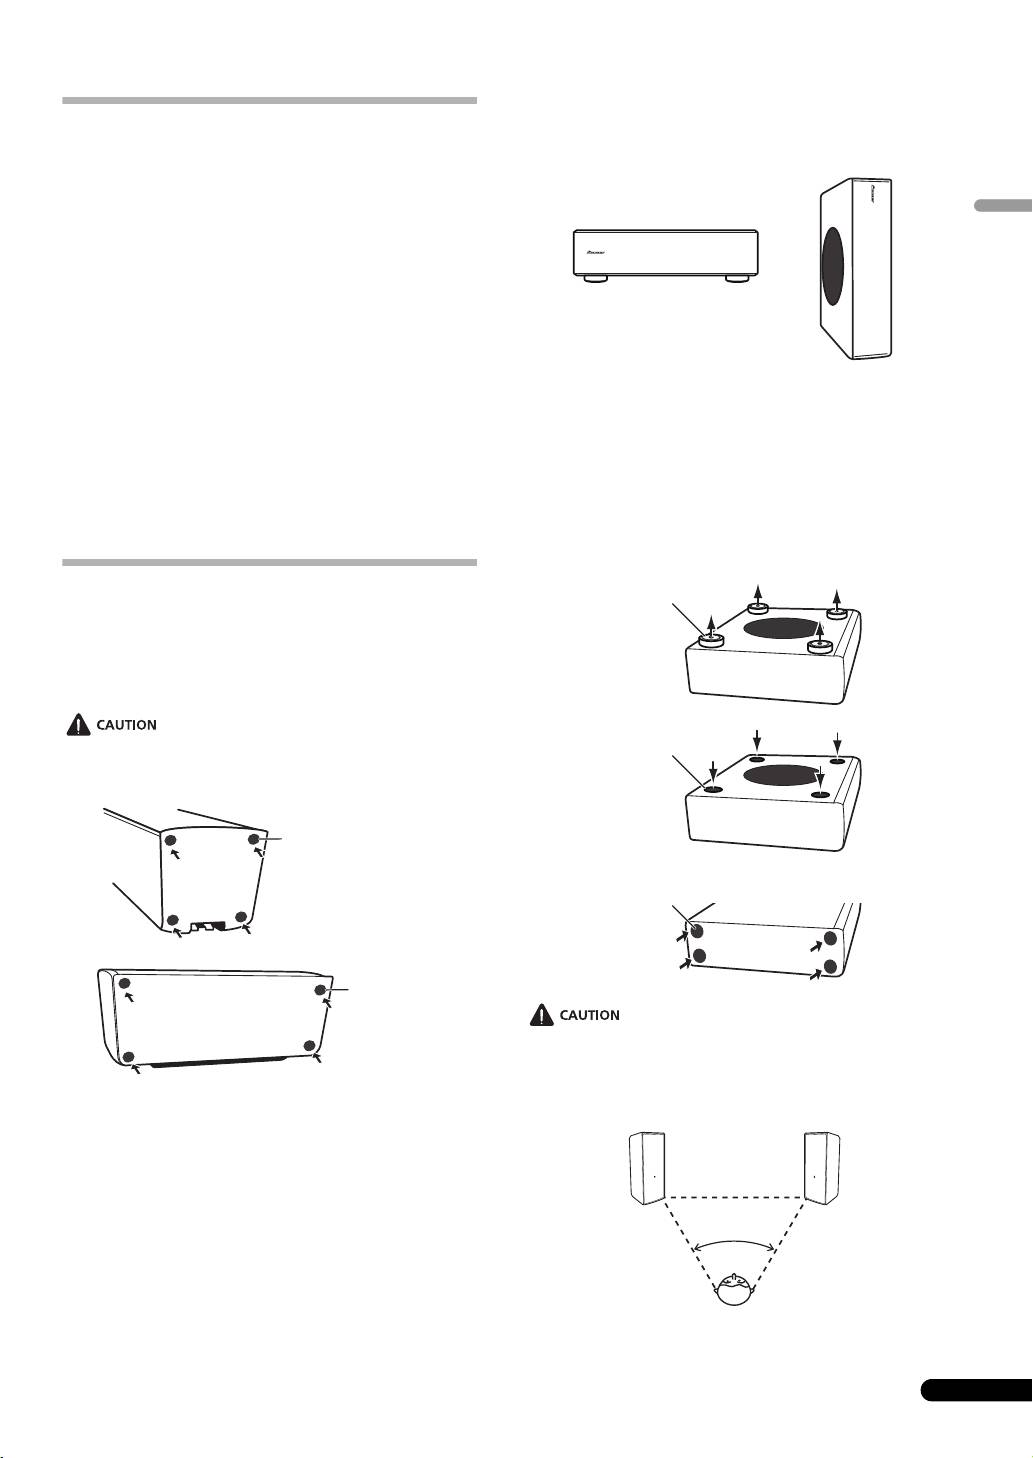
S-SLW500
What’s in the box
Installing the subwoofer
The subwoofer can be mounted in either vertical or horizontal
orientation. The factory default is horizontal orientation.
S-SL100-LR
• Speaker cord (4 m) x 2
• Non-skid pads x 8
English
• Warranty card x 1 (European model only)
• Operating instructions (this document)
S-SL100CR
• Speaker cord (4 m) x 1
• Speaker cord (10 m) x 2
• Non-skid pads x 12
• Warranty card x 1 (European model only)
For vertical orientation installation
• Operating instructions (this document)
1 The feet are attached with Phillips screws; use a Phillips
screwdriver to remove them.
S-SLW500
2 Apply the accessory seals to the place the feet were
• Speaker cord (3 m) x 1
located to hide the screw holes.
• Non-skid pads x 4
3 Apply the non-skid pads to the four corners of the surface
•Seal x 4
where the subwoofer is to be mounted. Note that the non-
• Warranty card x 1 (European model only)
skid pads may not be fully effective on all surfaces, so do not
install in slippery locations.
Installation
S-SL100-LR/S-SL100CR
Install non-skid pads
Use the accessory non-skid pads as necessary, depending on your
installation location.
Lay the unit on its side on soft cloth or other material that will not
scar the unit.
・ Do not attempt to perform these procedures while tilting the
unit at an angle. Lay the unit on its side on soft cloth or other
material that will not scar the unit.
Mounting location
3
En
Non-skid pads
Non-skid pads
Step 1
Feet
Step 2
Seals
Step 3
Non-skid pads
50˚ to 60˚
S-SL100-LR_S-SL100CR_En.fm 3 ページ 2011年4月12日 火曜日 午前11時31分
