Dell Precision 350: Drives
Drives : Dell Precision 350
Back to Contents Page
Drives
DellPrecision™Workstation350ServiceManual
Overview
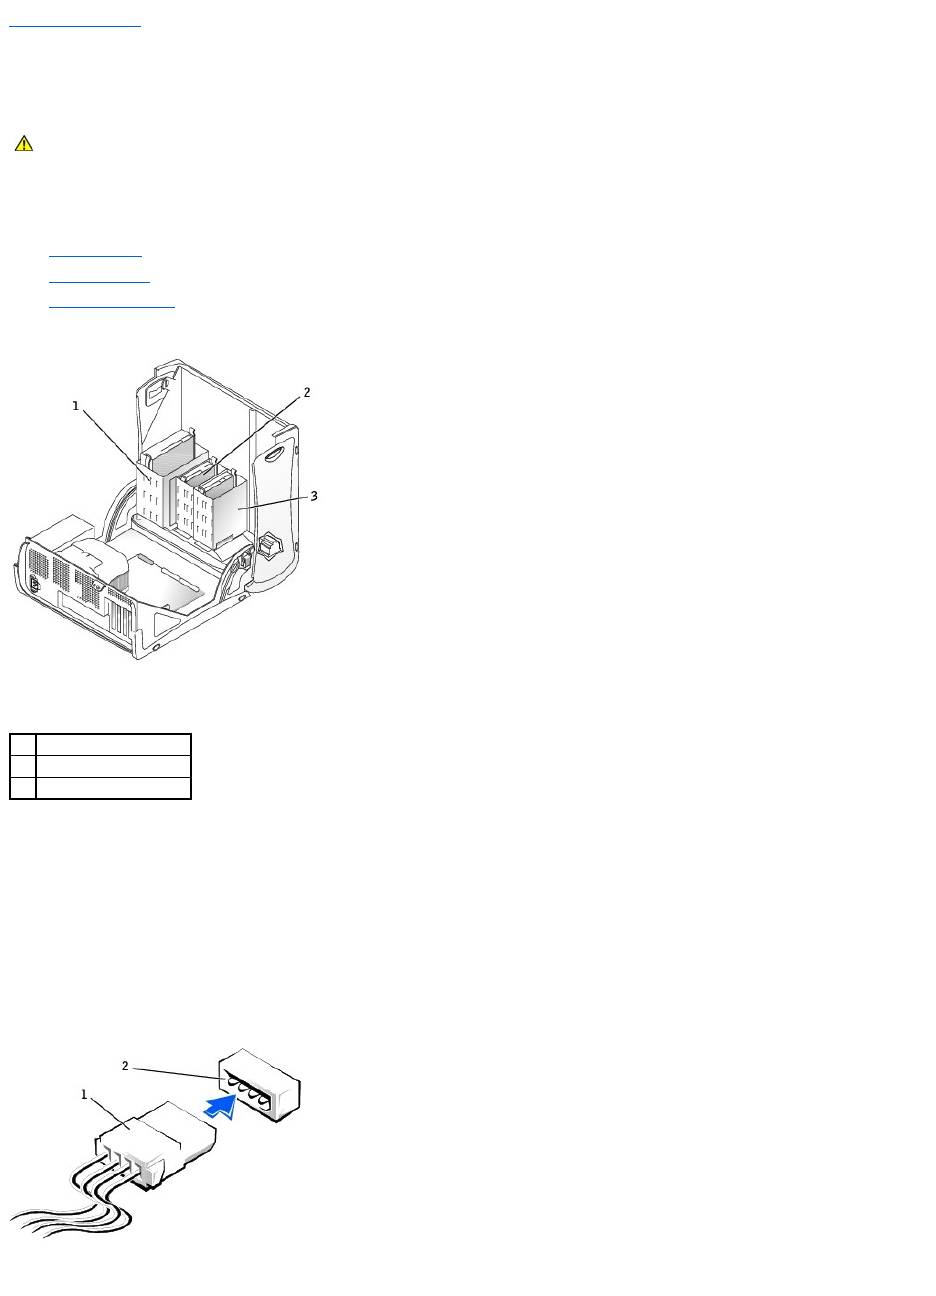
Your computer supports:
l Two hard drives
l Two floppy drives
l Two CD or DVD drives
IDE Drive Addressing
When you connect two IDE devices to a single IDE interface cable and configure them for the cable select setting, the device attached to the last connector on
the interface cable is the master or boot device (drive 0), and the device attached to the middle connector on the interface cable is the slave device (drive 1).
See the drive documentation in your upgrade kit for information on configuring devices for the cable select setting.
Your computer supports up to two IDE devices. Hard drives should be connected to the connector labeled "PRI IDE," and CD/DVD drives should be connected
to the connector labeled "SEC IDE."
Connecting Drive Cables
When you install a drive, you connect two cables—a DC power cable and an interface cable—to the back of the drive.
CAUTION: Before you begin any of the procedures in this section, follow the safety instructions in the System Information Guide.
1
CD/DVD drive(s)
2
floppy drive(s)
3
hard drive(s)
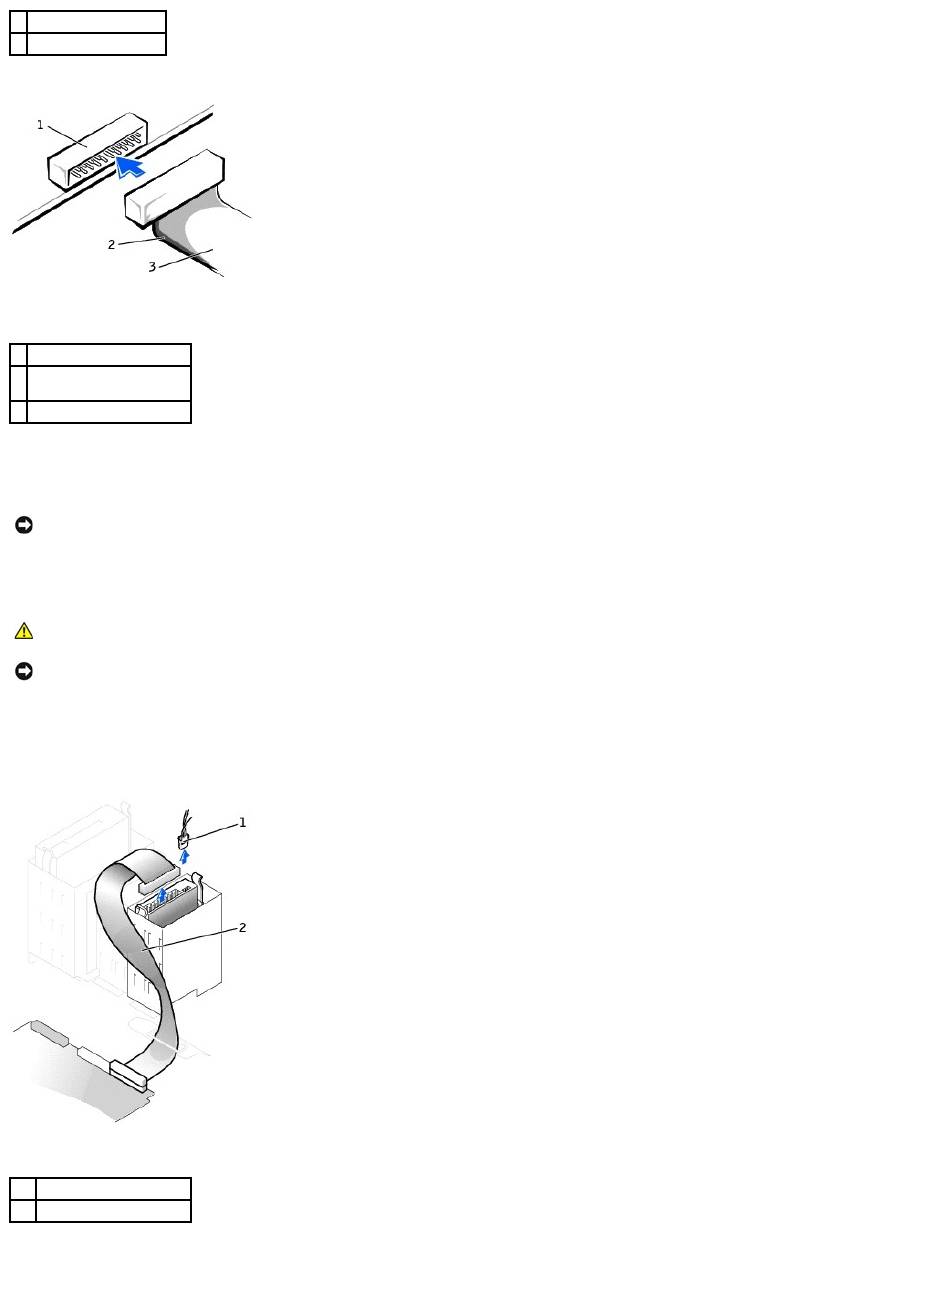
Most interface connectors are keyed for correct insertion; that is, a notch or a missing pin on one connector matches a tab or a filled-in hole on the other
connector. Keyed connectors ensure that the pin-1 wire in the cable (indicated by the colored stripe along one edge of the cable) goes to the pin-1 end of the
connector. The pin-1 end of a connector on a board or a card is usually indicated by a silk-screened "1" printed directly on the board or card.
Removing a Hard Drive
1. If you are replacing a hard drive that contains data you want to keep, back up your files before you begin this procedure.
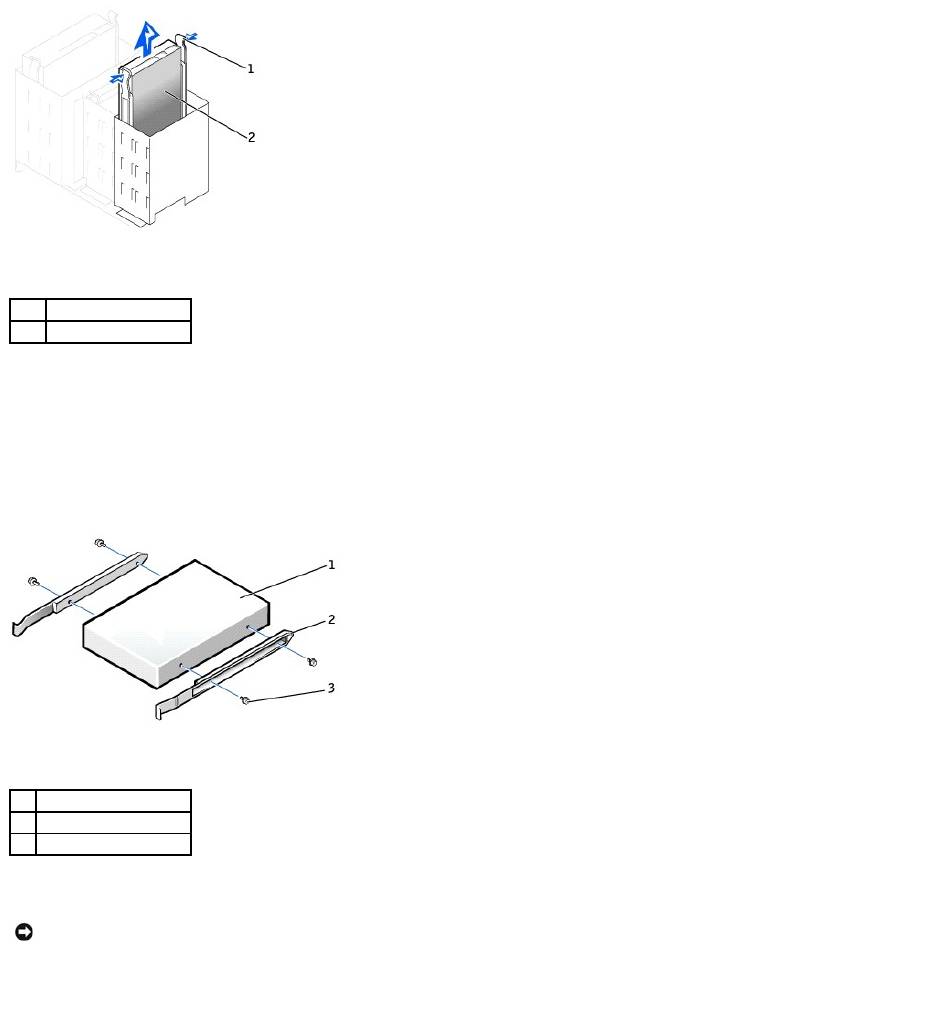
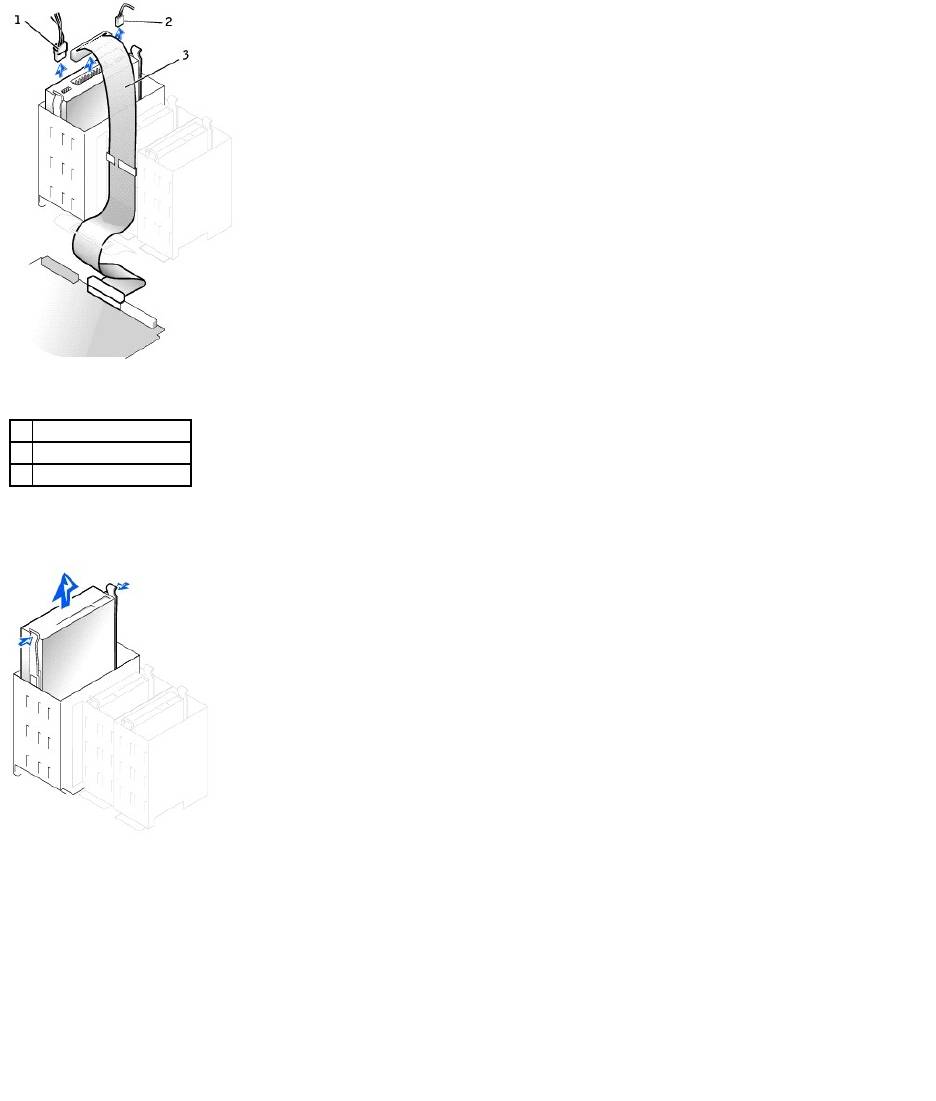
2. Disconnect the power and hard-drive cables from the drive.
3. Press in on the tabs on each side of the drive and slide the drive up and out.
1
power cable
2
power input connector
1
interface connector
2
colored stripe on edge of
interface cable
3
interface cable
NOTICE: When you connect an interface cable, do not place the colored stripe away from pin 1 of the connector. Reversing the cable prevents the drive
from operating and could damage the controller, the drive, or both.
CAUTION: Before you begin any of the procedures in this section, follow the safety instructions in the System Information Guide.
NOTICE: To avoid damage to the drive, do not set it on a hard surface. Instead, set the drive on a surface, such as a foam pad, that will sufficiently
cushion it.
1
power cable
2
hard-drive cable
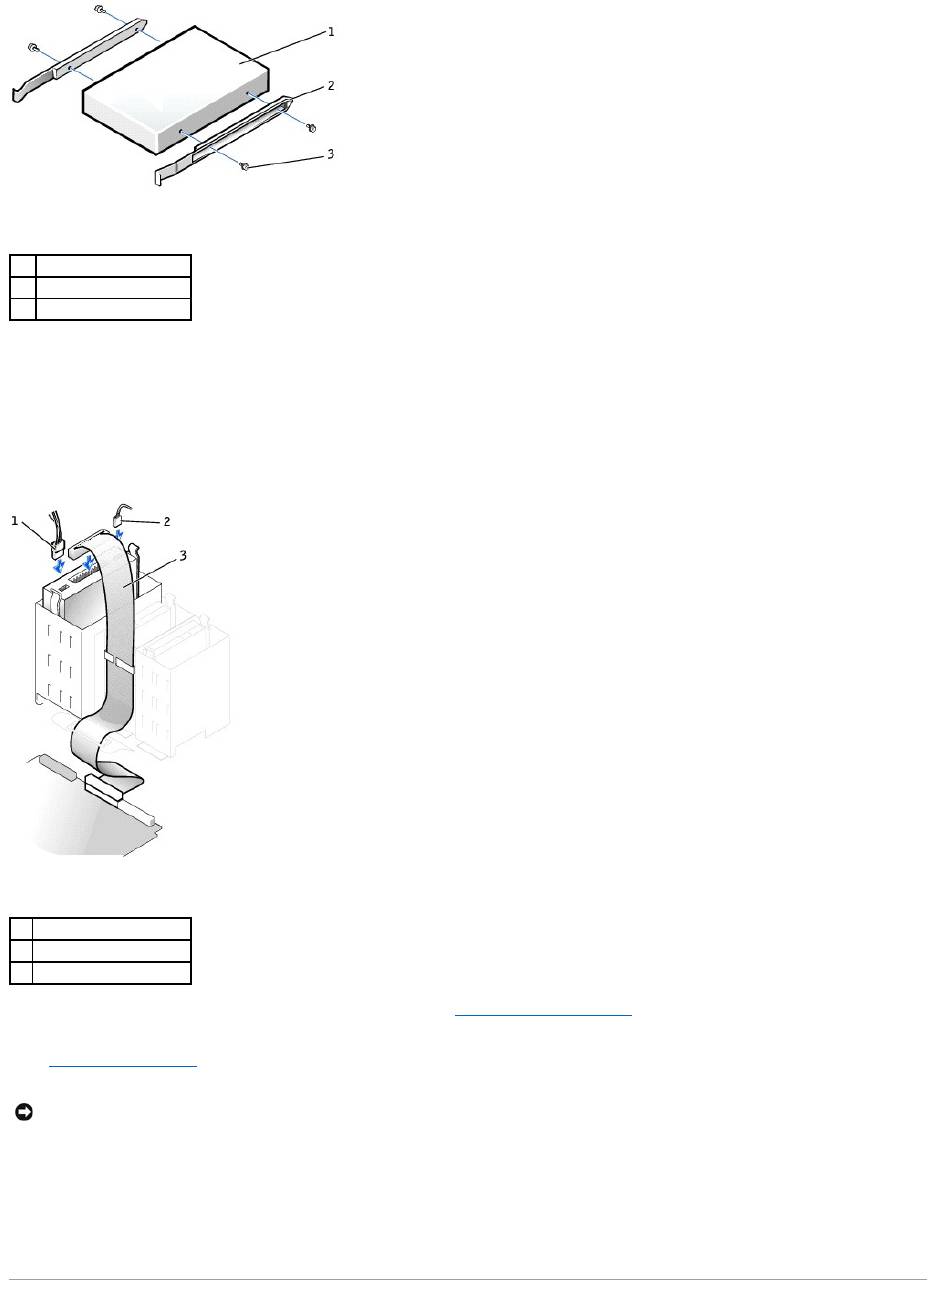
Installing a Hard Drive
1. Unpack the replacement hard drive, and prepare it for installation.
2. Check the documentation for the drive to verify that it is configured for your computer.
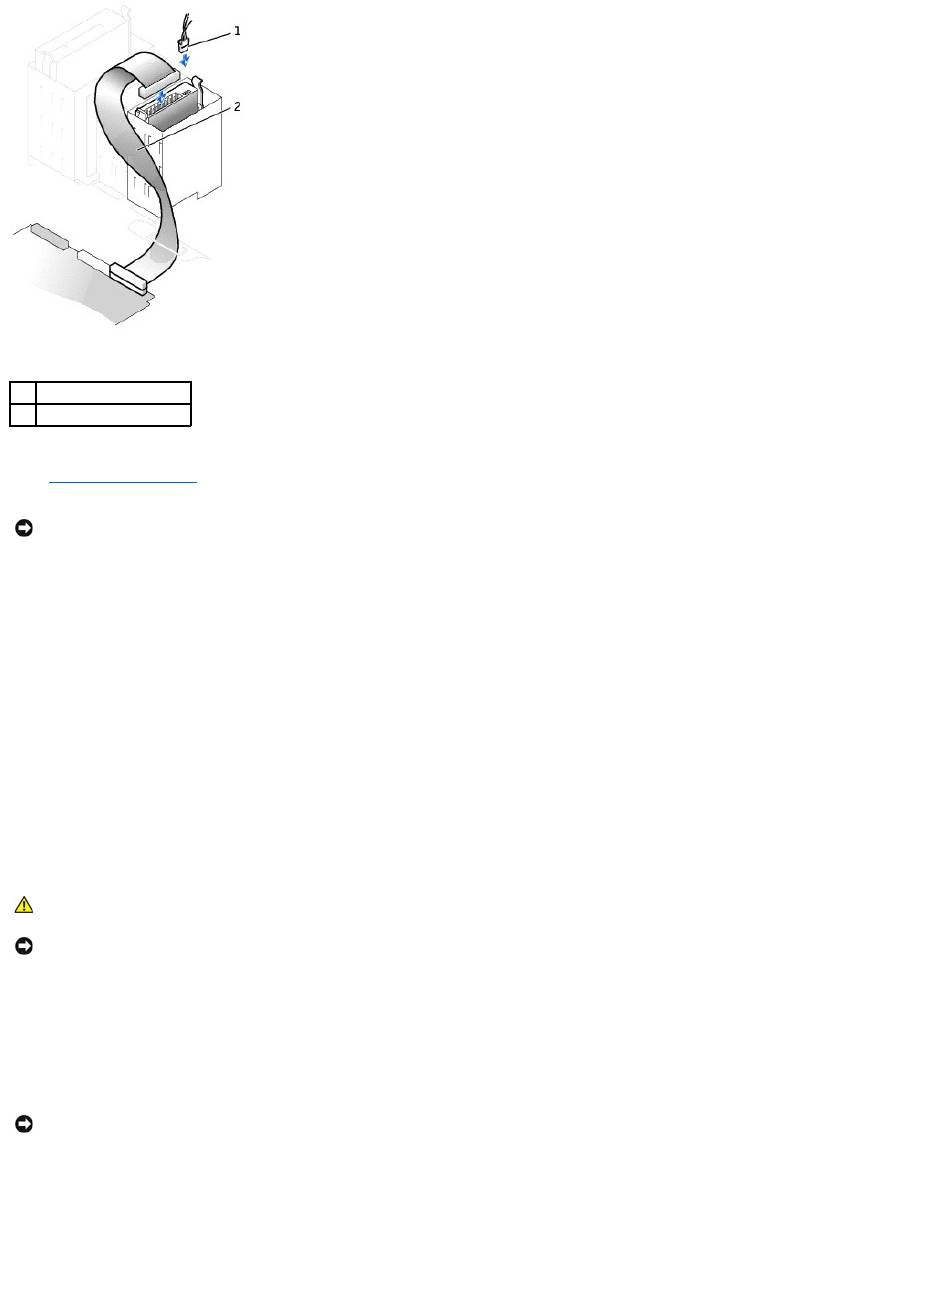
3. If your replacement hard drive does not have the bracket rails attached, remove the rails from the old drive by removing the two screws that secure
each rail to the drive. Attach the bracket rails to the new drive by aligning the screw holes on the drive with the screw holes on the bracket rails and
then inserting and tightening all four screws (two screws on each rail).
4. Gently slide the drive into place until the tabs securely click into position.
5. Connect the power and hard-drive cables to the drive.
1
tabs (2)
2
hard drive
1
drive
2
bracket rails (2)
3
screws (4)
NOTICE: Match the colored strip on the cable with pin 1 on the drive (pin 1 is marked as "1").
6. Check all connectors to be certain that they are properly cabled and firmly seated.
7. Close the computer cover.
8. Connect your computer and devices to electrical outlets, and turn them on.
See the documentation that came with the drive for instructions on installing any software required for drive operation.
9. If the drive you just installed is the primary drive, insert a bootable floppy disk into drive A.
10. Turn on the computer.
11. Enter system setup, and update the appropriate Primary Drive option (0 or 1).
12. Exit system setup, and restart the computer.
13. Partition and logically format your drive before you proceed to the next step.
See the documentation for your operating system for instructions.
14. Test the hard drive by running the Dell Diagnostics.
15. If the drive you just installed is the primary drive, install your operating system on the hard drive.
Adding a Second Hard Drive
1. Check the documentation for the drive to verify that it is configured for your computer.
2. Remove the two green plastic rails from the inside of the hard-drive bay by gently pulling the rails up and out of the bay.
3. Attach the rails to the hard drive using the two screws attached to the rails.
Ensure that the rail tabs are positioned at the back of the hard drive.
4. Remove the first hard drive from the upper bay and install it in the lower bay:
a. Disconnect the power and the hard-drive cables from the back of the first hard drive.
b. Press in the two green rail tabs and pull the first hard drive out of the upper bay.
c. Gently slide the first hard drive into the lower bay until you hear a click.
d. Reconnect the power and hard-drive cables to the back of the first hard drive.
5. Gently slide the new hard drive into the upper bay until you hear a click.
1
power cable
2
hard-drive cable
NOTICE: To connect a network cable, first plug the cable into the network wall jack and then plug it into the computer.
CAUTION: Before you begin any of the procedures in this section, follow the safety instructions in the System Information Guide.
NOTICE: To avoid damage to the drive, do not set it on a hard surface. Instead, set the drive on a surface, such as a foam pad, that will sufficiently
cushion it.
NOTICE: Do not install any drive into the lower hard-drive bay until you have removed the green drive rails from the inside of the hard-drive bay.
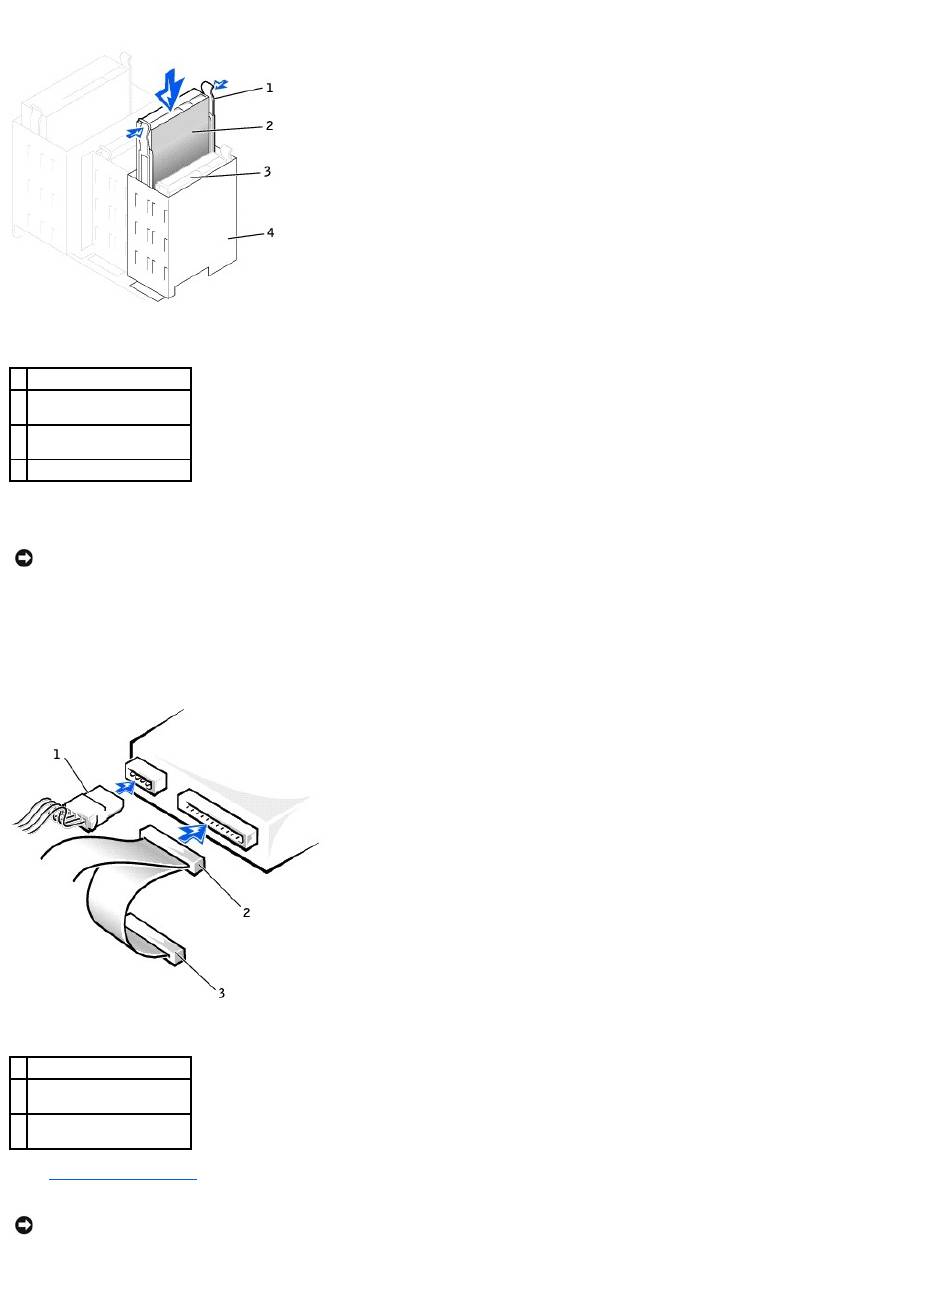
6. Connect a power cable to the drive.
7. Locate the extra connector on the drive cable that is attached to your first hard drive and attach the connector to the second hard drive.
Your computer uses cable-select drive cables. This means that the device connected to the end connector of the drive cable is the master device and
the device connected to the middle connector is the slave device. Be sure that the jumper setting on the new device is set for "cable select" (see the
documentation that came with the drive for information).
8. Close the computer cover.
9. Connect your computer and devices to electrical outlets, and turn them on.
10. See the documentation that came with the drive for instructions on installing any software required for drive operation.
1
rail tabs (2)
2
second hard drive in upper
bay
3
first hard drive in lower
bay
4
hard drive bay
NOTICE: Match the colored strip on the cable with pin 1 on the drive.
1
power cable
2
second hard-drive cable
(secondary drive)
3
first hard-drive cable
(primary boot drive)
NOTICE: To connect a network cable, first plug the cable into the network wall jack and then plug it into the computer.
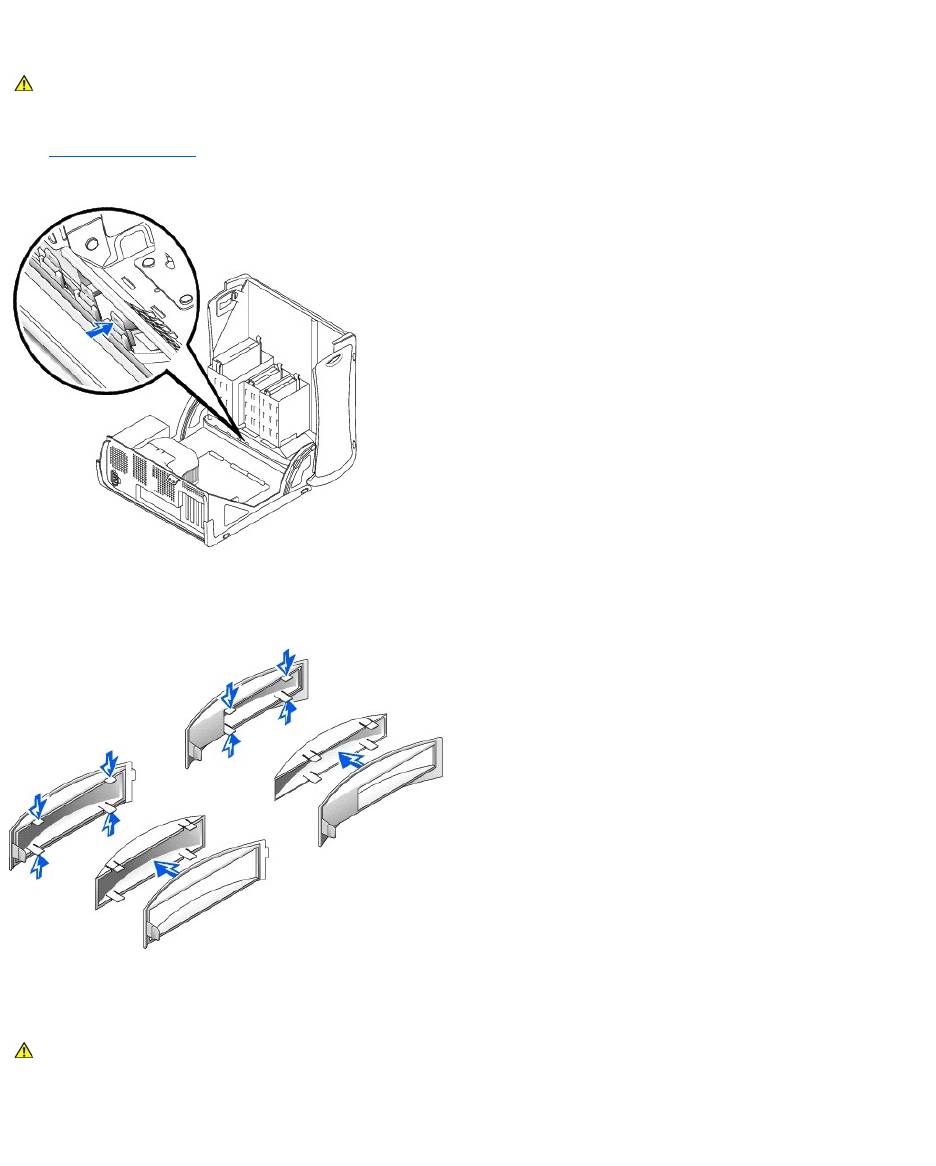
Front-Panel Inserts
If you are installing a new floppy or CD/DVD drive rather than replacing a drive, remove the front-panel inserts.
1. Open the computer cover to a 90-degree angle and release the insert tabs from inside the computer.
2. Press on the insert until it pops free of the front panel cover.
Removing a Floppy Drive
1. Disconnect the power and floppy-drive cables from the back of the floppy drive.
2. Disconnect the other end of the floppy-drive cable from the system board (labeled FLOPPY).
CAUTION: Before you begin any of the procedures in this section, follow the safety instructions in the System Information Guide.
CAUTION: Before you begin any of the procedures in this section, follow the safety instructions in the System Information Guide.
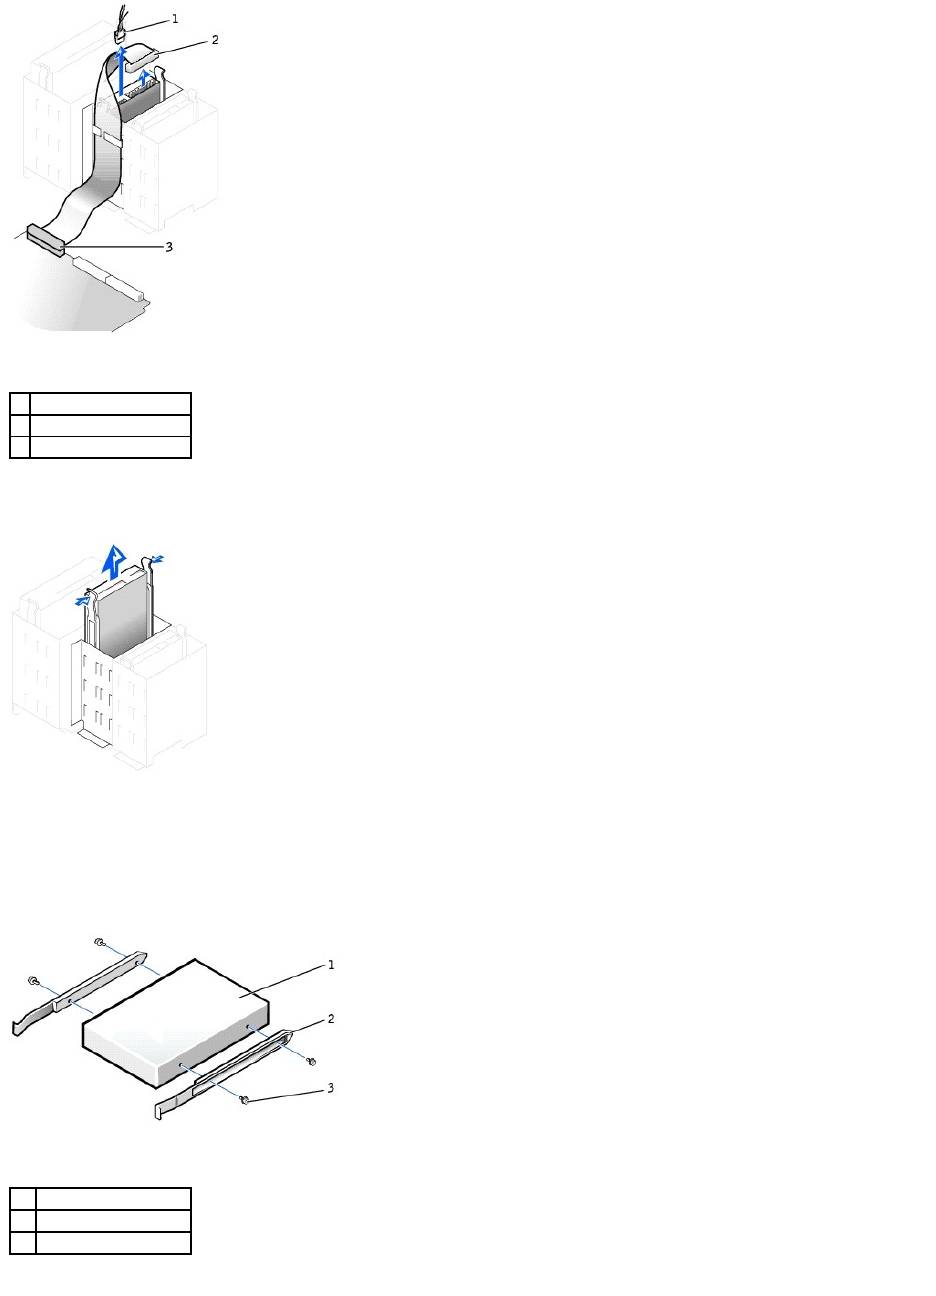
3. Press inward on the two tabs on the sides of the drive, slide the drive upward, and remove it from the floppy-drive bay.
Installing a Floppy Drive
1. If you are replacing a drive and the new drive does not have the bracket rails attached, remove the rails from the old drive by removing the two screws
that secure each rail to the drive. Attach the bracket to the new drive by aligning the screw holes on the drive with the screw holes on the bracket rails
and then inserting and tightening all four screws (two screws on each rail).
2. Gently slide the drive into place until the tabs securely click into position.
1
power cable
2
floppy-drive cable
3
floppy-drive connector
1
drive
2
bracket rails (2)
3
screws (4)
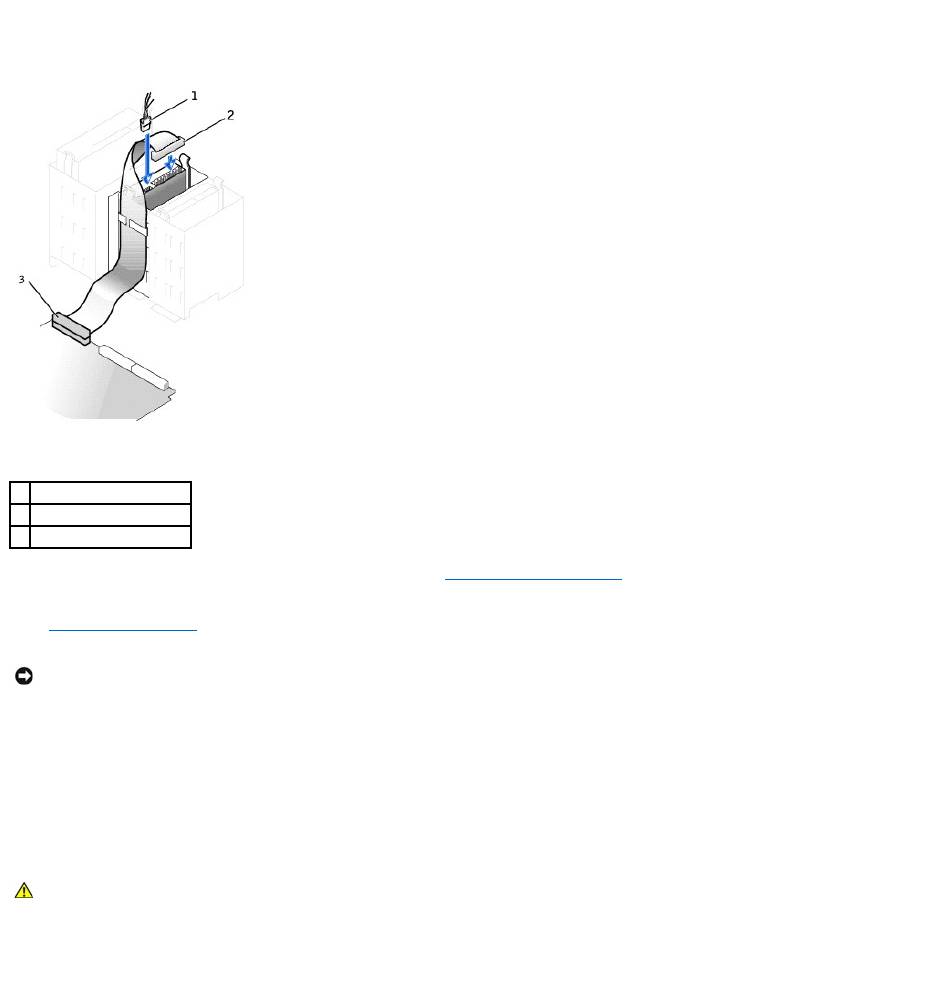
3. Attach the power and floppy-drive cables to the floppy drive.
4. Connect the other end of the floppy-drive cable to the connector labeled "FLOPPY" on the system board.
5. If you are installing a new floppy drive rather than replacing a drive, remove the front-panel inserts.
6. Check all cable connections, and fold cables out of the way to provide airflow for the fan and cooling vents.
7. Close the computer cover.
8. Connect your computer and devices to electrical outlets, and turn them on.
See the documentation that came with the drive for instructions on installing any software required for drive operation.
9. Enter system setup and update the appropriate Diskette Drive A option to reflect the size and capacity of your new floppy drive.
10. Verify that your computer works correctly by running the Dell Diagnostics.
Removing a CD/DVD Drive
1. Disconnect the power, audio, and CD/DVD drive cables from the back of the drive.
1
power cable
2
floppy-drive cable
3
floppy-drive connector
NOTICE: To connect a network cable, first plug the cable into the network wall jack and then plug it into the computer.
CAUTION: Before you begin any of the procedures in this section, follow the safety instructions in the System Information Guide.
2. Press inward on the two tabs on the sides of the drive, and then slide the drive upward and remove it from the drive bay.
Installing a CD/DVD Drive
1. If you are installing a new drive, unpack the drive and prepare it for installation.
Check the documentation that accompanied the drive to verify that the drive is configured for your computer. If you are installing an IDE drive, configure
the drive for the cable select setting.
2. Connect the new drive to the set of rails that are attached to the inside of the cover. If a set of rails is not attached inside the cover, contact Dell.
3. If you are installing a replacement drive and the new drive does not have the bracket rails attached, remove the rails from the old drive by removing
the two screws that secure each rail to the drive. Attach the bracket to the new drive by aligning the screw holes on the drive with the screw holes on
the bracket rails and then inserting and tightening all four screws (two screws on each rail).
1
power cable
2
audio cable
3
CD/DVD drive cable
4. Gently slide the drive into place until the tabs securely click into position.
5. If you are installing a drive that has its own controller card, install the controller card in a card slot.
See the documentation that accompanied the drive and controller card to verify that the configuration is correct for your computer. Change any settings
necessary for correct configuration.
6. Connect the power, audio, and CD/DVD drive cables to the drive.
7. If you are installing a new CD/DVD drive rather than replacing a drive, remove the front-panel inserts.
8. Check all cable connections, and fold cables out of the way to provide airflow for the fan and cooling vents.
9. Close the computer cover.
10. Connect your computer and devices to electrical outlets, and turn them on.
See the documentation that came with the drive for instructions on installing any software required for drive operation.
11. Update your configuration information by setting the appropriate Drive option (0 or 1) under Drives: Secondary to Auto. See "System Setup Options"
in your User's Guide for more information.
12. Verify that your computer works correctly by running the Dell Diagnostics.
1
drive
2
bracket rails (2)
3
screws (4)
1
power cable
2
audio cable
3
CD/DVD drive cable
NOTICE: To connect a network cable, first plug the cable into the network wall jack and then plug it into the computer.

Back to Contents Page
