Dell Precision 350: Control Panel
Control Panel : Dell Precision 350

Back to Contents Page
Control Panel
DellPrecision™Workstation350ServiceManual
Removing the Control Panel
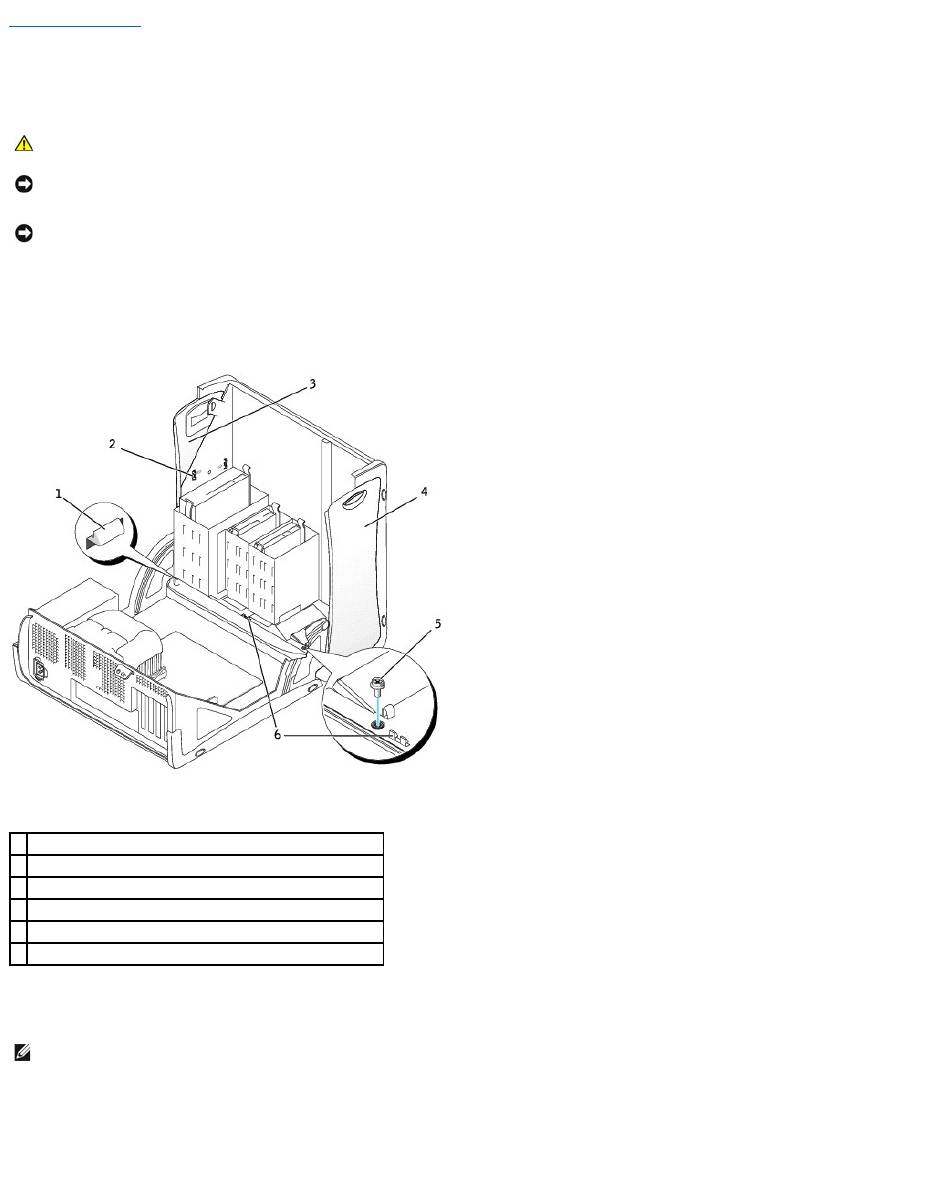
1. To remove the top and bottom panels of the computer, remove any installed CD drives and release all the tabs on each panel.
2. To prepare the computer cover for removal, release the three computer cover tabs (one tab is located by the CD drive and two tabs are located by the
I/O panel).
3. If necessary, remove the computer cover screw.
4. Close the computer and remove the computer cover.
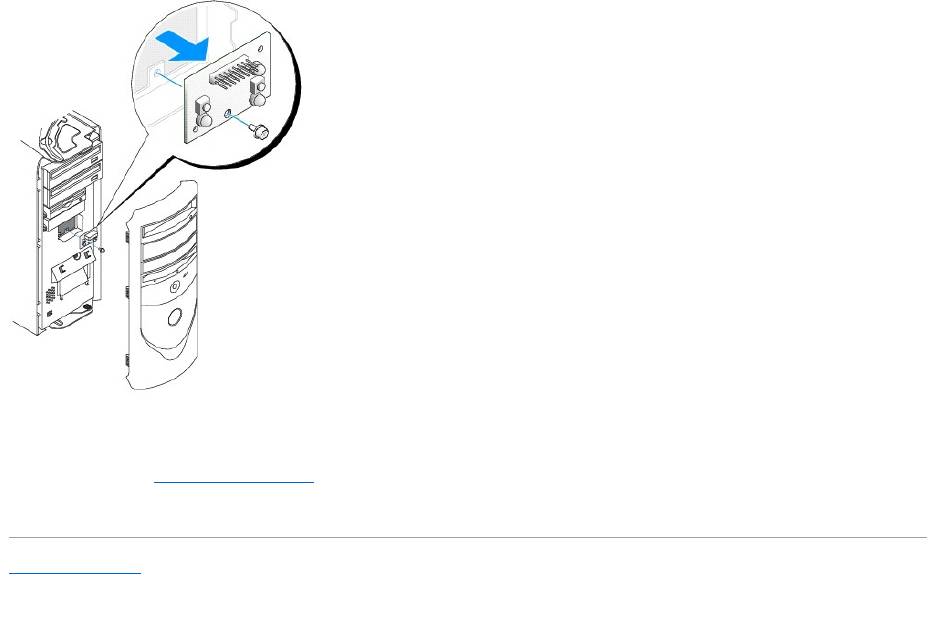
5. Remove the screw that secures the control panel to the computer, and pull the control panel away from the computer.
CAUTION: Before you perform this procedure, see the safety instructions in your System Information Guide.
NOTICE: To avoid electrostatic discharge, ground yourself by using a wrist grounding strap or by periodically touching an unpainted metal surface (such
as the back panel) on the computer.
NOTICE: Before you disconnect a device from the computer or remove a component from the system board, verify that the standby power light on the
system board has turned off. To locate the light, see "System Board Components."
1
computer cover tab (remove the CD drive to access this tab)
2
top-panel tabs
3
top panel
4
bottom panel
5
computer cover screw
6
computer cover tabs (2)
NOTE: To release the tab located by the CD drive, you can pry the computer cover away from the computer and pull out the tab.
Replacing the Control Panel
Follow the steps in the "Removing the Control Panel" procedure in the reverse order, ensuring that all tabs are secure.
Back to Contents Page
Back to Contents Page
Control Panel
DellPrecision™Workstation350ServiceManual
Removing the Control Panel
1. To remove the top and bottom panels of the computer, remove any installed CD drives and release all the tabs on each panel.
2. To prepare the computer cover for removal, release the three computer cover tabs (one tab is located by the CD drive and two tabs are located by the
I/O panel).
3. If necessary, remove the computer cover screw.
4. Close the computer and remove the computer cover.
5. Remove the screw that secures the control panel to the computer, and pull the control panel away from the computer.
CAUTION: Before you perform this procedure, see the safety instructions in your System Information Guide.
NOTICE: To avoid electrostatic discharge, ground yourself by using a wrist grounding strap or by periodically touching an unpainted metal surface (such
as the back panel) on the computer.
NOTICE: Before you disconnect a device from the computer or remove a component from the system board, verify that the standby power light on the
system board has turned off. To locate the light, see "System Board Components."
1
computer cover tab (remove the CD drive to access this tab)
2
top-panel tabs
3
top panel
4
bottom panel
5
computer cover screw
6
computer cover tabs (2)
NOTE: To release the tab located by the CD drive, you can pry the computer cover away from the computer and pull out the tab.

Replacing the Control Panel
Follow the steps in the "Removing the Control Panel" procedure in the reverse order, ensuring that all tabs are secure.
Back to Contents Page
