Pioneer KURO KRP-S02: INSTALLATION ON THE FLAT PANEL DISPLAY When using the table top stand: 1. Attaching the Speaker Brackets to the Speakers.
INSTALLATION ON THE FLAT PANEL DISPLAY When using the table top stand: 1. Attaching the Speaker Brackets to the Speakers.: Pioneer KURO KRP-S02
Table of contents
- CAUTION CHECKING THE ACCESSORIES Installation
- INSTALLATION ON THE FLAT PANEL DISPLAY When using the table top stand: 1. Attaching the Speaker Brackets to the Speakers.
- 2. Screw an supplied screw into the speaker mounting hole (lower of the two) at the top, rear of the flat panel display.
- Connect the speaker cables Connect the speaker cables
- When using the hung on wall unit: CABINET MAINTENANCE
- SPECIFICATIONS
9
English
English
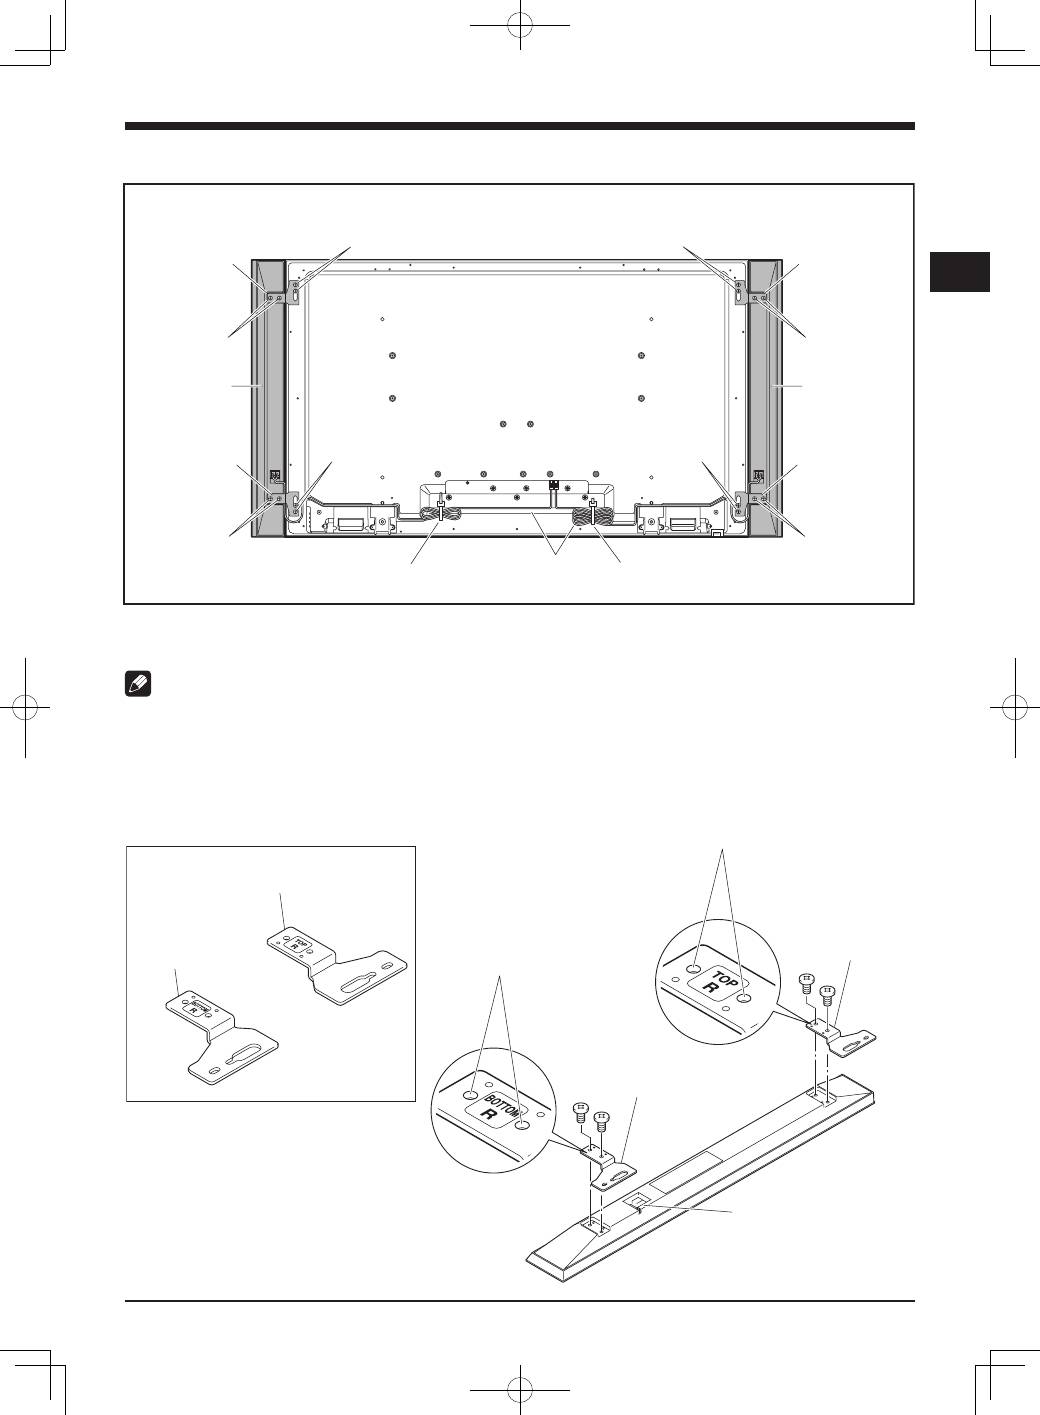
INSTALLATION ON THE FLAT PANEL DISPLAY
Flat panel display with the speaker installed
Speaker
Speaker
Speaker mounting
screw (M5 × 10 mm)
Speaker mounting
screw (M5 × 10 mm)
Speaker bracket
(for TOP-Left)
Speaker bracket
(for TOP-Right)
Speaker bracket
(for BOTTOM-Right)
Speaker bracket
(for BOTTOM-Left)
Speaker mounting
screw (M5 × 10 mm)
Speaker mounting
screw (M5 × 10 mm)
Speaker mounting
screw (M5 × 10 mm)
Speaker mounting
screw (M5 × 10 mm)
Cable clamp*
Cable clamp*
Speaker cable*
Speaker mounting
screw (M5 × 10 mm)
Speaker mounting
screw (M5 × 10 mm)
*: Accessories of the flat panel display
When using the table top stand:
NOTE:
Before attaching the speaker, please attach the KRP-TS01 series table top stand (or another flat panel display stand) to the flat panel
display.
1. Attaching the Speaker Brackets to the Speakers.
There are top and bottom speaker brackets for both the left and the right speakers. Attach the appropriate brackets to the top
and the bottom on the back of the speakers using the supplied screws.
(It shows the attachment of the bracket on the right side. It is attached on the left side by the same procedure.)
Screw holes
Speaker bracket
(For BOTTOM-Right)
Speaker bracket
(For BOTTOM-Right)
Speaker bracket
(For TOP-Right)
Place the speaker so its
terminals (bottom) are
facing you.
Speaker bracket
(For TOP-Right)
Screw holes
