Pioneer CP-ST100: Assembling the speaker stands
Assembling the speaker stands: Pioneer CP-ST100
Table of contents
CP-ST100_EN.book 3 ページ 2008年7月17日 木曜日 午前10時8分
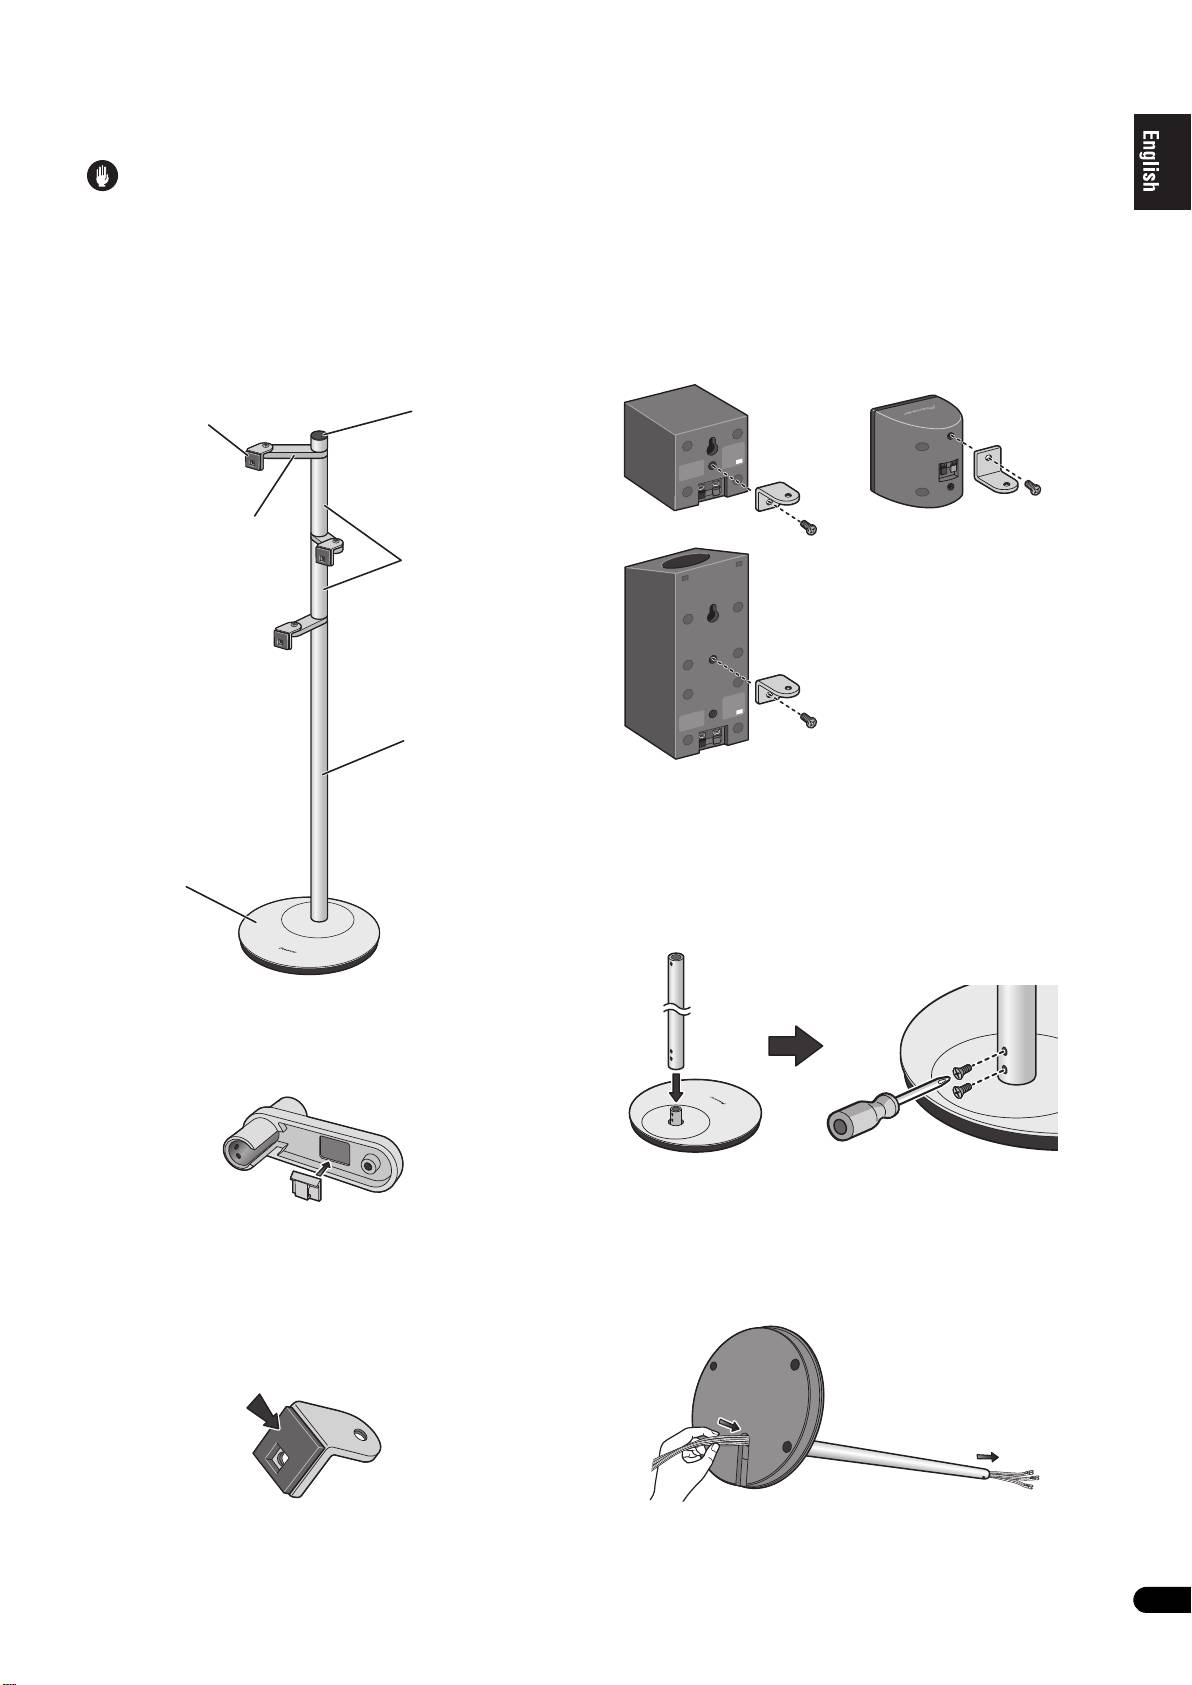
Fasten the angle bracket to the speaker. Orient the gasket
Assembling the speaker stands
material with the rear surface of the speaker, and align the
screw hole in the angle bracket with the speaker’s screw
Caution
hole, then use the furnished screw (M5xL10) to securely
fasten the angle bracket to the speaker.
• Pioneer is not responsible for any accidents or damage that
result from improper installation, misuse or modification of
• In the event the speaker is furnished with two screw holes,
fasten the angle bracket to the upper of the two holes.
the product, or natural disasters.
• The angle bracket has been originally designed to be
Assemble the speaker stands as illustrated below. Please note
mounted with the rounded angle arm oriented upwards, but
that a medium-sized Phillips screwdriver is required for
in the event interference occurs with speaker terminals, the
assembly.
rounded angle arm may also be mounted downward.
The accompanying illustration shows the fully assembled
Speaker Installation Examples
speaker stand, without speakers or wires.
Angle brackets
Cap
Arms
(In the event of interference
between speaker terminals
Supports (short)
and angle bracket)
Support (long)
3 Place a support (long) over the mounting post in the
stand base, and fasten securely with two countersunk
screws (M4xL6).
• The screw holes in the stand base are oriented to the rear
Stand base
side.
• The support (long) is designed with specific up-down
orientation. Confirm the orientation before assembling.
1 Fasten the wire clips to the arms.
Peel the protective paper backing from the clip and affix the
clip to the indentation on the underside of the arm as
shown.
4 Lay the stand on its side, and pass the speaker wires
into the hole in the stand base and through the
2 Fasten angle brackets to speakers.
support.
Peel the protective paper backing from the gasket and affix
Consult the owner’s manual for the speaker system and
the gasket to the angle bracket as shown.
confirm the proper wires to be used (wires may be color
coded).
• Affix the gasket to the square surface of the angle bracket. Be
sure to confirm the direction of the gasket so as to properly
align the gasket’s hole with the screw hole in the angle
bracket.
3
En
