Pioneer CP-2EX: Installing the speaker stands Assembling the speaker stands
Installing the speaker stands Assembling the speaker stands: Pioneer CP-2EX
Table of contents
- Installing the speaker stands Assembling the speaker stands
- Using the spikes
- Cabinet and stand maintenance Specifications
2
En
Thank you for buying this Pioneer product. Please read
through these operating instructions for proper assembly
and use. After you have finished reading the instructions, put
them away in a safe place for future reference.
Before you start
Before setting up your speaker system, we recommend
reading the operating instructions for your system thor-
oughly.
• Only use the screws supplied when fixing the speaker to
the speaker stand.
• Do not place the stand on an unstable and/or sloping
surface. The stand and speaker may fall and cause
injury.
• Do not use with any speaker system other than the one
for which the unit was designed. The stand may collapse
and be damaged and/or the speaker may fall and cause
injury.
• When moving the speaker and stand, first remove the
speaker from the stand, and then move the stand,
holding it by the two stems.
Installing the speaker stands
Place the stand on a stable, level surface; placing the stand
on an unstable surface can be dangerous.
When placing the speaker, keep in mind that the tone is
affected by the position of the speaker.
If the bass is insufficient, move the speaker closer to the wall.
The richest bass sound is obtained when the speaker is right
against the wall. If the bass is too powerful, producing a
muffled tone, move the speaker away from the wall. Placing
the speaker against a thick curtain may also be effective.
50 cm
20 cm
Adjust the position as necessary to obtain optimal sound
from your system.
• Pioneer assumes no liability whatsoever for damages
resulting from assembly, improper mounting, insuffi-
cient reinforcement, misuse of the product, acts of
nature, etc.
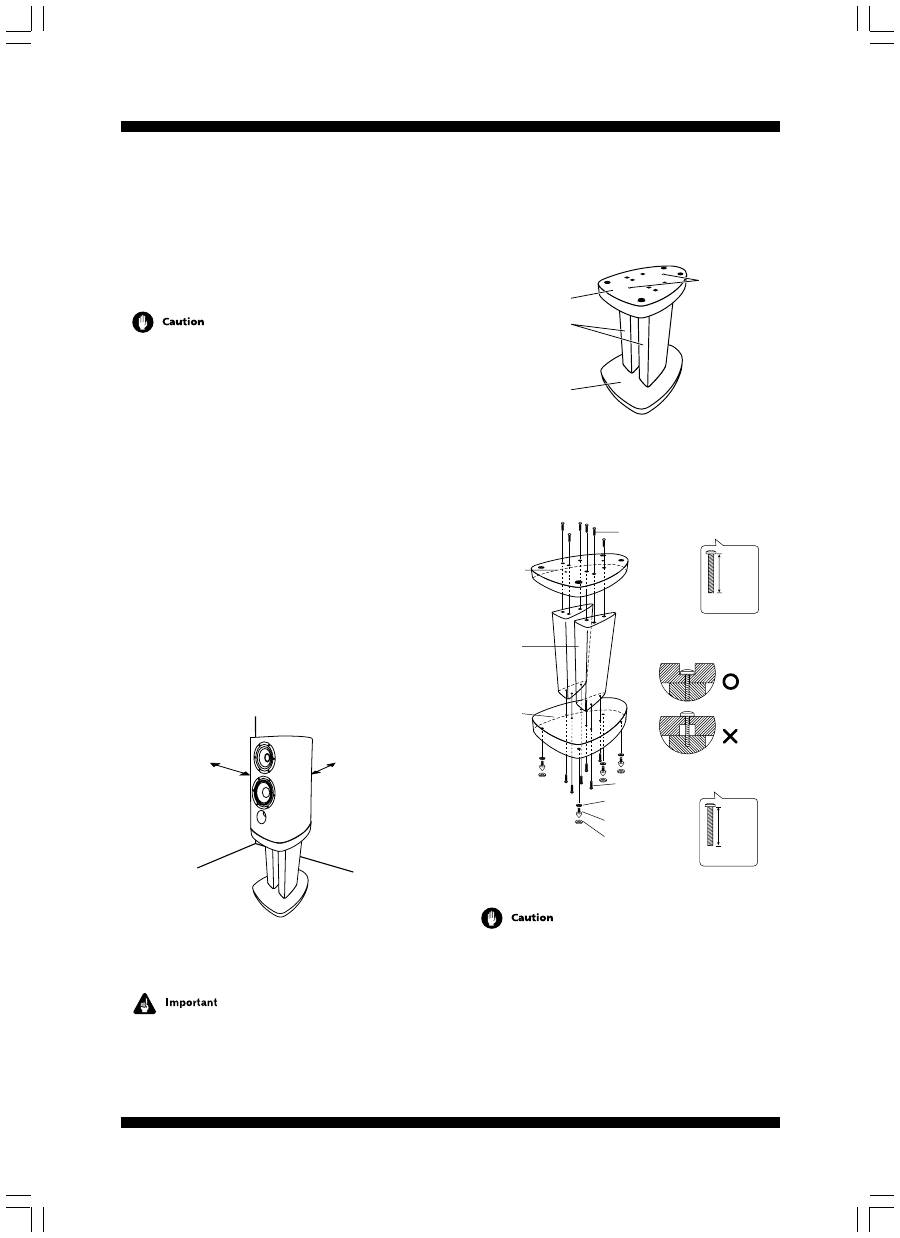
Assembling the speaker stands
Assemble the speaker stands as illustrated below. Please
note that a flathead screwdriver will be necessary for
assembly. The following illustration shows the fully assem-
bled speaker stand:
Screw holes
for securing
speaker
Speaker support
Stand base
Stand stems
•
Align the screw holes on the stand base and speaker
support with the screw holes in the two stems, then
insert the screws and tighten.
Screws (Bind head, M6xL40)
40 mm
Black
Screws (Bind head, M6xL40)
Nut
Spike (SBA6053)
Spike base
(SLA1057)
40 mm
Black
Speaker
support
Stand
base
Stand
stems
Please note that sunken
screw holes are provided
in the speaker support.
(SBA6054)
(SBA6054)
• Make sure you assemble the stand on a flat surface that
is relatively soft (such as a carpet).
• Make sure the screws are inserted in the screw holes as
shown above (with the screw head hidden) when
securing the speaker. Improper setup could result in
damage or injury if the speaker falls from the stand.
