Pioneer P1DAB-K: Installing the unit Loading the batteries Basic control
Installing the unit Loading the batteries Basic control: Pioneer P1DAB-K
Table of contents
- What’s in the box AAA size IEC R03 dry cell batteries x2 FM aerial (XC-P01 only), These guides Warranty card Power cord x2 Speaker caution sheet CD-ROM (Operating instructions) Remote control Remote control cable RCA audio cable (red/white plugs)
- English Information for users on collection and disposal of old equipment and used batteries POWER-CORD CAUTION Operating Environment VENTILATION CAUTION Condensation
- Connecting the speakers Connecting playback components Connecting aerials Connecting your iPod/iPhone/iPad mini or USB device
- Installing the unit Loading the batteries Basic control
4
En
•
When installing this unit, make sure to put it
on a level and stable surface.
Don
’
t install it on the following places:
–
on a color TV (the screen may distort)
–
near a cassette deck (or close to a device
that gives off a magnetic field). This may
interfere with the sound.
–
in direct sunlight
–
in damp or wet areas
–
in extremely hot or cold areas
–
in places where there is vibration or other
movement
–
in places that are very dusty or that have
hot fumes or oils (such as a kitchen)
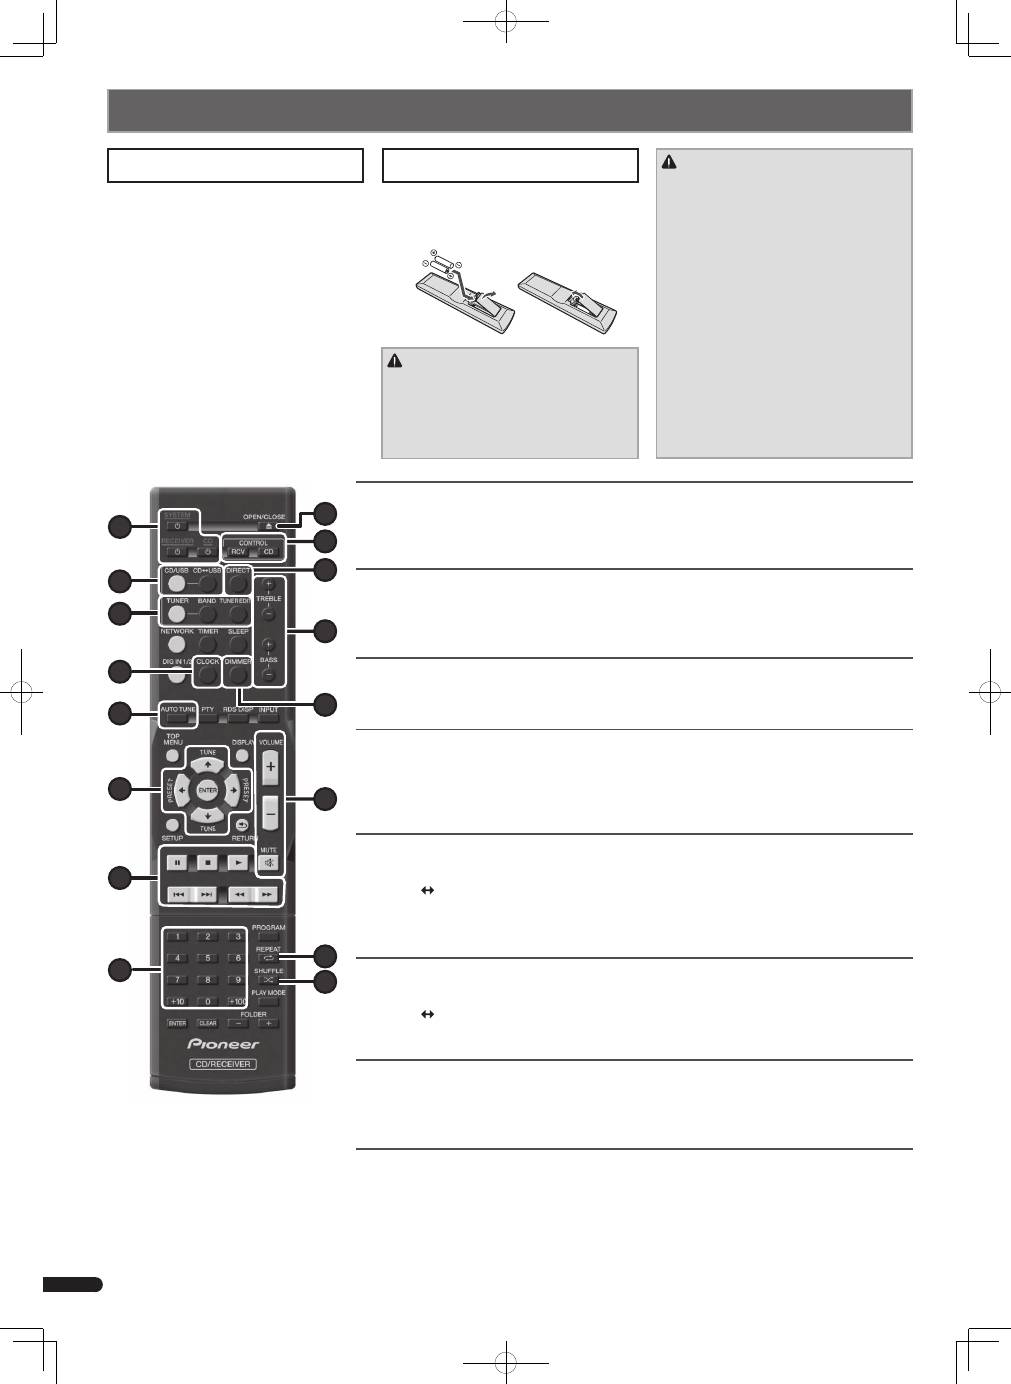
Switching the unit between standby and on
Press
u
SYSTEM
(
1
) to turn on the stereo receiver and CD player.
Press
u
RECEIVER
(
1
) to turn on the stereo receiver only.
Press
u
CD
(
1
) to turn on the CD player only.
Setting the clock
1. Press
CONTROL RCV
(
a
).
2. Press
CLOCK
(
4
) and press
ENTER
(
6
).
3. Use
k/l
and
ENTER
(
6
) to adjust the day of the week and time.
Control the display brightness
1. Press
CONTROL RCV
(for the stereo receiver) (
a
) or
CONTROL CD
(for the CD player) (
a
).
2. Press
DIMMER
(
d
) to switch the display brightness in four steps.
Control sound and adjust volume
Press
DIRECT
(
b
) to listen to the sound source in the original sound quality.
Press
TREBLE
+/–
(
c
) or
BASS +/–
(
c
) to adjust sound quality.
Press
VOLUME +/–
(
e
)
to adjust the listening volume.
Press
MUTE
(
e
) to mute the sound.
Listening to the audio CD
1. Press
CD/USB
(
2
).
2. Press
CD
USB
(
2
) to select CD function for the CD player.
3. Press
h
OPEN/CLOSE
(
9
) to open the disc tray, and place a disc.
4. Press
d
(
7
) to start playback. Use numeric buttons (
8
) or
o/p
(
7
) to select a track.
5. Press
REPEAT
(
f
) or
SHUFFLE
(
g
) to adjust the play mode.
Playing iPod/iPhone/iPad mini/USB device
1. Press
CD/USB
(
2
).
2. Press
CD
USB
(
2
) to select iPod/USB function for the CD player, and connect your iPod/iPhone/iPad
mini/USB device to the iPod/iPhone/iPad mini/USB terminal.
3. Press
d
(
7
) to start playback.
Listening to the radio
1. Press
TUNER
(
3
).
2. Press
CONTROL RCV
(
a
), and press
BAND
(
3
) to select a band (FM MONO or FM STEREO).
3. Use
TUNE
i/j
(
6
) to tune.
Listening to DAB (XP-01DAB only)
1. Press
TUNER
(
3
).
2. Press
CONTROL RCV
(
a
), and press
BAND
(
3
) to select DAB.
3. Press
TUNE
i/j
(
6
) to select a DAB service, and press
ENTER
(
6
).
When listening to DAB for the first time, press
AUTO TUNE
(
5
) instead of the operation in step 3.
14 10 12 11 15 16 13 9 1 5 6 7 3 2 4 8
The batteries included with this unit are to
check initial operations; they may not last
over a long period. We recommend using
alkaline batteries that have a longer life.
CAUTION
•
Incorrect use of batteries may result in
such hazards as leakage and bursting.
Observe the following precautions:
–
Never use new and old batteries together.
–
Insert the plus and minus sides of the
batteries properly according to the marks
in the battery case.
–
Batteries with the same shape may have
different voltages. Do not use different
batteries together.
–
When inserting the batteries, make
sure not to damage the springs on the
battery’s (–) terminals. This can cause
batteries to leak or overheat.
–
When disposing of used batteries, please
comply with governmental regulations or
environmental public institution’s rules
that apply in your country/area.
WARNING
•
Do not use or store batteries in direct
sunlight or other excessively hot place,
such as inside a car or near a heater. This
can cause batteries to leak, overheat,
explode or catch fire. It can also reduce the
life or performance of batteries.
Installing the unit
Loading the batteries
Basic control
XC_P01_P01DAB_QSG.indb 4
2012/12/21 13:32:43
