Pioneer S-81-QL: Connections
Connections: Pioneer S-81-QL
Table of contents
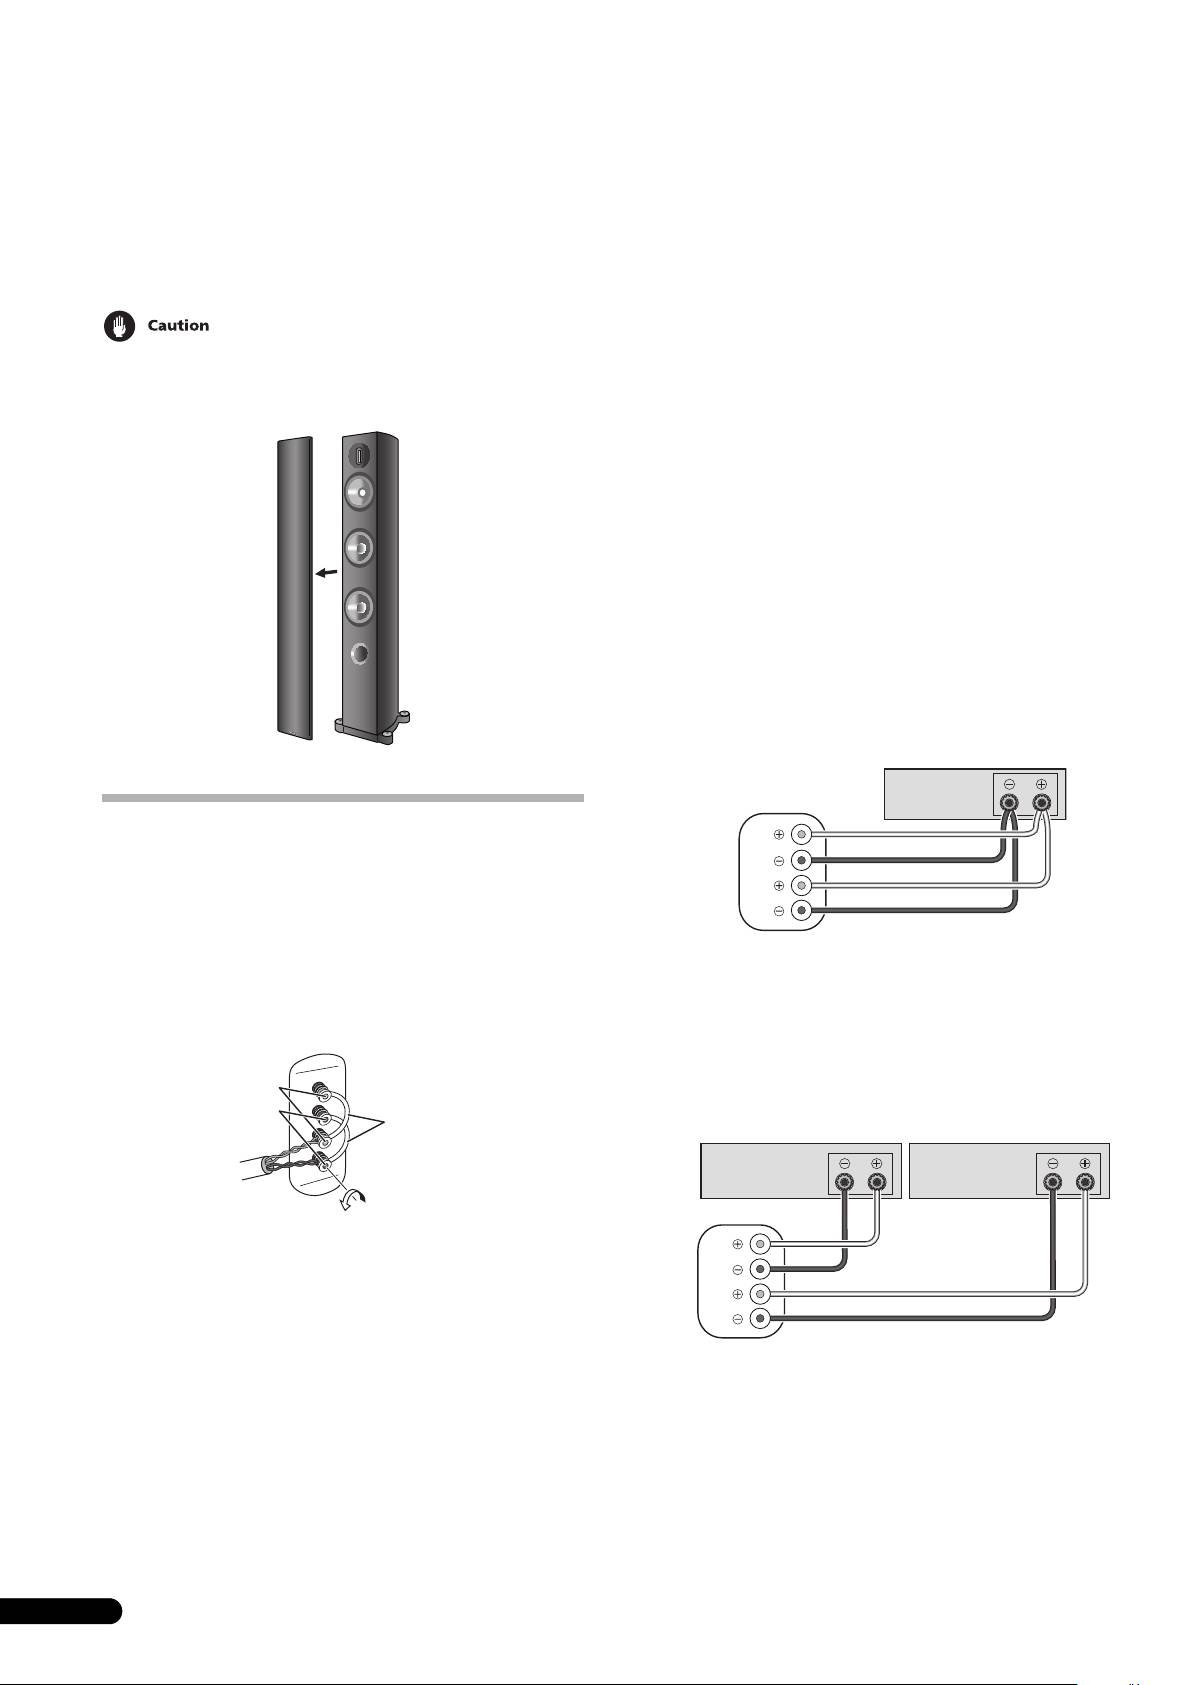
Attaching/removing the grille
• If the cables’ wires happen to be pushed out of the terminals,
This speaker system comes with grille which may be attached and
allowing the wires to come into contact with each other, it
removed by:
places an excessive additional load on the amp. This may
cause the amp to stop functioning, and may even damage the
1 To attach the grille, align the grille with the speaker body
amp.
and press gently.
• When using a set of speakers connected to an amplifier, you
2 To remove the grille, hold the grille with both hands near
won’t be able to obtain the normal stereo effect if the polarity
the middle and pull gently toward you to separate the grille
(+, –) of one of the speakers (left or right) is reversed.
from the speaker.
CAUTION
• Magnets are used for holding the grille in place. Do not place
the grilles near devices that may be susceptible to magnetic
influence (CRT televisions, etc.).
Bi-Wire connections
Bi-wiring requires two cables for each speaker, one for high
frequencies and one for low frequencies. Using separate cables
for the high end and low end improves the sound.
1 Switch off the power to your amplifier.
2R
emove the two short bars.
• In this state, the low-frequency speakers and the higher-
frequency speakers are completely independent. Store the
short bars in a safe place for later use.
• The lower terminals are for the bass, and the upper terminals
are for midrange and treble sounds.
• Connecting the cables with reversed polarity may degrade the
tone seriously. Confirm that the cables are connected
properly.
Connections
This speaker does not include speaker cables used for connecting
to an amplifier.
Connecting the cables
1 Switch off the power to your amplifier.
2 Connect the speaker cables to the input terminals (lower)
Bi-Amplification connections
on the back of the speaker. For input terminal polarity, red is
Bi-amping is an even more powerful way of connecting your
positive (+) and black is negative (–).
speakers. Just as with bi-wiring, the input terminal short bars are
removed, but here the low-frequency terminals are connected to a
Red terminal
(+)
separate, dedicated low-frequency amp, and the high-frequency
terminals are connected to a dedicated high-frequency amp.
Black terminal
(−)
Short bar connectors
3 Connect the other ends of the cables to the amp's
speaker output terminals (for more details, refer to your amp
instruction manual).
• Grasp the cap knobs on the lower input terminals and rotate
them to the left (counter-clockwise), insert the speaker cable
wires into the holes in the terminal posts, then tighten the
knobs to secure the short bar as well as the wires.
• You can also connect the speaker’s terminals with a banana
plug. When using a banana plug, be sure to remove the cap at
the tip of the input terminal.
• After connecting the plugs, pull lightly on the cables to make
sure that the ends of the cables are securely connected to the
terminals. Poor connections can create noise and
interruptions in the sound.
4
En
T
hese speaker terminals carry HAZARDOUS LIVE
voltage. To prevent the risk of electric shock when
connecting or disconnecting the speaker cables,
disconnect the power cord before touching any
uninsulated parts.
D3-4-2-2-3_A_En
(Only one channel shown)
Amplifier (rear)
Speaker
SPEAKERS OUTPUT
HF
HF
LF
LF
Speaker (rear): Input panel
FRRD-232-A_S-81_En.book 4 ページ 2008年7月22日 火曜日 午後2時26分
(Only one channel shown) (Only one channel shown)
Amplifier (rear)
Amplifier (rear)
(High frequency)
(Low frequency)
SPEAKERS OUTPUT
SPEAKERS OUTPUT
Speaker
HF
HF
LF
LF
Speaker (rear): Input panel
