Pioneer S-81-K: How to install
How to install: Pioneer S-81-K
Table of contents
FRRD-232-A_S-81_En.book 3 ページ 2008年7月22日 火曜日 午後2時26分
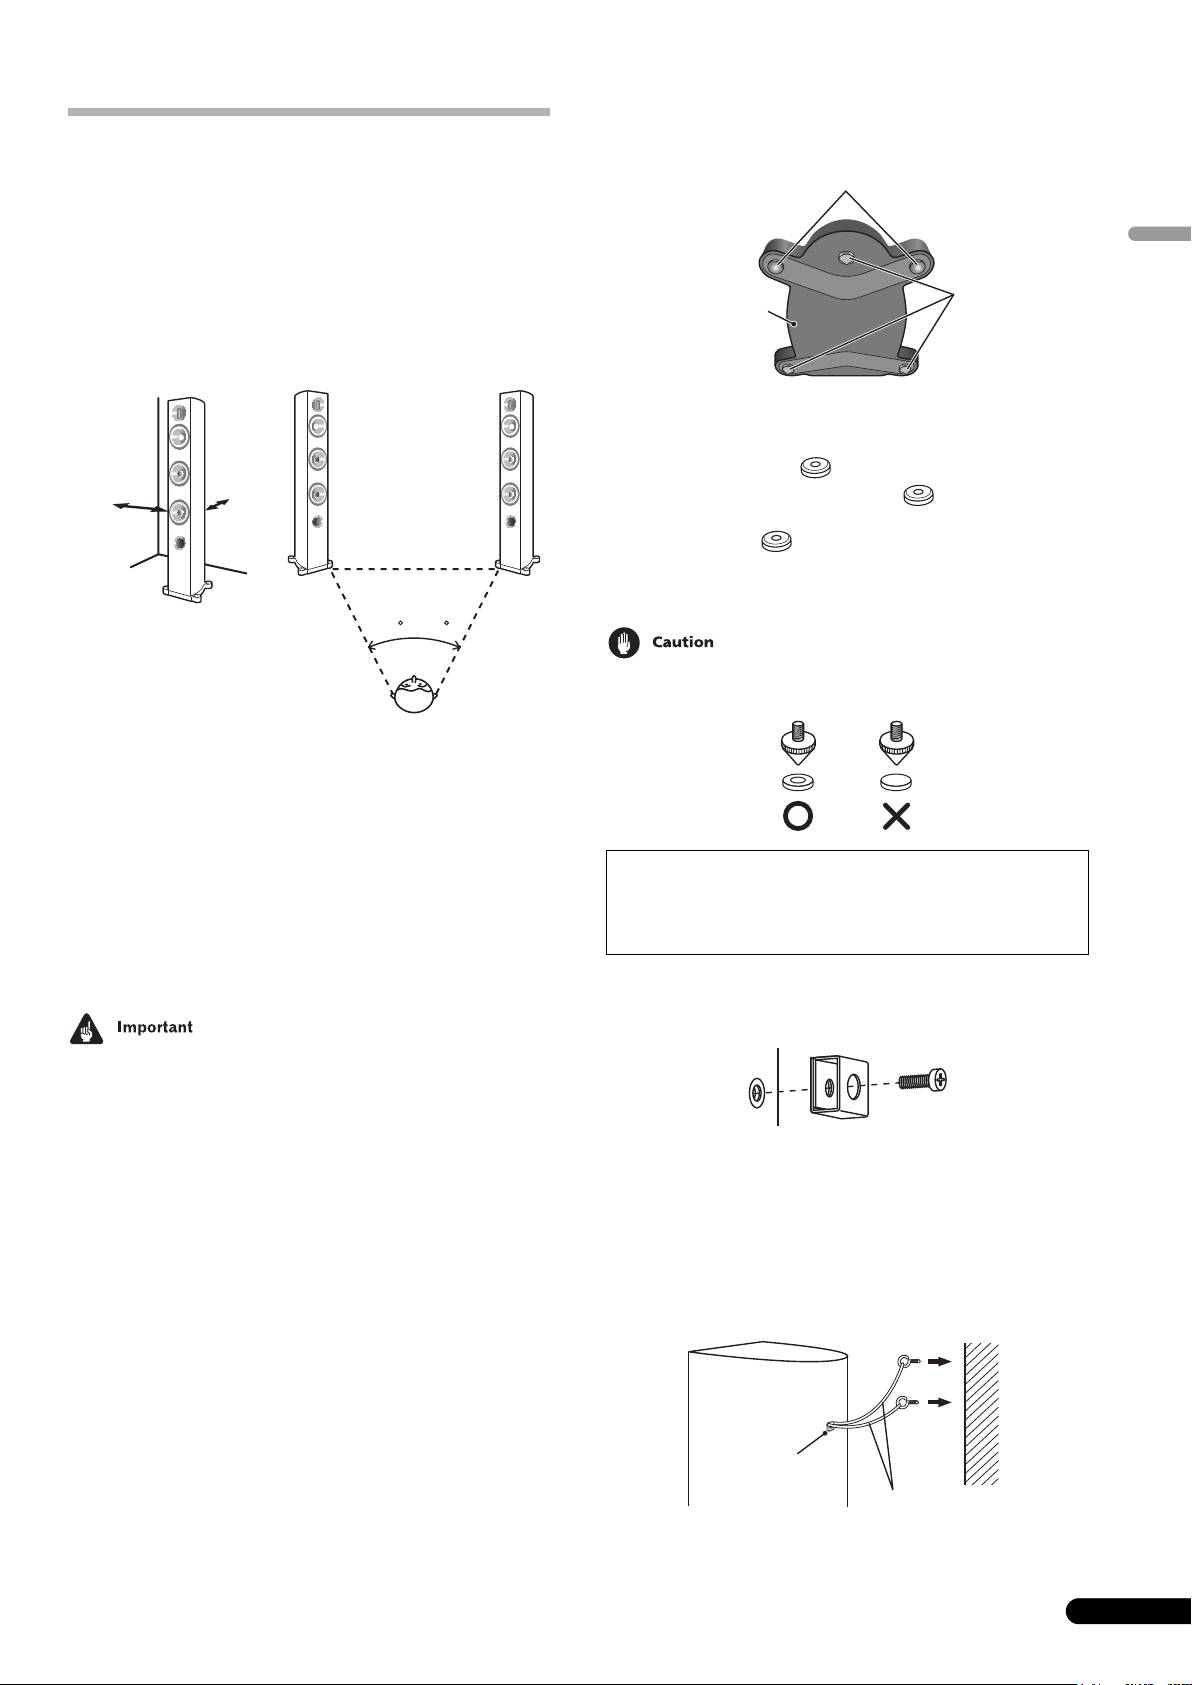
Using the spikes
This speaker system is supported by three points (the front two
How to install
legs, and the back spike located between the back two legs).
Tip-prevention legs
Choosing where to place the speaker systems
• Sounds played through speaker systems are easily affected in
Back
subtle ways by the conditions in the listening space.
English
• For best sound, choose a solid floor upon which to place the
speakers, and position the speakers as shown below. The level
Spikes
of low sounds can be adjusted by moving the speakers closer
Cabinet base
to or further from the wall. Adjust the speakers so that they are
equidistant from their respective side walls to assure balanced
sound.
Front
1 Set the spike bases in the positions where the points of
the three spikes will strike when the speaker is set down.
50 cm
20 cm
(19
11
/
(7
7
16
in.)
/
8
in.)
2 Set the speaker on the spike bases and check to confirm
the speaker does not rock.
50 to 60
• Always use the spike bases as shown, with the indented
surface facing up to receive the spike point.
• Place the left and right speakers equal distances from your
listening position for good stereo sound. Use speaker cords of
the same length for each speaker.
• So far as possible, place the front left and front right speakers
on the same plane as the TV screen.
• To achieve optimum surround sound, you should place the TV
between the left and right speakers, with the speakers
If you do not use the spike bases when placing the
pointing at a 50 to 60 degree angle toward the listening
speakers, the spikes may cause damage to the floor. If
position.
you plan on using the spikes we highly recommend to
• If the room has a lot of reverberation, we recommend hanging
use the spike bases.
heavy fabric on the walls, and/or putting a carpet on the floor
to damp the sound. For best results, cover walls completely.
Mounting the Fall-Prevention Fastener
• Using the included screw, tightly secure the metal catch to the
backside of the speaker.
• Pioneer assumes no liability whatsoever for damages
resulting from assembly, improper mounting, insufficient
reinforcement, misuse of the product, acts of nature, etc.
S-81-QL only
• Pass a commercially-available reinforced string through the
• The cabinet uses sliced veneer made of natural wood. Do not
metal catch to securely support the speaker to the wall. Be
place the speaker where it will be in direct sunlight, and avoid
sure that the wall to which you fasten the speaker is strong
positioning it near heaters and air conditioners. Doing so may
enough to support the weight of the speaker. After fastening
cause warping and discoloration of the speaker cabinet and
the speaker, make sure that it does not fall over.
damage to the speaker.
• The speaker can incur damage in the event of a fall.
• Do not attach the metal catch directly to the wall. It should
only be used in conjunction with reinforced string to prevent
the speaker from falling.
Metal catch
Reinforced strings
Backside of speaker
• Pass two reinforced strings through the metal catch, and
fasten the speaker to the wall as shown above.
3
En
