Pioneer A-70-K: Operation
Operation: Pioneer A-70-K
Table of contents
Operation 04
English
Chapter 4:
Operation
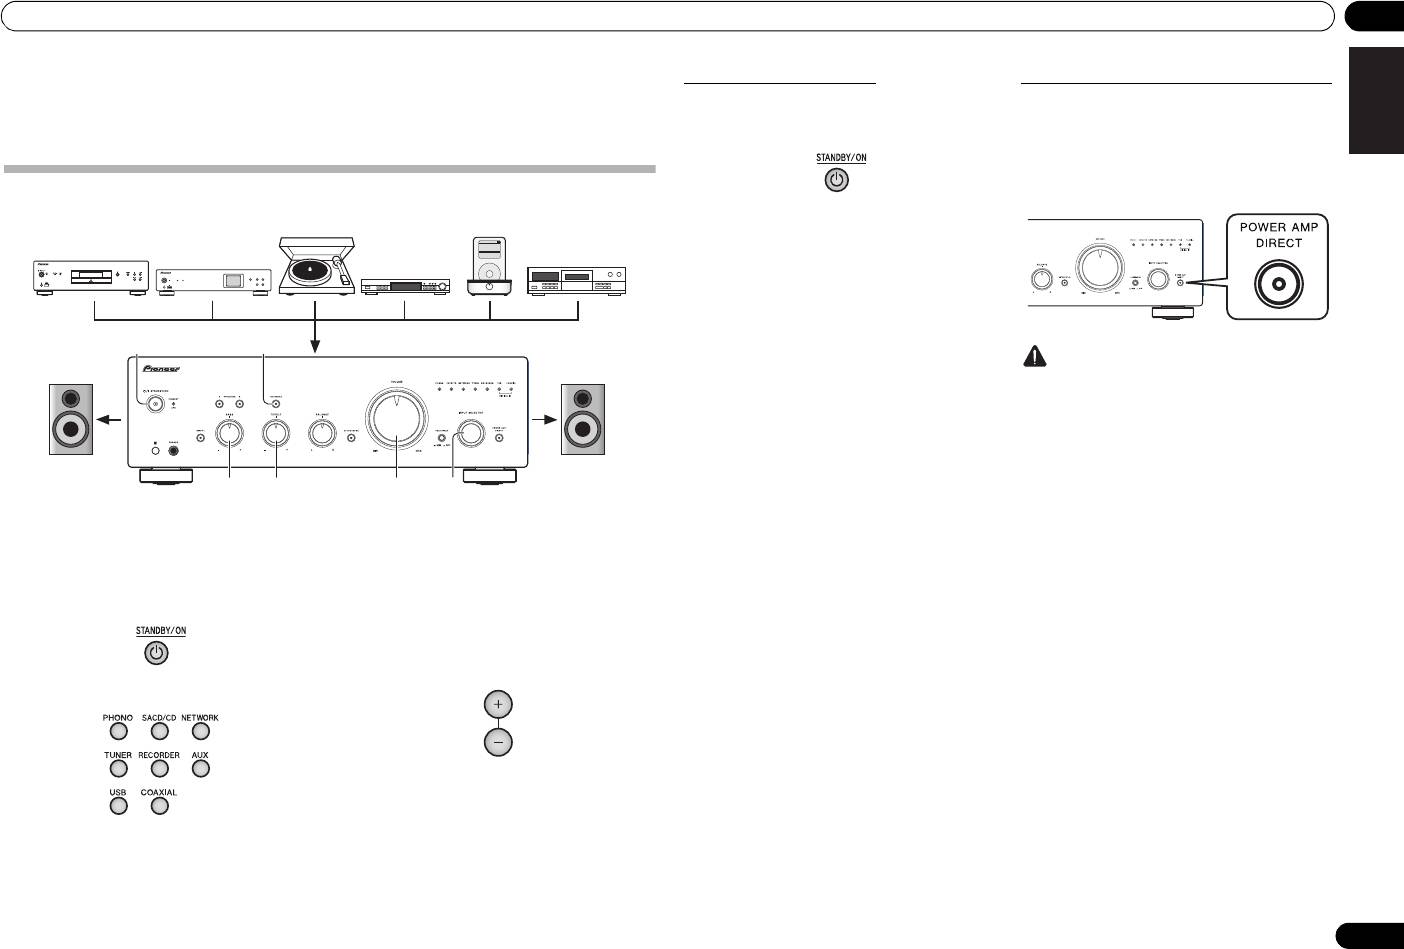
Playback
DeutschFrançais
Italiano Español Русский
1 Turn on the power of the playback
• In the case of the A-70, if PHONO is selected, use
the CARTRIDGE select switch to designate the type
component.
of cartridge used with your turntable, either MM
Nederlands
() or MC ().
2 Turn power ON to the unit.
• If the unit is in the standby mode, press the remote
4 Start playback of the component you
control’s STANDBY/ON button.
selected in step 1.
5 Adjust playback volume with
VOLUME
control.
3 Select the source you want to playback.
6 Adjust the tone to your preference using
the
BASS
and
TREBLE
controls, and
LOUDNESS
button.
Select the playback component.
If the DIRECT button has been set to ON, these controls
are disabled.
• When using the front panel controls, rotate the
INPUT SELECTOR knob.
11
En
Music>
Extras>
iPod
Settings>
Shuffle Songs
Backlight
MENU
/I STANDBY/ON
FUNCTION
NETWORK AUDIO PLAYER
N-50
iPod/USB
5V 2.1A
STANDBY
PURE AUDIO Hi-Bit 32
62
3566
Turntable
iPod dock, etc
SACD/CD player
CD recorder or
Network audio player
tape deck
Tuner
Playback
Playback
A70_SYXE8.book 11 ページ 2012年7月27日 金曜日 午後6時53分
Set the power to Standby
When using the unit as a power amplifier
When a pre-amplifier is connected to the unit’s POWER
1 Press the remote control’s
STANDBY/
AMP DIRECT IN terminals, the unit can be used as a
ON
button.
power amplifier.
1 Press the
POWER AMP DIRECT
button
on the front panel of the unit.
The POWER AMP DIRECT indicator will light.
The next time you wish to turn on the power, press the
remote control’s STANDBY/ON button.
• If the front panel’s /I STANDBY/ON button is
pressed, the power will be turned off. In this case, if
the power is off, pressing the remote control’s
STANDBY/ON button will not turn on the power.
To turn on the power again, press the front panel’s
/I STANDBY/ON button.
Caution
• When the POWER AMP DIRECT indicator is
lighted, operations change as follows:
– The unit’s front-panel VOLUME, BASS, TREBLE,
and BALANCE controls are disabled. These
adjustments are controlled by the component
connected to the unit’s POWER AMP DIRECT IN
terminals.
–The LOUDNESS button and ATTENUATOR
button (A-70 only) are disabled.
– When the POWER AMP DIRECT indicator is
lighted, sound volume from the unit will
automatically be fixed at its maximum output.
When using this unit as a power amplifier,
check the output level of the component
connected to the POWER AMP DIRECT IN
terminals and set it to a low level as appropriate
before turning on the POWER AMP DIRECT
indicator. If the sound volume of the component
connected to the POWER AMP DIRECT IN
terminals is initially set to a high output level,
VOLUME
loud sound may suddenly be output when the
POWER AMP DIRECT indicator lights.
– Sound is not produced from the PHONES jack
and RECORDER OUT terminals.
• For more information, consult the operating
instructions for the component connected to the
unit’s POWER AMP DIRECT IN terminals.
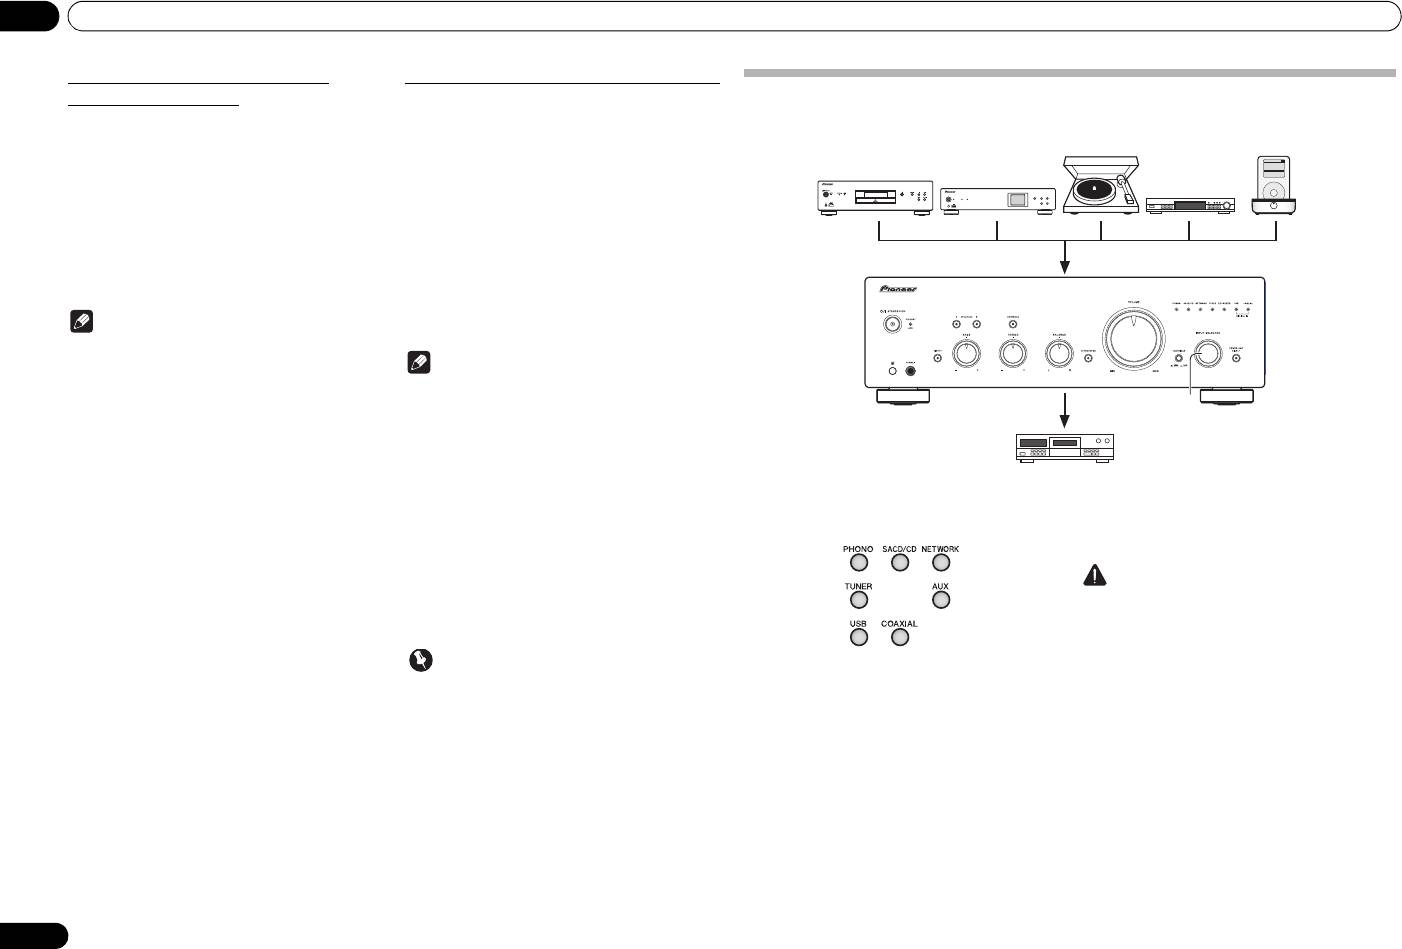
04 Operation
Playing music from a digital audio
Playing music from a computer (A-70 only)
component (A-70 only)
Use this function to play digital audio input to the unit's
Making an audio recording
rear panel DIGITAL IN USB port.
Outputs digital signals input to the DIGITAL IN
You can make an audio recording from any audio source connected to the amplifier.
COAXIAL connectors.
1 Connect the unit to a computer via USB
1 Make a digital input connection.
cable
Extras>
Music>
iPod
Settings>
Backlight
Shuffle Songs
• See Digital audio input connections on page 6.
• See Using a USB cable to connect to a computer on
MENU
page 7.
/I STANDBY/ON
FUNCTION
NETWORK AUDIO PLAYER
N-50
STANDBY
PURE AUDIO Hi-Bit 32
2 Press
COAXIAL
to select
DIGITAL IN
iPod/USB
5V 2.1A
COAXIAL
as the input source.
2 Press
USB
to select
DIGITAL IN USB
as
• When using the front panel controls, rotate the
the input source.
INPUT SELECTOR knob.
• When using the front panel controls, rotate the
• Sound is produced from the RECORDER OUT
INPUT SELECTOR knob.
terminals.
• Sound is produced from the RECORDER OUT
terminals.
Note
3 Begin playback on the computer.
• Digital signal formats that can be input to this unit
include linear PCM signals with sampling rates and
Note
quantitative bits up to 192 kHz/32 bits (Depending
on the connected device and environment,
• When using a USB cable to connect this unit to a
operation may not be successful).
computer for playing music files, the following
1
linear PCM digital signals are supported:
– Quantitative bits: 16 bit, 24 bit, 32 bit
– Sampling rates: 44.1 kHz, 48 kHz, 88.2 kHz,
96 kHz, 176.4 kHz, 192 kHz
• Playback cannot be controlled from this unit during
use of this function; use your computer to control
playback.
1 Select the source you want to record. 2 Start recording, then start playback of
• When disconnecting the USB cable, always stop
the source component.
playback on the computer first.
• Sound may not be produced if your computer does
not support USB 2.0 HS.
Caution
• This unit does not support use of a USB hub.
• Confirm that the short pin plugs are not inserted in
Always use a USB cable to connect the unit directly
the RECORDER OUT terminals, since malfunction
to the computer.
will result if they are inserted.
Important
• When using the DIGITAL IN USB port to input
audio files from a computer to this unit, it may be
necessary to install a special driver on the
computer. For details, see the website of Pioneer.
12
En
Turntable
iPod dock, etc
SACD/CD player
Network audio player
Tuner
Playback
Recording
Audio recording component
(CD recorder, tape deck, etc.)
A70_SYXE8.book 12 ページ 2012年7月27日 金曜日 午後6時53分
A70_SYXE8.book 13 ページ 2012年7月27日 金曜日 午後6時53分
Operation 04
English
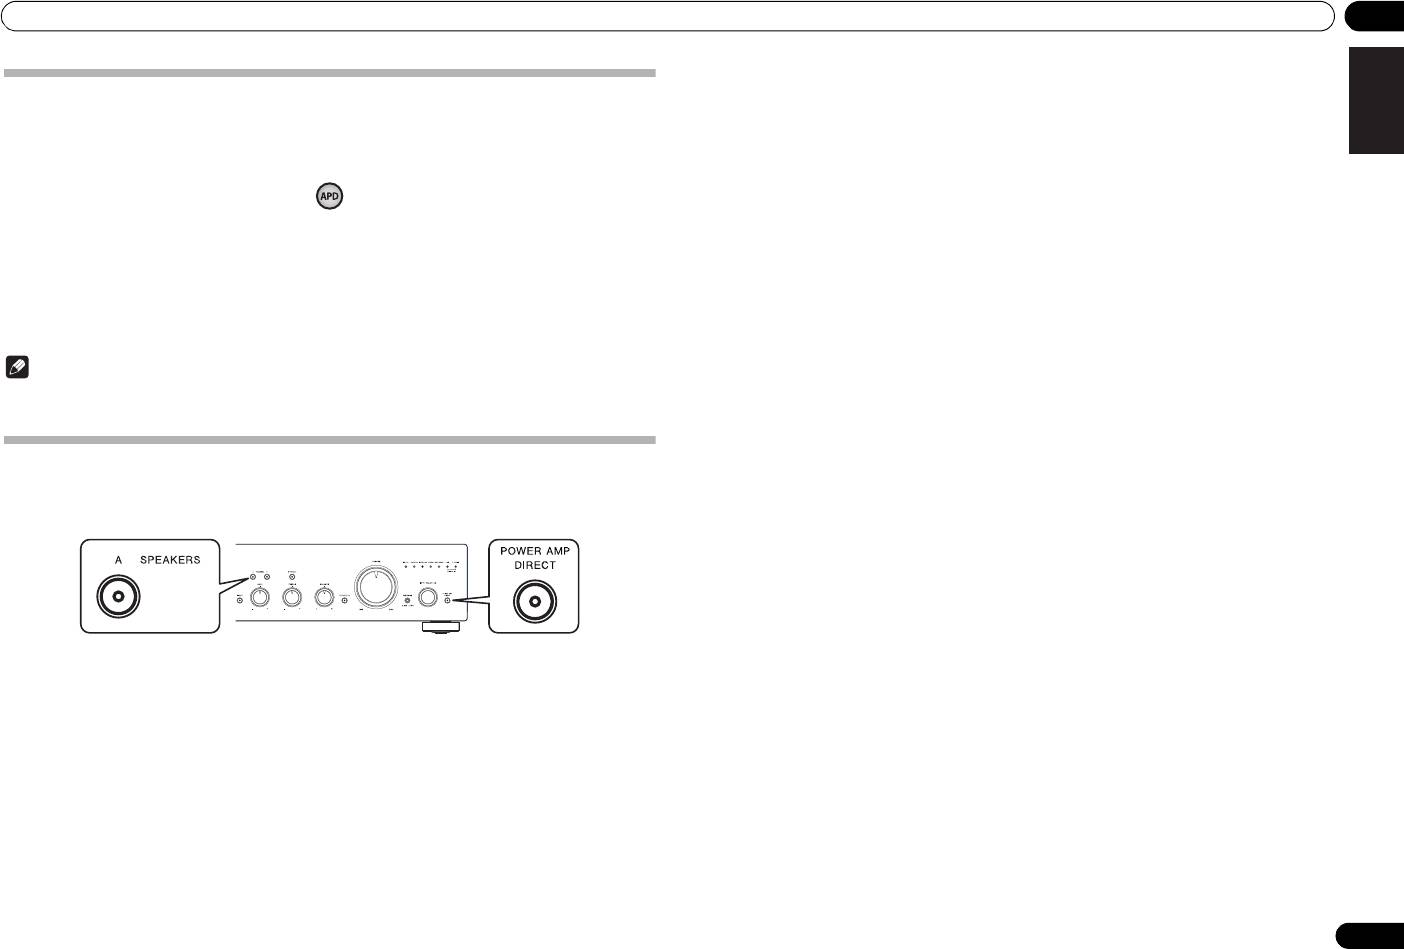
To set for automatic standby status (Auto Power Down)
This function automatically switches the unit to standby mode if no signal or switch operation is detected for 30
minutes.
1 If the unit’s power is ON, press the
APD
button on the remote control.
When this condition is set to ON, the STANDBY/APD indicator on the unit’s front panel will light green. Press the
buttons again to disable the setting.
• This setting can also be made by pressing the front panel LOUDNESS button and POWER AMP DIRECT button
simultaneously and holding them depressed for 3 seconds.
• The factory default setting is ON.
DeutschFrançais
•Rotating the TREBLE, BASS, BALANCE, or VOLUME controls will not be counted as a control operation for
purposes of resetting the Automatic Power-Down 30-minute timer.
Note
• Depending on the device connected, excessive noise produced by the device may be interpreted as an audio
signal, thus preventing the Automatic Power-Down function from operating.
Italiano Español Русский
Restoring all the settings to the factory default settings
1 When power is in standby mode, hold the front-panel’s SPEAKERS A button and
POWER AMP DIRECT button depressed simultaneously for five seconds.
Nederlands
2 Turn power ON to the unit.
13
En


