Asus PQ321QE: MOUNTING PRECAUTIONS
MOUNTING PRECAUTIONS: Asus PQ321QE
E
4
MOUNTING PRECAUTIONS
• This product is for use indoors.
• A mounting bracket compliant with VESA specications is
required.
• To install on a stand (commercially available) or on a wall, or to
remove or move the monitor, consult your dealer.
•
Mounting the monitor on the wall requires special expertise
and the work must be performed by an authorized ASUS dealer.
You should never attempt to perform any of this work yourself.
Our company will bear no responsibility for accidents or injuries
caused by improper mounting or mishandling.
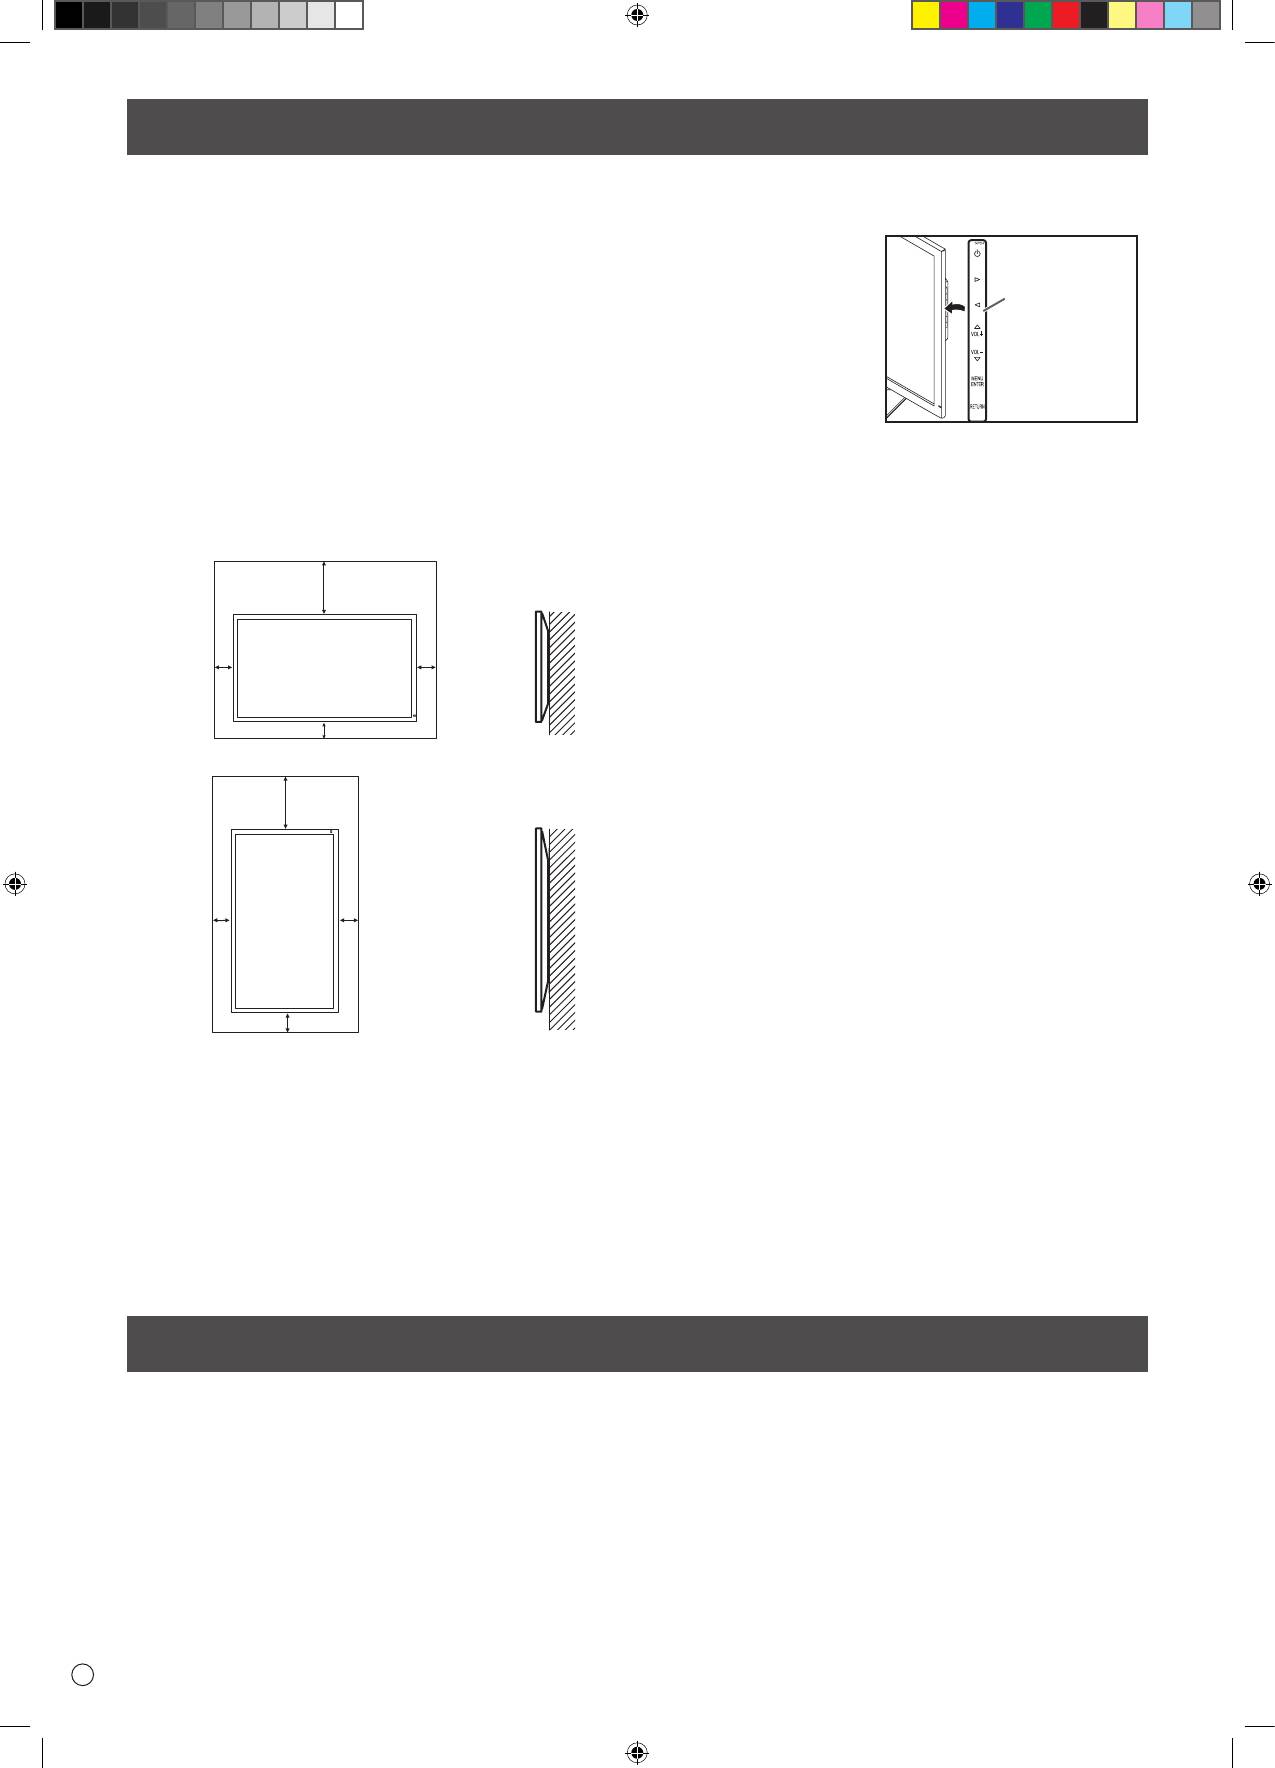
• Use the monitor with the surface perpendicular to a level
surface. If necessary, the monitor may be tilted up to 25
degrees upward or 5 degrees downward.
• This monitor should be used at an ambient temperature
between 32°F (0°C) and 104°F (40°C). Provide enough space
around the monitor to prevent heat from accumulating inside.
Supplied Components
For the monitor in landscape orientation
Unit: inch [cm]
7-7/8 [20]
*
2
2
[5]
[5]
2 [5]
For the monitor in portrait orientation
Unit: inch [cm]
7-7/8 [20]
*
2
2
[5]
[5]
2 [5]
• Do not place the monitor on a device which generates heat.
• When installing the monitor in landscape orientation, you
can attach the supplied
horizontal sticker
(Operation buttons) to the
right side.
* When you install this monitor on a wall, the monitor emits
heat during operation, please be aware that this heat may
discolor or alter the wall.
• If it is dicult to provide sucient space for any reason such
as the installation of the monitor inside a housing, or if the
ambient temperature may be outside of the range of 32°F (0°C)
to 104°F (40°C), install a fan or take other measures to keep the
ambient temperature within the required range.
• Do not block any ventilation openings. If the temperature
inside the monitor rises, this could lead to a malfunction.
If any component should be missing, please contact your dealer.
* Liquid Crystal Display Monitor: 1 * Power cord: 1 * AC adapter: 1
* Setup Manual (this manual): 1 * DisplayPort cable: 1 * RS-232C conversion cable (Φ3.5 mini-jack): 1
* Pedestal (for stand): 1 * Strut (for stand): 1 * Attachment plate (for stand): 1 (preinstalled on monitor)
* Countersunk screws (M4 x 6 without washers): 5 * Screws (M4 x 10 with washers): 4 * Hex wrench: 1
* Cable clamp: 2 * Cable clamp (small): 1 * Cable clamp (large): 2 * Horizontal Sticker (operation buttons): 1
Horizontal sticker
(Operation
buttons)
Оглавление
- Contents
- SAFETY PRECAUTIONS
- SAFETY PRECAUTIONS (Continued)
- MOUNTING PRECAUTIONS
- Installing the stand (supplied)
- Connections
- Turning Power On/O
- Specications
- Table des matières
- PRÉCAUTIONS DE SÉCURITÉ
- PRÉCAUTIONS DE SÉCURITÉ (Suite)
- PRÉCAUTIONS POUR LE MONTAGE
- Mise en place du support (fourni)
- Connexions
- Mise sous tension et hors tension
- Caractéristiques
- Índice
- PRECAUCIONES DE SEGURIDAD
- PRECAUCIONES DE SEGURIDAD (Continuación)
- PRECAUCIONES DE MONTAJE
- Instalar el soporte (suministrado)
- Conexiones
- Encendido/apagado
- Especicaciones
- Inhalt
- SICHERHEITSVORKEHRUNGEN
- SICHERHEITSVORKEHRUNGEN (Fortsetzung)
- WICHTIGE HINWEISE ZUR BEFESTIGUNG
- Anbringen des Ständers (im Lieferumfang enthalten)
- Anschlüsse
- Ein- und ausschalten
- Technische Daten
- Содержание
- ПРАВИЛА ТЕХНИКИ БЕЗОПАСНОСТИ
- ПРАВИЛА ТЕХНИКИ БЕЗОПАСНОСТИ (Продолжение)
- МЕРЫ ПРЕДОСТОРОЖНОСТИ ПРИ КРЕПЛЕНИИ
- Соединения
- Включение/выключение питания
- Спецификации
- Indice
- PRECAUZIONI DI SICUREZZA
- PRECAUZIONI DI SICUREZZA (seconda parte)
- PRECAUZIONI DI MONTAGGIO
- Installare il piedistallo (in dotazione)
- Connessioni
- Accensione/Spegnimento
- Speciche


