Asus P5E WS Professional – страница 7
Инструкция к Материнской Плате Asus P5E WS Professional
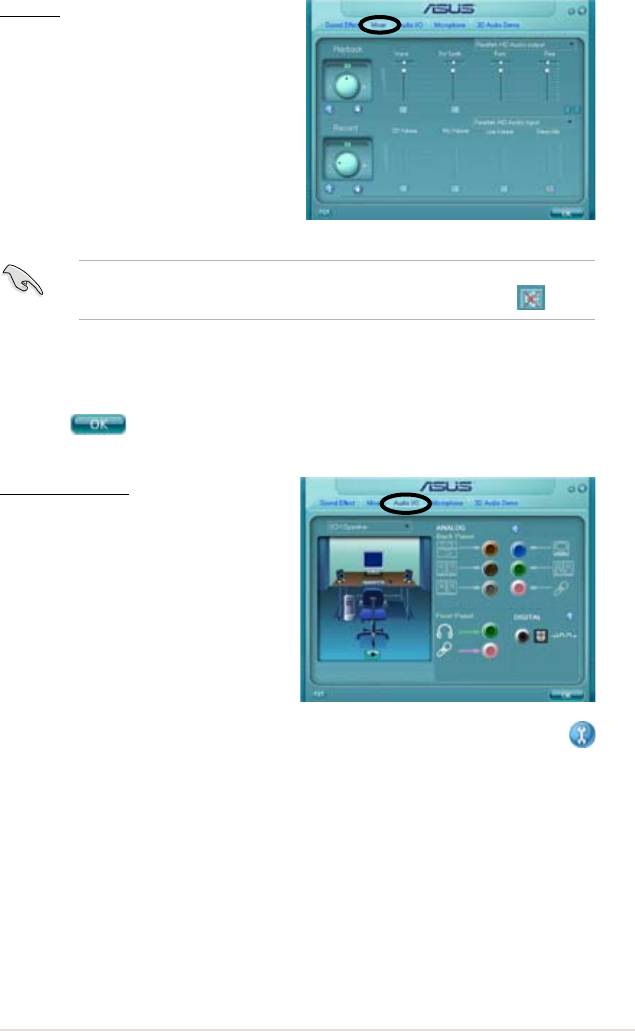
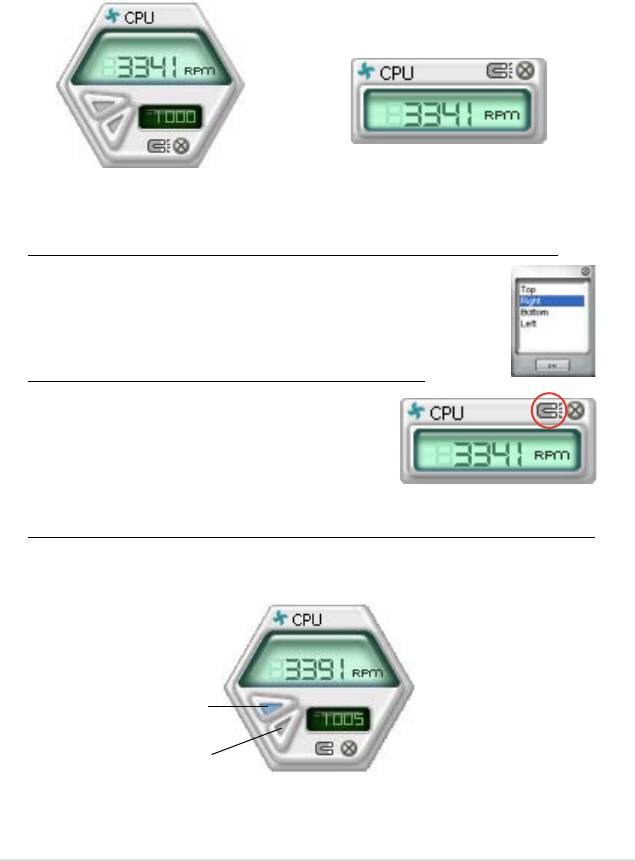
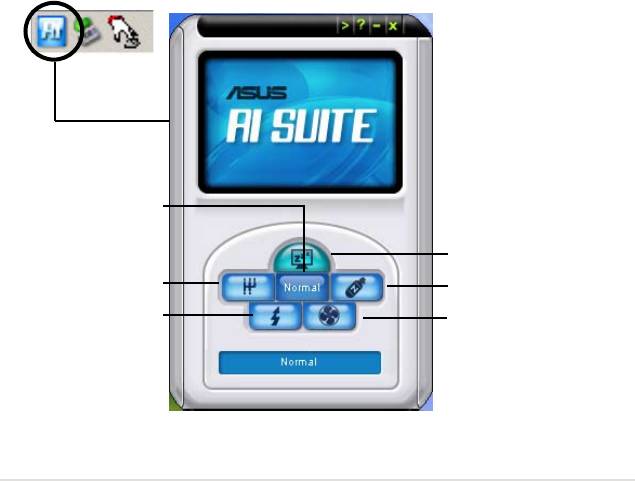
5-13
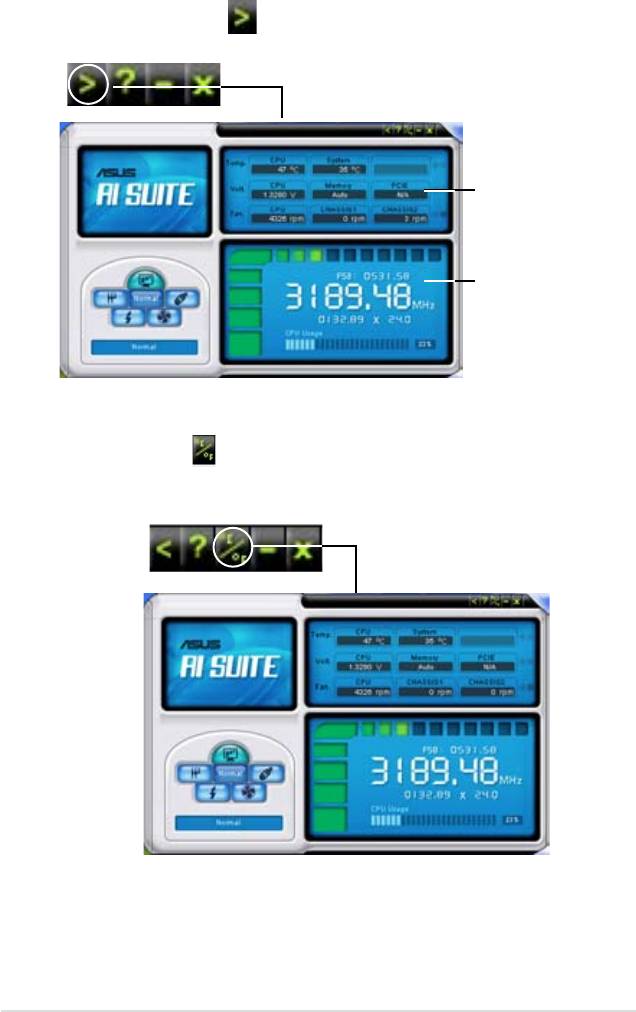
5-14
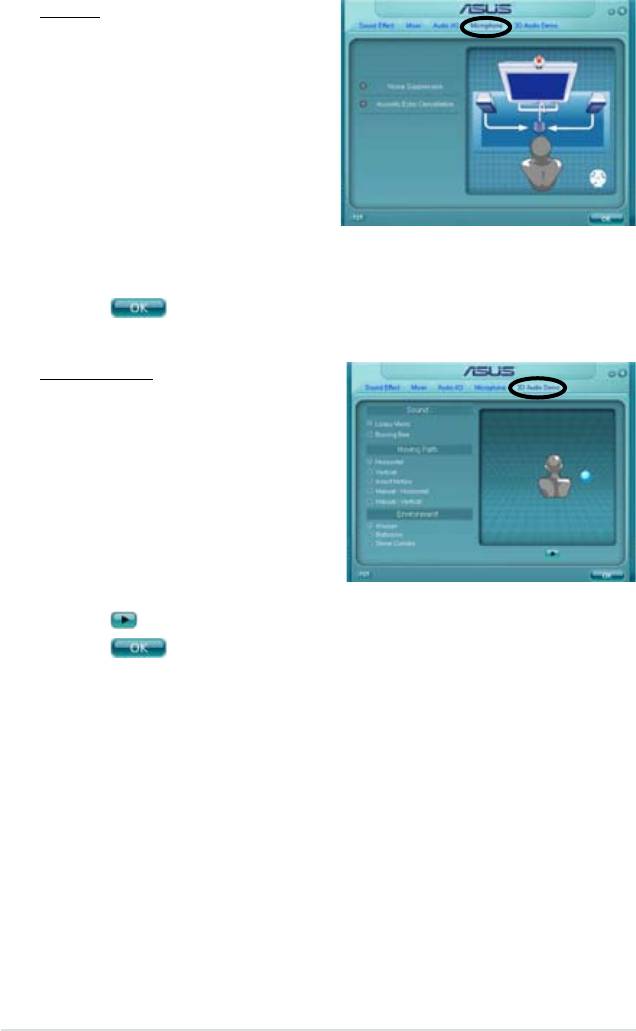
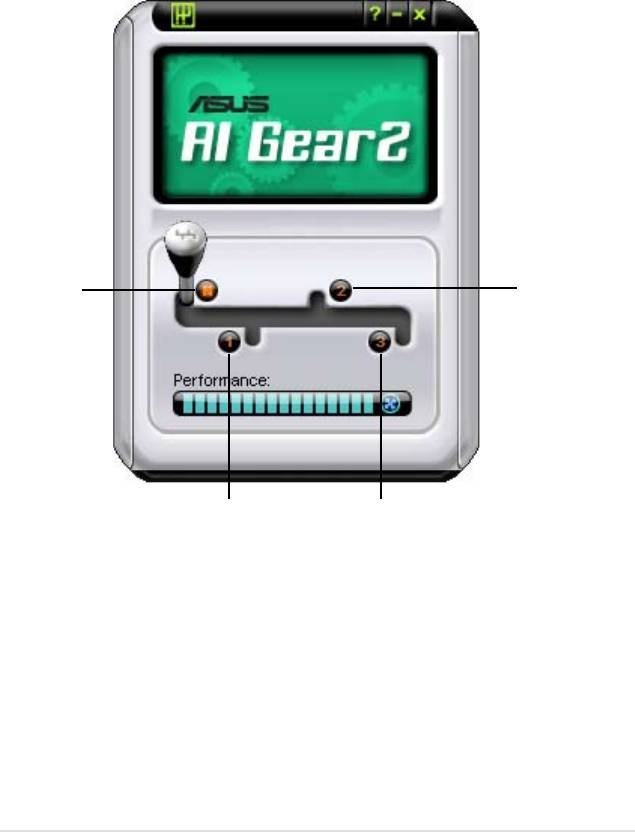
5-15
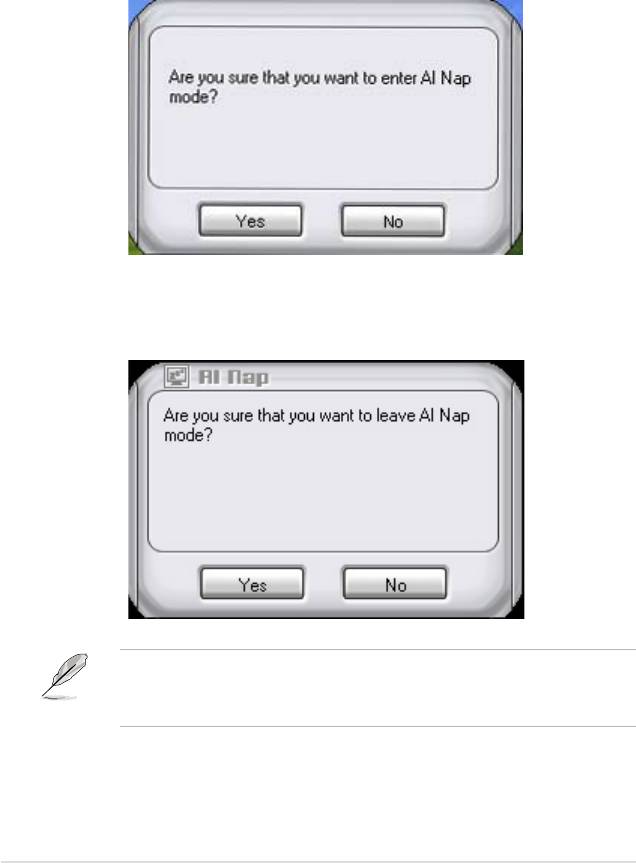
5-16
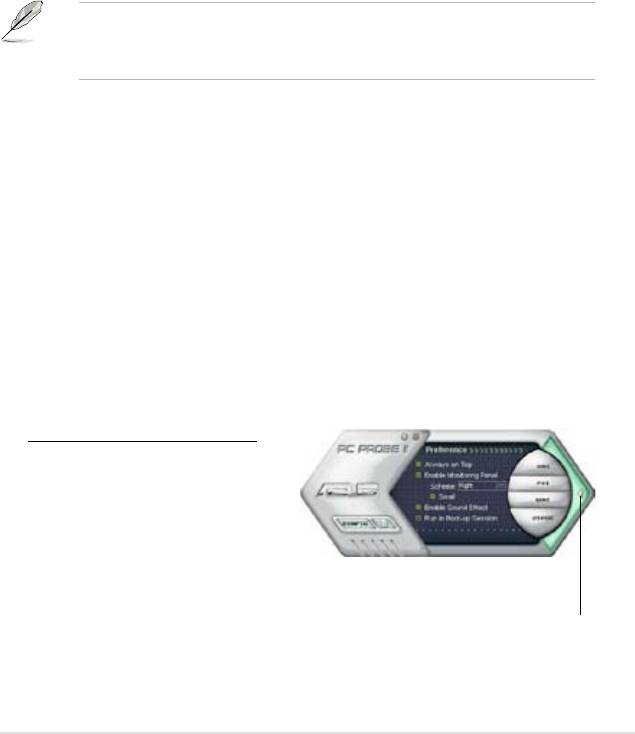
5-17
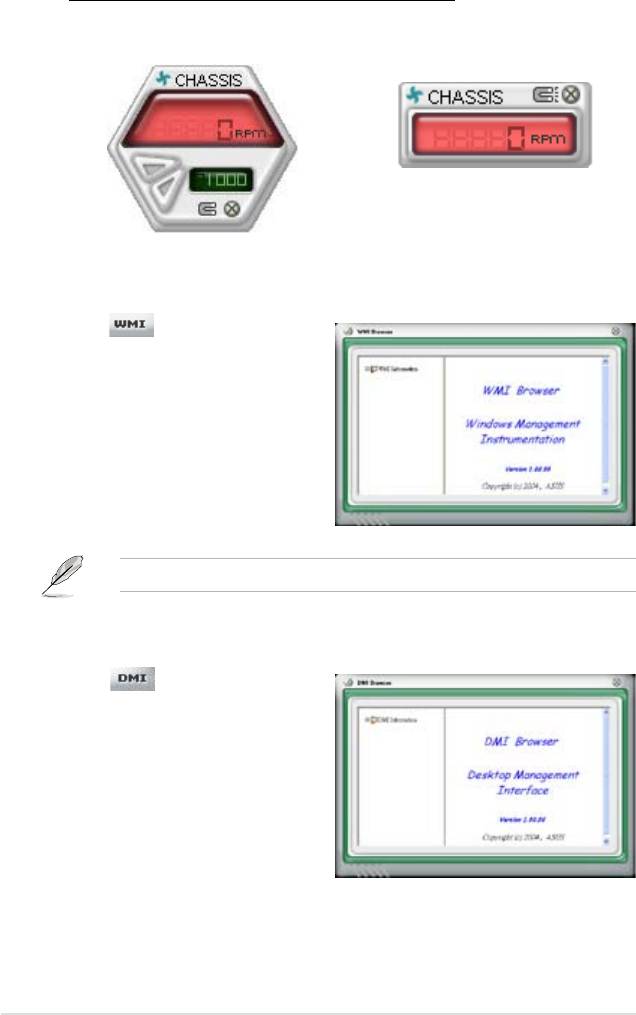
5-18
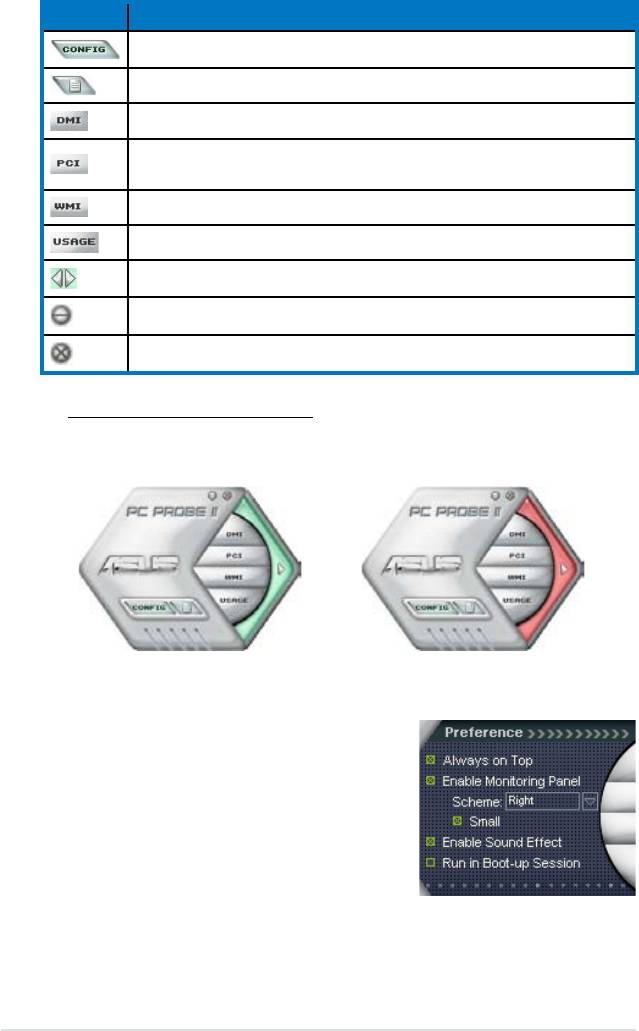
5-19
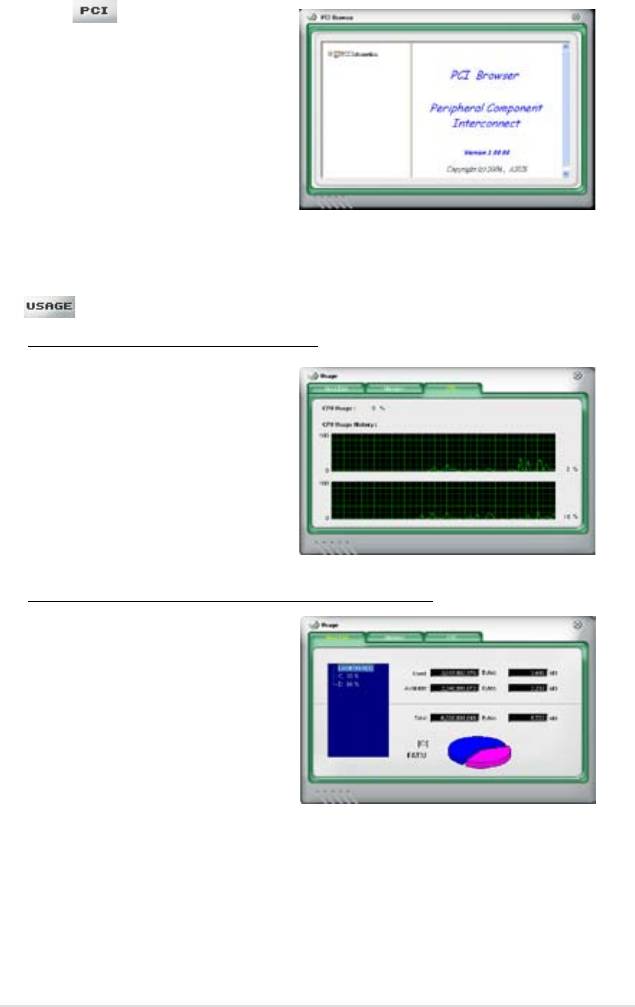
5-20
5-21
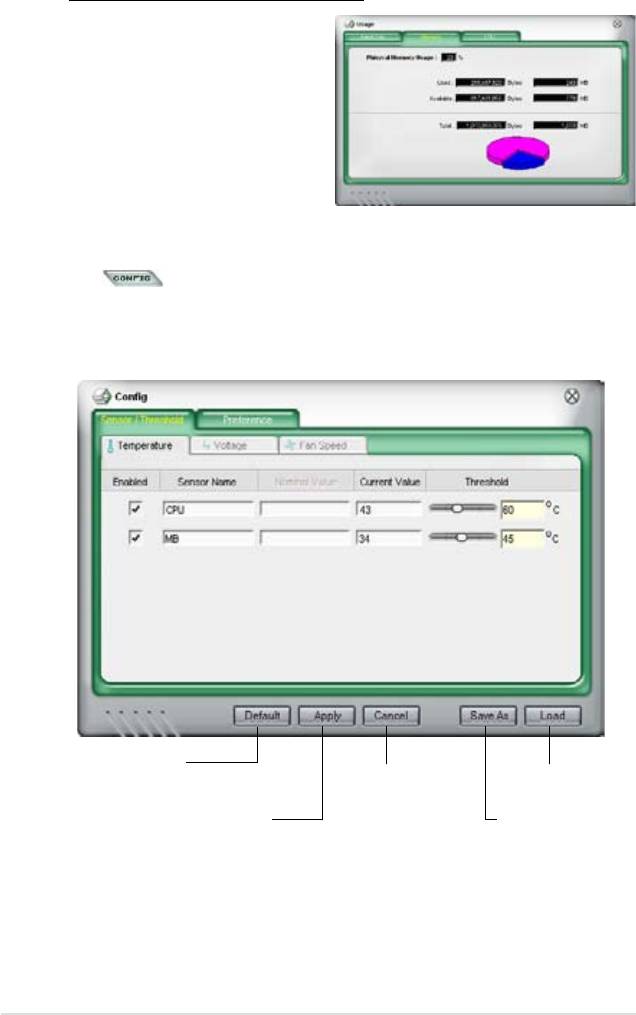
5-22
5-23
5-24
5-25
5-26

5-27

5-28

5-29
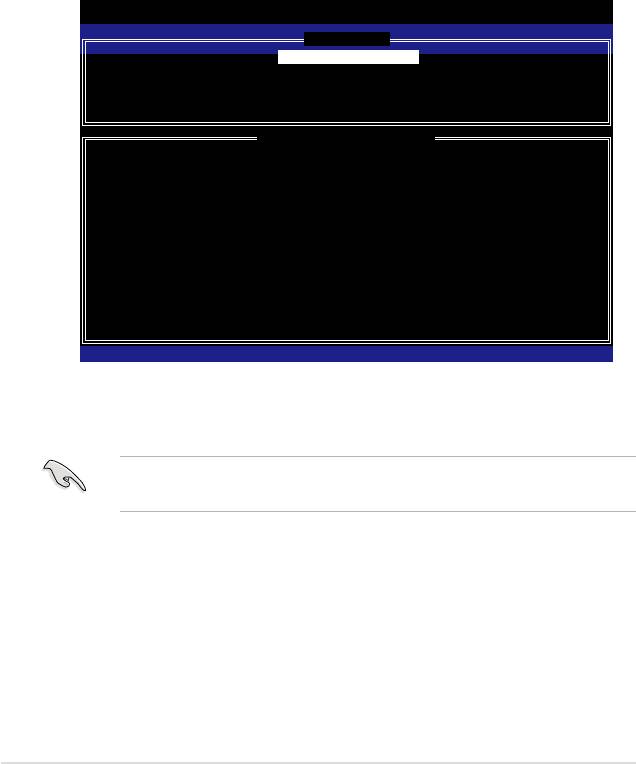
Intel(R) Matrix Storage Manager Option ROM v5.0.0.1032 ICH9R wRAID5
Copyright(C) 2003-05 Intel Corporation. All Rights Reserved.
[ MAIN MENU ]
1. Create RAID Volume
2. Delete RAID Volume
3. Reset Disks to Non-RAID
4. Exit
[ DISK/VOLUME INFORMATION ]
RAID Volumes:
Nonedened.
Physical Disks:
Port Drive Model Serial # Size Type/Status(Vol ID)
0 XXXXXXXXXXX XXXXXXXX XX.XXGB Non-RAID Disk
1 XXXXXXXXXXX XXXXXXXX XX.XXGB Non-RAID Disk
2 XXXXXXXXXXX XXXXXXXX XX.XXGB Non-RAID Disk
3 XXXXXXXXXXX XXXXXXXX XX.XXGB Non-RAID Disk
[↑↓]-Select [ESC]-Exit [ENTER]-Select Menu
5-30

Intel(R) Matrix Storage Manager Option ROM v5.0.0.1032 ICH9R wRAID5
Copyright(C) 2003-05 Intel Corporation. All Rights Reserved.
[ CREATE ARRAY MENU ]
Name:
Volume0
RAID Level:
RAID0(Stripe)
Disks:
Select Disks
Strip Size:
128KB
Capacity:
0.0 GB
Create Volume
[ DISK/VOLUME INFORMATION ]
Enter a string between 1 and 16 characters in length that can be used
touniquelyidentifytheRAIDvolume.Thisnameiscasesensitiveand
cannot contain special characters.
[↑↓]-Change [TAB]-Next [ESC]-Previous Menu [Enter]-Select
[ SELECT DISKS ]
Port Drive Model Serial # Size Status
0 XXXXXXXXXXXX XXXXXXXX XX.XGB Non-RAID Disk
1 XXXXXXXXXXXX XXXXXXXX XX.XGB Non-RAID Disk
2 XXXXXXXXXXXX XXXXXXXX XX.XGB Non-RAID Disk
3 XXXXXXXXXXXX XXXXXXXX XX.XGB Non-RAID Disk
Select 2 to 4 disks to use in creating the volume.
[↑↓]-Previous/Next [SPACE]-Selects [ENTER]-Selection Complete
5-31

WARNING: ALL DATA ON SELECTED DISKS WILL BE LOST.
Are you sure you want to create this volume? (Y/N):
5-32
