Sony α6500 ILCE-6500: Step 5: Shooting images in auto mode
Step 5: Shooting images in auto mode: Sony α6500 ILCE-6500
Table of contents
- Check out the Help Guide!
- Owner’s Record Battery pack WARNING
- Notice Power Cord
- Notes on using your camera No compensation for damaged content or recording failure Screen language Notes on recording/playback Notes on the monitor, electronic viewfinder, lens, and image sensor Notes on handling the product
- Notes on using lenses and accessories Notes on the Multi Interface Shoe Notes on shooting with the viewfinder
- Notes on recording for long periods of time or recording 4K movies Notes on continuous shooting
- How to turn off wireless network functions (Wi-Fi, NFC and Bluetooth function, etc.) temporarily Notes on wireless LAN Notes on playing back movies on other devices Notes on security when using wireless LAN products Warning on copyright On the data specifications described in this manual
- Checking the camera and the supplied items
- Identifying parts When the lens is removed Multi Interface Shoe*
-
- Eye sensor Viewfinder Eyepiece cup Attaching/removing the eyepiece cup
- Monitor (For touch operation: Touch panel/Touch pad) (N mark)
- Battery/memory card cover Memory card slot Battery lock lever Battery insertion slot Connection plate cover Tripod socket hole Access lamp
- Basic operations Using the control wheel
- Using the Fn (Function) button To adjust settings from the dedicated setting screens
- Using the AF/MF/AEL switch lever
- Startup guide Step 1: Inserting the battery pack/memory card into the camera
- To remove the battery pack To remove the memory card
- Step 2: Charging the battery pack while it is inserted in the camera
- Step 3: Attaching a lens
- To remove the lens
- Step 4: Setting the language and the clock
- Step 5: Shooting images in auto mode
- To shoot movies To play back images To delete displayed image To shoot images in various shooting modes
- Using the Wi-Fi / One-touch (NFC) / Bluetooth functions PlayMemories Mobile Recording location information to captured images
- Introduction to computer software / PlayMemories Camera Apps PlayMemories Home
- Image Data Converter Remote Camera Control PlayMemories Camera Apps
- List of MENU items (Camera Settings1) Quality/Image Size Shoot Mode/Drive
- AF
- Exposure Flash Color/WB/Img. Processing White Balance Priority Set in AWB
- DRO/Auto HDR Creative Style Picture Effect Picture Profile Soft Skin Effect Focus Assist Face Detection/Shoot Assist
- Auto Obj. Framing (Camera Settings2) Movie
- Shutter/SteadyShot Zoom Display/Auto Review DISP Button FINDER/MONITOR Finder Frame Rate Zebra Grid Line Exposure Set. Guide
- Live View Display Auto Review Custom Operation (Wireless) Send to Smartphone Send to Computer View on TV
- One-touch(NFC) Airplane Mode Wi-Fi Settings Bluetooth Settings Loc. Info. Link Set. Edit Device Name Reset Network Set. (Application) (Playback) Delete View Mode Image Index Display Rotation Slide Show
- Rotate Enlarge Image Protect Specify Printing Photo Capture (Setup)
- NTSC/PAL Selector Cleaning Mode Touch Operation Touch Pad (vertical) Touch Pad Area Set. Demo Mode TC/UB Settings Remote Ctrl HDMI Settings 4K Output Sel. USB Connection USB LUN Setting USB Power Supply PC Remote Settings Language
- Date/Time Setup
- Specifications Battery life and number of recordable images
- Memory cards that can be used
- Number of recordable images
- The number of images that can be recorded on a memory card
- Recordable movie times File Format Record Setting 8 GB 16 GB 32 GB 64 GB
- File Format Record Setting 8 GB 16 GB 32 GB 64 GB
- Notes on continuous movie recording
- Specifications Camera
- Rechargeable battery pack NP-FW50
- On focal length Trademarks
- On GNU GPL/LGPL applied software
C:\4690670411ILCE6500CEC\01GB-ILCE6500CEC\020PRE.indd
2016/09/30 16:25
Hint
• If you want to set the date and time later, you can cancel the date and time
setting procedure by pressing the MENU button. In this case, the setting
screen for the date and time will reappear the next time you turn on the
camera.
• To reset the date and time setting, use MENU (page 42).
Note
• This camera does not have a function for inserting the date into images.
You can insert the date into images and then save and print them using
PlayMemories Home (for Windows only).
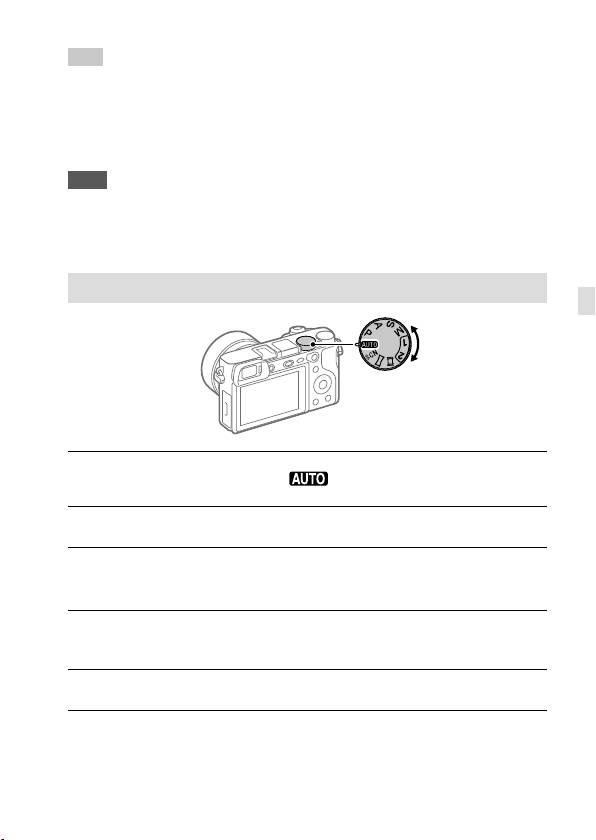
Step 5: Shooting images in auto mode
GB
1
Turn the mode dial to set to .
2
Look through the viewfinder and hold the camera.
3
Set the size of the subject by rotating the zoom ring of the lens
when a zoom lens is attached.
4
Press the shutter button halfway down to focus.
• When the image is in focus, an indicator (such as ) will light up.
5
Press the shutter button all the way down.
GB
27
ILCE-6500
4-690-670-41(1)
