
Pioneer DJM-2000: Changing the settings
Changing the settings: Pioneer DJM-2000
24
En
DRB1497-B
Changing the settings
24
1
1 Press [LIVE SAMPLER (UTILITY, WAKE UP)] for at least 1
seconds.
The [USER SETUP] screen appears.
The [LIVE SAMPLER (UTILITY, WAKE UP)] indicator flashes.
! To display the [CLUB SETUP] screen, first turn this unit’s power off, then press
[POWER] while pressing [LIVE SAMPLER (UTILITY, WAKE UP)].
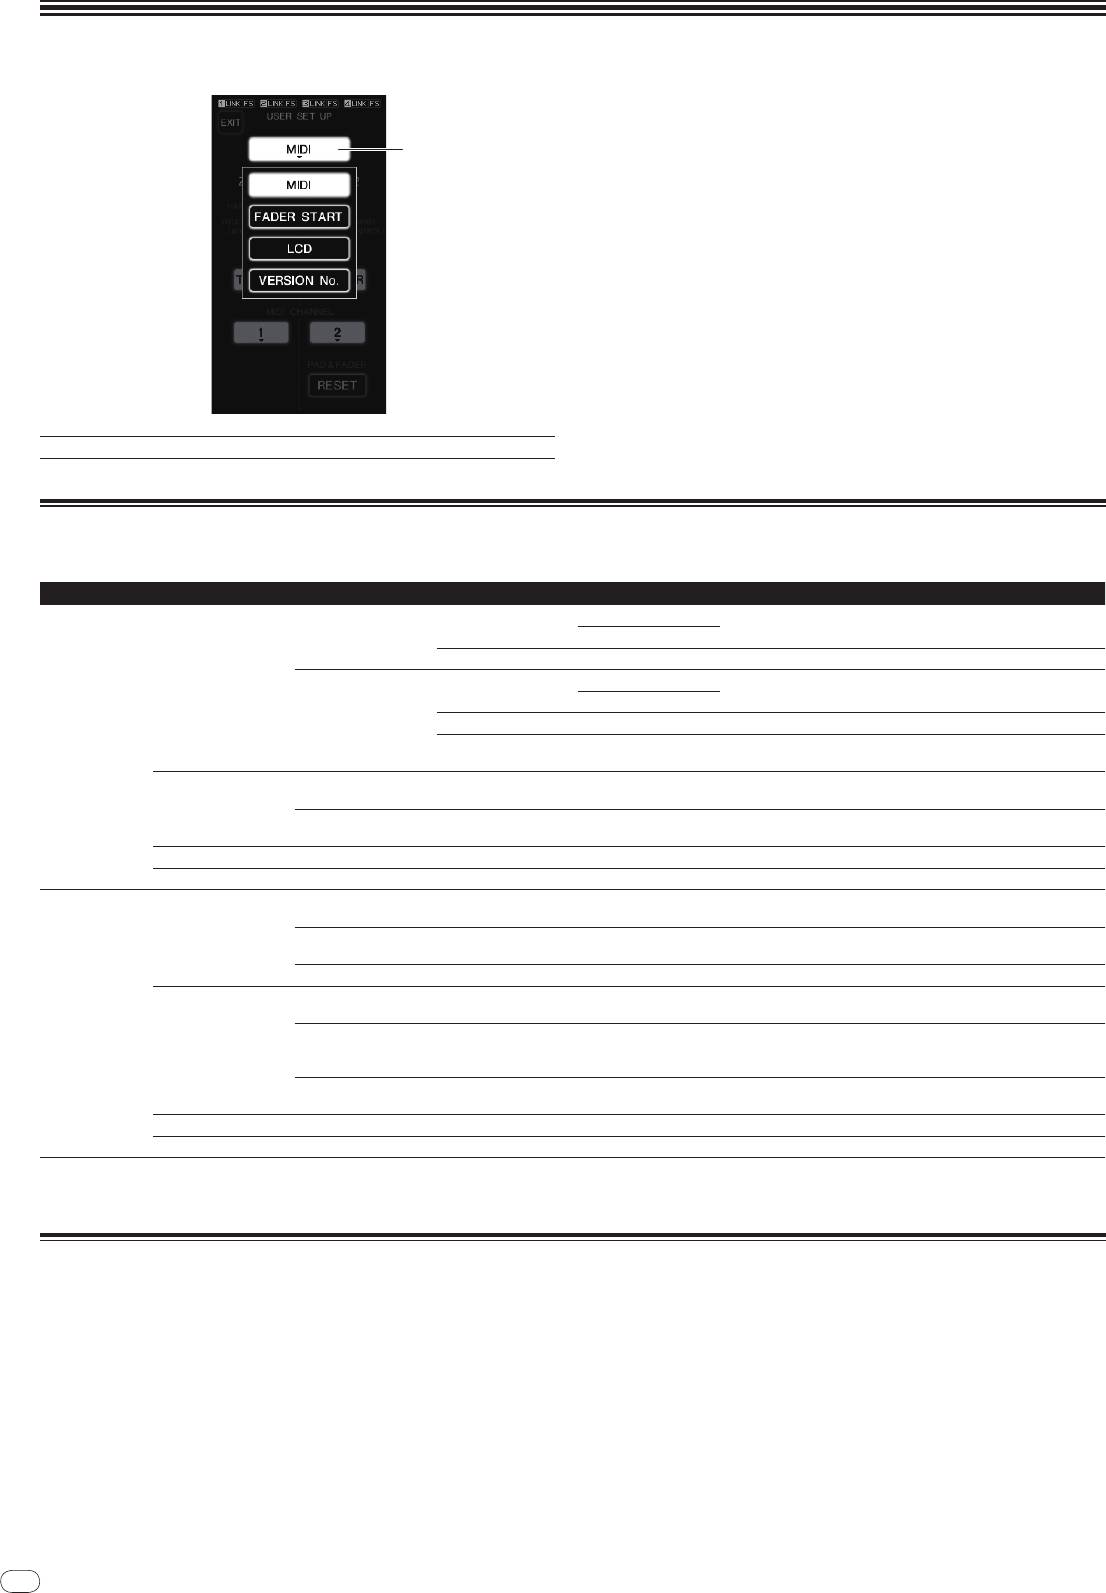
2 Press the setup item button.
The selection items appear.
3 Select the setup item.
Select the item on the touch panel and enter it.
4 Change the item’s setting.
Select the item on the touch panel and enter it.
! Press [SAVE] to save the changes to the [CLUB SETUP] screen.
5 Press [EXIT].
The [USER SETUP] screen closes.
! To close the [CLUB SETUP] screen, press [POWER] to turn this unit’s power
1
Setup item button
off.
Setting preferences
Settings indicated in italics are the default settings set upon purchase.
Mode Options settings Selection item 1 Selection item 2 Selection item 3 Descriptions
TOGGLE
1
BUTTON ACTION
Select the MIDI signal sending method, [TOGGLE] or [TRIGGER].
ZONE1
TRIGGER
MIDI CHANNEL
1, 2, to 16 Sets the MIDI channel.
TOGGLE
MIDI
BUTTON ACTION
Select the MIDI signal sending method, [TOGGLE] or [TRIGGER].
TRIGGER
2
ZONE2
MIDI CHANNEL
1, 2, to 16 Sets the MIDI channel.
USER SETUP
Restores the [TYPE A] – [TYPE D] MIDI settings to the default values.
RESET
—
[RESET] function is unique to [ZONE2].
Turns the fader start function of the DJ players connected to the
LINK
CH1 to CH4 ON, OFF
[LINK] terminals on and off.
FADER START
Turns the fader start function of the DJ players connected to the
CONTROL
CH2, CH3 ON, OFF
[CONTROL] terminals on and off.
LCD BACK LIGHT
1, 2, 3, 4, 5 — Adjusts the touch panel’s brightness.
VERSION No.
— — — Displays the DJM-2000’s software version.
DIGITAL OUT MAX
–19 dB, –15 dB, –10 dB,
Adjusts the maximum audio level output from the [DIGITAL OUT]
—
LEVEL
–5 dB
terminal.
SYSTEM
DIGITAL SAMPLING
48 kHz, 96 kHz — Switches the digital signal sampling rate.
RATE
AUTO STANDBY
ON, OFF — Turns the auto standby function on and off.
OUTPUT TO BOOTH
Sets whether or not to output the microphone’s audio signals from
ON, OFF —
MONITOR
[BOOTH] terminals.
CLUB SETUP
Sets the talkover sensitivity. The talkover function is activated when
TALK OVER THRESH-
–25 dB, –20 dB, –15 dB,
MIC
—
a sound with a volume above the set volume is input to the micro-
OLD LEVEL
–10 dB
phone.
–25 dB, –20 dB, –15 dB,
Sets the attenuation level for the sound other than the microphone’s
TALK OVER LEVEL
—
–10 dB
sound when the talkover function is activated.
TOUCH PANEL
— — — The touch panel’s calibration is adjusted by pressing [+] in order.
FACTORY RESET
YES, NO — — Restores all the settings to their factory defaults.
1 Changes the MIDI settings of the buttons on the control panel, [FREQUENCY MIX] and [SIDECHAIN REMIX].
2 Changes the MIDI settings for [TYPE A] to [TYPE D] on the MIDI control screen.
About the auto standby function
When [AUTO STANDBY] is set to [ON], the standby mode is set automatically if 4 hours pass with all of the conditions below met.
— That none of this unit’s buttons or controls are operated.
— That no audio signals of –10 dB or greater are input to this unit’s input terminals.
— That no PRO DJ LINK connections are made.
! The standby mode is canceled when [LIVE SAMPLER (UTILITY, WAKE UP)] is pressed.
Table of contents
- Contents
- Before start
- Connections
- Operations
- Changing the settings
- Additional information
- Sommaire
- Informations
- Raccordements
- Opérations
- Changement des réglages
- Informations supplémentaires
- Inhalt
- Vor der
- Anschlüsse
- Bedienungen
- Ändern der Einstellungen
- Zusätzliche Informationen
- Indice
- Prima di cominciare
- Collegamenti
- Operazioni
- Modifica delle impostazioni
- Informazioni aggiuntive
- Inhoud
- Alvorens te
- Aansluitingen
- Bediening
- Instellingen aanpassen
- Aanvullende informatie
- Contenido
- Antes de empezar a
- Conexiones
- Operaciones
- Cambio de los ajustes
- Información adicional
- Содержание
- До начала
- Подключения
- Операции
- Изменение настроек
- Дополнительная информация


