Dell Latitude X300 – страница 4
Инструкция к Ноутбуку Dell Latitude X300
Оглавление
- Dell™ Latitude™ X300 User's Guide

ms
—
millisecond
—
A measure of time that equals one thousandth of a second. Access times of storage devices are often measured in ms.
N
network adapter
—
A chip that provides network capabilities. A computer may include a network adapter on its system board, or it may contain a PC Card with
an adapter on it. A network adapter is also referred to as a
NIC
(network interface controller).
NIC
—
See
network
adapter
.
notification area
—
The section of the Windows taskbar that contains icons for providing quick access to programs and computer functions, such as the clock,
volume control, and print status. Also referred to as
system tray
.
ns
—
nanosecond
—
A measure of time that equals one billionth of a second.
NVRAM
—
nonvolatile random access memory
—
A type of memory that stores data when the computer is turned off or loses its external power source. NVRAM
is used for maintaining computer configuration information such as date, time, and other system setup options that you can set.
O
Optical Drive
—
A drive that uses optical technology to read or write data from CDs, DVDs, or DVD+RWs. Example of optical drives include CD drives, DVD
drives, CD-RW drives, and CD-RW/DVD combo drives.
P
parallel connector
—
An I/O port often used to connect a parallel printer to your computer. Also referred to as an
LPT port
.
partition
—
A physical storage area on a hard drive that is assigned to one or more logical storage areas known as logical drives. Each partition can contain
multiple logical drives.
PC Card
—
A removable I/O card adhering to the PCMCIA standard. Modems and network adapters are common types of PC Cards.
PCI
—
peripheral component interconnect
—
PCI is a local bus that supports 32-and 64-bit data paths, providing a high-speed data path between the
microprocessor and devices such as video, drives, and networks.
PCMCIA
—
Personal Computer Memory Card International Association
—
The organization that establishes standards for PC Cards.
PIN
—
personal identification number
—
A sequence of numerals and/or letters used to restrict unauthorized access to computer networks and other secure
systems.
PIO
—
programmed input/output
—
A method of transferring data between two devices through the microprocessor as part of the data path.
pixel
—
A single point on a display screen. Pixels are arranged in rows and columns to create an image. A video resolution, such as 800 x 600, is expressed as
the number of pixels across by the number of pixels up and down.

Plug-and-Play
—
The ability of the computer to automatically configure devices. Plug and Play provides automatic installation, configuration, and compatibility
with existing hardware if the BIOS, operating system, and all devices are Plug and Play compliant.
POST
—
power-on self-test
—
Diagnostics programs, loaded automatically by the BIOS, that perform basic tests on the major computer components, such as
memory, hard drives, and video. If no problems are detected during POST, the computer continues the start-up.
program
—
Any software that processes data for you, including spreadsheet, word processor, database, and game packages. Programs require an operating
system to run.
PS/2
—
personal system/2
—
A type of connector for attaching a PS/2-compatible keyboard, mouse, or keypad.
PXE
—
pre-boot execution environment
—
A WfM (Wired for Management) standard that allows networked computers that do not have an operating system to
be configured and started remotely.
R
RAID
—
redundant array of independent disks
—
A system of two or more drives working together for performance and fault tolerance. RAID drives are
typically used on servers and high-end PCs.
The three most common RAID levels are 0, 3, and 5:
l
Level 0: Provides data striping but no redundancy. Level 0 improves performance but does not provide fault tolerance.
l
Level 3: Same as Level 0, but also reserves one dedicated drive for error correction data, providing good performance and some level of fault
tolerance.
l
Level 5: Provides data striping at the byte level and also stripe error correction information, resulting in excellent performance and good fault
tolerance.
RAM
—
random-access memory
—
The primary temporary storage area for program instructions and data. Any information stored in RAM is lost when you shut
down your computer.
readme file
—
A text file included with a software package or hardware product. Typically, readme files provide installation information and describe new
product enhancements or corrections that have not yet been documented.
read-Only
—
Data and/or files you can view but cannot edit or delete. A file can have read-only status if:
l
It resides on a physically write-protected floppy disk, CD, or DVD.
l
It is located on a network in a directory and the system administrator has assigned rights only to specific individuals.
refresh rate
—
The frequency, measured in Hz, at which your screen's horizontal lines are recharged (sometimes also referred to as its
vertical frequency
). The
higher the refresh rate, the less video flicker can be seen by the human eye.
resolution
—
The sharpness and clarity of an image produced by a printer or displayed on a monitor. The higher the resolution, the sharper the image.
RFI
—
radio frequency interference
—
Interference that is generated at typical radio frequencies, in the range of 10 kHz to 100,000 MHz. Radio frequencies are
at the lower end of the electromagnetic frequency spectrum and are more likely to have interference than the higher frequency radiations, such as infrared
and light.
ROM
—
read-only memory
—
Memory that stores data and programs that cannot be deleted or written to by the computer. ROM, unlike RAM, retains its
contents after you shut down your computer. Some programs essential to the operation of your computer reside in ROM.
RPM
—
revolutions per minute
—
The number of rotations that occur per minute. Hard drive speed is often measured in rpm.
RTC
—
real time clock
—
Battery-powered clock on the system board that keeps the date and time after you shut down the computer.
RTCRST
—
real-time clock reset
—
A jumper on the system board of some computers that can often be used for troubleshooting problems.

S
ScanDisk
—
A Microsoft utility that checks files, folders, and the hard disk's surface for errors. ScanDisk often runs when you restart the computer after it has
stopped responding.
SDRAM
—
synchronous dynamic random-access memory
—
A type of DRAM that is synchronized with the optimal clock speed of the microprocessor.
serial connector
—
An I/O port often used to connect devices such as a handheld digital device or digital camera to your computer.
Service Tag
—
A bar code label on your computer that identifies your computer when you access Dell Support at
support.dell.com
or when you call Dell for
customer service or technical support.
setup program
—
A program that is used to install and configure hardware and software. The
setup.exe
or
install.exe
program comes with most Windows
software packages. Setup program differs from system setup program.
shortcut
—
An icon that provides quick access to frequently used programs, files, folders, and drives. When you place a shortcut on your Windows desktop
and double-click the icon, you can open its corresponding folder or file without having to find it first. Shortcut icons do not change the location of files. If you
delete a shortcut, the original file is not affected. Also, you can rename a shortcut icon.
shutdown
—
The process of closing windows and exiting programs, exiting the operating system, and turning off your computer. You can lose data if you turn
off your computer before completing a shutdown.
smart card
—
A card that is embedded with a microprocessor and a memory chip. Smart cards can be used to authenticate a user on computers equipped for
smart cards.
software
—
Anything that can be stored electronically, such as computer files or programs.
S/PDIF
—
Sony/Philips Digital Interface
—
An audio transfer file format that allows the transfer of audio from one file to another without converting it to and
from an analog format, which could degrade the quality of the file.
standby mode
—
A power management mode that shuts down all unnecessary computer operations to save energy.
surge protectors
—
Prevent voltage spikes, such as those that may occur during an electrical storm, from entering the computer through the electrical outlet.
Surge protectors do not protect against lightning strikes or against brownouts, which occur when the voltage drops more than 20 percent below the normal
AC-line voltage level.
Network connections cannot be protected by surge protectors. Always disconnect the network cable from the network connector during electrical storms.
SVGA
—
super-video graphics array
—
A video standard for video cards and controllers. Typical SVGA resolutions are 800 x 600 and 1024 x 768.
The number of colors and resolution that a program displays depends on the capabilities of the monitor, the video controller and its drivers, and the amount of
video memory installed in the computer.
S-video TV-out
—
A connector used to attach a TV or digital audio device to the computer.
SXGA
—
super-extended graphics array
—
A video standard for video cards and controllers that supports resolutions up to 1280 x 1024.
SXGA+
—
super-extended graphics array plus
—
A video standard for video cards and controllers that supports resolutions up to 1400 x 1050.

system board
—
The main circuit board in your computer. Also known as the
motherboard
.
system setup program
—
A utility that serves as an interface between the computer hardware and the operating system. System setup allows you to
configure user-selectable options in the BIOS, such as date and time or system password. Unless you understand what effect the settings have on the
computer, do not change the settings for this program.
system tray
—
See
notification area
.
T
TAPI
—
telephony application programming interface
—
Enables Windows programs to operate with a wide variety of telephony devices, including voice, data,
fax, and video.
text editor
—
A program used to create and edit files that contain only text; for example, Windows Notepad uses a text editor. Text editors do not usually
provide word wrap or formatting functionality (the option to underline, change fonts, and so on).
travel module
—
A plastic device designed to fit inside the module bay of a portable computer to reduce the weight of the computer.
U
UPS
—
uninterruptible power supply
—
A backup power source used when the electrical power fails or drops to an unacceptable voltage level. A UPS keeps a
computer running for a limited amount of time when there is no electrical power. UPS systems typically provide surge suppression and may also provide
voltage regulation. Small UPS systems provide battery power for a few minutes to enable you to shut down your computer.
USB
—
universal serial bus
—
A hardware interface for a low-speed device such as a USB-compatible keyboard, mouse, joystick, scanner, set of speakers,
printer, broadband devices (DSL and cable modems), imaging devices, or storage devices. Devices are plugged directly in to a 4-pin socket on your computer
or in to a multi-port hub that plugs in to your computer. USB devices can be connected and disconnected while the computer is turned on, and they can also be
daisy-chained together.
UTP
—
unshielded twisted pair
—
Describes a type of cable used in most telephone networks and some computer networks. Pairs of unshielded wires are
twisted to protect against electromagnetic interference, rather than relying on a metal sheath around each pair of wires to protect against interference.
UXGA
—
ultra extended graphics array
—
A video standard for video cards and controllers that supports resolutions up to 1600 x 1200.
V
video controller
—
The circuitry on a video card or on the system board (in computers with an integrated video controller) that provides the video
capabilities
—
in combination with the monitor
—
for your computer.
video memory
—
Memory that consists of memory chips dedicated to video functions. Video memory is usually faster than system memory. The amount of
video memory installed primarily influences the number of colors that a program can display.
video mode
—
A mode that describes how text and graphics are displayed on a monitor. Graphics-based software, such as Windows operating systems,
displays in video modes that can be defined as
x
horizontal pixels by
y
vertical pixels by
z
colors. Character-based software, such as text editors, displays in
video modes that can be defined as
x
columns by
y
rows of characters.
video resolution
—
See
resolution
.
virus
—
A program that is designed to inconvenience you or to destroy data stored on your computer. A virus program moves from one computer to another
through an infected disk, software downloaded from the Internet, or e-mail attachments. When an infected program starts, its embedded virus also starts.

A common type of virus is a boot virus, which is stored in the boot sectors of a floppy disk. If the floppy disk is left in the drive when the computer is shut down
and then turned on, the computer is infected when it reads the boot sectors of the floppy disk expecting to find the operating system. If the computer is
infected, the boot virus may replicate itself onto all the floppy disks that are read or written in that computer until the virus is eradicated.
V
—
volt
—
The measurement of electric potential or electromotive force. One V appears across a resistance of 1 ohm when a current of 1 ampere flows
through that resistance.
W
W
—
watt
—
The measurement of electrical power. One W is 1 ampere of current flowing at 1 volt.
WHr
—
watt-hour
—
A unit of measure commonly used to indicate the approximate capacity of a battery. For example, a 66-WHr battery can supply 66 W of
power for 1 hour or 33 W for 2 hours.
wallpaper
—
The background pattern or picture on the Windows desktop. Change your wallpaper through the Windows Control Panel. You can also scan in
your favorite picture and make it wallpaper.
write-protected
—
Files or media that cannot be changed. Use write-protection when you want to protect data from being changed or destroyed. To write-
protect a 3.5-inch floppy disk, slide its write-protect tab to the open position.
X
XGA
—
extended graphics array
—
A video standard for video cards and controllers that supports resolutions up to 1024 x 768.
Z
ZIF
—
zero insertion force
—
A type of socket or connector that allows a computer chip to be installed or removed with no stress applied to either the chip or
its socket.
Zip
—
A popular data compression format. Files that have been compressed with the Zip format are called Zip files and usually have a filename extension
of
.zip
. A special kind of zipped file is a self-extracting file, which has a filename extension of
.exe
. You can unzip a self-extracting file by double-clicking it.
Zip drive
—
A high-capacity floppy drive developed by Iomega Corporation that uses 3.5-inch removable disks called Zip disks. Zip disks are slightly larger than
regular floppy disks, about twice as thick, and hold up to 100 MB of data.
Using the Keyboard and Touchpad
Numeric Keypad
Keyboard Shortcuts
Touch Pad
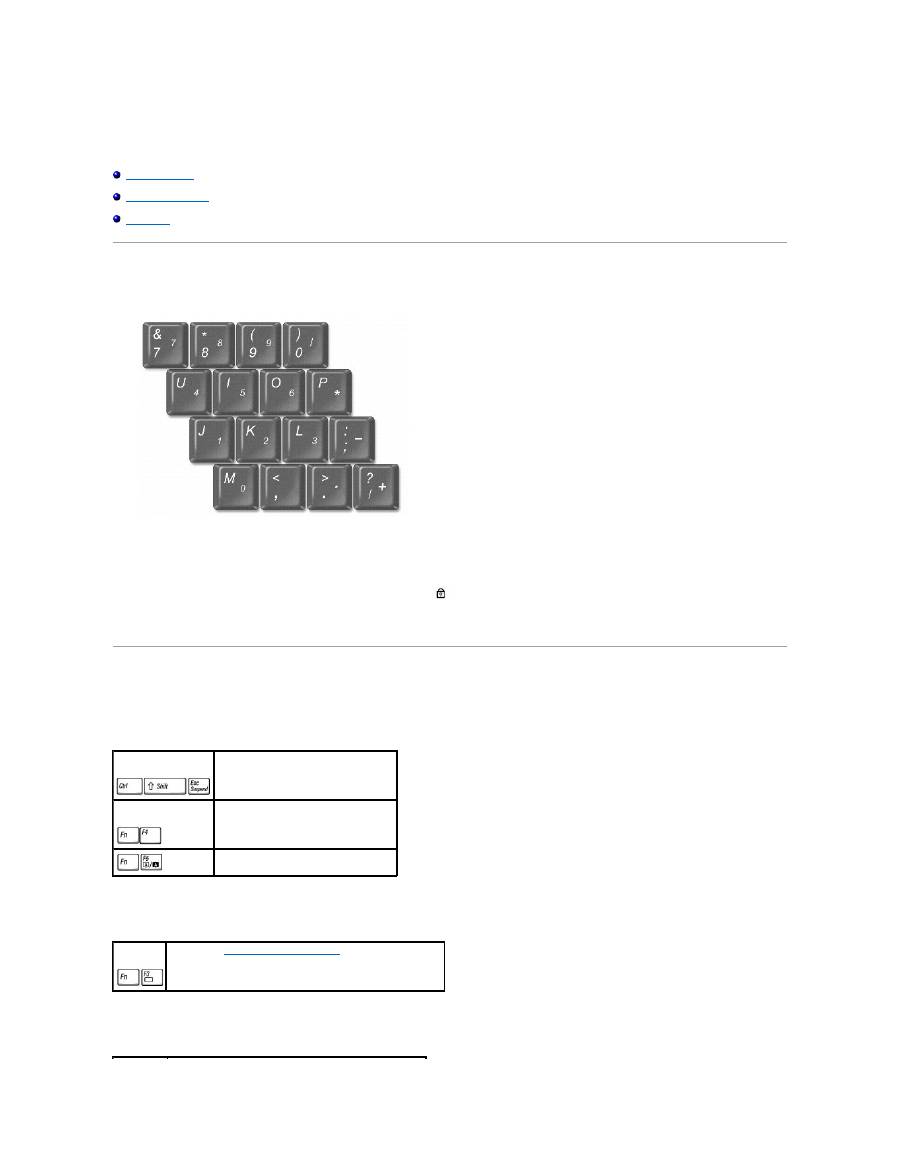
Numeric Keypad
The numeric keypad functions like the numeric keypad on an external keyboard. Each key on the keypad has multiple functions.
l
To enable the Num Lk keypad, hold down <Fn> and press <F4>. The
light indicates that the <Num Lk> is active.
l
To disable the keypad, press <Fn><F4> again.
Keyboard Shortcuts
System Functions
Battery
CD or DVD Tray
Opens the Task Manager window
Enables and disables the numeric keypad
Enables and disables the scroll lock
Displays the
Dell QuickSet Battery Meter
(if QuickSet is installed)

Display Functions
Radios (Including Wireless Networking and Bluetooth™)
Power Management
Speaker Functions
Microsoft
®
Windows
®
Logo Key Functions
Ejects the tray out of the drive (if
Dell QuickSet
is installed).
Switches the video image to the next display option. The options include the integrated display, an external monitor, and both displays
simultaneously.
Increases brightness on the integrated display only (not on an external monitor).
Decreases brightness on the integrated display only (not on an external monitor).
Enables and disables radios, including wireless networking and Bluetooth
Activates a power management mode. You can reprogram this keyboard shortcut to activate a different power management mode using the
Advanced Tab
in the
Power Options Properties
window.
Increases the volume of the integrated speakers and external speakers, if attached
Decreases the volume of the integrated speakers and external speakers, if attached
Enables and disables the integrated speakers and external speakers, if attached
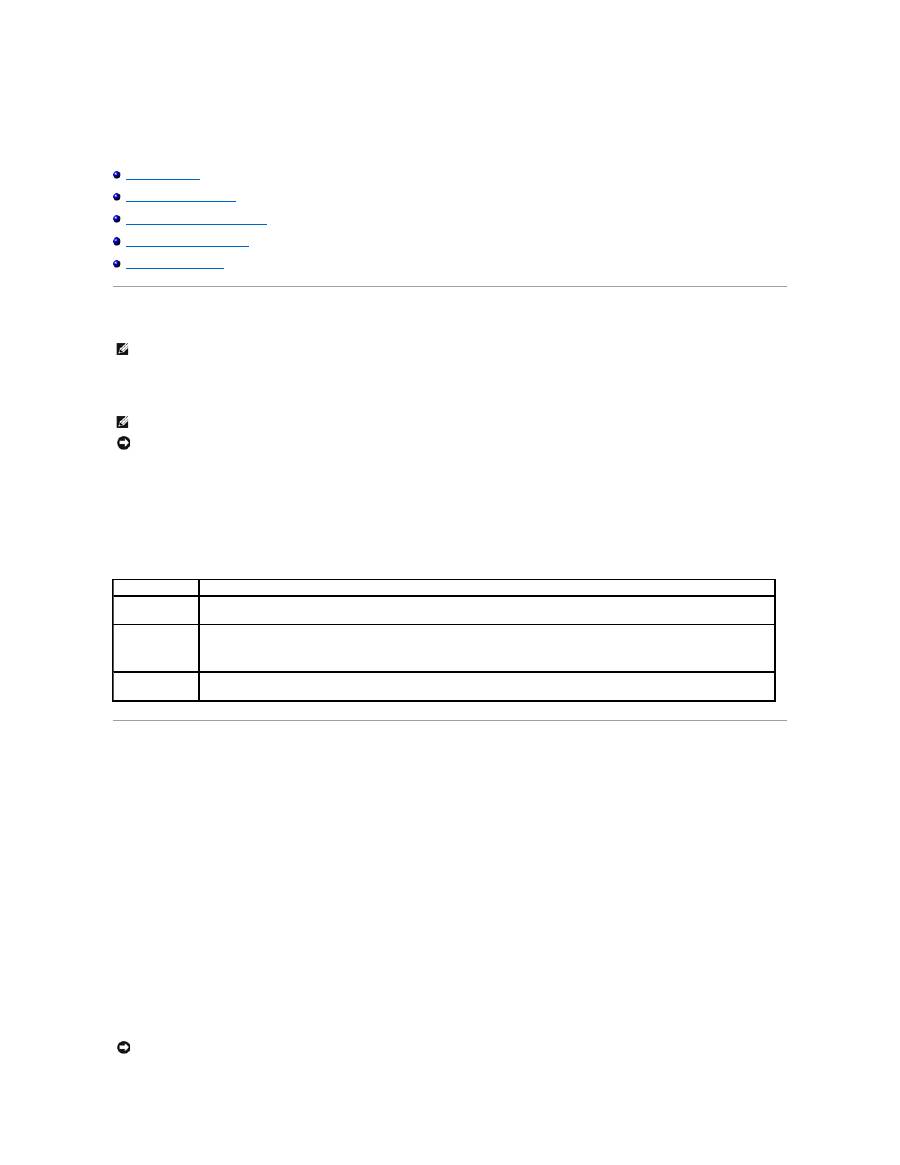
Minimizes all open windows
Maximizes all windows
Runs Windows Explorer
Opens the
Run
dialog box
Opens the
Search Results
dialog box
Opens the
Search Results-Computer
dialog box (if the computer is connected to a network)
To adjust keyboard operation, such as the character repeat rate:
l
In Windows XP
, open the Control Panel, click
Printers and Other Hardware
, and click
Keyboard
.
l
In Windows 2000
, open the Control Panel and double-click the
Keyboard
icon.
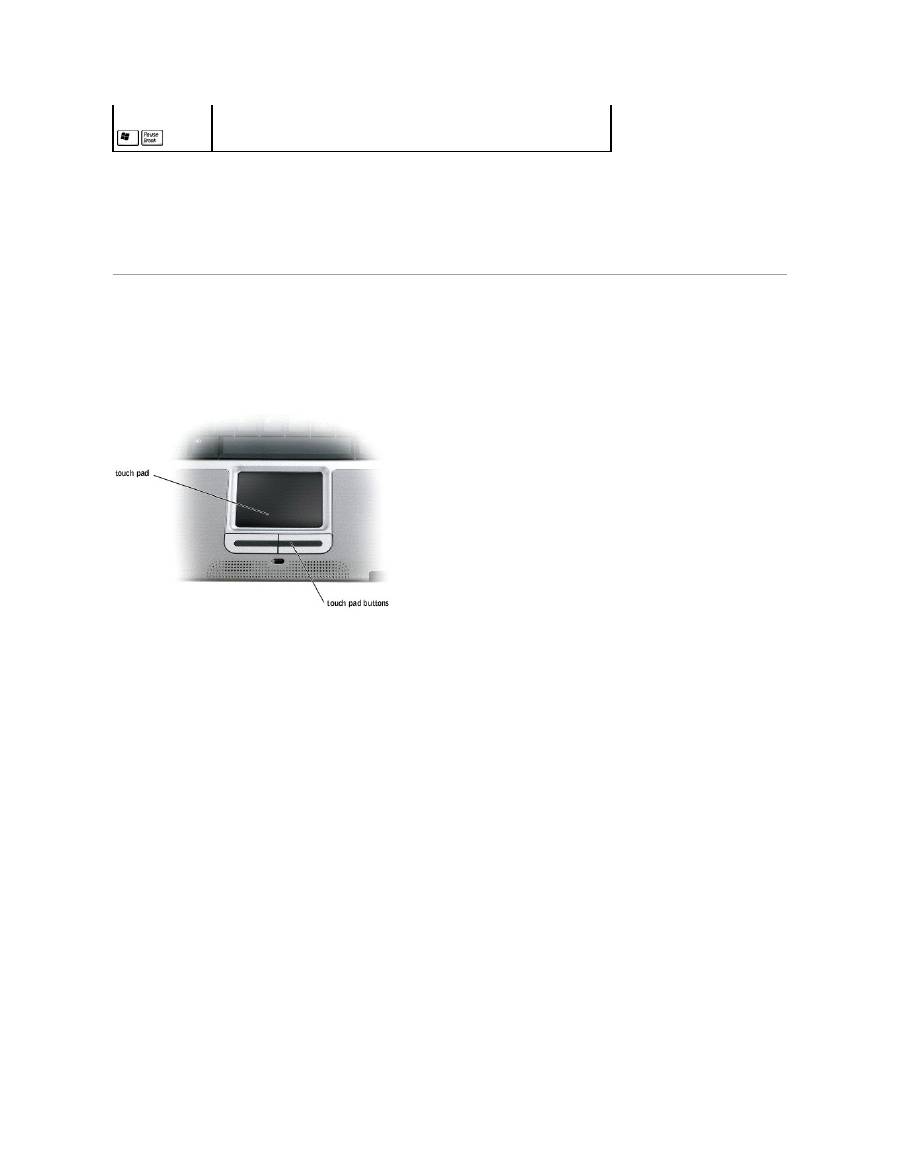
Touch Pad
The touch pad detects the pressure and movement of your finger to allow you to move the cursor on the display. Use the touch pad and touch pad buttons as
you would use a mouse.
l
To move the cursor, lightly slide your finger over the touch pad.
l
To select an object, lightly tap once on the surface of the touch pad or use your thumb to press the left touch-pad button.
l
To select and move (or drag) an object, position the cursor on the object and tap down-up-down on the touch pad. On the second down motion, leave
your finger on the touch pad and move the selected object by sliding your finger over the surface.
l
To double-click an object, position the cursor on the object and tap twice on the touch pad or use your thumb to press the left touch-pad button twice.
Customizing the Touch Pad
You can use the
Mouse Properties
window to disable the touch pad or adjust their settings.
1.
In Windows XP
, open the Control Panel, click
Printers and Other Hardware
, and then click
Mouse
.
In Windows 2000
, open the Control Panel and double-click the
Mouse
icon.
2.
In the
Mouse Properties
window:
l
Click the
Device Select
tab to disable the touch pad.
l
Click the
Pointer
tab to adjust the touch pad.
3.
Click
OK
to save the settings and close the window.
Opens the
System Properties
dialog box
Passwords
About Passwords
Using a Primary Password
Using an Administrator Password
Using a Hard Drive Password
Assigning an Asset Tag
About Passwords
A primary password prevents unauthorized access to the computer at start-up. You can use an administrator password instead of the primary password. A
hard drive password helps prevent unauthorized access to data on the drive, even when the drive is installed in another computer.
If you forget any of your passwords, contact your system administrator or call Dell. For your protection, Dell technical support staff will ask you for proof of your
identity to ensure that only an authorized person can use the computer.
The following table identifies types and features of passwords available on your computer.
Using a Primary Password
The primary password allows you to protect the computer from unauthorized access.
After assigning a primary password, you must enter it each time you turn on your computer. The following message appears each time you turn on the
computer:
Please type in the primary or administrator password and press <Enter>.
To continue, enter your password (maximum eight characters).
If you do not enter a password within 2 minutes, the computer returns to its previous state.
If you have assigned an administrator password, you can use it instead of the primary password. The computer does not specifically prompt you for the
administrator password.
NOTE:
Passwords are disabled when you receive your computer.
NOTE:
Only hard drives purchased from Dell for use with the Dell™ Latitude™ D
-Family computers support hard drive passwords.
NOTICE:
Passwords provide a high level of security for data in your computer or hard drive. However, they are not foolproof. If you require more
security, obtain and use additional forms of protection, such as smart cards, data encryption programs, or PC Cards with encryption features.
Type of Password
Features
Primary
l
Protects the computer from unauthorized access
Administrator
l
Gives system administrators or service technicians access to computers for repair or reconfiguration
l
Allows you to restrict access to the system setup program in the same way a system password restricts access to the computer
l
Can be used instead of the primary password
Hard drive
l
Helps protect the data on your hard drive or external hard drive (if one is being used) from unauthorized access.
NOTICE:
If you disable the administrator password, the primary password is also disabled.

Using an Administrator Password
The administrator password is designed to give system administrators or service technicians access to computers for repair or reconfiguration. The
administrators or technicians can assign identical administrator passwords to groups of computers, allowing you to assign the primary password.
When you set an administrator password, the
Configure Setup
option becomes available in the system setup program. The
Configure Setup
option allows
you to restrict access to the system setup program in the same way a primary password restricts access to the computer.
The administrator password can be used instead of the primary password. Whenever you are prompted to enter the primary password, you can enter the
administrator password.
If you forget the primary password and do not have an administrator password assigned, or if you have both a primary and an administrator password
assigned but forget them both, contact your system administrator or contact Dell.
Using a Hard Drive Password
The hard drive password helps protect the data on your hard drive from unauthorized access. You can also assign a password for an external hard drive (if
one is being used) that can be the same as or different from the password for the primary hard drive.
After assigning a hard drive password, you must enter it each time you turn on the computer and each time you resume normal operation from standby
mode.
If the hard drive password is enabled, the following message appears each time you turn on the computer:
Please type in the hard-disk drive password and press <Enter>.
To continue, enter your password (maximum eight characters). Press <Esc> to return the computer to its previous state.
If you do not enter a password within 2 minutes, the computer returns to its previous state.
If you enter the wrong password, the following message appears:
Invalid password
[Press Enter to retry]
If the correct password is not entered in three attempts, the computer tries to boot from another bootable device if the
Boot First Device
option in the system
setup program is set to allow it. If the
Boot First Device
option is not set to allow booting from another device, the computer returns to the state it was in
when you turned it on.
If the hard drive password, the external hard-drive password, and the primary password are the same, you are prompted only for the primary password. If
the hard drive password is different from the primary password, you are prompted for both. Two different passwords provide greater security.
Assigning an Asset Tag
The Asset Tag utility allows you to enter an asset tag that you or your company assigns to the computer. After you enter an asset tag, the tag appears in the
system setup screens.
NOTE:
The administrator password provides access to the computer, but it does not provide access to the hard drive when a hard drive password is
assigned.
NOTICE:
If you disable the administrator password, the primary password is also disabled.
NOTE:
The administrator password provides access to the computer, but it does not provide access to a hard drive that is protected by a hard drive
password.

You can also use the Asset Tag utility to enter an owner tag that appears in the system log-on screen and with the primary password prompt.
Use your
Drivers and Utilities
CD to create a bootable floppy disk, and then use the bootable floppy disk to assign an asset tag:
1.
Save and close any open files and exit any open programs. Connect the Dell™ D/Bay with a floppy drive to the powered USB connector on the left side
of the computer, or connect a USB floppy drive to the USB connector on the right side of the computer.
2.
Insert the
Drivers and Utilities
CD.
3.
When the
Welcome Dell System Owner
window appears, click
Next
.
4.
Select
MS-DOS
from the
Operating System
drop-down menu.
5.
Click
Dell Portables Asset Tag
, click
Extract
, and then click
Setup
.
6.
Insert a blank floppy disk and press <Enter>.
Follow the instructions on the screen to create a bootable floppy disk.
7.
Boot the computer using the bootable floppy disk:
a.
Restart the computer.
b.
Press <F12> immediately after the DELL™ logo appears.
If the operating system logo appears, wait until you see the Microsoft
®
Windows
®
desktop, and then shut down the computer and try again.
c.
Press the arrow keys to select
Diskette Drive
and press <Enter>.
8.
Type
asset
and a space followed by the new asset tag, and press <Enter>.
For example, type the following command line and press <Enter>.
asset 1234$ABCD&
9.
When the computer prompts you to verify the asset tag, type
y
.
The computer displays the new or modified asset tag and the Service Tag.
10.
Restart your computer to exit the Asset Tag utility.
Viewing Existing Asset and Service Tags
1.
Boot the computer using the bootable floppy disk you created in "
Assigning an Asset Tag
."
2.
Type
asset
and press <Enter>.
Deleting an Asset Tag
1.
Boot the computer using the bootable floppy disk you created in "
Assigning an Asset Tag
."
2.
Type
asset /d
and press<Enter>.
3.
When the computer prompts you to delete the asset tag, type
y
.
Assigning an Owner Tag
An owner tag can have up to 48 characters; any combination of letters, numbers, and spaces is valid.
1.
Boot the computer using the bootable floppy disk you created in "
Assigning an Asset Tag
."
2.
Type
asset /o
and a space followed by the new owner tag, and press <Enter>.
For example, type the following command line and press <Enter>:
asset /o ABC Company
3.
When the computer prompts you to verify the owner tag, type
y
.
The computer displays the new owner tag.
Deleting an Owner Tag
NOTE:
An asset tag can have up to 10 characters; any combination of characters excluding spaces is valid.
NOTE:
For security, you cannot set, change, or delete the owner tag if the primary or administrator passwords are set.
1.
Boot the computer using the bootable floppy disk you created in "
Assigning an Asset Tag
."
2.
Type
asset /o /d
and press <Enter>.
3.
When the computer prompts you to delete the owner tag, type
y
.
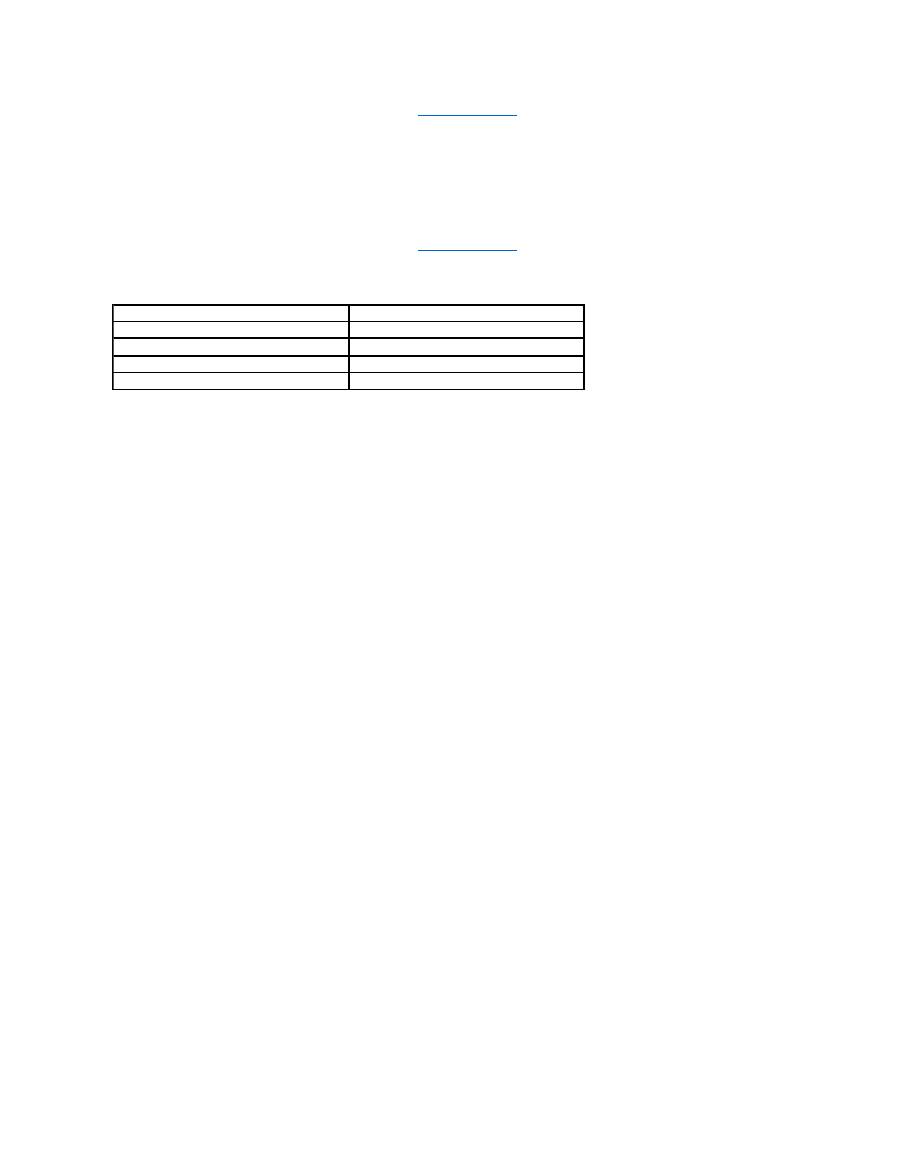
Asset Tag Options
To use one of the asset tag options (see the following table):
1.
Boot the computer using the bootable floppy disk you created in "
Assigning an Asset Tag
."
2.
Type
asset
and a space followed by the option, and then press <Enter>.
Asset Tag Option
Description
/d
Deletes the asset tag
/o
owner tag
Specifies a new owner tag
/o /d
Deletes the owner tag
/?
Displays the Asset Tag utility help screen

Using PC Cards
PC Card Types
PC Card Blanks
Extended PC Cards
Installing a PC Card
Removing a PC Card or Blank
PC Card Types
See "
Specifications
" for information on supported PC Cards.
The PC Card slot has one connector that supports a single Type I or Type II card. The PC Card slot supports CardBus technology and extended PC Cards.
"Type" of card refers to its thickness, not its functionality
PC Card Blanks
Your computer shipped with a plastic blank installed in the PC Card slot. Blanks protect unused slots from dust and other particles. Save the blank for use
when no PC Card is installed in the slot; blanks from other computers may not fit your computer.
To remove the blank, see "
Removing a PC Card or Blank
."
Extended PC Cards
An extended PC Card (for example, a wireless network adapter) is longer than a standard PC Card and extends outside the computer. Follow these
precautions when using extended PC Cards:
l
Protect the exposed end of an installed card. Striking the end of the card can damage the system board.
l
Always remove an extended PC Card before you pack the computer in its carrying case.
Installing a PC Card
You can install a PC Card in the computer while the computer is running. The computer automatically detects the card.
PC Cards are generally marked with a symbol (such as a triangle or an arrow) to indicate which end to insert into the slot. The cards are keyed to prevent
incorrect insertion. If card orientation is not clear, see the documentation that came with the card.
To install a PC Card:
1.
Hold the card with its orientation symbol pointing into the slot and the top side of the card facing up. The latch may need to be in the "in" position
before you insert the card.
2.
Slide the card into the slot until the card is completely seated in its connector.
If you encounter too much resistance, do not force the card. Check the card orientation and try again.
NOTE:
A PC Card is not a bootable device.
The computer recognizes most PC Cards and automatically loads the appropriate device driver. If the configuration program tells you to load the
manufacturer's drivers, use the floppy disk or CD that came with the PC Card.
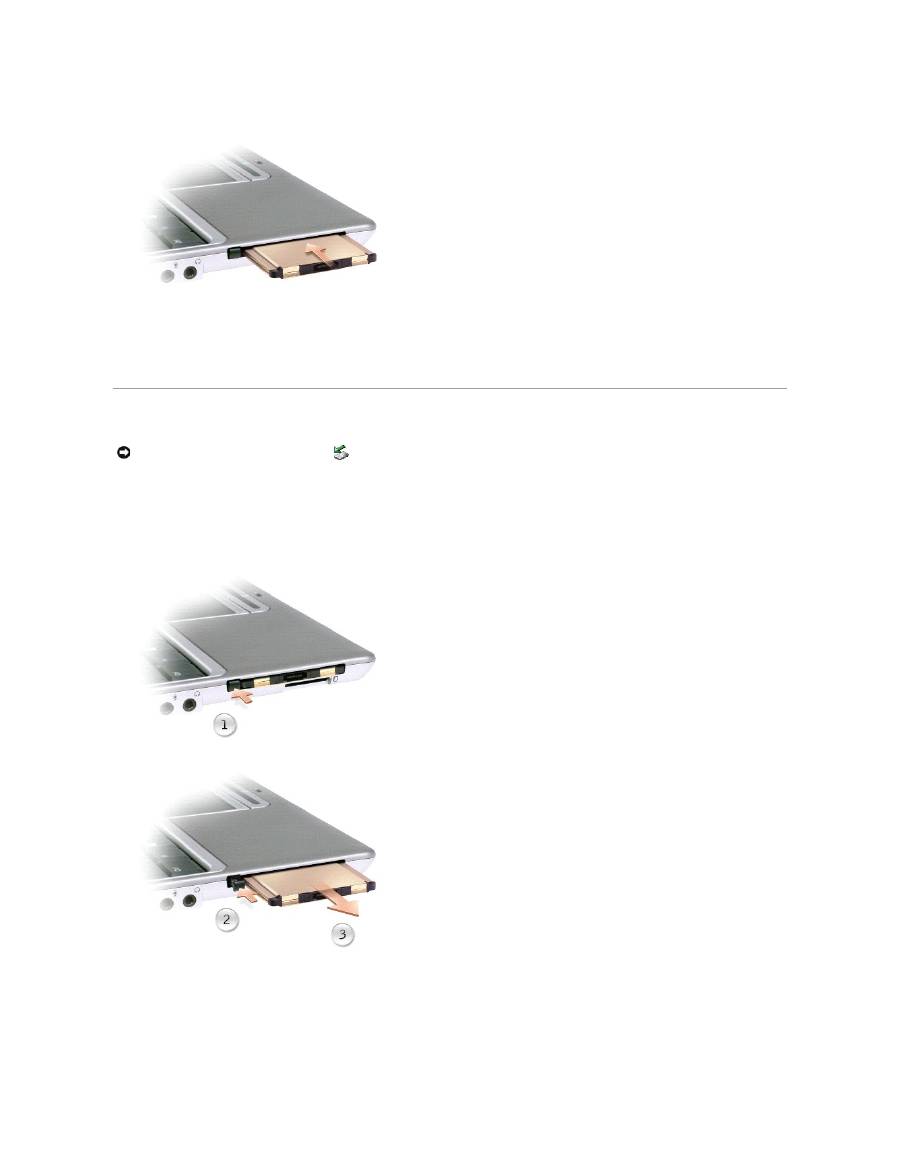
Removing a PC Card or Blank
Press the latch and gently remove the card or blank. For some latches, you must press the latch twice: once to pop the latch out, and then a second time to
pop the card out.
Save a blank to use when no PC Card is installed in a slot. Blanks protect unused slots from dust and other particles.
NOTICE:
Use the PC Card configuration utility
on the taskbar to select a card and stop it from functioning before you remove it from the computer.
If you do not stop the card in the configuration utility, you could lose data. Do not attempt to eject a card by pulling its cable, if one is attached.
Solving Problems
Power Problems
Fill out the
Diagnostics Checklist
as you complete these checks.
Error Messages
If the message is not listed, see the documentation for the operating system or the program that was running at the time the message appeared.
Power Problems
Error Messages
Video and Display Problems
Sound and Speaker Problems
Printer Problems
Modem and Internet Connection Problems
Touch Pad or Mouse Problems
External Keyboard Problems
Unexpected Characters
Drive Problems
PC Card Problems
Network Problems
General Program Problems
If Your Computer Gets Wet
If You Drop or Damage Your Computer
Resolving Other Technical Problems
Check the power light
—
When the power light is lit or blinking, the computer has power. If the light is off, press the power button to turn
on the computer.
Charge the battery
—
The battery charge may be depleted.
1.
Reinstall the battery.
2.
Use the AC adapter to connect the computer to an electrical outlet.
3.
Turn on the computer.
Check the battery status light
—
If the battery status light flashes orange or is a steady orange the battery charge is low or depleted.
Connect the computer to an electrical outlet.
If the battery status light rapidly flashes orange, the battery may be defective.
Contact Dell
.
Test the electrical outlet
—
Ensure that the electrical outlet is working by testing it with another device, such as a lamp.
Check the AC adapter
—
Check the AC adapter cable connections. If the AC adapter has a light, ensure that the light is on.
Connect the computer directly to an electrical outlet
—
Bypass power protection devices, power strips, and the extension cable to verify
that the computer turns on.
Eliminate possible interference
—
Turn off nearby fans, fluorescent lights, halogen lamps, or other appliances.
Adjust the Power Properties
—
See "
Power Options Properties
."
Reseat the memory module
—
If the computer power light turns on but the display remains blank,
reseat the memory module
.

Auxiliary device failure
—
The touch pad or external PS/2 mouse may be faulty. For an external mouse, check the cable connection.
Enable the Pointing Device option in the system setup program. If the problem persists,
contact Dell
.
Bad command or file name
—
Ensure that you have spelled the command correctly, put spaces in the proper place, and used the correct
pathname.
Cache disabled due to failure
—
The primary cache internal to the microprocessor has failed.
Contact Dell
.
CD drive controller failure
—
The CD drive does not respond to commands from the computer. See "
Network Problems
."
Data error
—
The floppy or hard drive cannot read the data. See "
Network Problems
."
Decreasing available memory
—
The memory module may be faulty or improperly seated. Reseat the memory module and, if
necessary, replace it. See "
Adding Memory
."
Disk C: failed initialization
—
The hard drive failed initialization. Run the Hard-Disk Drive tests as described in the "
Dell Diagnostics
."
Floppy drive 0 seek failure
—
The system configuration information may not match the hardware configuration. Run the Diskette tests
as described in the "
Dell Diagnostics
."
Diskette read failure
—
The floppy disk may be defective. If the drive access light turns on, try a different disk. See "
Network
Problems
."
Diskette subsystem reset failed
—
The floppy drive controller may be faulty. Run the Diskette tests as described in the "
Dell
Diagnostics
."
Diskette write-protected
—
Because the floppy disk is write-protected, the operation cannot be completed. Slide the write-protect
notch.
Drive not ready
—
The operation requires a floppy disk in the drive or a hard drive in the bay before it can continue. Insert a floppy
disk, or push the floppy disk all the way into the drive until the eject button pops out.
Error reading PCMCIA card
—
The computer cannot identify the PC Card. Reinsert the card or try another PC Card.
Extended memory size has changed
—
The amount of memory recorded in NVRAM does not match the memory installed in the
computer. Restart the computer. If the error appears again,
contact Dell
.
Gate A20 failure
—
A memory module may be loose.
Reinstall the memory module
and, if necessary, replace it.
General failure
—
The operating system is unable to carry out the command. This message is usually followed by specific information
—
for example,
Printer out of paper
. Take the appropriate action.
Hard-disk drive configuration error
—
The computer cannot identify the drive type. Turn off the computer, remove the hard drive, and
boot the computer from a bootable floppy disk or CD. Then turn off the computer, reinstall the hard drive, and restart the computer.
Run the Hard-Disk Drive tests as described in the "
Dell Diagnostics
."
Hard-disk drive controller failure 0
—
The hard drive does not respond to commands from the computer. Turn off the computer, remove
the hard drive, and boot the computer from a bootable floppy disk or CD. Then turn off the computer, reinstall the hard drive, and
restart the computer. If the problem persists, try another drive. Run the Hard-Disk Drive tests as described in the "
Dell Diagnostics
."
Hard-disk drive failure
—
The hard drive does not respond to commands from the computer. Turn off the computer, remove the hard
drive, and boot the computer from a bootable floppy disk or CD. Then turn off the computer, reinstall the hard drive, and restart the
computer. If the problem persists, try another drive. Run the Hard-Disk Drive tests as described in "
Dell Diagnostics
."
Hard-disk drive read failure
—
The hard drive may be defective. Turn off the computer, remove the hard drive, and boot the computer
from a bootable floppy disk or CD. Then turn off the computer, reinstall the hard drive, and restart the computer. If the problem
persists, try another drive. Run the Hard-Disk Drive tests as described in "
Dell Diagnostics
."

Insert bootable media
—
The operating system is trying to boot to a nonbootable floppy disk or CD. Insert a bootable floppy disk or CD.
Invalid configuration information-please run System Setup Program
—
The system configuration information does not match the
hardware configuration. This message is most likely to occur after a memory module is installed. Correct the appropriate options in the
system setup program. See "
Commonly Used Options
."
Keyboard clock line failure
—
For external keyboards, check the cable connection. Run the Keyboard Controller test as described in the
"
Dell Diagnostics
."
Keyboard controller failure
—
For external keyboards, check the cable connection. Restart the computer, and avoid touching the
keyboard or the mouse during the boot routine. Run the Keyboard Controller test as described in the "
Dell Diagnostics
."
Keyboard data line failure
—
For external keyboards, check the cable connection. Run the Keyboard Controller test as described in the
"
Dell Diagnostics
."
Keyboard stuck key failure
—
For external keyboards or keypads, check the cable connection. Restart the computer, and avoid touching
the keyboard or keys during the boot routine. Run the Stuck Key test as described in the "
Dell Diagnostics
."
Memory address line failure at address, read value expecting value
—
A memory module may be faulty or improperly seated.
Reinstall
the memory module
and, if necessary, replace it.
Memory allocation error
—
The software you are attempting to run is conflicting with the operating system, another program, or a
utility. Turn off the computer, wait 30 seconds, and then restart it. Try to run the program again. If the error message still appears, see
the software documentation.
Memory data line failure at address, read value expecting value
—
A memory module may be faulty or improperly seated.
Reinstall the
memory module
and, if necessary, replace it.
Memory double word logic failure at address, read value expecting value
—
A memory module may be faulty or improperly seated.
Reinstall the memory module
and, if necessary, replace it.
Memory odd/even logic failure at address, read value expecting value
—
A memory module may be faulty or improperly seated.
Reinstall the memory module
and, if necessary, replace it.
Memory write/read failure at address, read value expecting value
—
A memory module may be faulty or improperly seated.
Reinstall
the memory module
and, if necessary, replace it.
No boot device available
—
The computer cannot find the floppy disk or hard drive. If the floppy drive is your boot device, ensure that a
bootable floppy disk is in the drive. If the hard drive is your boot device, ensure that the drive is installed, properly seated, and
partitioned as a boot device.
No boot sector on hard drive
—
The operating system may be corrupted.
Contact Dell
.
No timer tick interrupt
—
A chip on the system board may be malfunctioning. Run the System Set tests as described in the "
Dell
Diagnostics
."
Operating system not found
—
Contact Dell
.
Optional ROM bad checksum
—
The optional ROM apparently failed.
Contact Dell
.
A required .DLL file was not found
—
The program that you are trying to open is missing an essential file. Remove and then reinstall the
program.
Microsoft
®
Windows
®
XP
1.
Click the Start button.
2.
Click
Control Panel
.
3.
Click Add or Remove Programs.
4.
Select the program you want to remove.
5.
Click Remove/Change and follow the prompts on the screen.
6.
See the program documentation for installation instructions.
Windows 2000

Video and Display Problems
Fill out the
Diagnostics Checklist
as you complete these checks.
If the display is blank
1.
Click the Start button, point to Settings, and then click Control Panel.
2.
Double-click the Add/Remove Programs icon.
3.
Select the program that you want to remove.
4.
Click Change or Remove Programs.
5.
See the program documentation for installation instructions.
Sector not found
—
The operating system cannot locate a sector on the floppy or hard drive. You may have a defective sector or
corrupted FAT on the floppy disk or hard drive. Run the Windows error-checking utility to check the file structure on the floppy disk or
hard drive. See Windows
®
Help
for instructions. If a large number of sectors are defective, back up the data (if possible), and then
reformat the floppy disk or hard drive.
Seek error
—
The operating system cannot find a specific track on the floppy disk or hard drive. If the error is on the floppy disk, try
another floppy disk.
Shutdown failure
—
A chip on the system board may be malfunctioning. Run the System Set tests as described in the "
Dell
Diagnostics
."
Time-of-day clock lost power
—
System configuration settings are corrupted. Connect your computer to an electrical outlet to charge
the battery. If the problem persists, try to restore the data by entering the system setup program. Then immediately exit the program.
See "
Using the System Setup Program
." If the message reappears,
contact Dell
.
Time-of-day clock stopped
—
The reserve battery that supports the system configuration settings may be dead. Connect your computer
to an electrical outlet to charge the battery. If the problem persists,
contact Dell
.
Time-of-day not set-please run the System Setup program
—
The time or date stored in the system setup program does not match the
system clock. Correct the settings for the Date and Time options. See "
Using the System Setup Program
."
Timer chip counter 2 failed
—
A chip on the system board may be malfunctioning. Run the System Set tests as described in the the "
Dell
Diagnostics
."
Unexpected interrupt in protected mode
—
The keyboard controller may be malfunctioning, or a memory module may be loose. Run the
System Memory tests and the Keyboard Controller test as described in the "
Dell Diagnostics
."
x:\ is not accessible. The device is not ready
—
Insert a disk into the drive and try again.
Warning: Battery is critically low
—
The battery is running out of charge. Replace the battery, or connect the computer to an electrical
outlet. Otherwise, activate hibernate mode or turn off the computer.
NOTE:
If you are using a program that requires a higher resolution than your computer supports, Dell recommends that you attach an external monitor
to your computer.
Check the
light
—
When the
light is on, the computer is turned on.
l
If the
light is off, press the power button.
l
If the
light is blinking, your power management settings may have caused the display to turn off. Press the power button to exit
standby mode.
Check the battery
—
If you are using a battery to power your computer, the battery charge may be depleted. Connect the computer to an
electrical outlet using the AC adapter, and turn on the computer.
Test the electrical outlet
—
Ensure that the electrical outlet is working by testing it with another device, such as a lamp.
If the display is difficult to read
If only part of the display is readable
Sound and Speaker Problems
Fill out the
Diagnostics Checklist
as you complete these checks.
If you have a problem with integrated speakers
Check the AC adapter
—
Check the AC adapter cable connections. If the AC adapter has a light, ensure that it is on.
Connect the computer directly to an electrical outlet
—
Bypass power protection devices, power strips, and the extension cable to verify
that the computer turns on.
Adjust the Power Properties
—
Search for the keyword
standby
in Windows
Help
or Windows Help and Support Center.
Switch the video image
—
If your computer is attached to an external monitor, press <Fn><F8> to switch the video image to the display.
Adjust the brightness
—
See "
Adjusting Brightness
" for instructions on adjusting the brightness.
Move the subwoofer away from the computer or monitor
—
If your external speaker system includes a subwoofer, ensure that the
subwoofer is at least 60 cm (2 ft) away from the computer or external monitor.
Eliminate possible interference
—
Turn off nearby fans, fluorescent lights, halogen lamps, or other appliances.
Rotate the computer to face a different direction
—
Eliminate sunlight glare, which can cause poor picture quality.
Adjust the Windows display settings
Windows XP
1.
Click the
Start
button and then click
Control Panel
.
2.
Click
Appearance and Themes
.
3.
Click the area you want to change or click the
Display
icon.
4.
Try different settings for
Color quality
and
Screen resolution
.
Windows 2000
1.
Click the
Start
button, point to
Settings
, and then click
Control Panel
.
2.
Double-click the
Display
icon and then click the
Settings
tab.
3.
Try different settings for
Colors
,
Screen area
, and
Advanced Settings
.
Run the Video diagnostics tests
—
If no error message appears and you still have a display problem, but the display is not completely blank,
run the
Video
device group in the Dell Diagnostics. Then
contact Dell
.
See "Error Messages"
—
If an error message appears, see "
Error Messages
."
Connect an external monitor
1.
Turn off your computer and connect an external monitor to the computer.
2.
Turn on the computer and the monitor and adjust the monitor brightness and contrast controls.
If the external monitor works, the computer display or video controller may be defective.
Contact Dell
.
If you have a problem with external speakers
Printer Problems
Fill out the
Diagnostics Checklist
as you perform the various checks.
Adjust the Windows
®
volume control
—
Double-click the speaker icon in the lower-right corner of your screen. Ensure that the volume is
turned up and that the sound is not muted. Adjust the volume, bass, or treble controls to eliminate distortion.
Adjust the volume using keyboard shortcuts
—
See "
Keyboard Shortcuts
." Press <Fn><End> to disable (mute) or reenable the integrated
speakers.
Reinstall the sound (audio) driver
—
See "
Reinstalling Drivers and Utilities
."
NOTE:
The volume control in some MP3 players overrides the Windows volume setting. If you have been listening to MP3 songs, make sure that you did
not turn the player volume down or off.
Check the speaker cable connections
—
See the setup diagram supplied with the speakers.
Test the electrical outlet
—
Ensure that the electrical outlet is working by testing it with another device, such as a lamp.
Ensure that the speakers are turned on
—
See the setup diagram supplied with the speakers.
Adjust the Windows volume control
—
Double-click the speaker icon in the lower-right corner of your screen. Ensure that the volume is
turned up and that the sound is not muted. Adjust the volume, bass, or treble controls to eliminate distortion.
Test the speakers
—
Plug the speaker audio cable into the headphone connector on the computer. Ensure that the headphone volume
control is turned up. Play a music CD.
Run the speaker self-test
—
Some speaker systems have a self-test button on the subwoofer. See the speaker documentation for self-test
instructions.
Eliminate possible interference
—
Turn off nearby fans, fluorescent lights, or halogen lamps to check for interference.
Reinstall the sound (audio) driver
—
See "
Reinstalling Drivers and Utilities
."
Check the printer cable connections
—
Ensure that the printer cable is properly connected to the computer.
Check the printer cable
1.
Turn off the printer and computer.
2.
Swap the printer cable with a cable that you know is working.
3.
Turn on the printer and computer, and try again to print.
4.
If you print successfully,
contact Dell
for assistance in obtaining a new printer cable.
Test the electrical outlet
—
Ensure that the electrical outlet is working by testing it with another device, such as a lamp.
Ensure that the printer is turned on
—
See the documentation supplied with the printer.
