Melissa 653-081 – страница 2
Инструкция к Микроволновой Печи Melissa 653-081

MIKROAALTOUUNIN OSAT
Älä sijoita mikroaaltouunia tai virtajohtoa kuumaan
paikkaan, kuten sähkölieden keittolevyjen tai kaasulieden
polttimien lähelle.
Mikroaaltouunin kytkeminen
Kytke mikroaaltouuni 230 voltin sähköverkkoon
(vaihtovirtaverkkoon), jonka taajuus on 50 Hz. Jos
mikroaaltouuni kytketään sähköverkkoon, jossa on väärä
jännite, takuu ei ole voimassa.
Pyörivän lasialustan asettaminen
Ennen kuin käytät uunia, tarkista, että pyörivä lasialusta
(6) on kiinnitetty pyöritysakselin (7) päälle. Sitä ei ole
suunniteltu pysymään lujasti paikallaan, mutta se on
asetettava uunin keskelle niin, ettei se kosketa uunin
reunoja kypsennyksen aikana.
Kellonajan asettaminen
Kun uuni kytketään pistorasiaan, kuuluu piippaus ja
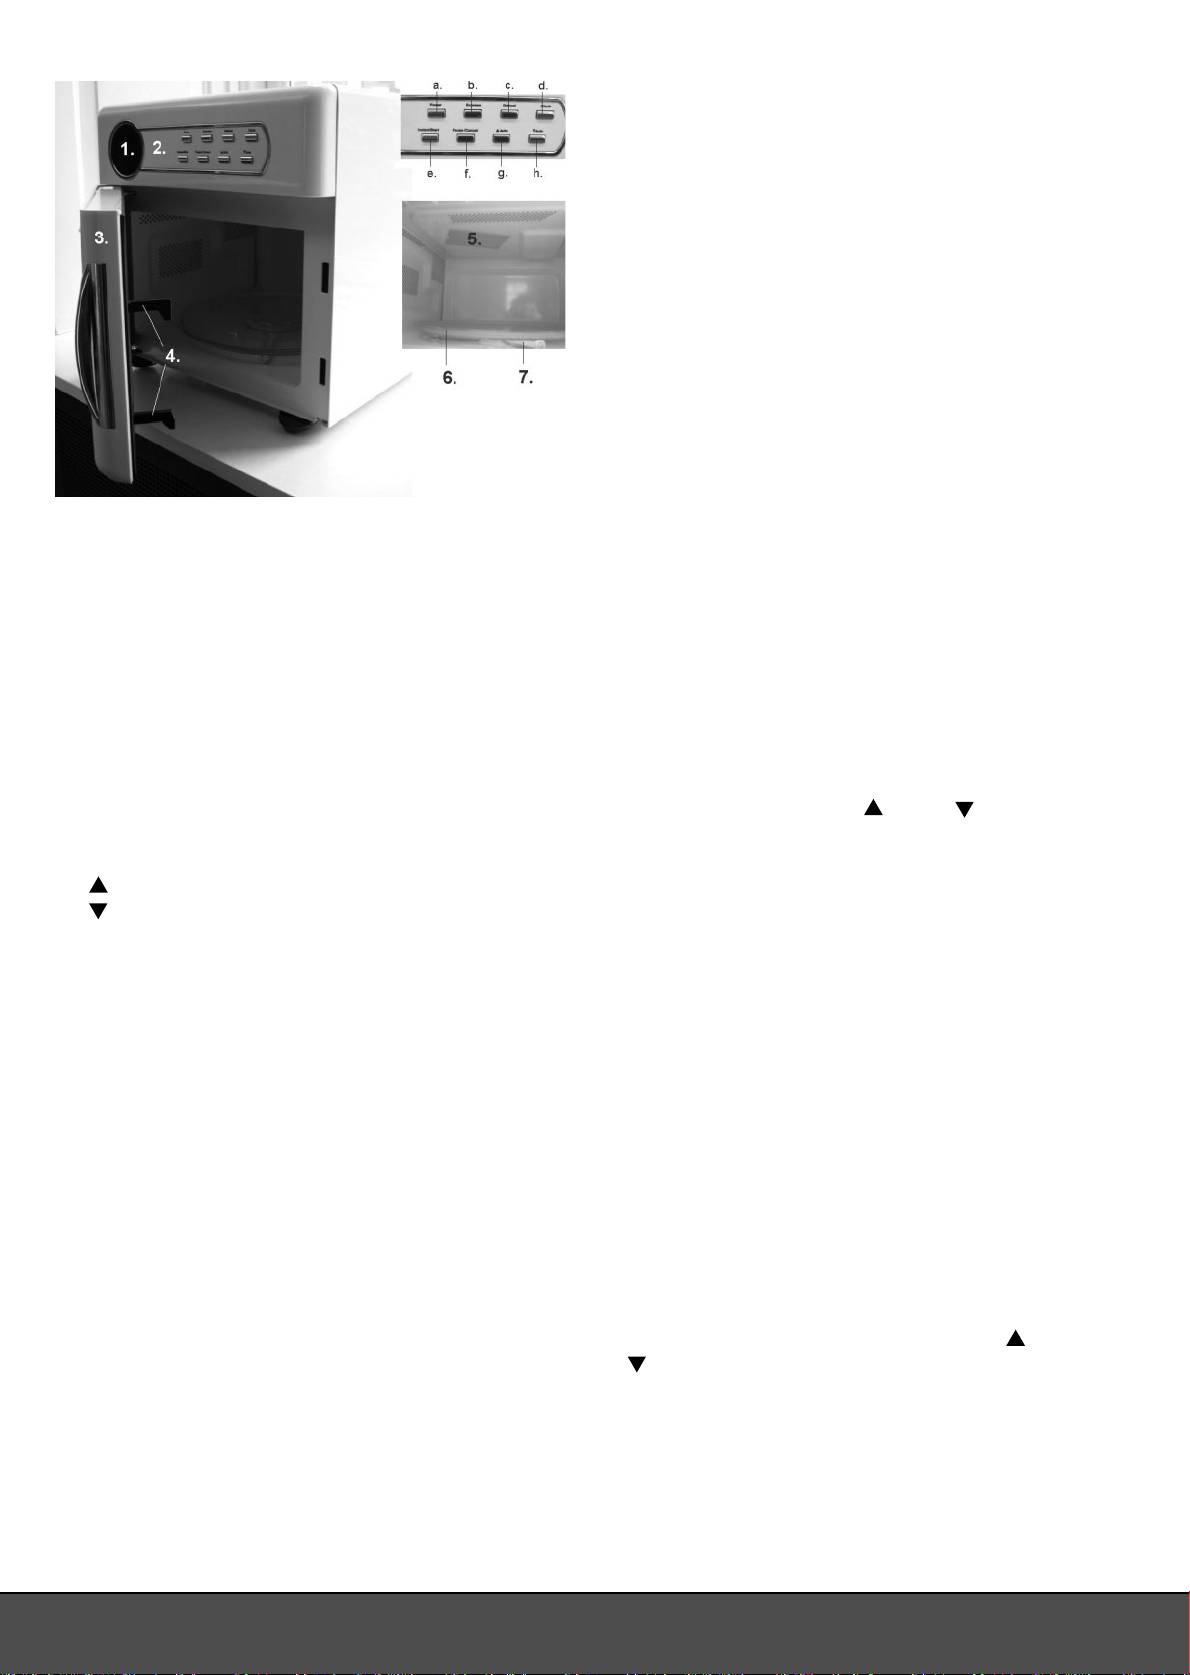
1. Näyttö
näytössä (1) vilkkuu kolmesti ”88:88”. Kun näytössä
2. Ohjauspaneeli
oleva kaksoispiste (:) vilkkuu, kelloon voi asettaa ajan.
3. Luukku
Huomaa: Mikroaaltouuni antaa äänimerkin aina, kun
4. Lukitustapit (turvalukko)
painat jotakin painiketta.
5. Mikroaaltoputken suojalevy
1. Paina Clock-painiketta (d) kerran. Näyttöön ilmestyy
6. Pyörivä lasialusta
”0:00” ja tuntinumero vilkkuu.
7. Pyöritysakseli
2. Aseta oikea tunti painamalla painikkeita Auto
(g) ja Auto (h). Jos tuntiaikaa ei aseteta noin
Ohjauspaneelin painikkeet:
viiden sekunnin kuluessa, asetus peruuntuu
a. Power (virta päälle/pois)
automaattisesti.
b. Express (pikakypsennys)
3. Paina Clock-painiketta vielä kerran. Minuuttinumero
c. Defrost (sulatus)
vilkkuu, ja minuutit voi nyt asettaa.
d. Clock (kello)
4. Lopeta asetus painamalla Clock-painiketta tai
e. Instant/start (pika/käynnistys)
odottamalla noin viisi sekuntia. Tämän jälkeen
f. Pause/Cancel (keskeytä/peruuta)
näytössä näkyy aika.
g. Auto (ylös, valitse automaattinen
kypsennysohjelma)
MIKROAALTOUUNIN KÄYTTÄMINEN
h. Auto (alas, valitse automaattinen
kypsennysohjelma)
Mikroaaltouunia käytetään seuraavalla tavalla:
MIKROAALTOUUNIN VALMISTELEMINEN
1. Aseta kypsennettävä ruoka uuniin ja sulje luukku.
2. Valitse kypsennystoiminto, -teho ja -aika, jos
Kaikki mikroaaltouunit on tarkistettu tehtaalla. Kun
tarpeen (tarkemmat tiedot on esitetty alla kohdassa
olet purkanut mikroaaltouunin pakkauksesta, tarkista
”Kypsennysaika”). Aloita kypsennys painamalla
kuitenkin turvallisuussyistä huolellisesti, ettei uuni ole
Instant/Start-painiketta (e).
vaurioitunut kuljetuksen aikana. Tarkista, ettei uunissa
3. Uuni käynnistyy ja näytössä näkyy jäljellä oleva
ole näkyviä vaurioita (kuten lommoja), ja että luukku
kypsennysaika. Jos haluat pidentää tai lyhentää
(3) sulkeutuu kunnolla ja saranat ovat kunnossa. Jos
kypsennysaikaa uunin käydessä, paina painiketta
mikroaaltouunissa on vaurioita, ota yhteyttä liikkeeseen,
Auto (g) ja Auto (h).
josta ostit sen. Älä käytä uunia, ennen kuin valtuutettu
4. Voit keskeyttää kypsennyksen milloin tahansa
huoltoliike on tarkistanut sen kunnon.
painamalla Pause/Cancel-painiketta (f).
Tarkista ennen mikroaaltouunin käyttämistä, että olet
Kypsennyksen voi keskeyttää myös silloin, kun
poistanut kaikki pakkausmateriaalit sekä sisä- että
käynnissä on pikakypsennys, manuaalinen
ulkopuolelta.
kypsennys, automaattinen sulatus, automaattinen
kypsennysohjelma tai kypsennys ajastimella.
Mikroaaltouunin sijoittaminen
• Jos painat painiketta kerran, kypsennys keskeytyy
Aseta uuni vaakasuoralle alustalle ja jätä sen taakse
väliaikaisesti. Jos painat painiketta kahdesti,
vähintään 10 cm, sivuille 5 cm, ja yläpuolelle 20 cm
kypsennys keskeytyy kokonaan.
tyhjää tilaa, jotta uunin ilmanvaihto toimii hyvin. Älä
• Voit myös keskeyttää kypsennyksen väliaikaisesti
irrota mikroaaltouunin jalkoja. Tämä uuni on suunniteltu
avaamalla luukun (Tämä on käytännöllistä, jos ruokaa
pysymään itsestään pystyssä. Huolehdi aina, että
on käänneltävä.).
kotelon päällä olevia tuuletusaukkoja ei ole peitetty. Jos
• Väliaikaisesti keskeytettyä kypsennystä voit jatkaa
ilma ei pääse virtaamaan vapaasti tuuletusaukoista, uuni
painamalla Instant/start-painiketta.
voi ylikuumentua. Mikroaaltouunia ei saa käyttää, ennen
kuin se on jäähtynyt.
21
manual.indd 21manual.indd 21 08/04/05 11:14:4508/04/05 11:14:45
5. Uunista katkeaa virta automaattisesti, kun asetettu
HUOM. Kypsennyksen aikana voit tarkistaa
kypsennysaika on kulunut. Näytössä näkyy ”End”, ja
tehotason painamalla Power-painiketta. Valittu vaihe
kuuluu kuusi piippausta. Jos painat Pause/Cancel-
näkyy niin kauan, kuin pidät painiketta alhaalla. Kun
painiketta tai avaat uunin luukun, kolmen minuutin
vapautat painikkeen, normaali näyttö tulee taas
kuluttua kuuluu kolme piippausta.
näkyviin.
6. Kun olet avannut luukun tai painanut Pause/Cancel-
painiketta, näyttöön palautuu kellonaika.
Pikakypsennys
Pikakypsennys toimii täydellä teholla joko 30 sekuntia,
KYPSENNYSTOIMINNOT
yhden minuutin, tai minuutin ja 30 sekuntia.
Pisin mahdollinen kypsennysaika on 99 minuuttia ja 99
1. Paina Express-painiketta (b), kunnes näyttöön
sekuntia. Kypsennysajat asetetaan 10 sekunnin jaksoissa
ilmestyy haluamasi kypsennysaika.
viiteen minuuttiin saakka ja sen jälkeen 30 sekunnin
2. Käynnistä kypsennys painamalla Instant/start-
jaksoissa.
painiketta.
Manuaalinen kypsennys ja tehotason valinta
Automaattinen sulatus
1. Valitse teho painamalla Power-painiketta (a). Alla
Uunissa on kolme sulatusohjelmaa:
olevassa taulukossa on esitetty eri tehotasot.
2. Kun näet haluamasi tehon näytöllä (katso alla
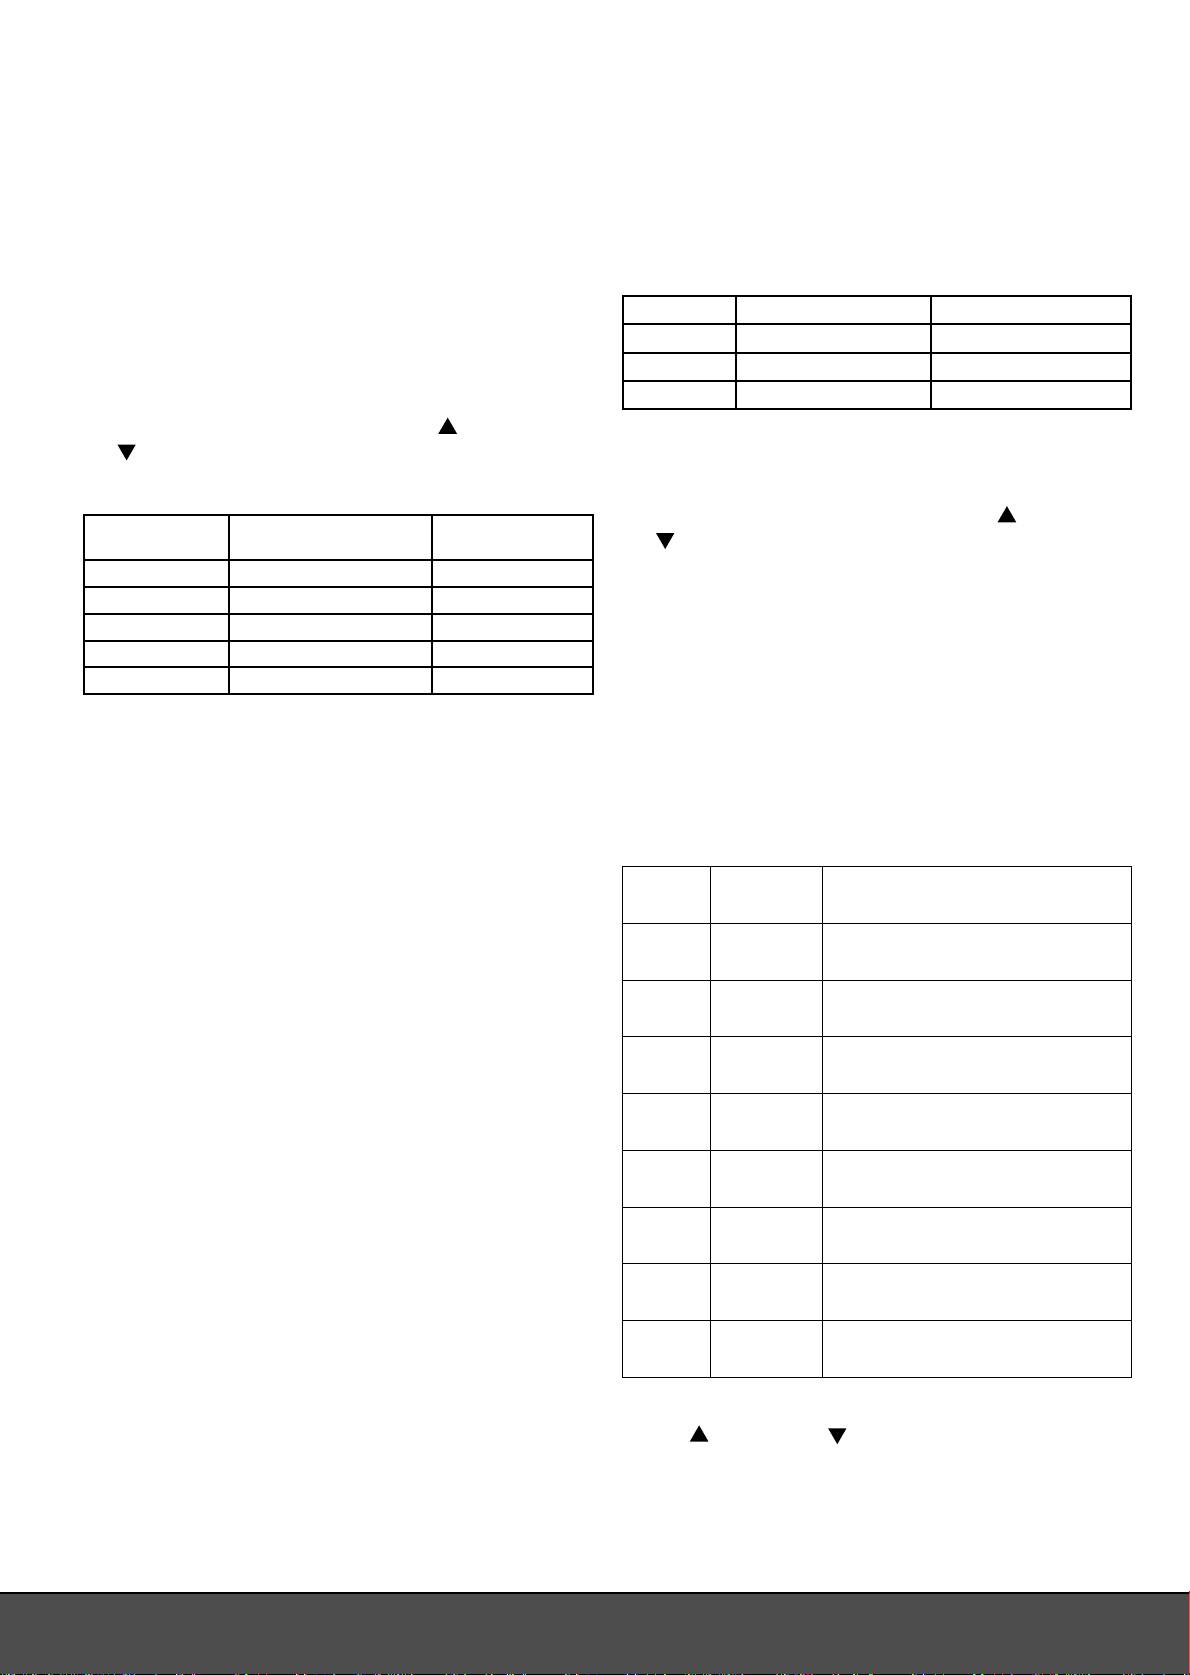
Ohjelma Käyttötarkoitus Paino
olevasta taulukosta kohta ”Näyttöteksti”), aseta
d1 Liha 0,1–2,0 kg
haluamasi kypsennysaika painikkeilla
Auto (g) ja
d2 Siipikarja 0,2–3,0 kg
Auto (h).
d3 Kala ja äyriäiset 0,1–0,9 kg
3. Käynnistä kypsennys painamalla Instant/start-
painiketta.
1. Paina Defrost-painiketta (c), kunnes näyttöön
ilmestyy haluamasi ohjelma.
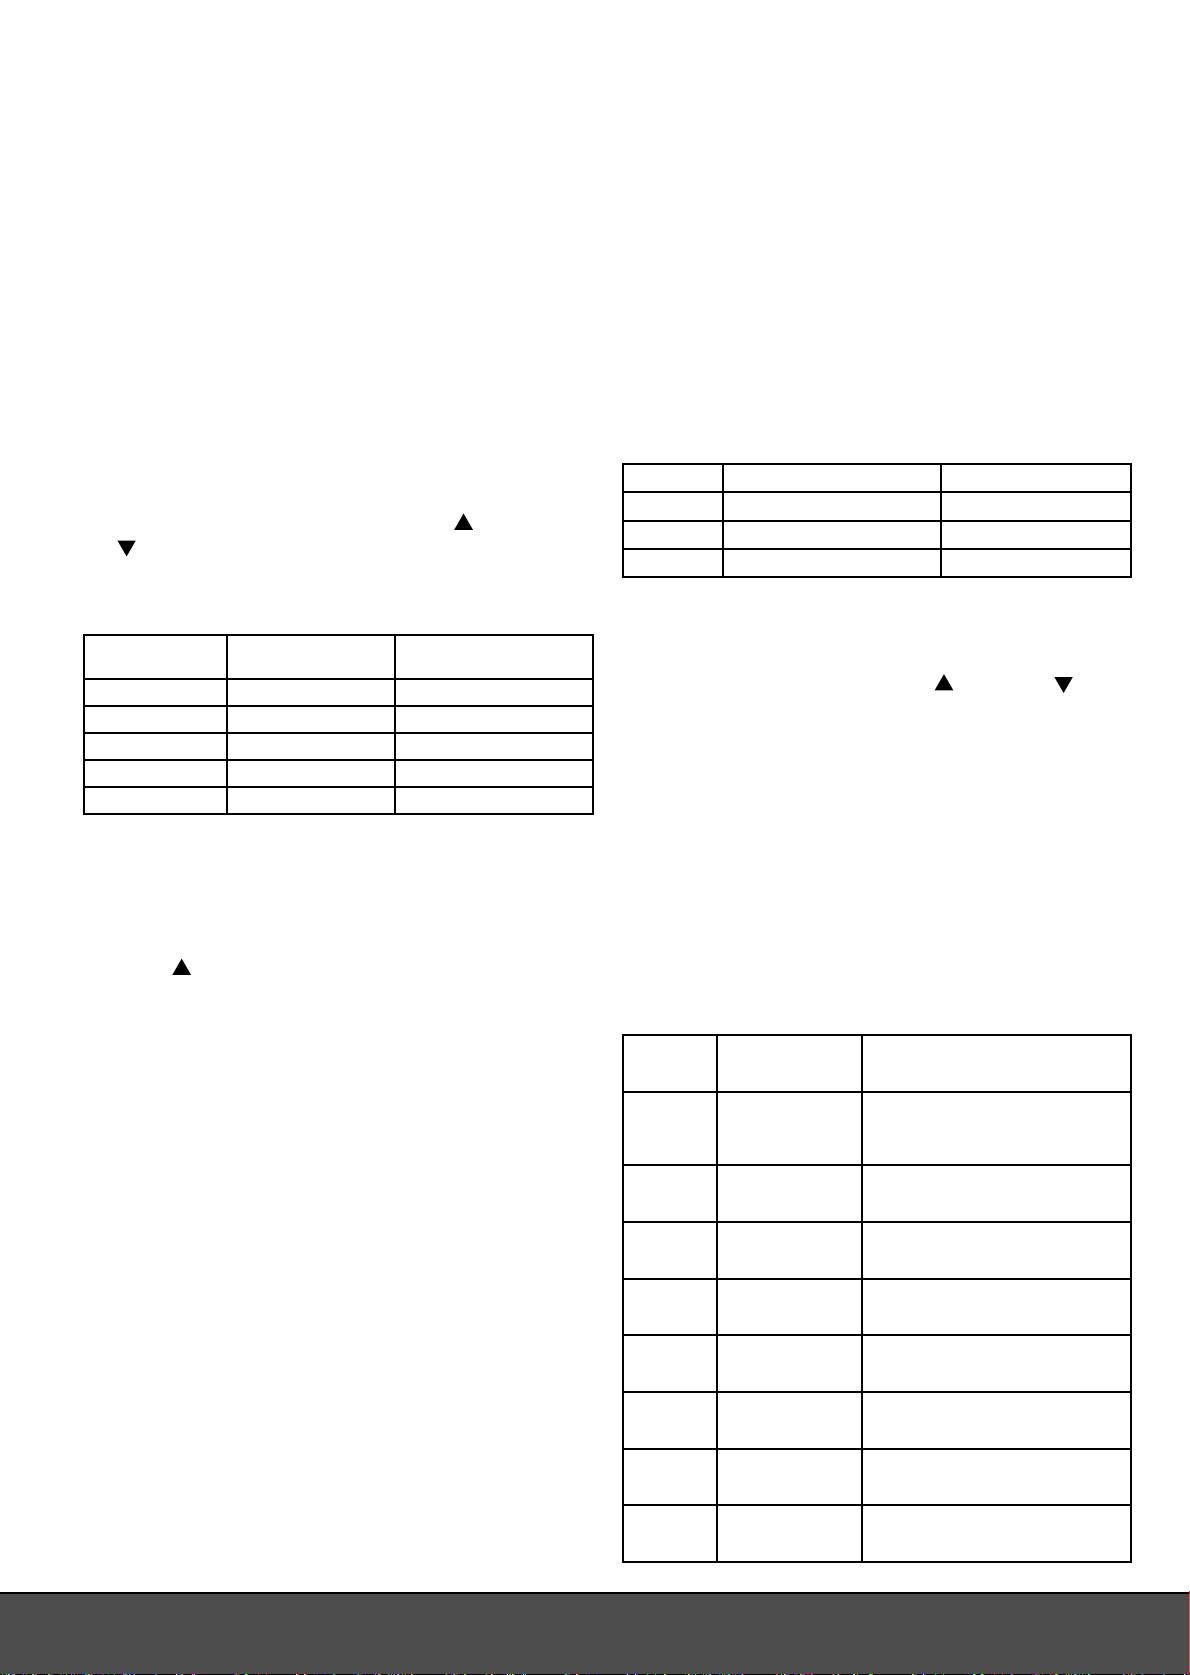
Painallusten
Näyttöteksti Mikroaaltoteho
2. Paina Instant/start-painiketta.
määrä
3. Valitse ruuan paino painikkeilla Auto (g) ja Auto
1 100P 100 %
(h). Ohjelma asettaa sulatusajan automaattisesti.
2 80P 80 %
4. Käynnistä sulatus painamalla Instant/start-painiketta.
3 60P 60 %
5. Suosittelemme, että käännät ruuan, kun uuni
4 40P 40 %
piippaa kuusi kertaa. Sulatus ei keskeydy, ellet avaa
5 20P 20 %
uunin luukkua tai paina Pause/Cancel-painiketta.
Käännettyäsi ruuan jatka sulatusta painamalla
Esimerkki:
Instant/Start-painiketta.
Haluat asettaa mikroaaltouunin kypsentämään 60 %:n
teholla 10 minuutin ajan.
Automaattisten kypsennysohjelmien käyttäminen
• Paina Power-painiketta kolme kertaa. Näyttöön
Mikroaaltouunin tehoa ja kypsennysaikaa ei tarvitse
ilmestyy “60P”.
määrittää automaattista kypsennystä varten.
• Paina Auto -painiketta, kunnes näyttöön ilmestyy
Voit valita haluamasi kahdeksasta esiasetetusta
”10:00”. Vinkkejä Jos pidät painiketta alaspainettuna,
kypsennysohjelmasta:
näytön asetukset vaihtuvat nopeammin.
• Käynnistä kypsennys painamalla Instant/start-
painiketta.
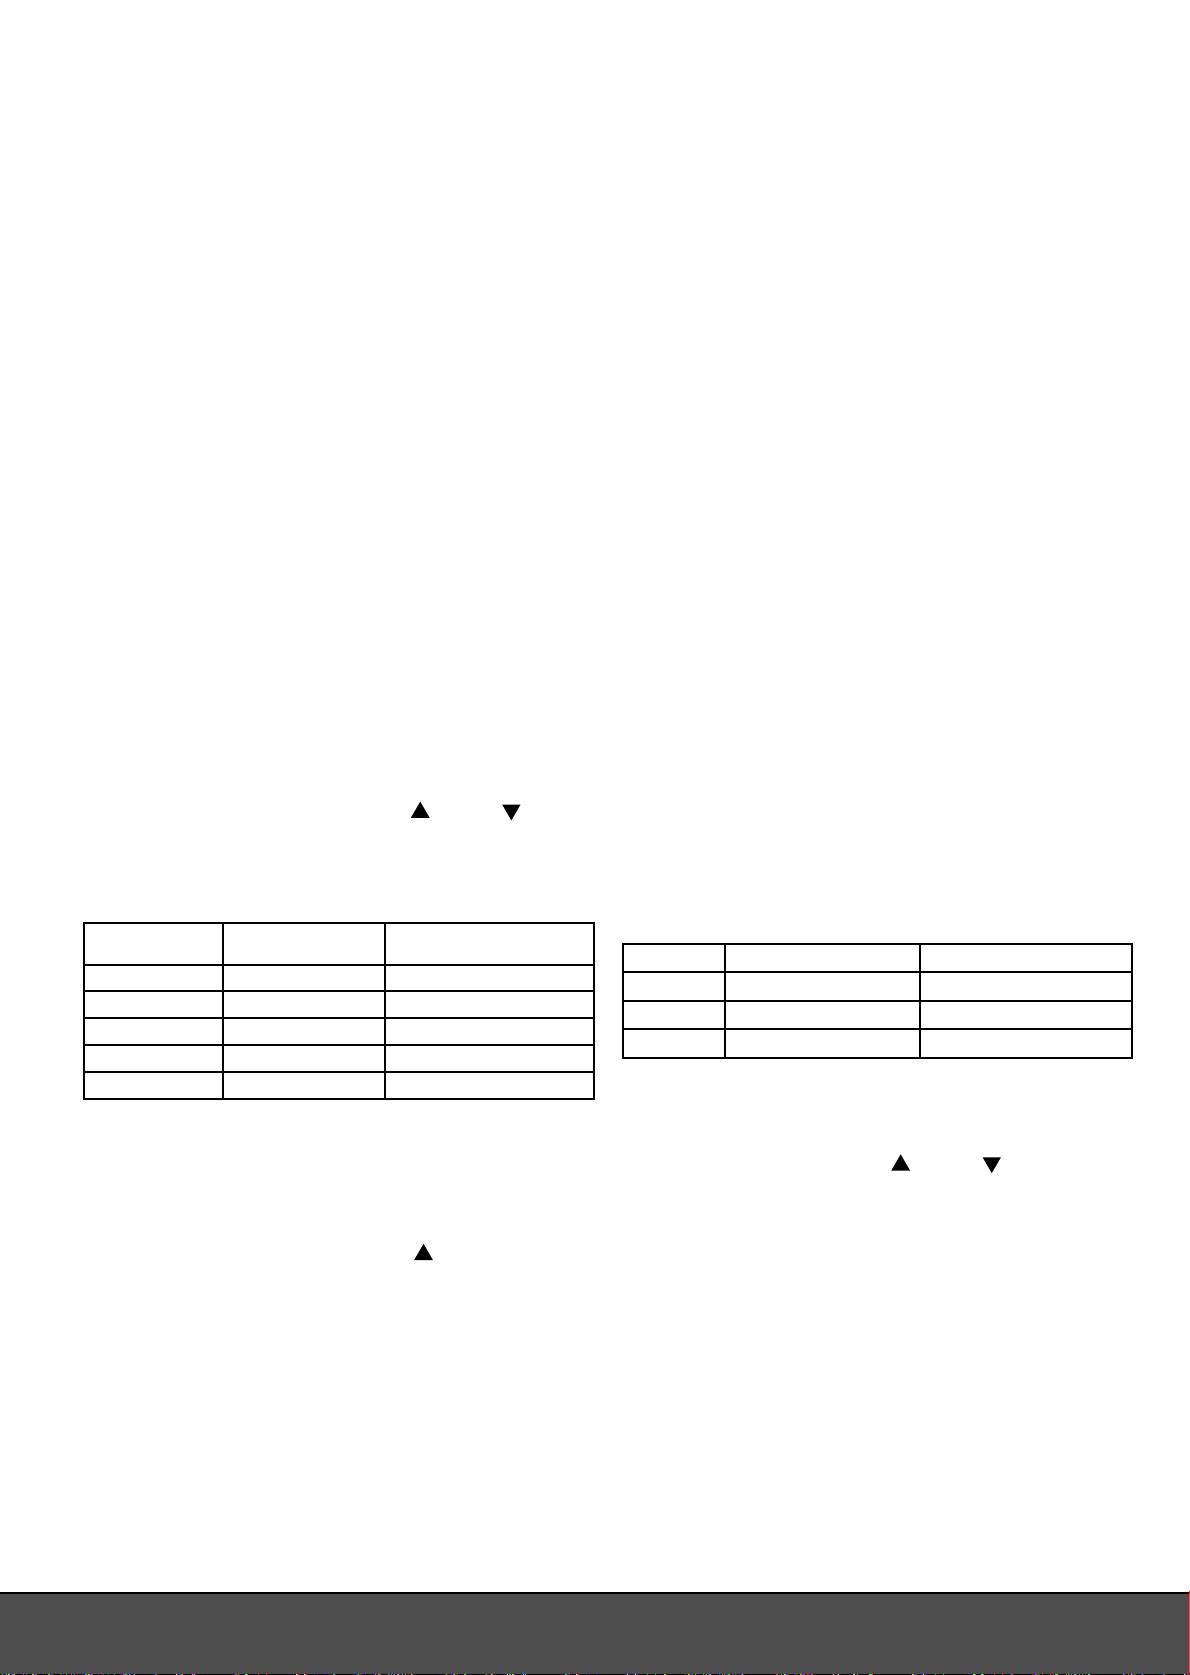
Näyttö Käyttötarkoitus Huomioitavaa
Mikroaaltotehoa voi vaihtaa kypsennyksen aikana,
Kypsennä 85 g popcornia. Jos
A.1 Popcorn
kaikki maissit ovat poksahtaneet,
eli kypsennyksen voi esim. aloittaa suurella teholla ja
keskeytä ohjelma.
päättää pienemmällä teholla.
A.2 Popcorn Kuten yllä, mutta 100 g popcornia.
Esimerkki:
Kypsennys 100 %:n teholla kaksi minuuttia ja 40 %:n
Lämmitä yksi pala pizzaa
A.3 Pizza
teholla viisi minuuttia.
(noin 150 g).
• Valitse 100 %:n mikroaaltoteho ja kahden minuutin
kypsennysaika.
A.4 Kuumat juomat Lämmitä 250 ml nestettä.
• Valitse 40%:n mikroaaltoteho ja viiden minuutin
kypsennysaika. Kun asetat toista kypsennysvaihetta,
A.5 Kuumat juomat Lämmitä 500 ml nestettä.
kuuluu kaksi piippausta.
• Käynnistä kypsennys painamalla Instant/start-
Kypsennä noin 500 g suikaloituja
painiketta. Näytössä näkyy kypsennysaika, joka
A.6 Perunat
tai viipaloituja perunoita.
käynnissä olevalla teholla on jäljellä, ei siis koko jäljellä
olevaa kypsennysaikaa.
A.7 Perunat Kuten yllä, mutta 650 g perunoita.
Voit asettaa enintään neljä eri tehotason ja
A.8 Kala Höyrytä 500 g kalaa.
kypsennysajan vaihetta.
22
manual.indd 22manual.indd 22 08/04/05 11:14:4608/04/05 11:14:46

1. Valitse haluamasi automaattiohjelma painamalla
Kypsennysaikaan vaikuttaa myös ruuan kiinteys.
painiketta
Auto (g) ja Auto (h).
Mitä kiinteämpää ruoka on, sitä kauemmin sitä on
2. Käynnistä kypsennys painamalla Instant/start-
kypsennettävä.
painiketta.
• Kokonainen paisti tarvitsee pitemmän kypsennysajan
kuin pataruoka.
Ajastimen käyttäminen
• Pihvi tarvitsee pitemmän kypsennysajan kuin
Tällä toiminnolla voit asettaa mikroaaltouunin
jauheliharuoka.
käynnistämään manuaalisen kypsennyksen
automaattisesti haluamaasi aikaan. HUOM.
Mitä kylmempää ruoka on, sitä kauemmin sitä on
Kellonajan on oltava asetettuna (ks. kohta ”Kellonajan
kypsennettävä. Huoneenlämpöinen ruoka kypsyy siten
asettaminen”). Ajastinta ei voi käyttää pika- tai
nopeammin kuin jääkaapista otettu tai pakastettu ruoka.
automaattikypsennykseen eikä sulatukseen.
Vihannesten kypsennysaika määräytyy niiden
1. Aloita valitsemalla mikroaaltoteho ja kypsennysaika
tuoreuden mukaan. Tarkista vihannesten tuoreus ennen
(ks. kohta ”Manuaalinen kypsennys ja tehotason
kypsennystä ja pidennä tai lyhennä kypsennysaikaa sen
valinta”.
mukaan.
2. Paina Clock-painiketta kolmen sekunnin ajan. Kuuluu
piippaus. Nyt voit asettaa käynnistysajan (tunteina ja
Koska kypsennysaika on mikroaaltouunia käytettäessä
minuutteina) painamalla Auto (g) ja Auto (h) (ks.
lyhyt, ruoka ei kuivu ja kypsy liikaa.
kohta ”Kellonajan asettaminen”).
• Voit tarvittaessa lisätä ruokaan hieman vettä.
3. Vahvista käynnistysaika painamalla Clock-
• Kalaa ja vihanneksia kypsennettäessä vettä tarvitsee
painiketta. Kuuluu piippaus. Kypsennys käynnistyy
lisätä vain hyvin vähän.
automaattisesti asettamanasi ajankohtana.
4. Voit aloittaa kypsennyksen heti painamalla Instant/
Mikroaaltoteho
start-painiketta. Voit poistaa ajastetun käynnistysajan
Tehoasetus valitaan kypsennettävän tai lämmitettävän
painamalla Pause/Cancel-painiketta.
ruuan laadun mukaan.
Tavallisesti ruoka kypsennetään tai lämmitetään täydellä
HUOM. Jos haluat nähdä tekemäsi asetuksen, paina
teholla.
Clock-painiketta. Asetettu käynnistysaika näkyy
• Täyttä tehoa käytetään esimerkiksi ruuan nopeaan
näytöllä noin kolmen sekunnin ajan, sitten näyttö
uudelleenlämmitykseen tai veden keittämiseen.
palautuu normaaliksi.
• Pientä tehoa käytetään pääasiassa ruuan
sulattamiseen sekä juusto-, maito- ja munaruokien
LAPSILUKITUS
valmistukseen. (Älä keitä mikroaaltouunissa
Lapsilukituksen avulla voit estää lapsia käyttämästä
kokonaisia kuorellisia munia, sillä ne voivat
mikroaaltouunia. Kun lapsilukitus on käytössä,
räjähtää.) Pientä tehoa voi käyttää myös hitaaseen
mikroaaltouunia ei voida käyttää. Aktivoi lapsilukitus
hauduttamiseen, joka säilyttää ruuan hyvät aromit.
painamalla Pause/cancel-painiketta noin kolmen
sekunnin ajan. Kuulet piippauksen, ja näyttöön ilmestyy
Yleistietoja ruuan kypsentämisestä
”OFF”. Poista lapsilukitus käytöstä painamalla Pause/
• Jos haluat kypsentää mikroaaltouunissa koko
cancel-painiketta noin kolmen sekunnin ajan, sitten
aterian, kypsennä ensin kiinteimmät ruoka-aineet,
näyttöön palautuu kellonaika.
kuten perunat. Kun kiinteimmät ruoka-aineet
ovat kypsiä, peitä ne muiden ruoka-aineiden
RUUANVALMISTUSVINKKEJÄ
kypsennyksen ajaksi.
• Useimmat ruuat on peitettävä. Tiivis kansi pitää
Seuraavassa on muutamia perusohjeita ruuan
höyryn ja kosteuden kypsennysastiassa ja lyhentää
valmistukseen mikroaaltouunissa:
siten kypsennysaikaa. Tämä koskee ennen kaikkea
vihannesten, kalaruokien ja pataruokien kypsennystä.
Kypsennysaika
Peitetyssä ruuassa lämpö jakautuu lisäksi paremmin,
Pieni määrä ruokaa kypsyy nopeammin kuin suuri
joten kypsennysaika lyhenee ja tulos on erinomainen.
määrä. +Jos kaksinkertaistat ruuan määrän, sitä on
• Ruoka kypsyy parhaiten, kun se asetetaan uuniin
kypsennettävä vastaavasti vähintään kaksi kertaa
oikein. Mikroaallot ovat tehokkaimpia uunin
kauemmin.
keskiosassa. Jos kypsennät esimerkiksi perunoita,
aseta ne pyörivän lasialustan reunoille, jotta ne
Pienet lihapalat, pienet kalat ja pilkotut vihannekset
kypsyvät tasaisesti.
kypsyvät nopeammin kuin suuret palat. Jos valmistat
• Jotta kiinteät ruoka-aineet, kuten liha tai siipikarja,
uunissa esimerkiksi gulassia tai lihapataa, liha on hyvä
kypsyisivät tasaisesti, kääntele lihapaloja muutaman
leikata enintään 2 x 2 cm:n paloiksi.
kerran.
• Voit paistaa mikroaaltouunissa leivonnaisia, et
kuitenkaan hiivalla kohotettavia leivonnaisia.
• Kun kypsennät ruokia, joissa on paksu kuori, esim.
perunoita, omenoita, kokonaisia kurpitsoja tai
kastanjoita, pistele kuoreen reikiä, jotta ruoka ei
halkea kypsennyksen aikana.
23
manual.indd 23manual.indd 23 08/04/05 11:14:4608/04/05 11:14:46

• Perinteistä uunia käytettäessä uunin avaamista
• Mikroaaltouunin paistokelmua voi käyttää etenkin
yritetään tavallisesti välttää mahdollisimman paljon.
keittoja, kastikkeita tai pataruokia kypsennettäessä
Mikroaaltouunia käytettäessä tästä ei tarvitse
sekä ruokaa sulatettaessa. Paistokelmua voi myös
huolehtia: luukun avaaminen ei aiheuta merkittävää
käyttää löysästi ruuan ympärillä, jolloin roiskuva
energia- tai lämpöhäviötä. Toisin sanoen voit avata
rasva ei likaa uunia.
mikroaaltouunin luukun ja tarkistaa ruuan kypsyyden
• Talouspaperi sopii kypsennykseen erinomaisesti, sillä
niin usein kuin haluat.
se imee kosteutta ja rasvaa. Esimerkiksi pekonia voi
laittaa kerroksittain talouspaperin väliin. Näin pekoni
Tärkeitä ruuan kypsennystä koskevia turvaohjeita
kypsyy kauttaaltaan rapeaksi, koska se ei makaa
• Jos lämmität mikroaaltouunissa vauvanruokaa
omassa rasvassaan. Kotona leivotun leivän voi
tai nestettä tuttipullossa, sekoita aina ruokaa tai
ottaa suoraan pakastimesta, kääriä talouspaperiin ja
nestettä ja tarkista sen lämpötila huolellisesti ennen
lämmittää mikroaaltouunissa.
syöttämistä. Näin lämpö jakautuu ruokaan tai
• Märkä talouspaperi sopii hyvin kalalle tai
nesteeseen tasaisesti eikä lapsi saa palovammoja.
vihanneksille. Ruuan peittäminen estää sitä
Älä laita tuttipullon korkkia ja/tai tuttiosaa
kuivumasta.
mikroaaltouuniin.
• Rasvatiivis leivinpaperi. Kala ja suuret vihannekset,
• Jotkin ruoka-aineet voivat hiiltyä ja savuta, jos niitä
kuten kukkakaali tai maissintähkät, voi kääriä
kuumennetaan liian kauan. Jos näin käy, pidä luukku
märkään rasvatiiviiseen leivinpaperiin.
suljettuna ja katkaise mikroaaltouunista virta.
• Paistopussit sopivat erinomaisesti lihalle, kalalle
• Jotkin vähän vettä sisältävät ruoka-aineet, kuten
ja vihanneksille. Älä koskaan sulje paistopussia
suklaapalat tai makeat täytetyt leivonnaiset, on
metallisulkimella. Sulje pussi puuvillanauhalla. Tee
kuumennettava varovasti. Muutoin ruoka voi
pussiin pieniä reikiä ja aseta se mikroaaltouuniin
pilaantua tai rikkoa astian.
lautasen tai lasiastian päälle.
RUUANVALMISTUKSESSA KÄYTETTÄVÄT VÄLINEET
Tärkeää!
Varmista ennen ruuanvalmistuksen aloittamista, että
Kun valmistat ruokaa mikroaaltouunissa, älä käytä
astiat on valmistettu oikeasta materiaalista. Jotkin
seuraavia astioita ja välineitä:
muovityypit voivat pehmetä ja muuttaa muotoaan,
ja jotkin keramiikkatyypit voivat haljeta (etenkin
• Tiiviit lasiastiat tai pullot, joissa on pieni aukko, koska
kuumennettaessa pieniä ruokamääriä).
ne voivat räjähtää.
• Tavalliset lämpömittarit.
Voit kokeilla seuraavasti, sopiiko astia mikroaaltouuniin:
• Alumiinifolio tai folioastiat, koska mikroaallot eivät
• Aseta astia mikroaaltouuniin.
läpäise niitä eivätkä kypsennä ruokaa.
• Aseta astiaan lasi, joka on puolillaan vettä.
• Kierrätyspaperi, sillä se saattaa sisältää pieniä
• Käynnistä mikroaaltouuni ja anna sen käydä 15–30
metallisiruja, jotka voivat aiheuttaa kipinöitä ja/tai
sekuntia täydellä teholla.
tulipalon.
• Jos astia on kosketettaessa erittäin kuuma, älä käytä
• Suljetut rasiat tai astiat, joissa on tiiviit kannet, koska
sitä mikroaaltouunissa.
syntyvä ylipaine voi räjäyttää ne.
• Metallisulkimet tai muut kannet tai kalvot, jotka
Kun valmistat ruokaa mikroaaltouunissa, käytä mieluiten
sisältävät metallilankoja. Poista metallia sisältävät
seuraavia astioita ja materiaaleja:
osat, koska ne voivat aiheuttaa kipinöitä.
• Lasit ja lasikulhot.
• Metallikulhot, -astiat ja -pakkaukset, jos niitä
• Keramiikka (lasitettu ja lasittamaton). Ruoka pysyy
ei ole varta vasten tarkoitettu käytettäviksi
kauemmin kuumana lasitetussa keramiikka-astiassa
mikroaaltouuneissa. Mikroaallot eivät läpäise
kuin muissa astioissa.
metalliastioita ja lämmitä ruokaa vaan heijastuvat
• Muoviastiat. Muoviastioita voi käyttää moniin
niistä takaisin.
lämmitystarkoituksiin. Varoitus! Mikroaaltouunissa
• Lautaset, astiat ja kulhot, joissa on metalli-, kulta-
EI saa käyttää melamiinista, polyeteenistä tai
ja hopeakoristeita. Nämä astiat voivat hajota ja/tai
fenolimuoveista valmistettuja muoviastioita.
aiheuttaa kipinöitä uunissa.
• Posliini. Mikroaaltouunissa voi käyttää kaikenlaista
PUHDISTUS
posliinia, mutta suositeltavinta on käyttää
tulenkestävää posliinia.
Puhdista mikroaaltouuni seuraavien ohjeiden mukaisesti:
• Tulenkestävät kannelliset astiat. Lasiastiat, joiden
• Katkaise mikroaaltouunista virta ja irrota pistoke
kansi sulkeutuu niin tiiviisti, ettei höyryä pääse ulos,
pistorasiasta ennen puhdistusta.
sopivat ihanteellisesti vihanneksille ja hedelmille,
• Älä koskaan puhdista mikroaaltouunin sisä- tai
joihin ei lisätä vettä (kypsennysaika saa olla kuitenkin
ulkopintaa hankaavilla puhdistusaineilla, teräsvillalla
enintään 5 minuuttia).
tai muilla voimakkailla puhdistusmateriaaleilla, sillä
• Paistoastiat. Käytä ruskistavia paistoastioita erittäin
ne voivat naarmuttaa pintoja.
varoen. Älä koskaan kuumenna paistoastiaa
• Puhdista uuni lämpimään veteen kostutetulla liinalla
lasialustalla kauempaa kuin 5 minuuttia. Aseta
ja lisää liinaan puhdistusainetta, jos uuni on erittäin
paistoastian ja lasialustan väliin sopiva eriste,
likainen.
esimerkiksi kuumuutta kestävä lautanen. Näin
• Huolehdi, ettei tuuletusaukkoihin pääse vettä.
lasialusta ei ylikuumene.
24
manual.indd 24manual.indd 24 08/04/05 11:14:4708/04/05 11:14:47

• Puhdista mikroaaltouunin pyörivä rengas ja sisäpohja
säännöllisesti, jotta lasialusta pääsee pyörimään
esteettä.
• Voit pestä pyörivän lasialustan astianpesukoneessa.
• Älä peitä ilmanpoistoaukkoja (5)!
• Vinkkejä Kun uuni on ollut pitkään käytössä,
sen sisätila saattaa alkaa haista. Jos haju ei
haihdu tavallisella puhdistuksella, laita muutama
sitruunaviipale mukiin ja kypsennä niitä uunissa
täydellä teholla 2–3 minuuttia. Tämä poistaa hajun
tehokkaasti.
ENNEN MIKROAALTOUUNIN TOIMITTAMISTA
HUOLTOLIIKKEESEEN
Jos mikroaaltouuni ei käynnisty, toimi seuraavasti:
• Tarkista, että virtajohdon pistoke on kytketty oikein
pistorasiaan. Jos näin ei ole, irrota pistoke, odota 10
sekuntia, ja kytke se uudelleen pistorasiaan.
• Tarkista, onko sulake palanut tai onko
automaattisulake (johdonsuojakatkaisin) lauennut.
Jos näin ei ole, tarkista pistorasian toiminta
kytkemällä siihen toinen laite.
• Tarkista, että luukku on kunnolla kiinni. Jos luukku
ei ole kiinni, automaattinen turvalukitusjärjestelmä
(luukun lukitustapit) (4) estää mikroaaltouunin
käynnistämisen.
• Tarkista, että olet valinnut tehon oikein ja asettanut
kypsennysajan ajastimella.
Jos mikroaaltouuni ei toimi vieläkään, ota yhteyttä
huoltoliikkeeseen.
YMPÄRISTÖNSUOJELU
Kun sähkölaite lakkaa toimimasta, se on hävitettävä
paikallisen lain mukaisesti ja tavalla, joka vähiten
rasittaa ympäristöä. Sähkölaitteet voi yleensä toimittaa
paikalliseen kierrätyspisteeseen.
TAKUUEHDOT
Takuu ei ole voimassa, jos
• edellä olevia ohjeita ei ole noudatettu
• laitteeseen on tehty muutoksia
• laitetta on käsitelty väärin tai rajusti, tai se on kärsinyt
muita vaurioita
• syntyneet viat johtuvat sähköverkon häiriöistä.
Kehitämme jatkuvasti tuotteidemme toimivuutta
ja muotoilua, minkä vuoksi pidätämme itsellämme
oikeuden muuttaa tuotetta ilman etukäteisilmoitusta.
MAAHANTUOJA
Adexi Group
Emme ole vastuussa mahdollisista painovirheistä.
25
manual.indd 25manual.indd 25 08/04/05 11:14:4808/04/05 11:14:48

UK
• Do not use the microwave oven if it contains cleaning
INTRODUCTION ................................................................................26
agent residues.
IMPORTANT SAFETY PRECAUTIONS .............................................. 26
• Never heat oil or fat in the microwave oven.
Fire hazard! ........................................................................................26
• Keep an eye on any children in the vicinity of the
KEY TO THE MICROWAVE OVEN PARTS ........................................ 27
appliance when it is in use.
PREPARING THE MICROWAVE OVEN ............................................. 27
• Never try to repair the microwave oven yourself.
Positioning the microwave ................................................................27
• If the microwave oven, cord or plug needs to be
Connecting the microwave oven ....................................................... 27
repaired, it should be taken to an authorised service
Inserting the glass turntable .............................................................. 28
centre. Unauthorised repairs or modifi cations will
Setting the clock ...............................................................................28
invalidate the guarantee. Please contact the store
OPERATING THE MICROWAVE OVEN ............................................. 28
where you bought the device for repairs under
COOKING FUNCTIONS .................................................................... 28
guarantee.
Manual cooking – selecting power level ...........................................28
Express cooking ................................................................................28
Fire hazard!
Automatic defrosting ......................................................................... 28
To reduce the risk of fi re occurring in the oven
Cooking using preset programs ........................................................28
compartment, please note the following points:
Cooking using the timer .................................................................... 29
• Do not cook food for too long or at too high a
CHILD SAFETY LOCK .......................................................................29
temperature, and do not leave the microwave oven
TIPS FOR FOOD PREPARATION ...................................................... 29
unattended if paper, plastic or other fl ammable
Cooking time .....................................................................................29
materials have been used in the microwave oven
Microwave power .............................................................................. 29
with a view to reducing cooking times.
General information on cooking ........................................................29
• Metal clips and lids/fi lm containing metallic threads
Important safety measures when preparing food! ............................30
can cause sparks in the microwave oven and must
USING UTENSILS WHEN PREPARING FOOD .................................30
therefore be removed.
Important! .......................................................................................... 30
• If materials in the microwave oven catch fi re, leave
CLEANING .........................................................................................31
the door closed. Switch the microwave oven off
BEFORE GOING TO A REPAIR CENTRE .......................................... 31
immediately, and remove the plug from the wall
ENVIRONMENTAL TIPS ....................................................................31
socket.
GUARANTEE TERMS ........................................................................31
IMPORTER ........................................................................................31
INTRODUCTION
To get the best out of your new microwave oven, please
read through these instructions carefully before using
it for the fi rst time. Take particular note of the safety
precautions. We also recommend that you keep the
instructions for future reference, so that you can remind
yourself of the functions of the microwave oven.
IMPORTANT SAFETY PRECAUTIONS
• The microwave oven may only be used for its
original purpose, i.e. for preparing food for domestic
purposes.
• The microwave oven is for indoor use only.
• Do not use the microwave oven if the cord or plug is
damaged, if it is not functioning properly, or if it has
been damaged by a heavy impact or similar.
• Do not block or cover any vent holes on the
microwave oven.
• Do not switch the microwave oven on when it is
empty. In order for the microwave oven to be able
to absorb microwaves, there must be something in
it (food), otherwise it may be damaged. If you would
like to practise using the various functions, place a
cup of water inside the microwave oven.
• Do not use the microwave oven if the safety locking
system is not functioning, which means that the
microwave oven could be switched on even if the
door is not closed. If the door is open, you risk being
exposed to microwave radiation.
26
manual.indd 26manual.indd 26 08/04/05 11:14:4908/04/05 11:14:49

KEY TO THE MICROWAVE OVEN PARTS
Do not place the microwave oven or the cord near hot
areas, for example gas rings and electric hotplates.
Connecting the microwave oven
The microwave oven must be connected to a 230-volt
AC current, 50 Hz. The guarantee is not valid if the
microwave oven is connected to the wrong voltage.
Inserting the glass turntable
Before using the oven, ensure the glass turntable (6) is
seated on its spindle (7). It is not designed to be securely
held in place, but should be centrally positioned and
not come into contact with the sides of the oven during
cooking.
Setting the clock
When the oven is connected to the mains, an audible
beep will sound and “88:88” will fl ash three times on the
display (1). When a colon (:) starts to fl ash, the clock can
be set. Please note: Each time one of the microwave
1. Display
oven keys is pressed, a beep is heard.
2. Control panel
3. Door
1. Press the Clock (d) key once. “0:00” will appear in
4. Dowels (safety lock)
the display and the hour fi gure will fl ash.
5. Magnetron cover
2. Set the correct hour value using the Auto (g)
6. Glass turntable
and Auto (h) keys. If a value is not entered within
7. Spindle
approx. 5 seconds, the procedure will automatically
cancel.
Control panel keys:
3. Press the Clock key once more. The minute value will
a. Power (on/off)
fl ash, and can now be set.
b. Express
4. Press the Clock key to fi nish the procedure or wait
c. Defrost
approx. 5 seconds. The display then shows the time.
d. Clock
e. Instant/start
OPERATING THE MICROWAVE OVEN
f. Pause/Cancel
g.
Auto (up, select preset program)
The microwave oven is operated in the following way.
h. Auto (down, select preset program)
1. Place the food to be cooked in the oven and close
PREPARING THE MICROWAVE OVEN
the door.
2. Select the cooking function and power and
Each individual microwave oven is checked at the
preparation time, if relevant (described in “Cooking
factory, but for safety’s sake, after unpacking the oven,
Times” below). Start cooking by pressing the Instant/
you should check carefully that the microwave oven has
Start (e) key.
not been damaged during transport. Check whether
3. The oven will start and the display will show
there is any visible damage (e.g. in the form of dents or
unelapsed cooking time. Use the Auto (g) and
similar), if the door (3) closes properly, and if the hinges
Auto (h) keys to extend or shorten cooking time while
are in order. If it appears that the microwave oven has
the oven is working.
been damaged, you must contact the shop where you
4. Cooking can be interrupted at any time by pressing
bought it, and do not use it until it has been checked by
the Pause/Cancel key (f). This can be done even
an authorised specialist.
if using manual or express cooking, automatic
defrosting, preset programs or cooking with timer.
Before using the microwave oven, you should check that
• One press temporarily interrupts cooking, two
you have removed all packaging from it both inside and
presses permanently interrupts cooking.
outside.
• Cooking can also be temporarily interrupted by
opening the door (practical if the food needs turning).
Positioning the microwave
• Cooking that has been temporarily interrupted can
The microwave oven should be placed on a fl at surface,
be resumed by pressing the Instant/Start key.
with clearance of at least 10 cm at the rear, 5 cm at the
5. Once the cooking time set has elapsed, the oven will
sides and 20 cm above to ensure suffi cient ventilation.
switch off automatically. The display will show “End”,
Do not remove the feet of the microwave oven. This oven
and 6 beeps will sound. 3 beeps will sound after 3
is designed to be free-standing. Always ensure the vent
minutes if the Pause/Cancel key is pressed, or the
holes on top of the cabinet are not covered. If they are
door is opened.
covered while the microwave oven is in use, there is a
risk of it overheating. The microwave oven cannot then
be used until it has cooled down.
27
manual.indd 27manual.indd 27 08/04/05 11:14:4908/04/05 11:14:49
6. Once the door has been opened or the Pause/Cancel
Express cooking
key pressed, the display will return to the clock
Express cooking is performed at full microwave power
function.
for 30 seconds, 1 minute or 1 minute and 30 seconds.
1. Press the Express (b) key until the display shows the
COOKING FUNCTIONS
desired cooking time.
Maximum cooking time programmable is 99 minutes
2. Press the Instant/Start key to commence cooking.
and 99 seconds. Cooking times are programmed in 10
second intervals up to 5 minutes and 30 second intervals
Automatic defrosting
thereafter.
The oven has 3 defrosting programs:
Manual cooking – selecting power level
Programme Used for Weight
1. Press the Power key (a) to select power required.
d1 Meat 0.1 – 2.0 kg
See the various levels in the table below.
d2 Poultry 0.2 – 3.0 kg
2. When the display shows the required power (see
d3 Fish and shellfi sh 0.1 – 0.9 kg
“Indication in the display” in the table below) enter
the required cooking time using the
Auto (g) and
1. Press the Defrost (c) key until the display shows the
Auto (h) keys.
desired program.
3. Press the Instant/Start key to commence cooking.
2. Press the Instant/Start key.
3. Enter the weight of the food using the Auto (g) and
Number of
Indication in the display Microwave power
Auto (h) keys. The program will automatically set
presses on key
the defrosting time.
1 100P 100 %
4. Press the Instant/Start key to commence defrosting.
2 80P 80 %
5. When the oven beeps 6 times, we recommend you
3 60P 60 %
turn the food. The oven will not stop unless the door
4 40P 40 %
is opened or the Pause/Cancel key is pressed. Press
5 20P 20 %
the Instant/Start key to restart defrosting once the
food has been turned.
Example:
You want to set the microwave oven to cook at 60 %
Cooking using preset programs
power for 10 minutes.
With automatic cooking, it is not necessary to specify
• Press the Power key three times. The display shows
the microwave power and cooking time. You can choose
“60P”.
between 8 different pre-set cooking programs:
• Press the Auto key until the display shows “10:00”.
Tip: If you hold the keys down, the display will
change faster.
Display Ideal for Remarks
• Press the Instant/Start key to commence cooking.
Cooking 85 g popcorn. Interrupt the
A.1 Popcorn
program if all the corns have popped
Microwave power can be varied during cooking, so that
cooking can start at a high level and fi nish at a lower
A.2 Popcorn As above, but for 100 g popcorn
level for instance.
Heating one piece of pizza
Example:
A.3 Pizza
(approx. 150 g)
Setting the oven to cook at 100% power for 2 minutes,
followed by 40% for 5 minutes.
A.4 Hot drink Heating 250 ml of liquid
• Select 100 % microwave power and cooking time of
2 minutes as described above.
A.5 Hot drink Heating 500 ml of liquid
• Select 40% microwave power and cooking time of
5 minutes. When setting a new cooking step, two
Cooking of approx. 500 g sliced or
beeps will sound.
A.6 Potatoes
chopped potatoes
• Press the Instant/Start key to commence cooking.
The display will show the unelapsed cooking time
A.7 Potatoes As above, but for 650 g of potatoes
for each power step in sequence, not the total
unelapsed cooking time.
You can program up to 4 steps with different power
A.8 Fish Steaming 500 g fi sh
levels and cooking times.
1. Select the desired automatic program by pressing
NB: To see the power level set during cooking, press
the Auto (g) and Auto (h) keys.
the Power key. The step selected will be shown as
2. Press the Instant/Start key to commence cooking.
long as the key is held down. Once released, the
normal display will reappear.
28
manual.indd 28manual.indd 28 08/04/05 11:14:5108/04/05 11:14:51

Cooking using the timer
The colder the food, the longer the cooking time needs
You can use this function to set the microwave oven to
to be. Food at room temperature will therefore cook
automatically start manual cooking at a given time.
faster than food from a fridge or freezer.
NB: The clock must be set as described in “Setting
When cooking vegetables, the cooking time depends
the clock”. The timer function cannot be used for
on the freshness of the vegetables. Therefore check the
express and automatic cooking, and defrosting.
condition of the vegetables, and add or deduct a little
time accordingly.
1. Start by setting microwave power and cooking time
as described in “Manual cooking with selection of
The short cooking time when using a microwave oven
power”.
means that the food does not overcook.
2. Hold the Clock key down for 3 seconds. A beep
• If required, a little water can be added.
will sound. You can now set the start time (hours
• When cooking fi sh and vegetables, you only need to
and minutes) using Auto (g) and Auto (h) as
use a minimum of water.
described under “Setting the clock”.
3. Press the Clock key to confi rm the start time. A beep
Microwave power
will sound. Cooking now starts automatically at the
The choice of power setting depends on the condition of
time entered.
the food to be cooked.
4. To start cooking immediately, press the Instant/Start
In most cases, the food is cooked at full power.
key. To delete a start time, press the Pause/Cancel
• Full power is used, among other things, for reheating
key.
food quickly, boiling water or similar.
• Low power is principally used to defrost food and
NB: If you want to see the setting you have made,
prepare dishes containing cheese, milk or egg.
press the Clock key. The start time will be displayed
(Whole eggs in their shell cannot be cooked in
for approx. 3 seconds before the display returns to
the microwave oven, as there is a risk of the eggs
normal.
exploding). In addition, lower power settings are also
used to fi nish off and to retain the excellent aroma of
CHILD SAFETY LOCK
a dish.
The child safety lock prevents small children from using
the microwave oven. The microwave oven cannot be
General information on cooking
operated as long as the child safety lock is active. The
• If the whole meal is to be prepared in the microwave
child safety lock is activated by holding the Pause/
oven, it is recommended that you start with the
Cancel key down for approx. 3 seconds. A beep will
most compact foods, such as potatoes. Once these
sound and the display shows “OFF”. The child safety
are ready, cover them while the rest of the food is
lock is deactivated by holding the Pause/Cancel key
prepared.
down for approx. 3 seconds before the display returns to
• Most food should be covered. A close-fi tting cover
show the time.
retains the steam and moisture, which shortens
the cooking time in the microwave oven. This is
TIPS FOR FOOD PREPARATION
particularly the case when cooking vegetables,
When preparing food in the microwave oven, the
fi sh dishes and casseroles. Covering food also
following basic rules apply:
distributes the heat better, thus ensuring rapid and
excellent results.
Cooking time
• In order to achieve the best possible results, it is
Smaller quantities of food cook more rapidly than
important to position the food correctly, as the
large quantities. If the amount of food is doubled,
microwave rays are most powerful in the centre of
the preparation time must be more than doubled
the microwave oven. If, for example, you are baking
correspondingly.
potatoes, you should position them along the edge
of the glass turntable so that they cook evenly.
Small pieces of meat, small fi sh and chopped vegetables
• In order to cook compact dishes such as meat and
cook more quickly than large pieces. For the same
poultry evenly, it is important to turn the pieces of
reason, it is recommended, if, for example, you wish to
meat a few times.
make goulash, stews or similar, that the meat be cut into
• You can bake in the microwave oven, although not
pieces no bigger than 2 x 2 cm.
using recipes that include yeast.
• When preparing food with a thick skin, e.g. potatoes,
apples, whole squash or chestnuts, you should prick
The compactness of the food is also very important for
holes in the skin to prevent the food from bursting
the cooking time. The more compact the food is, the
during cooking.
longer it takes to cook it.
• When preparing food in a “traditional” oven, you
• Whole joints require a longer cooking time than
normally avoid opening the oven door as much as
stewed dishes.
possible. This is not the case with a microwave oven:
• A joint requires a longer time than a dish with minced
no energy or signifi cant heat is lost. In other words,
meat.
you can open the microwave door and look at the
food as often as you want.
29
manual.indd 29manual.indd 29 08/04/05 11:14:5208/04/05 11:14:52

Important safety measures when preparing food!
• Kitchen roll is ideal, as it absorbs moisture and fat.
• If using the microwave oven to heat baby food or
For example, bacon can be placed in layers, with
liquids in a feeding bottle, you must always stir the
kitchen roll between each layer. The bacon will then
food/liquid and check the temperature thoroughly
be completely crispy, as it does not sit in its own
before serving. This ensures that the heat is evenly
fat. Home-baked bread can be taken directly from
distributed and avoids scalding injuries. The lid and/
the freezer, packed in kitchen roll and heated in the
or teat must not be fi tted on a feeding bottle when it
microwave oven.
is placed in the microwave oven.
• Wet kitchen roll can be used for fi sh or vegetables.
• If some foods are heated too long, they may char
Covering the food prevents it from drying out.
and give off smoke. If this happens, you should leave
• Greaseproof paper Fish, large vegetables, such
the door closed and switch off the microwave oven
as caulifl ower, corn on the cob and similar can be
completely.
packed in wet greaseproof paper.
• Some foods with low water content, e.g. chocolate in
• Roasting bags are ideal for meat, fi sh and
squares and pastries with a sweet fi lling, should be
vegetables. However, they must never be closed
heated carefully, otherwise they or the container may
using metal clips. Cotton thread should be used
be ruined.
instead. Prick the bag with small holes, and place it
in the microwave oven on a plate or glass dish.
USING UTENSILS WHEN PREPARING FOOD
Before starting to prepare food in containers, you should
Important!
check that the containers you wish to use are made of a
When you prepare food in the microwave oven, you
suitable material, as some types of plastic may become
should not use the following implements and materials:
limp and deform, while some types of ceramics may
crack (particularly when heating small quantities of food).
• Sealed glass/bottles with small openings, as they
may explode.
In order to test if a container is suitable for use in a
• General purpose thermometers
microwave oven:
• Silver foil/foil trays, as the microwave rays cannot
• Place the container in the microwave oven.
penetrate the material and the food will not cook.
• At the same time, place a half-full glass of water in
• Recycled paper, as it may contain small metal
the container.
splinters that could cause sparks and/or a fi re.
• Start the microwave oven, and run it for 15-30
• Closed tins/containers with tightly sealed lids, as
seconds at maximum power.
excess pressure may cause the tin/container to
• If the container becomes very hot to the touch, you
explode.
should avoid using it in the microwave oven.
• Metal clips and other lids/foils, containing metal
wires. These can form sparks in the microwave oven
When you prepare food in the microwave oven, you
and must therefore be removed.
should preferably use the following implements and
• Metal bowls/containers and packaging, unless they
materials:
are designed specifi cally for use in microwave ovens.
The microwaves are refl ected and cannot penetrate
• Glass and glass bowls
the food through the metal.
• Stoneware (glazed and unglazed). The food stays hot
• Plates, dishes and bowls/containers with metal, gold
longer in glazed stoneware than in other dishes.
and silver decorations. They may break and/or cause
• Plastic containers. Can be used for many heating
sparks to form in the oven compartment.
purposes. Caution! Plastic containers made from
melamine, polyethylene and phenol must NOT be
used.
• Porcelain. All porcelain can be used in microwave
ovens, although fi reproof porcelain is preferable.
• Fireproof covered dishes. Glass dishes with lids
that fi t so closely that steam cannot escape are
ideal for vegetables and fruit to which no liquid is
added (however, the cooking time must not exceed 5
minutes).
• Browning dishes. You must be very careful when
using this type of dish. Never heat the browning dish
for more than 5 minutes on the turntable. Suitable
insulation, such as a heat-tested plate, should be
placed between the browning dish and the turntable
to prevent the turntable from overheating.
• Microwave oven roasting fi lm can be used,
particularly for soups, sauces, stewed dishes or
when defrosting food. Can also be used as a loose
covering to prevent fat, etc. from spraying out into
the oven compartment.
30
manual.indd 30manual.indd 30 08/04/05 11:14:5308/04/05 11:14:53

CLEANING
GUARANTEE TERMS
When cleaning the microwave oven, you should pay
The guarantee does not apply:
attention to the following points:
• if the above instructions are not followed
• if the appliance has been interfered with
• Switch the microwave oven off and remove the plug
• if the appliance has been mishandled, subjected to
from the wall socket before cleaning.
rough treatment, or has suffered any other form of
• Never use scouring powder, steel scourers or other
damage
strong cleaning agents to clean the interior or
• if faults have arisen as a result of faults in your
exterior surfaces of the microwave oven, as they may
electricity supply.
scratch the surfaces.
• Instead use a cloth dampened with hot water, and
Due to the constant development of our products in
add detergent if the microwave oven is very dirty.
terms of function and design, we reserve the right to
• Make sure that no water gets into the vent holes.
make changes to the product without prior warning.
• The turning ring and the fl oor of the microwave oven
must be cleaned regularly so that the glass turntable
IMPORTER
can turn without hindrance.
Adexi Group
• The glass turntable can be cleaned in a dishwasher.
• Do not remove the magnetron cover (5)!
We cannot be held responsible for any printing errors.
• Tip: When the oven has been in use for some time,
the oven compartment can begin to smell. If the
smell is not dispersed by ordinary cleaning, place
a few lemon slices in a cup and cook them in the
microwave oven at full power for 2-3 minutes. This
will effectively disperse the smell.
BEFORE GOING TO A REPAIR CENTRE
If the microwave oven will not start:
• Check that the plug is correctly in place in the wall
socket. If that is not the case, remove the plug, wait
10 seconds and then plug it in again.
• Check whether a fuse has blown or whether the fuse
relay has been switched off. If it is not that, you can
check that the socket itself is working by plugging in
another device.
• Check that the door is closed properly. If this is not
the case, the automatic safety system via the lock
dowels (4) ensures that the microwave oven cannot
be started.
• Check whether the operating panel has been set
correctly, and whether the timer has been activated.
If the microwave oven still does not work, you should
contact a repair engineer.
ENVIRONMENTAL TIPS
When electronic products no longer work, they should
be disposed of in a manner that causes least impact
on the environment and in accordance with any local
legislation. In most cases you can take such products to
your local recycling station.
31
manual.indd 31manual.indd 31 08/04/05 11:14:5408/04/05 11:14:54

DE
EINLEITUNG ...................................................................................... 32
• Benutzen Sie das Gerät nicht, wenn das
WICHTIGE SICHERHEITSHINWEISE ................................................ 32
Sicherheitssystem der Tür nicht funktioniert und das
Feuergefahr! ...................................................................................... 32
Gerät angeschaltet werden kann, obwohl die Tür
BESCHREIBUNG .............................................................................. 33
nicht geschlossen ist. Wenn die Tür offen ist, besteht
VORBEREITUNG DES MIKROWELLENHERDS ................................ 33
die Gefahr, dass Sie Mikrowellenstrahlung ausgesetzt
Aufstellen der Mikrowelle .................................................................. 33
werden.
Anschluss des Mikrowellengeräts ..................................................... 33
• Benutzen Sie das Gerät nicht, wenn sich noch
Einbau des Glas-Drehtellers .............................................................. 33
Reinigungsmittelreste darin befi nden.
Einstellen der Uhr .............................................................................. 33
• Erhitzen Sie niemals Öl oder Fett im Gerät.
BEDIENUNG DES MIKROWELLENHERDS ...................................... 33
• Beaufsichtigen Sie Kinder, die sich in der Nähe des
GARFUNKTIONEN ............................................................................ 34
laufenden Gerätes aufhalten.
Manuelles Garen Wählen der Leistungsstufe .................................. 34
• Versuchen Sie niemals, das Mikrowellengerät selbst
Schnellgaren ...................................................................................... 34
zu reparieren.
Automatisches Abtauen .................................................................... 34
• Falls das Mikrowellengerät, das Kabel oder der
Garen mit Festprogrammen .............................................................. 34
Stecker zu reparieren ist, muss dies in einem
Garen mit Zeitschaltuhr ..................................................................... 35
autorisierten Servicecenter erfolgen. Unbefugte
KINDERSICHERUNG ........................................................................ 35
Reparaturen oder Veränderungen führen zum
TIPPS FÜR DIE ESSENSZUBEREITUNG .......................................... 35
Erlöschen der Garantie. Setzen Sie sich bei
Zubereitungszeit ................................................................................ 35
Reparaturen im Rahmen der Garantie mit Ihrem
Leistung der Mikrowelle .................................................................... 35
Fachhändler in Verbindung.
Allgemeine Informationen zur Zubereitung ....................................... 36
Wichtige Sicherheitsmaßnahmen bei der Zubereitung von
Feuergefahr!
Lebensmitteln .................................................................................... 36
Um das Brandrisiko zu reduzieren, beachten Sie bitte
VERWENDUNG VON UTENSILIEN BEI DER ZUBEREITUNG
Folgendes:
VON LEBENSMITTELN ..................................................................... 36
• Kochen Sie das Essen nicht zu lange oder zu
Achtung! ............................................................................................ 37
kräftig. Lassen Sie das Mikrowellengerät nicht
REINIGUNG ....................................................................................... 37
unbeaufsichtigt, wenn sich Papier, Plastik oder
BEVOR SIE DAS GERÄT ZUM KUNDENDIENST BRINGEN ............. 37
andere brennbare Garbeschleuniger im Gerät
UMWELTTIPPS .................................................................................. 37
befi nden.
GARANTIEBEDINGUNGEN ............................................................... 37
• Metallklammern und Deckel/Folien, die Metallfasern
IMPORTEUR ...................................................................................... 37
enthalten, können zur Funkenbildung im Innenraum
führen und sind deshalb zu entfernen.
• Falls Materialien im Gerät in Brand geraten, lassen
EINLEITUNG
Sie die Tür geschlossen. Schalten Sie das Gerät
Bevor Sie Ihr neues Mikrowellengerät in Gebrauch
sofort aus und ziehen Sie den Stecker aus der
nehmen, sollten Sie diese Gebrauchsanweisung
Steckdose.
sorgfältig durchlesen. Beachten Sie insbesondere die
Sicherheitshinweise. Sie sollte die Gebrauchsanleitung
aufbewahren, damit Sie später darin nachschlagen
können.
WICHTIGE SICHERHEITSHINWEISE
• Benutzen Sie das Gerät nur für den vorgesehenen
Verwendungszweck, d.h. für die Zubereitung von
Lebensmitteln im Haushalt.
• Verwenden Sie das Gerät niemals im Freien.
• Benutzen Sie das Gerät nicht, wenn die Leitungen
oder der Stecker beschädigt sind, wenn das Gerät
nicht optimal funktioniert oder Schäden erlitten hat.
• Blockieren Sie nicht die Lüftungsöffnungen des
Geräts.
• Schalten Sie das Gerät nicht ein, wenn sich
kein Gargut im Gerät befi ndet, da ohne Inhalt
(Lebensmittel) die Mikrowellen nicht absorbiert
werden können. Wird das Gerät ohne Gargut
angeschaltet, kann es beschädigt werden. Wenn Sie
die Funktionen des Geräts testen möchten, stellen
Sie eine Tasse mit Wasser in das Gerät.
32
manual.indd 32manual.indd 32 08/04/05 11:14:5508/04/05 11:14:55
BESCHREIBUNG
blockiert, während das Gerät in Gebrauch ist, besteht die
Gefahr einer Überhitzung. Das Gerät kann erst wieder in
Gebrauch genommen werden, wenn es abgekühlt ist.
Stellen Sie das Gerät nicht in die Nähe von
Wärmequellen, wie z.B. Gasfl ammen oder elektrischen
Kochplatten. Das Kabel darf ebenfalls nicht in der Nähe
von Wärmequellen verlegt werden.
Anschluss des Mikrowellengeräts
Das Gerät muss an 230 Volt Wechselspannung (50
Hz) angeschlossen werden. Die Garantie erlischt,
wenn das Mikrowellengerät an eine falsche Spannung
angeschlossen wird.
Einbau des Glas-Drehtellers
Vergewissern Sie sich vor der Inbetriebnahme, dass der
Glas-Drehteller (6) korrekt auf der Spindel (7) sitzt. Der
Drehteller darf während der Zubereitung nicht mit dem
Gehäuse in Kontakt kommen.
1. Display
2. Bedienfeld
Einstellen der Uhr
3. Tür
Sobald Sie die Mikrowelle an eine Steckdose
4. Dübel (Sicherheitsverriegelung)
anschließen, ertönt ein Hinweissignal und im Display
5. Magnetron-Abdeckung
(1) blinkt dreimal der Hinweis „88:88“. Sobald der
6. Glas-Drehteller
Doppelpunkt blinkt, können Sie die Uhrzeit einstellen.
7. Spindel
Hinweis: Jedesmal wenn eine Taste an dem Gerät
gedrückt wird, ist ein Piepton zu hören.
Tasten des Bedienfelds
1. Drücken Sie die Taste CLOCK (d). Im Display
a. Betriebsschalter (Ein/Aus)
erscheint der Hinweis „0:00“ und die Stundenanzeige
b. Schnellzubereitung
blinkt.
c. Auftauen
2. Stellen Sie mit den Tasten (g) und (h) die
d. Uhr
Stunden ein. Wenn Sie innerhalb von ca. 5 Sekunden
e. Start
keine Eingabe vornehmen, wird der Vorgang
f. Pause/Abbrechen
abgebrochen.
g.
(Einstellung und Programmwahl)
3. Drücken Sie erneut die Taste CLOCK. Jetzt blinkt
h. (Einstellung und Programmwahl)
die Minutenanzeige und Sie können die Minuten
VORBEREITUNG DES MIKROWELLENHERDS
einstellen.
4. Drücken Sie anschließend erneut die Taste CLOCK
Jedes einzelne Gerät ist in der Fabrik kontrolliert worden.
oder warten Sie ca. 5 Sekunden. Das Display zeigt
Sicherheitshalber sollten Sie sich jedoch nach dem
nun die Uhrzeit an.
Auspacken vergewissern, dass beim Transport keine
Schäden entstanden sind. Überprüfen Sie, ob sichtbare
BEDIENUNG DES MIKROWELLENHERDS
Schäden (z.B. in Form von Dellen) vorliegen, ob die Tür
Der Mikrowellenherd wird wie folgt bedient:
(3) gut schließt und ob die Scharniere in Ordnung sind.
Falls Sie vermuten, dass die Mikrowelle beschädigt ist,
1. Stellen Sie das Essen in den Mikrowellenherd und
setzen Sie sich bitte mit dem Verkäufer in Verbindung.
schließen Sie die Tür.
Das Gerät darf in diesem Fall erst nach Überprüfung
2. Wählen Sie die gewünschte Garfunktion, die
durch eine Fachwerkstatt in Betrieb genommen werden.
Leistungsstufe und die Zubereitungszeit aus (s.u.).
Starten Sie den Garvorgang durch Drücken der Taste
Entfernen Sie alle Verpackungsmaterialien und
INSTANT/START (e).
Transportsicherungen, bevor Sie das Gerät in Betrieb
3. Im Display wird die restliche Zubereitungszeit
nehmen.
angezeigt. Während des Garvorgangs können Sie die
Zubereitungszeit durch Drücken der Taste (g) und
Aufstellen der Mikrowelle
(h) verlängern bzw. verkürzen.
Die Mikrowelle muss auf einer waagerechten Unterlage
4. Die Zubereitung kann jederzeit durch Drücken der
stehen, wobei an der Rückseite mindestens 10 cm,
Taste PAUSE/CANCEL (f) unterbrochen werden.
an den Seiten mindestens 5 cm und über dem Gerät
Der Abbruch ist auch bei manueller Zeiteinstellung,
mindestens 20 cm Abstand sein müssen, um eine
während der Schnellzubereitung, während des
ausreichende Luftzirkulation zu gewährleisten. Entfernen
automatischen Abtauens, bei Festprogrammen oder
Sie nicht die Füße des Mikrowellengeräts. Die Mikrowelle
bei der zeitgesteuerten Zubereitung möglich.
muss frei stehen und darf nicht direkt an einer Wand
betrieben werden. Die Lüftungsöffnungen an der
Oberseite dürfen nicht verdeckt werden. Werden diese
33
manual.indd 33manual.indd 33 08/04/05 11:14:5608/04/05 11:14:56
• Einmaliges Drücken der Taste unterbricht das Garen
Beispiel:
vorübergehend, zweimaliges Drücken bricht den
Die Zubereitung soll bei einer Leistung von 100 % zwei
Garvorgang endgültig ab.
Minuten dauern und anschließend mit 40 % weitere fünf
• Durch Öffnen der Tür (beispielsweise um das Essen
Minuten fortgesetzt werden.
umzudrehen) können Sie den Garvorgang kurzzeitig
• Stellen Sie eine Mikrowellenleistung von 100 % und
unterbrechen.
eine Zubereitungszeit von 2 Minuten ein (s.o.).
• Ein unterbrochener Garvorgang kann durch Drücken
• Stellen Sie anschließend eine Mikrowellenleistung
der Taste INSTANT/START fortgesetzt werden.
von 40 % und eine Zubereitungszeit von 5 Minuten
5. Nach Ablauf der Zubereitungszeit schaltet sich die
ein. Sobald Sie eine neue Zubereitungsstufe
Mikrowelle automatisch aus. Im Display erscheint
einstellen, ertönen zwei Hinweissignale.
die Meldung „END“ und das Gerät gibt 6 kurze
• Mit der Taste INSTANT/START starten Sie die
Signaltöne aus. Wenn Sie die Taste PAUSE/CANCEL
Zubereitung. Das Display zeigt abwechselnd die
gedrückt oder die Tür geöffnet haben, gibt das Gerät
restliche Zubereitungszeit der beiden Leistungsstufen
nach 3 Minuten drei kurze Hinweistöne aus.
an (d.h. die restliche Gesamtzubereitungszeit wird
6. Sobald Sie die Tür öffnen oder die Taste PAUSE/
nicht angezeigt).
CANCEL drücken, wird die Uhrzeit im Display
angezeigt.
Sie können bis zu vier Leistungsstufen und
Zubereitungszeiten einstellen.
GARFUNKTIONEN
Sie können eine maximale Zubereitungszeit von 99
Hinweis: Wenn Sie während des Garens die Taste
Minuten und 99 Sekunden einstellen. Die Garzeiten
POWER drücken, wird die aktuelle Leistungsstufe
werden in Schritten von 10 Sekunden festgelegt. Ab
angezeigt. Sobald Sie die Taste loslassen,
einer Garzeit von 5 Minuten werden sie in Schritten von
verschwindet die Anzeige wieder und die restliche
30 Sekunden eingegeben.
Zubereitungszeit wird angezeigt.
Manuelles Garen – Wählen der Leistungsstufe
Schnellgaren
1. Stellen Sie die gewünschte Leistungsstufe mit der
Das Schnellgaren wird bei voller Leistung durchgeführt.
Taste POWER (a) ein. Die Leistungsstufen fi nden Sie
Sie können eine Zubereitungsdauer von 30 Sekunden, 1
in der nachstehenden Tabelle.
Minute oder 1 Minute und 30 Sekunden festlegen.
2. Sobald das Display die gewünschte Leistung anzeigt
1. Drücken Sie wiederholt die Taste EXPRESS (b), bis
(siehe „Anzeige im Display“ in der folgenden Tabelle),
die gewünschte Zubereitungszeit angezeigt wird.
geben Sie mit den AUTO-Tasten
(g) und (h) die
2. Mit der Taste INSTANT/START starten Sie die
Garzeit ein.
Zubereitung.
3. Mit der Taste INSTANT/START starten Sie die
Zubereitung.
Automatisches Abtauen
Die Mikrowelle hat 3 Auftauprogramme:
Anzahl
Anzeige im Display Leistung der Mikrowelle
der Tastendrucke
Programm Für Gewicht
1 100P 100 %
d1 Fleisch 0,1 bis 2,0 kg
2 80P 80 %
d2 Gefl ügel 0,2 bis 3,0 kg
3 60P 60 %
d3 Fisch und Schalentiere 0,1 bis 0,9 kg
4 40P 40 %
5 20P 20 %
1. Drücken Sie wiederholt die Taste DEFROST (c), bis
das gewünschte Programm angezeigt wird.
Beispiel:
2. Drücken Sie die Taste INSTANT/START.
Die Zubereitung soll bei 60 % Leistung 10 Minuten
3. Geben Sie mit den Tasten (g) und (h) das
dauern.
Gewicht des Garguts ein. Die Auftauzeit wird
• Drücken Sie dreimal die Taste POWER. Das Display
automatisch eingestellt.
zeigt „60P“ an.
4. Mit der Taste INSTANT/START starten Sie das
• Drücken Sie wiederholt die Taste AUTO, bis die
Auftauen.
Meldung „10:00“ im Display erscheint. Tipp: Wenn
5. Sobald die Mikrowelle sechs kurze Hinweistöne
Sie die Taste gedrückt halten, beschleunigt sich die
ausgibt, sollten Sie das Essen umdrehen. Das
Zeiteinstellung.
Auftauen kann durch Öffnen der Tür oder Drücken
• Mit der Taste INSTANT/START starten Sie die
der Taste PAUSE/CANCEL beendet werden.
Zubereitung.
Nachdem Sie das Essen umgedreht haben, drücken
Sie die Taste START, um das Auftauen fortzusetzen.
Die Mikrowellenleistung kann während der Zubereitung
geändert werden. So können Sie beispielsweise
Garen mit Festprogrammen
einstellen, dass die Zubereitung mit hoher Leistung
Beim automatischen Garen müssen die Leistungsstufe
beginnt, aber gegen Ende des Garens gesenkt wird.
und die Garzeit nicht eingestellt werden. Sie haben die
Auswahl zwischen 8 voreingestellten Garprogrammen:
34
manual.indd 34manual.indd 34 08/04/05 11:14:5708/04/05 11:14:57
ist. Halten Sie die Taste PAUSE/CANCEL 3 Sekunden
Display Geeignet für Hinweise
gedrückt, um die Kindersicherung einzuschalten.
Ein Hinweiston ertönt und im Display erscheint die
Zubereitung von 85 g Popcorn. Beenden
A.1 Popcorn
Meldung „OFF“. Halten Sie die Taste PAUSE/CANCEL
Sie das Programm manuell.
3 Sekunden gedrückt, um die Kindersicherung wieder
auszuschalten.
A.2 Popcorn Wie oben, aber für 100 g Popcorn.
TIPPS FÜR DIE ESSENSZUBEREITUNG
A.3 Pizza Zubereitung einer Pizza (ca. 150 g).
Bei der Zubereitung von Lebensmitteln im
Mikrowellengerät gelten folgende Grundregeln:
A.4 Heißgetränk Erwärmen von 250 ml Flüssigkeit.
Zubereitungszeit
Kleinere Mengen lassen sich schneller garen als größere
A.5 Heißgetränk Erwärmen von 500 ml Flüssigkeit.
Mengen. Wenn Sie die Menge verdoppeln, erhöht sich
die Zubereitungszeit um mehr als das Doppelte.
Zubereitung von ca. 500 g Kartoffeln (in
A.6 Kartoffeln
Scheiben oder Würfeln).
Geschnittenes Gemüse, kleinere Fleisch- und
Fischstücke kochen schneller als große Stücke. Für
A.7 Kartoffeln Wie oben, aber für 650 g Kartoffeln.
Gulasch, Eintöpfe und Geschmortes ist das Fleisch in
Stücke von maximal 2 x 2 cm zu schneiden.
A.8 Fisch Zubereitung von 500 g Fisch.
Die Kompaktheit des Essens ist ebenfalls sehr wichtig
für die Zubereitungszeit. Je kompakter das Essen ist,
1. Stellen Sie mit der Taste (g) und (h) das
desto länger dauert die Zubereitung.
gewünschte Automatikprogramm ein.
• Ganze Bratenstücke erfordern eine längere
2. Mit der Taste INSTANT/START starten Sie die
Zubereitungszeit als Eintöpfe.
Zubereitung.
• Ein Bratenstück erfordert längere Zeit als ein Gericht
mit Hackfl eisch.
Garen mit Zeitschaltuhr
Sie können diese Funktion verwenden, um den
Je kälter die Lebensmittel sind, desto länger ist die
Mikrowellenherd so einzustellen, dass er mit dem
Zubereitungszeit. Lebensmittel mit Zimmertemperatur
gewählten Garverfahren zu einem vorab gewählten
können schneller zubereitet werden als Lebensmittel aus
Zeitpunkt beginnt. Hinweis: Die Uhr muss eingestellt sein
dem Kühlschrank oder dem Gefrierschrank.
(siehe „Einstellen der Uhr“). Für die Schnellzubereitung,
das automatische Garen und das Auftauen kann die
Bei der Zubereitung von Gemüse hängt die Kochzeit von
Zeitschaltuhr nicht verwendet werden.
der Frische des Gemüses ab. Kontrollieren Sie deshalb
das Gemüse während der Zubereitung und verkürzen
1. Stellen Sie Mikrowellenleistung und Zubereitungszeit
oder verlängern Sie die Garzeit entsprechend.
ein (vgl. „Manuelles Garen – Wählen der
Leistungsstufe“).
Die kurze Zubereitungszeit im Mikrowellenherd bewirkt,
2. Halten Sie die Taste CLOCK 3 Sekunden gedrückt.
dass das Essen nicht zerkocht.
Nachdem das Gerät einen Hinweiston ausgegeben
• Sie können ggf. etwas Wasser hinzufügen.
hat, können Sie mit den Tasten (g) und (h)
• Bei der Zubereitung von Fisch und Gemüse sind nur
die Startzeit (Stunden und Minuten) einstellen (vgl.
geringe Mengen Wasser notwendig.
Abschnitt „Einstellen der Uhr“).
3. Bestätigen Sie die Einstellung durch Drücken
Leistung der Mikrowelle
der Taste CLOCK. Sie hören einen Hinweiston.
Die Wahl der Leistungsstufe hängt vom Zustand der
Der Garvorgang beginnt nun automatisch zur
Lebensmittel ab, die zubereitet werden sollen.
eingegebenen Zeit.
In den meisten Fällen erfolgt die Zubereitung in der
4. Mit der Taste INSTANT/START können Sie den
höchsten Leistungsstufe.
Garvorgang sofort starten. Drücken Sie die Taste
• Die höchste Stufe wird unter anderem für das
PAUSE/CANCEL, wenn Sie die Zeitschaltuhr
schnelle Aufwärmen von Essen und das Kochen von
ausschalten wollen.
Wasser verwendet.
• Die niedrigen Stufen werden vorzugsweise beim
Hinweis: Sie können die Einstellungen durch Drücken
Auftauen sowie bei der Zubereitung von Käse-,
der Taste CLOCK im Display kontrollieren. Sobald Sie
Milch- und Eierspeisen verwendet. (Ganze Eier mit
die Taste drücken, wird die Startzeit ca. 3 Sekunden
Schale können nicht in der Mikrowelle gekocht
lang angezeigt.
werden – sie können platzen) Die niedrigen Stufen
KINDERSICHERUNG
werden außerdem verwendet, um die Zubereitung
des Essens abzuschließen oder sein Aroma zu
Die Kindersicherung verhindert, dass Kinder den
bewahren.
Mikrowellenherd benutzen können. Die Mikrowellen kann
nicht benutzt werden, solange die Kindersicherung aktiv
35
manual.indd 35manual.indd 35 08/04/05 11:14:5808/04/05 11:14:58

Allgemeine Informationen zur Zubereitung
VERWENDUNG VON UTENSILIEN BEI DER
• Wird die gesamte Mahlzeit im Mikrowellengerät
ZUBEREITUNG VON LEBENSMITTELN
zubereitet, empfi ehlt es sich, zuerst die kompakteren
Vor der Zubereitung von Lebensmitteln in Behältern
Lebensmittel zu erwärmen, wie z.B. Kartoffeln.
sollten Sie kontrollieren, dass der verwendete Behälter
Wenn diese gekocht sind, werden sie zugedeckt,
aus einem geeigneten Material besteht. Einige
und danach kann der Rest der Mahlzeit zubereitet
Kunststoffe können aufweichen und sich verformen.
werden.
Andere Kunststoffe und einige Keramikarten können
• Die meisten Lebensmittel sollten abgedeckt werden.
aufplatzen, besonders wenn kleine Mengen Essen
Ein dichtes Abdecken hält den Dampf und die
erwärmt werden.
Feuchtigkeit, wodurch sich die Zubereitungszeit in
der Mikrowelle verkürzt. Dies gilt insbesondere für
Um zu prüfen, ob ein Behälter mikrowellengeeignet ist,
Gemüse, Fisch-, Schmor- und Eintopfgerichte. Ein
gehen Sie folgendermaßen vor:
Zudecken der Lebensmittel bedeutet auch, dass
• Stellen Sie den Behälter in die Mikrowelle.
sich die Hitze besser verteilt und dadurch wird die
• Stellen Sie ein Glas, das zur Hälfte mit Wasser gefüllt
Zubereitung schneller und schmackhafter.
ist, im Behälter in das Gerät.
• Um das bestmögliche Ergebnis zu erzielen,
• Stellen Sie das Gerät für 15 bis 30 Sekunden auf die
müssen die Lebensmittel richtig positioniert
höchste Leistung.
werden, da die Mikrowellenstrahlen in der Mitte
• Wird der Behälter sehr heiß, darf er nicht in der
des Geräts am stärksten sind. Bei der Zubereitung
Mikrowelle benutzt werden.
z.B. von Kartoffeln sollten diese am Rande des
Glas-Drehtellers positioniert werden, damit sie
Beim Zubereiten von Lebensmitteln in der Mikrowelle
gleichmäßig gegart werden.
sollten Sie vorzugsweise folgende Behälter und
• Um kompakte Gerichte mit Fleisch oder
Materialien verwenden:
Gefl ügel gleichmäßig zu garen, ist es wichtig, die
• Glas und Glasschüsseln
Fleischstücke einige Male umzudrehen.
• Steingut (glasiert und unglasiert). Das Essen hält sich
• Sie können mit der Mikrowelle auch backen,
in glasierten Steingutschüsseln länger warm als in
allerdings keine Backwaren, in denen Hefe
anderen Schüsseln.
verwendet wird.
• Kunststoffbehälter. Sind in der Regel für die
• Bei der Zubereitung von Lebensmitteln mit dicker
Mikrowelle geeignet. Warnung! Kunststoffbehälter
Schale, z.B. Kartoffeln, Äpfel, ganze Zucchini oder
aus Melamin, Polyethylen und Phenol sind nicht
Kastanien, sollten Sie Löcher in die Schale bohren,
geeignet.
damit die Lebensmittel nicht während des Garens
• Porzellan. Sämtliche Arten von Porzellan sind
aufplatzen.
mikrowellengeeignet, feuerfestes Porzellan eignet
• Ein herkömmlicher Backofen soll normalerweise so
sich jedoch am besten.
wenig wie möglich geöffnet werden. Das gilt nicht
• Feuerfeste Schüsseln mit Deckel. Glasschüsseln,
für Mikrowellengeräte. Hier wird durch Öffnen keine
deren Deckel so fest schließen, dass kein Dampf
Energie verschwendet. Sie können die Tür beliebig
herauskommen kann, sind ideal für Gemüse und
oft öffnen, um nach dem Essen zu sehen.
Obst ohne Zusatz von Wasser (jedoch nicht mehr als
5 Min. Garzeit).
Wichtige Sicherheitsmaßnahmen bei der Zubereitung
• Bräunungsgeschirr. Bei der Verwendung dieser Art
von Lebensmitteln
von Behältern ist Vorsicht geboten. Erhitzen Sie
• Nach dem Erwärmen von Babynahrung oder
eine Bräunungsschale niemals länger als 5 Minuten
Flüssigkeiten in Flaschen sollten Sie auch hier die
auf dem Drehteller. Ein passender Isolator, wie z.B.
Nahrung/Flüssigkeit gut durchrühren oder schütteln
ein mikrowellengeeigneter Teller, kann zwischen
und die Temperatur überprüfen, bevor Sie dem Kind
der Bräunungsschale und dem Drehteller platziert
die Nahrung geben. Das Durchrühren/Schütteln
werden, um zu vermeiden, dass der Drehteller
gewährleistet, dass die Wärme gleichmäßig verteilt
überhitzt.
ist und verhindert Verbrühungen. Der Deckel und/
• Mikrowellengeeignete Bratenfolien können
oder Sauger darf nicht auf der Flasche sein, wenn sie
insbesondere für Suppen, Soßen, Eintöpfe oder beim
in die Mikrowelle gestellt wird.
Auftauen verwendet werden. Sie können eventuell
• Bei einer zu langen Erhitzungszeit können die
auch als lose Abdeckung verwendet werden, um zu
Lebensmittel verkohlen oder Rauch entwickeln.
verhindern, dass Fett das Gerät verschmutzt.
Geschieht dies, lassen Sie die Tür geschlossen und
• Küchentücher sind ideal, da sie Feuchtigkeit und
schalten Sie das Gerät aus, um einen eventuellen
Fett aufsaugen. Z.B. lassen sich Schinken und
Brand zu ersticken.
Küchentücher abwechselnd aufeinander schichten.
• Einige Lebensmittel mit geringem Wassergehalt, z.B.
Der Schinken wird ganz kross, da er nicht im eigenen
Blockschokolade und Backwaren mit süßer Füllung,
Fett brät. Selbstgemachtes Brot kann direkt aus
müssen vorsichtig erwärmt werden, um sie nicht zu
dem Gefrierschrank genommen, in eine Küchenrolle
verderben oder den Behälter nicht zu beschädigen.
gepackt und in der Mikrowelle erwärmt werden.
• Nasse Küchentücher können bei Fisch und Gemüse
verwendet werden. Das Abdecken der Lebensmittel
verhindert das Austrocknen.
36
manual.indd 36manual.indd 36 08/04/05 11:14:5908/04/05 11:14:59

• Pergamentpapier. Fisch, großes Gemüse wie
• Tipp: Nach längerem und intensivem Gebrauch
Blumenkohl, Maiskolben u. ä. können in nasses
kann es zu einer Geruchsentwicklung im Gerät
Pergamentpapier gewickelt werden.
kommen. Sollten sich die Gerüche nicht durch eine
• Mikrowellengeeignete Bratenbeutel sind ideal für
normale Reinigung beseitigen lassen, legen Sie
Fleisch, Fisch und Gemüse. Sie dürfen jedoch nie mit
einige Zitronenscheiben in eine Tasse und lassen Sie
Metallklammern verschlossen werden! Verwenden
die Mikrowelle bei voller Leistung 2 bis 3 Minuten
Sie stattdessen Baumwollgarn. Stechen Sie kleine
eingeschaltet.
Löcher in den Beutel und legen Sie ihn auf einem
Teller oder in einer Glasschüssel in das Gerät.
BEVOR SIE DAS GERÄT ZUM KUNDENDIENST
BRINGEN
Achtung!
Wenn das Gerät nicht startet:
Beim Zubereiten von Lebensmitteln in der Mikrowelle
• Prüfen Sie, ob der Stecker ordnungsgemäß
dürfen Sie folgende Behälter und Materialien nicht
eingesteckt ist. Ist dies nicht der Fall, Stecker ziehen,
verwenden:
10 Sekunden warten und Stecker erneut einstecken.
• Prüfen Sie, ob eine Sicherung durchgebrannt bzw.
• Versiegeltes Glas oder Flaschen mit kleinen
ein Sicherungsschalter angesprungen ist. Ist dies
Öffnungen, da diese platzen können.
nicht der Fall, überprüfen Sie die Steckdose, indem
• Normale Thermometer
Sie ein anderes Gerät anschließen.
• Silberpapier oder Aluminiumfolienbehälter, da die
• Überprüfen Sie, ob die Tür ordnungsgemäß
Mikrowellen diese Materialien nicht durchdringen
geschlossen ist. Das automatische
können.
Sicherheitssystem (4) gewährleistet, dass die
• Recyclingpapier, da es kleine Metallsplitter enthalten
Mikrowelle nicht bei geöffneter Tür eingeschaltet
kann, die Funken und oder Feuer verursachen
werden kann.
können.
• Überprüfen Sie, ob das Bedienfeld korrekt
• Geschlossene Dosen/Behälter mit dicht
programmiert wurde oder die Zeitschaltuhr
schließenden Deckeln, da der Überdruck dazu führen
eingeschaltet ist.
kann, dass die Schachtel/der Behälter platzt.
• Metallklemmen und andere Deckel/Folien,
Arbeitet das Gerät immer noch nicht, so wenden Sie sich
die Metallfasern enthalten. Diese können zur
bitte an einen Fachmann.
Funkenbildung im Innenraum führen und sind
deshalb zu entfernen.
UMWELTTIPPS
• Schüsseln oder Behälter aus Metall, wenn sie
Nicht mehr funktionsfähige elektronische Geräte sind
nicht speziell für die Verwendung in der Mikrowelle
umweltgerecht zu entsorgen. Beachten Sie die an Ihrem
gekennzeichnet sind. Mikrowellen werden refl ektiert
Ort geltenden Entsorgungsvorschriften.
und können nicht durch Metall in das Essen
gelangen.
GARANTIEBEDINGUNGEN
• Teller, Schüsseln u. ä. mit Metallrand oder Gold/
Die Garantie erlischt:
Silber u.ä. Sie können zerbrechen und Funken im
• falls die vorstehenden Hinweise nicht beachtet
Innenraum des Geräts verursachen.
werden
• falls unbefugte Eingriffe am Gerät vorgenommen
REINIGUNG
wurden
Bei der Reinigung des Geräts sind folgende Punkte zu
• wenn das Gerät unsachgemäß bedient oder
beachten:
fahrlässig bzw. mutwillig beschädigt wurde
• sofern Defekte auf eine fehlerhafte
• Vor dem Reinigen Gerät ausschalten und Stecker
Netzstromversorgung zurückzuführen sind
ziehen.
• Scheuerpulver, Stahlschwämme oder andere starke
Aufgrund der ständigen Weiterentwicklung der Produkte
Reinigungsmittel, welche die Flächen verkratzen
behält sich der Hersteller das Recht auf Änderung des
können, dürfen nicht zur Reinigung verwendet
Produkts ohne vorherige Ankündigung vor.
werden.
• Verwenden Sie stattdessen ein mit heißem
IMPORTEUR
Wasser angefeuchtetes Tuch und fügen Sie ein
Adexi Group
Reinigungsmittel hinzu, wenn das Mikrowellengerät
sehr schmutzig ist.
Der Hersteller haftet nicht für Druckfehler.
• Achten Sie darauf, dass kein Wasser in die
Lüftungsöffnungen eindringt.
• Drehring und Garraumboden sind regelmäßig zu
reinigen, damit sich der Drehteller ungehindert
bewegen kann.
• Drehteller und Drehring sind spülmaschinenfest.
• Entfernen Sie nicht die Magnetron-Abdeckung (5)!
37
manual.indd 37manual.indd 37 08/04/05 11:15:0008/04/05 11:15:00

PL
WPROWADZENIE ............................................................................ 38
• Nie wolno w∏àczaç pustej kuchenki mikrofalowej. Aby
WA˚NE INFORMACJE NA TEMAT BEZPIECZE¡STWA ............... 38
kuchenka mikrofalowa absorbowa∏a mikrofale, musi
Niebezpieczeƒstwo po˝aru! .............................................................. 38
si´ w niej coÊ znajdowaç (˝ywnoÊç), w przeciwnym
BUDOWA KUCHENKI MIKROFALOWEJ ........................................ 39
razie urzàdzenie mo˝e ulec uszkodzeniu.
PRZYGOTOWANIE KUCHENKI MIKROFALOWEJ ........................ 39
Poszczególne funkcje mo˝na przeçwiczyç wstawiajàc
Ustawianie kuchenki mikrofalowej ..................................................... 39
do wn´trza kuchenki fili˝ank´ z wodà.
Pod∏àczanie kuchenki mikrofalowej ..................................................39
• Nie wolno u˝ywaç kuchenki mikrofalowej, je˝eli
Wk∏adanie szklanego talerza obrotowaego .......................................39
blokada zabezpieczajàca nie dzia∏a prawid∏owo tzn.,
Ustawianie zegara ............................................................................. 39
gdy mo˝na w∏àczyç kuchenk´ mikrofalowà przy
OBS¸UGA KUCHENKI MIKROFALOWEJ .......................................40
otwartych drzwiczkach. Przy otwartych drzwiczkach
FUNKCJE GOTOWANIA ..................................................................40
istnieje ryzyko napromieniowania mikrofalami.
Gotowanie r´czne – wybór poziomu mocy ....................................... 40
• Nie wolno u˝ywaç kuchenki mikrofalowej, je˝eli
Gotowanie przyspieszone .................................................................40
wewnàtrz sà pozosta∏oÊci Êrodków czyszczàcych.
Automatyczne rozmra˝anie ............................................................... 40
• Nie wolno podgrzewaç w kuchence oleju ani innego
Gotowanie przy u˝yciu wst´pnie ustawionych programów .............. 41
t∏uszczu.
Gotowanie przy u˝yciu timera ...........................................................41
• Podczas pracy kuchenki nale˝y zwróciç uwag´ na
BLOKADA ZABEZPIECZAJÑCA PRZED DOST¢PEM DZIECI ...... 41
znajdujàce si´ w pobli˝u dzieci.
PORADY NA TEMAT PRZYGOTOWYWANIA
• Nigdy nie wolno samodzielnie naprawiaç kuchenki
PRODUKTÓW SPO˚YWCZYCH .....................................................41
mikrofalowej.
Czas gotowania. ................................................................................41
• Je˝eli kuchenka mikrofalowa, przewód lub
Moc mikrofal ...................................................................................... 42
wtyczka wymagajà naprawy, powinna ona zostaç
Informacje ogólne dotyczàce gotowania ...........................................42
przeprowadzona przez autoryzowane centrum
Zasady bezpiecznego u˝ytkowania podczas przygotowywania
serwisowe. Nieautoryzowane naprawy lub
po˝ywienia! ........................................................................................ 42
modyfikacje uniewa˝nià gwarancj´. Informacje na
KORZYSTANIE Z NACZY¡ PODCZAS PRZYGOTOWANIA
temat napraw gwarancyjnych mo˝na uzyskaç w
PO˚YWIENIA ....................................................................................42
sklepie, w którym zakupiono urzàdzenie.
Wa˝ne! ..............................................................................................43
CZYSZCZENIE .................................................................................43
Niebezpieczeƒstwo po˝aru!
ZANIM UDASZ SI¢ DO PUNKTU SERWISOWEGO ....................... 43
Aby zmniejszyç ryzyko po˝aru, nale˝y przestrzegaç
WSKAZÓWKI DOTYCZÑCE OCHRONY RODOWISKA .................44
nast´pujàcych zaleceƒ:
WARUNKI GWARANCJI ..................................................................44
• Nie nale˝y gotowaç ˝ywnoÊci zbyt d∏ugo lub przy
IMPORTER .......................................................................................44
zbyt wysokiej temperaturze, a tak˝e pozostawiaç
kuchenki mikrofalowej bez nadzoru, je˝eli w celu
skrócenia czasu gotowania u˝yto papieru, plastiku
lub innych ∏atwopalnych materia∏ów.
WPROWADZENIE
• Metalowe zapinki, pokrywki/folia zawierajàce w∏ókna
Aby w maksymalnym stopniu wykorzystaç mo˝liwoÊci
metalowe mogà powodowaç iskrzenie wewnàtrz
nowej kuchenki mikrofalowej, nale˝y przed pierwszym
kuchenki, dlatego nale˝y je usunàç.
u˝yciem uwa˝nie przeczytaç poni˝sze instrukcje.
• JeÊli zawartoÊç kuchenki mikrofalowej zapali si´,
Szczególnà uwag´ nale˝y zwróciç na zasady
nie nale˝y otwieraç drzwiczek. Nale˝y natychmiast
bezpieczeƒstwa. Zaleca si´ zachowanie tej instrukcji na
wy∏àczyç kuchenk´ i wyjàç wtyczk´ z gniazda
przysz∏oÊç, gdyby zasz∏a koniecznoÊç przypomnienia
sieciowego.
sobie funkcji kuchenki mikrofalowej.
WA˚NE INFORMACJE NA TEMAT
BEZPIECZE¡STWA
• Kuchenka mikrofalowa mo˝e byç u˝ywana jedynie
zgodnie z jej pierwotnym przeznaczeniem, tzn. do
przygotowywania ˝ywnoÊci do u˝ytku domowego.
• Kuchenka mikrofalowa przeznaczona jest wy∏àcznie
do u˝ytku wewnàtrz pomieszczeƒ.
• Nie nale˝y korzystaç z kuchenki mikrofalowej, jeÊli
przewód sieciowy lub wtyczka sà uszkodzone,
urzàdzenie nie dzia∏a prawid∏owo lub zosta∏o
uszkodzone wskutek silnego uderzenia lub w
podobny sposób.
• Nie wolno zatykaç ani zakrywaç otworów
wentylacyjnych w kuchence.
38
manual.indd 38manual.indd 38 08/04/05 11:15:0108/04/05 11:15:01
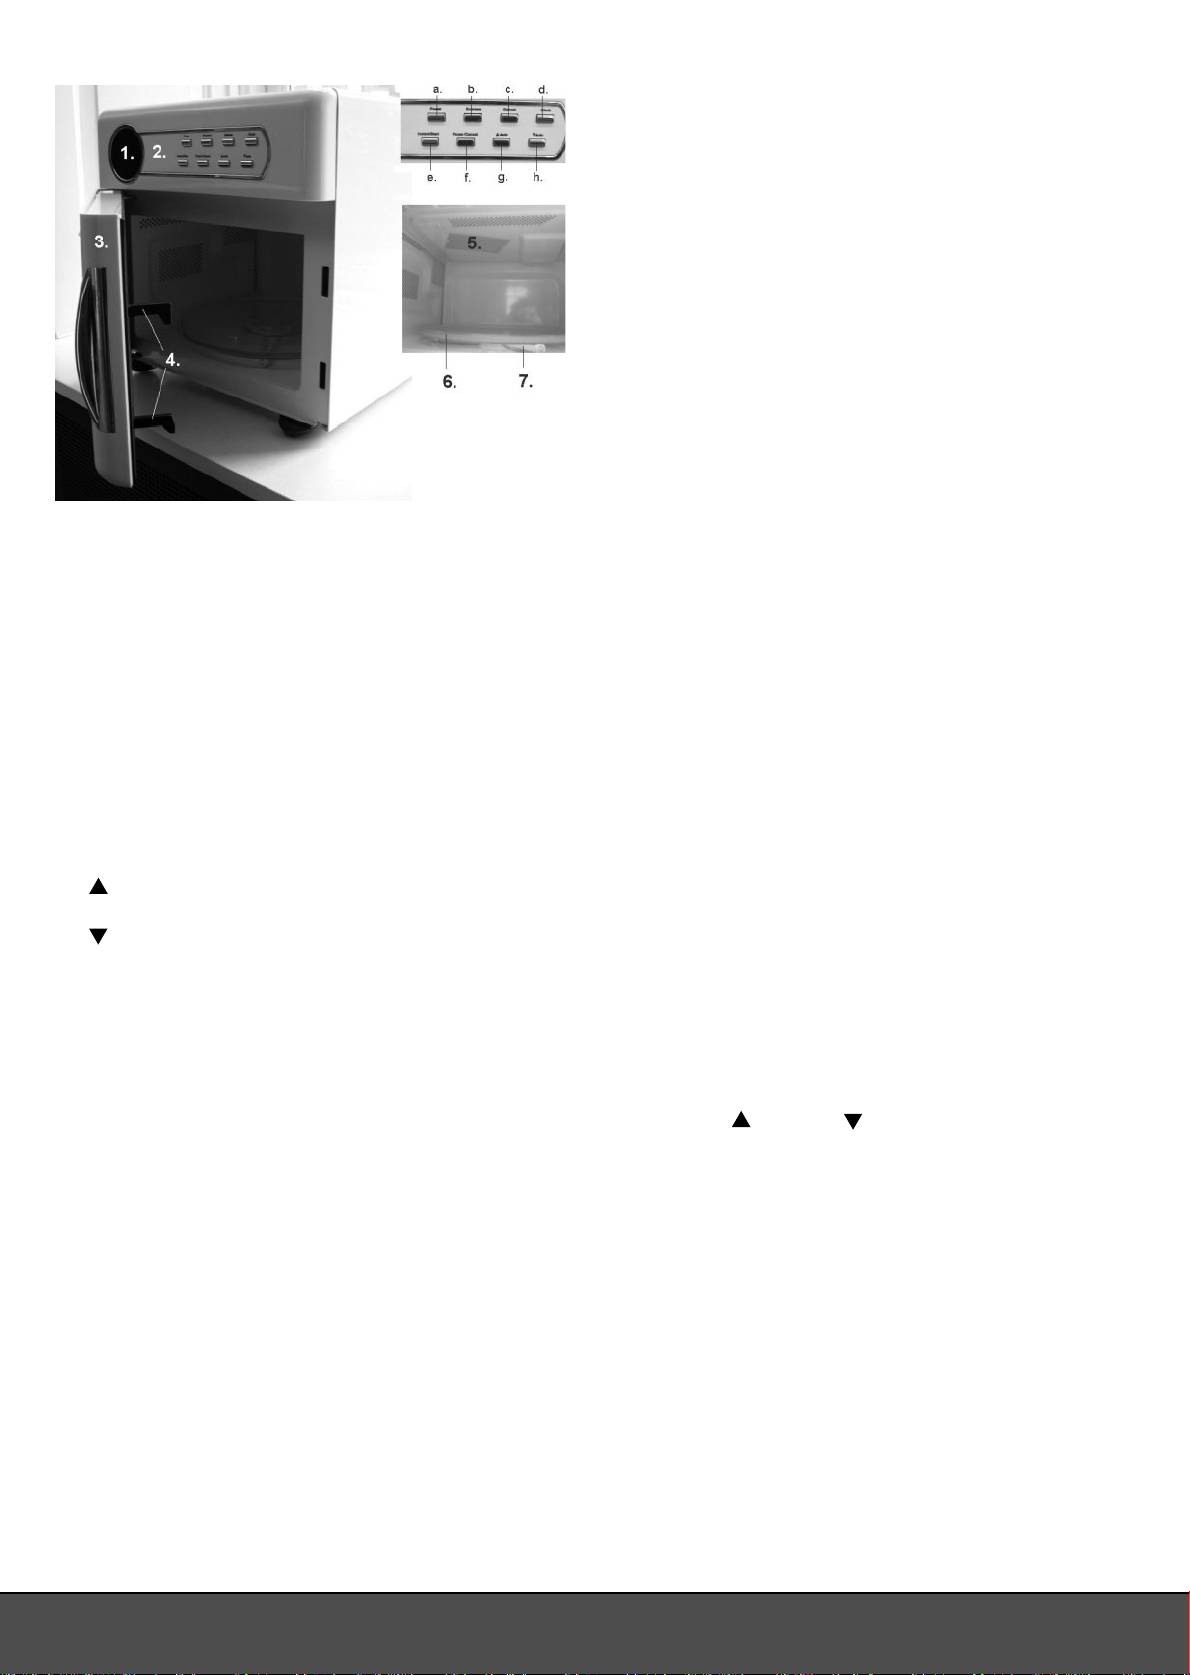
BUDOWA KUCHENKI MIKROFALOWEJ
Ustawianie kuchenki mikrofalowej
W celu zapewnienia wystarczajàcej wentylacji,
kuchenk´ mikrofalowà nale˝y ustawiç na p∏askiej
powierzchni, z zachowaniem co najmniej 10 cm odst´pu
od tylnej Êcianki, 5 cm od boków kuchenki i 20 cm
od jej górnej Êcianki. Nie nale˝y demontowaç nó˝ek
urzàdzenia. Kuchenka jest urzàdzeniem niezale˝nym.
Otwory wentylacyjne w górnej cz´Êci obudowy nigdy
nie powinny byç zakryte. Je˝eli sà one zas∏oni´te
podczas pracy kuchenki mikrofalowej, mo˝e nastàpiç
jej przegrzanie. Kuchenka mikrofalowa mo˝e zostaç
ponownie w∏àczona dopiero po wystygni´ciu.
Nie nale˝y umieszczaç kuchenki mikrofalowej ani
jej przewodu zasilajàcego w pobli˝u nagrzanych
powierzchni, na przyk∏ad palników gazowych i
elektrycznych p∏ytek grzejnych.
Pod∏àczanie kuchenki mikrofalowej
Kuchenka mikrofalowa musi zostaç pod∏àczona do
1. WyÊwietlacz
sieci zasilajàcej pràdu zmiennego o napi´ciu 230V i
2. Panel sterowania
cz´stotliwoÊci 50Hz. Pod∏àczenie kuchenki do êród∏a
3. Drzwiczki
pràdu o niew∏aÊciwym napi´ciu skutkuje uniewa˝nieniem
4. Ko∏ki (zamek bezpieczeƒstwa)
gwarancji.
5. Pokrywa magnetronu
6. Szklany talerz obrotowy
Wk∏adanie szklanego talerza obrotowego
7. OÊ obrotowa
Przed u˝yciem kuchenki nale˝y upewniç si´, ˝e szklany
talerz obrotowy (6) jest zamontowany na osi obrotowej
Przyciski panelu sterowania:
(7). Talerz nie ustawia si´ automatycznie w bezpiecznej
a. Wy∏àcznik zasilania
pozycji, nale˝y wi´c umieÊciç go tak, aby podczas
b. Funkcja szybkiego gotowania (Express)
gotowania nie dotyka∏ Êcianek kuchenki.
c. Funkcja rozmra˝ania (Defrost)
d. Zegar
Ustawianie zegara
e. Instant/start
Po pod∏àczeniu kuchenki do zasilania rozlegnie si´
f. Pause/cancel
sygna∏ dêwi´kowy, a na wyÊwietlaczu (1) mignà trzy
g. Auto (w gór´, wybieranie wst´pnie ustawionych
razy cyfry „88:88”. Kiedy dwukropek (:) zacznie migaç,
programów)
mo˝na ustawiç zegar. Uwaga: Za ka˝dym razem, kiedy
h. Auto (w dó∏, wybieranie wst´pnie ustawionych
naciskany jest jeden z przycisków kuchenki, s∏ychaç
programów)
sygna∏ dêwi´kowy.
PRZYGOTOWANIE KUCHENKI MIKROFALOWEJ
1. NaciÊnij raz przycisk Clock (d). Na wyÊwietlaczu
Ka˝da kuchenka mikrofalowa jest sprawdzana w
pojawià si´ cyfry „0:00”, a cyfra godziny zacznie
fabryce, jednak dla bezpieczeƒstwa zalecamy po
migaç.
rozpakowaniu kuchenki sprawdzenie, czy nie uleg∏a ona
2. Ustaw odpowiednià wartoÊç dla godziny za pomocà
uszkodzeniu podczas transportu. Nale˝y sprawdziç,
przycisków Auto (g) i Auto (h). Je˝eli wartoÊç
czy nie ma ˝adnych widocznych Êladów uszkodzenia
nie zostanie wprowadzona w ciàgu 5 sekund,
(np. w postaci wgnieceƒ lub tym podobnych), czy
procedura zostanie automatycznie anulowana.
drzwiczki (3) zamykajà si´ prawid∏owo oraz czy zawiasy
3. NaciÊnij ponownie przycisk Clock. WartoÊç minut
sà w porzàdku. Je˝eli kuchenka mikrofalowa uleg∏a
zacznie migaç, umo˝liwiajàc jej ustawienie.
uszkodzeniu, nale˝y skontaktowaç si´ ze sklepem, w
4. NaciÊnij przycisk Clock, aby zakoƒczyç procedur´
którym dokonano zakupu i nie uruchamiaç jej przed
lub odczekaj oko∏o 5 sekund. Na wyÊwietlaczu
sprawdzeniem przez autoryzowanego specjalist´.
wyÊwietlona zostanie godzina.
Przed u˝yciem kuchenki powinno si´ sprawdziç, czy
ca∏e opakowanie zewn´trzne jak i wewn´trzne zosta∏o
usuni´te.
39
manual.indd 39manual.indd 39 08/04/05 11:15:0108/04/05 11:15:01
OBS¸UGA KUCHENKI MIKROFALOWEJ
Przyk∏ad:
Chcesz zaprogramowaç kuchenk´ mikrofalowà na
Obs∏uga kuchenki mikrofalowej:
gotowanie przy 60 % mocy przez 10 minut.
• NaciÊnij trzy razy przycisk Power. Na wyÊwietlaczu
1. UmieÊç produkty przeznaczone do gotowania w
pojawi si´ napis „60P”.
kuchence mikrofalowej i zamknij drzwiczki.
• Naciskaj przycisk Auto, a˝ na wyÊwietlaczu pojawi
2. Wybierz funkcj´ gotowania, moc i czas gotowania
si´ napis „10:00”. Wskazówka: Je˝eli przytrzyma
(szczegó∏owy opis poni˝ej w rozdziale „Czas
si´ przyciski wciÊni´te, wyÊwietlacz b´dzie szybko
gotowania”). W celu rozpocz´cia gotowania naciÊnij
zmienia∏ wskazanie.
przycisk Instant/Start (e).
• NaciÊnij przycisk Instant/Start, aby rozpoczàç
3. Kuchenka zostanie uruchomiona, a wyÊwietlacz
gotowanie.
poka˝e pozosta∏y czas gotowania. Podczas pracy
kuchenki za pomocà przycisku
Auto (g) i Auto
Moc mikrofalówki mo˝na zmieniaç si´ podczas
(h) mo˝na wyd∏u˝yç lub skróciç czas gotowania.
gotowania, aby na przyk∏ad móc rozpoczàç gotowanie
4. Gotowanie mo˝na w ka˝dej chwili przerwaç,
przy wysokim poziomie i zakoƒczyç przy niskim
naciskajàc przycisk Pause/Cancel (f). Mo˝na to
poziomie.
zrobiç nawet podczas r´cznego lub przyspieszonego
gotowania, automatycznego rozmra˝ania, wst´pnie
Przyk∏ad:
ustawionych programów lub gotowania z w∏àczonym
Ustawienie kuchenki na gotowanie przy 100% mocy
czasomierzem.
przez 2 minuty, a nast´pnie przy 40% przez 5 minut.
• Jednokrotne naciÊni´cie przycisku wstrzymuje
• Ustaw moc mikrofalówki na100% i czas gotowania
gotowanie na chwil´, dwukrotne - przerywa je
na 2 minuty, jak opisano powy˝ej.
zupe∏nie.
• Ustaw moc mikrofalówki na 40% i czas gotowania
• Proces gotowania mo˝na tak˝e wstrzymaç na chwil´,
na 5 minut. Podczas ustawiania nowego etapu
otwierajàc drzwiczki kuchenki (jest to przydatne,
gotowania rozlegnie si´ 2-krotny sygna∏ dêwi´kowy.
je˝eli ˝ywnoÊç musi byç obrócona).
• NaciÊnij przycisk Instant/Start, aby rozpoczàç
• Gotowanie, które zosta∏o czasowo przerwane,
gotowanie. Na wyÊwietlaczu pojawi si´ pozosta∏y
mo˝e byç wznowione poprzez naciÊni´cie przycisku
czas gotowania dla ka˝dego poziomu mocy, a nie
Instant/Start.
ca∏kowity pozosta∏y czas gotowania.
5. Po up∏yni´ciu ustawionego czasu kuchenka zostanie
automatycznie wy∏àczona. Na wyÊwietlaczu pojawi
Mo˝na zaprogramowaç maksymalnie 4 etapy o ró˝nym
si´ napis „End” i rozlegnie si´ 6-krotny sygna∏
poziomie mocy i ró˝nym czasie gotowania.
dêwi´kowy. Po naciÊni´ciu przycisku Pause/Cancel
lub przy otwartych drzwiczkach po trzech minutach
UWAGA: Aby sprawdziç poziom mocy ustawiony
rozlegnie si´ 3-krotny sygna∏ dêwi´kowy.
podczas gotowania, naciÊnij przycisk Power.
6. Po otworzeniu drzwi lub naciÊni´ciu przycisku
Wybrany etap b´dzie wyÊwietlony przez ca∏y czas
Pause/Cancel wyÊwietlacz powróci do funkcji zegara.
przytrzymania przycisku. Po zwolnieniu przycisku
FUNKCJE GOTOWANIA
wyÊwietlacz powróci do normalnych wskazaƒ.
Maksymalny czas gotowania, jaki mo˝na
Gotowanie przyspieszone
zaprogramowaç, to 99 minut i 99 sekund. Czasy
Gotowanie przyspieszone jest wykonywane przy pe∏nej
gotowania sà programowane w odst´pach od 10 sekund
mocy kuchenki mikrofalowej przez 30 sekund, 1 minut´
do 5 minut i 30 sekund.
lub 1 minut´ i 30 sekund.
1. Naciskaj przycisk Express (b), a˝ na wyÊwietlaczu
Gotowanie r´czne – wybór poziomu mocy
pojawi si´ ˝àdany czas gotowania.
1. NaciÊnij przycisk Power (Moc) (a), aby wybraç
2. NaciÊnij przycisk Instant/Start, aby rozpoczàç
wymagany poziom mocy. Opis poszczególnych
gotowanie.
poziomów zawiera poni˝sza tabela.
2. Gdy wyÊwietlacz poka˝e odpowiedni poziom mocy
Automatyczne rozmra˝anie
(zobacz „Odczyt wyÊwietlacza” w tabeli poni˝ej),
Kuchenka posiada 3 programy rozmra˝ania:
wprowadê ˝àdany czas gotowania za pomocà
przycisków Auto (g) i Auto (h) .
3. NaciÊnij przycisk Instant/Start, aby rozpoczàç
Program Przeznaczony dla Waga
gotowanie.
d1
Mi´so
0,1 - 2,0 kg
d2
Drób
0,2 - 3,0 kg
IloÊç naciÊni´ç
d3
Ryby i skorupiaki
0,1 - 0,9 kg
Odczyt wyÊwietlacza Moc mikrofal
przycisku
1 100P 100 %
1. Naciskaj przycisk Defrost (c), a˝ na wyÊwietlaczu
pojawi si´ ˝àdany program.
2 80P 80 %
2. NaciÊnij przycisk Instant/Start.
3 60P 60 %
3. Wybierz wag´ produktów za pomocà przycisków ^
4 40P 40 %
Auto i ° Auto. Program automatycznie okreÊli czas
5 20P 20 %
rozmra˝ania.
40
manual.indd 40manual.indd 40 08/04/05 11:15:0208/04/05 11:15:02
