Dell XPS 14Z (L412z) – страница 4
Инструкция к Ноутбуку Dell XPS 14Z (L412z)
Оглавление

book.book Page 61 Thursday, May 3, 2012 3:09 PM
15
Speakers
WARNING: Before working inside your computer, read the safety information
that shipped with your computer. For additional safety best practices information,
see the Regulatory Compliance Homepage at
www.dell.com/regulatory_compliance.
CAUTION: Only a certified service technician should perform repairs on your
computer. Damage due to servicing that is not authorized by Dell is not covered by
your warranty.
CAUTION: To avoid electrostatic discharge, ground yourself by using a wrist
grounding strap or by periodically touching an unpainted metal surface (such as a
connector on your computer).
CAUTION: To help prevent damage to the system board, remove the main battery
(see "Removing the Battery" on page 15) before working inside the computer.
Removing the Speakers
1
Follow the instructions in "Before You Begin" on page 7.
2
Remove the system board (see "Removing the System Board" on page 45).
3
Make a note of the antenna cables routing and remove the antenna cables
from the routing guides.
Speakers 61
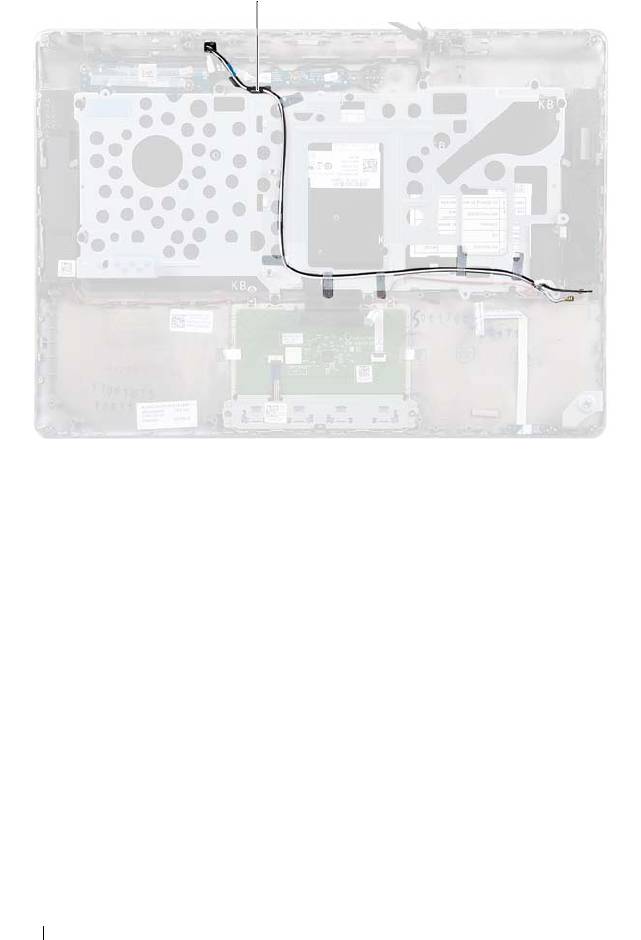
1 antenna cables (2)
4
Make a note of the speakers cable routing and remove the speaker cables
from the routing guides.
62 Speakers
1
book.book Page 62 Thursday, May 3, 2012 3:09 PM
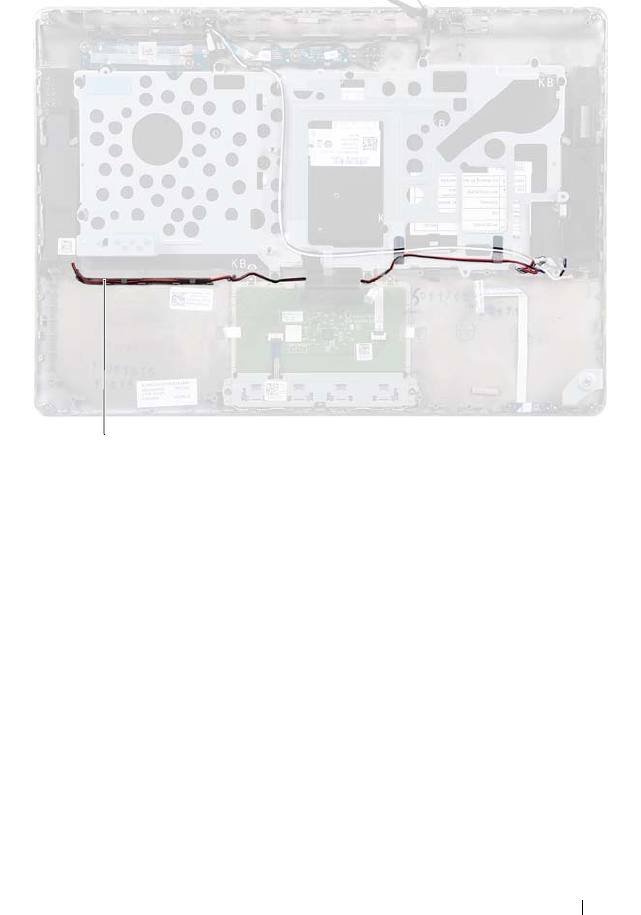
1 speakers cable
5
Remove the two screws (one on each side) that secure the speakers to the
palm-rest assembly.
6
Slide and lift the speakers along with the cable off the palm-rest assembly.
Speakers 63
1
book.book Page 63 Thursday, May 3, 2012 3:09 PM
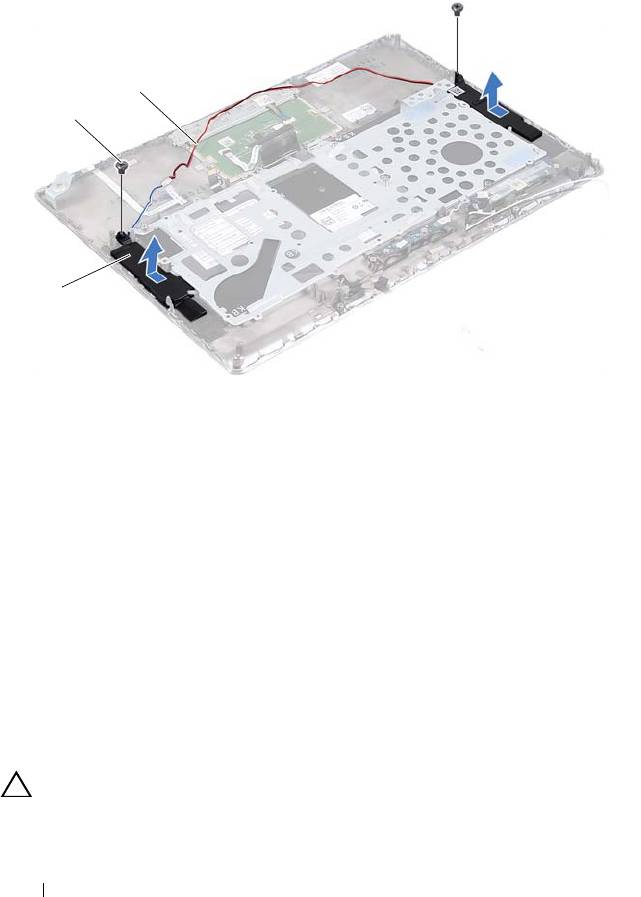
1 speakers (2) 2 screws (2)
3 speakers cable
Replacing the Speakers
1
Follow the instructions in "Before You Begin" on page 7.
2
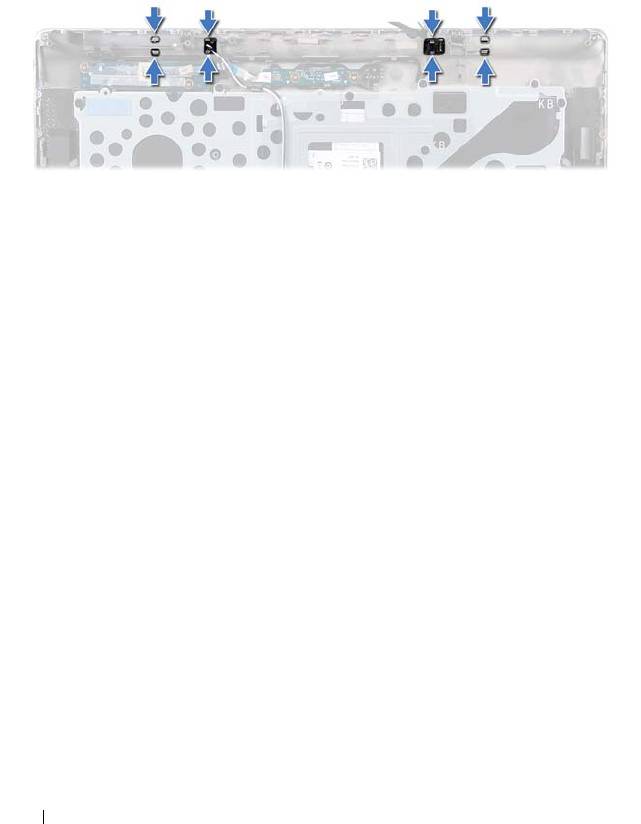
Place the speakers on the palm-rest assembly and route the speakers cable
through the routing guides.
3
Replace the two screws (one on each side) that secure the speakers to the
palm-rest assembly.
4
Route the antenna cables through the routing guides.
5
Replace the system board (see "Replacing the System Board" on page 48).
CAUTION: Before turning on the computer, replace all screws and ensure that no
stray screws remain inside the computer. Failure to do so may result in damage to
the computer.
64 Speakers
3
2
1
book.book Page 64 Thursday, May 3, 2012 3:09 PM

book.book Page 65 Thursday, May 3, 2012 3:09 PM
16
Display
WARNING: Before working inside your computer, read the safety information
that shipped with your computer. For additional safety best practices information,
see the Regulatory Compliance Homepage at
www.dell.com/regulatory_compliance.
CAUTION: Only a certified service technician should perform repairs on your
computer. Damage due to servicing that is not authorized by Dell is not covered by
your warranty.
CAUTION: To avoid electrostatic discharge, ground yourself by using a wrist
grounding strap or by periodically touching an unpainted metal surface (such as a
connector on your computer).
CAUTION: To help prevent damage to the system board, remove the main battery
(see "Removing the Battery" on page 15) before working inside the computer.
Display Hinge Covers
Removing the Display Hinge Covers
1
Follow the instructions in "Before You Begin" on page 7.
2
Remove the system board (see "Removing the System Board" on page 45).
3
Push the eight tabs (four on each side) that secure the display hinge covers
to the palm-rest assembly.
Display 65
book.book Page 66 Thursday, May 3, 2012 3:09 PM
4
Turn the palm-rest assembly over.
5
Lift the display hinge covers off the palm-rest assembly.
66 Display
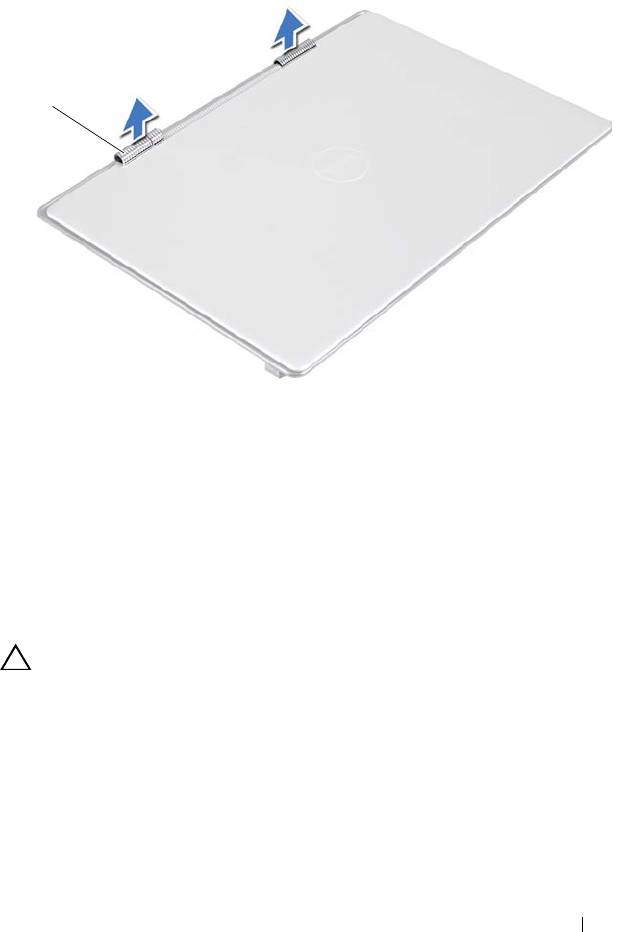
1 display hinge covers (2)
Replacing the Display Hinge Covers
1
Follow the instructions in "Before You Begin" on page 7.
2
Align the tabs on the display hinge covers with the slots on the palm-rest
assembly and snap the display hinge covers into place.
3
Replace the system board (see "Replacing the System Board" on page 48).
CAUTION: Before turning on the computer, replace all screws and ensure that no
stray screws remain inside the computer. Failure to do so may result in damage to
the computer.
Display 67
1
book.book Page 67 Thursday, May 3, 2012 3:09 PM
Display Assembly
Removing the Display Assembly
1
Follow the instructions in "Before You Begin" on page 7.
2
Remove the display hinge covers (see "Removing the Display Hinge
Covers" on page 65).
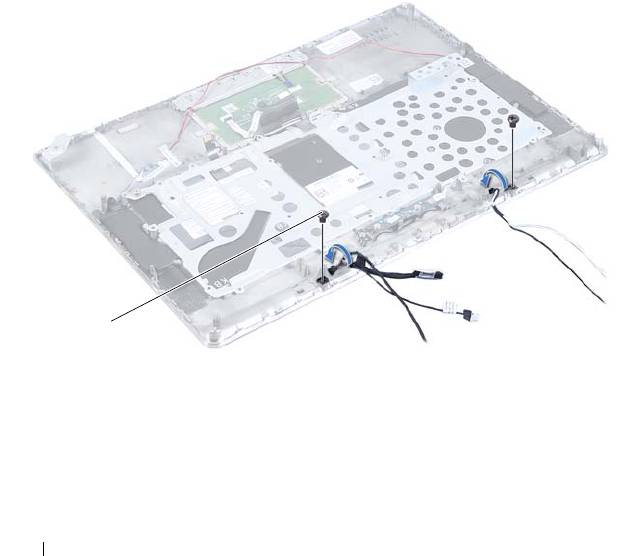
3
Remove the two screws that secure the display assembly to the palm-rest
assembly.
4
Carefully push the antenna cables, ambient-light-sensor cable, display
cable, and camera cable towards the top of the computer.
1 screws (2)
68 Display
1
book.book Page 68 Thursday, May 3, 2012 3:09 PM

5
Remove the four screws (two on each side) that secure the display
assembly to the palm-rest assembly.
6
Slide and lift the display assembly away from the palm-rest assembly.
1 palm-rest assembly 2 display assembly
3 screws (4)
Replacing the Display Assembly
1
Follow the instructions in "Before You Begin" on page 7.
2
Slide and place the display assembly on the palm-rest assembly.
3
Replace the four screws that secure the display assembly to the palm-rest
assembly.
Display 69
3
1
2
book.book Page 69 Thursday, May 3, 2012 3:09 PM

book.book Page 70 Thursday, May 3, 2012 3:09 PM
4
Carefully route the antenna cables, ambient-light-sensor cable, display
cable, and camera cable towards the bottom of the computer.
5
Replace the two screws that secure the display assembly to the palm-rest
assembly.
6
Replace the display hinge covers (see "Replacing the Display Hinge
Covers" on page 67).
CAUTION: Before turning on the computer, replace all screws and ensure that no
stray screws remain inside the computer. Failure to do so may result in damage to
the computer.
70 Display

book.book Page 71 Thursday, May 3, 2012 3:09 PM
17
Palm-Rest Assembly
WARNING: Before working inside your computer, read the safety information
that shipped with your computer. For additional safety best practices
information, see the Regulatory Compliance Homepage at
www.dell.com/regulatory_compliance.
CAUTION: Only a certified service technician should perform repairs on your
computer. Damage due to servicing that is not authorized by Dell is not covered by
your warranty.
CAUTION: To avoid electrostatic discharge, ground yourself by using a wrist
grounding strap or by periodically touching an unpainted metal surface (such as a
connector on your computer).
CAUTION: To help prevent damage to the system board, remove the main battery
(see "Removing the Battery" on page 15) before working inside the computer.
Removing the Palm-Rest Assembly
1
Follow the instructions in "Before You Begin" on page 7.
2
Remove the system board (see "Removing the System Board" on page 45).
3
Remove the keyboard (see "Removing the Keyboard" on page 58).
4
Remove the speakers (see "Removing the Speakers" on page 61).
5
Remove the power-button board (see "Removing the Power-Button Board"
on page 51).
6
Remove the display-converter board (see "Removing the Display-
Converter Board" on page 39).
7
Remove the hall-sensor board (see "Removing the Hall-Sensor Board" on
page 35).
8
Remove the display assembly (see "Removing the Display Assembly" on
page 68).
9
Lift the display assembly off the palm-rest assembly.
CAUTION: Carefully separate the palm-rest assembly from the display assembly
to avoid damage to the display assembly.
Palm-Rest Assembly 71

book.book Page 72 Thursday, May 3, 2012 3:09 PM
Replacing the Palm-Rest Assembly
1
Follow the instructions in "Before You Begin" on page 7.
2
Replace the display assembly (see "Replacing the Display Assembly" on
page 69).
3
Replace the hall-sensor board (see "Replacing the Hall-Sensor Board" on
page 37).
4
Replace the display-converter board (see "Replacing the Display-Converter
Board" on page 40).
5
Replace the power-button board (see "Replacing the Power-Button Board"
on page 52).
6
Replace the speakers (see "Replacing the Speakers" on page 64).
7
Replace the keyboard (see "Replacing the Keyboard" on page 59).
8
Replace the system board (see "Replacing the System Board" on page 48).
CAUTION: Before turning on the computer, replace all screws and ensure that no
stray screws remain inside the computer. Failure to do so may result in damage to
the computer.
72 Palm-Rest Assembly

book.book Page 73 Thursday, May 3, 2012 3:09 PM
18
Flashing the BIOS
The BIOS may require flashing when an update is available or when replacing
the system board. To flash the BIOS:
1
Turn on the computer.
2
Go to
support.dell.com/support/downloads
.
3
Locate the BIOS update file for your computer:
NOTE: The Service Tag for your computer is located on a label at the bottom
of your computer.
If you have your computer’s Service Tag:
a
Click
Enter a Tag
.
b
Enter your computer’s Service Tag in the
Enter a service tag:
field,
click
Go
, and proceed to step 4.
If you do not have your computer’s Service Tag:
a
Click
Select Model.
b
Select the type of product in the
Select Your Product Family
list.
c
Select the product brand in the
Select Your Product Line
list.
d
Select the product model number in the
Select Your Product Model
list.
NOTE: If you have selected a different model and want to start over again,
click Start Over on the top right of the menu.
e
Click
Confirm
.
4
A list of results appears on the screen. Click
BIOS
.
5
Click
Download Now
to download the latest BIOS file.
The
File Download
window appears.
Flashing the BIOS 73

book.book Page 74 Thursday, May 3, 2012 3:09 PM
6
Click
Save
to save the file on your desktop. The file downloads to your
desktop.
7
Click
Close
if the
Download Complete
window appears.
The file icon appears on your desktop and is titled the same as the
downloaded BIOS update file.
8
Double-click the file icon on the desktop and follow the instructions on
the screen.
74 Flashing the BIOS
