Dell Latitude D530 – страница 3
Инструкция к Ноутбуку Dell Latitude D530
Оглавление
®
®
Microsoft
Windows
Power Meter
The Windows Power Meter indicates the remaining battery charge. To check
the Power Meter, double-click the battery meter icon ( or ) on the
taskbar.
If the computer is connected to an electrical outlet, a icon appears.
Charge Gauge
By either pressing once or pressing and holding the status button on the
charge gauge on the battery, you can check:
• Battery charge (check by pressing and
releasing
the status button)
• Battery health (check by pressing and
holding
the status button)
The battery operating time is largely determined by the number of times it is
charged. After hundreds of charge and discharge cycles, batteries lose some
charge capacity—or battery health. That is, a battery can show a status of
charged but maintain a reduced charge capacity (health).
Check the Battery Charge
To check the battery charge, press and release the status button on the battery
charge gauge to illuminate the charge-level lights. Each light represents
approximately 20 percent of the total battery charge. For example, if the
battery has 80 percent of its charge remaining, four of the lights are on. If no
lights appear, the battery has no charge.
Check the Battery Health
NOTE: You can check battery health in one of two ways: by using the charge gauge
on the battery as described below and by using the Battery Meter in Dell QuickSet.
For information about QuickSet, right-click the icon in the taskbar, and click Help.
To check the battery health using the charge gauge, press and hold the status
button on the battery charge gauge for at least 3 seconds. If no lights appear,
the battery is in good condition, and more than 80 percent of its original
charge capacity remains. Each light represents incremental degradation. If
five lights appear, less than 60 percent of the charge capacity remains, and you
should consider replacing the battery. See "Battery" on page 155 for more
information about the battery operating time.
Using a Battery 41

Low-Battery Warning
NOTICE: To avoid losing or corrupting data, save your work immediately after a
low-battery warning. Then connect the computer to an electrical outlet, or install a
second battery in the media bay. If the battery runs completely out of power,
hibernate mode begins automatically.
A pop-up window warns you when the battery charge is approximately 90
percent depleted. If two batteries are installed, the low-battery warning
means that the combined charge of both batteries is approximately 90
percent depleted. The computer enters hibernate mode when the battery
charge is at a critically low level.
You can change the settings for the battery alarms in QuickSet or the Power
Options Properties window. See "Configuring Power Management Settings"
on page 44 for information about accessing QuickSet or the Power Options
Properties window.
Conserving Battery Power
Perform the following actions to conserve battery power:
• Connect the computer to an electrical outlet when possible because
battery life is largely determined by the number of times the battery is
used and recharged.
• Place the computer in standby mode or hibernate mode when you leave
the computer unattended for long periods of time. See "Power
Management Modes" on page 43.
• Use the Power Management Wizard or the
Power Options Properties
window to select options to optimize your computer’s power usage. These
options can also be set to change when you press the power button, close
the display, or press <Fn><Esc>.
NOTE: See "Configuring Power Management Settings" on page 44 for information
on conserving battery power.
42 Using a Battery

Power Management Modes
Standby and Sleep Mode
®
Standby mode (sleep mode in Microsoft Windows Vista
) conserves power
by turning off the display and the hard drive after a predetermined period of
inactivity (a time-out). When the computer exits standby or sleep mode, it
returns to the same operating state it was in before entering standby or sleep
mode.
NOTICE: If your computer loses AC and battery power while in standby or sleep
mode, it may lose data.
To enter standby mode in Windows XP, click the Start button, click Tu rn o ff
computer, and then click Stand by.
To enter sleep mode in Windows Vista, click the Windows Vista Start button
, and then click Sleep.
Depending on how you set the power management options in the Power
Options Properties window or the QuickSet Power Management Wizard, you
may also use one of the following methods:
• Press the power button.
• Close the display.
• Press <Fn><Esc>.
To exit standby or sleep mode, press the power button or open the display,
depending on how you set the power management options. You cannot make
the computer exit standby or sleep mode by pressing a key or touching the
touch pad.
Hibernate Mode
Hibernate mode conserves power by copying system data to a reserved area on
the hard drive and then completely turning off the computer. When the
computer exits hibernate mode, it returns to the same operating state it was
in before entering hibernate mode.
NOTICE: You cannot remove devices or undock your computer while your
computer is in hibernate mode.
Your computer enters hibernate mode if the battery charge level becomes
critically low.
Using a Battery 43

To manually enter hibernate mode in Windows XP, click the Start button,
click Turn of f comput er, press and hold <Shift>, and then click Hibernate.
To manually enter hibernate mode in Windows Vista, click the Windows
Vista Start button , and then click Hibernate.
Depending on how you set the power management options in the Power
Options Properties window or the QuickSet Power Management Wizard, you
may also use one of the following methods to enter hibernate mode:
• Press the power button.
• Close the display.
• Press <Fn><Esc>.
NOTE: Some PC Cards or Express Cards may not operate correctly after the
computer exits hibernate mode. Remove and reinsert the card, or simply restart
(reboot) your computer.
To exit hibernate mode, press the power button. The computer may take a
short time to exit hibernate mode. You cannot make the computer exit
hibernate mode by pressing a key or touching the touch pad. For more
information on hibernate mode, see the documentation that came with your
operating system.
Configuring Power Management Settings
You can use the QuickSet Power Management Wizard or Windows Power
Options Properties to configure the power management settings on your
computer. For more information about QuickSet, right-click the QuickSet
icon in the taskbar and click Help.
Accessing Power Options Properties
Windows XP
Click the Start button, point to Control Panel→ Performance and
Maintenance, and then click Power Options
Windows Vista
Click the Windows Vista Start button , click Control Panel, click System
and Maintenance, and then click Power Options.
44 Using a Battery

Charging the Battery
When you connect the computer to an electrical outlet or install a battery
while the computer is connected to an electrical outlet, the computer checks
the battery charge and temperature. If necessary, the AC adapter then charges
the battery and maintains the battery charge.
NOTE: With Dell™ ExpressCharge™, when the computer is turned off, the AC
adapter charges a completely discharged battery to 80 percent in about 1 hour and
to 100 percent in approximately 2 hours. Charge time is longer with the computer
turned on. You can leave the battery in the computer for as long as you like. The
battery’s internal circuitry prevents the battery from overcharging.
If the battery is hot from being used in your computer or being in a hot
environment, the battery may not charge when you connect the computer to
an electrical outlet.
The battery is too hot to start charging if the light flashes alternately
green and orange. Disconnect the computer from the electrical outlet and
allow the computer and the battery to cool to room temperature. Then
connect the computer to an electrical outlet to continue charging the battery.
For information about resolving problems with a battery, see "Power
Problems" on page 116.
Replacing the Battery
CAUTION: Using an incompatible battery may increase the risk of fire or
explosion. Replace the battery only with a compatible battery purchased from
Dell. The battery is designed to work with your Dell™ computer. Do not use a
battery from other computers with your computer.
CAUTION: Before performing these procedures, turn off the computer, disconnect
the AC adapter from the electrical outlet and the computer, disconnect the modem
from the wall connector and computer, and remove any other external cables from
the computer.
NOTICE: You must remove all external cables from the computer to avoid possible
connector damage.
For information about replacing the second battery, which is located in the
media bay, see the Service Manual for your system on support.dell.com.
To remove the battery:
Using a Battery 45
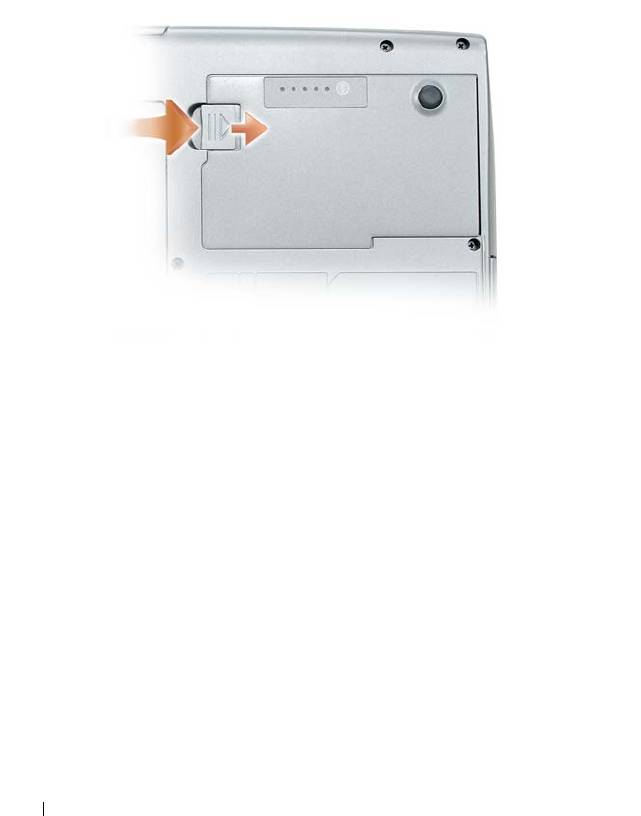
1
If the computer is connected to a docking device (docked), undock it. See
the documentation that came with your docking device for instructions.
2
Ensure that the computer is turned off.
3
Slide the battery-bay latch release on the bottom of the computer, and
then remove the battery from the bay.
To replace the battery, follow the removal procedure in reverse order and press
down until the battery-bay latch release fully engages.
Storing a Battery
Remove the battery when you store your computer for an extended period of
time. A battery discharges during prolonged storage. After a long storage
period, recharge the battery fully (see "Charging the Battery" on page 45)
before you use it.
46 Using a Battery
5
Using the Keyboard
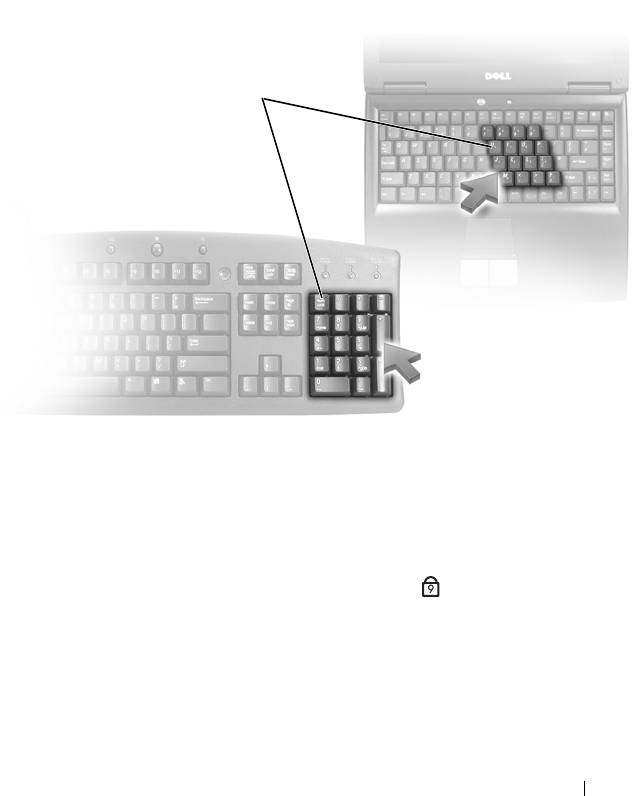
Numeric Keypad
numeric keypad
The numeric keypad functions like the numeric keypad on an external
keyboard. Each key on the keypad has multiple functions. The keypad
numbers and symbols are marked in blue on the right of the keypad keys. To
type a number or symbol, hold down <Fn> and press the desired key.
• To enable the keypad, press <Num Lk>. The light indicates that the
9
keypad is active.
• To disable the keypad, press <Num Lk> again.
Using the Keyboard 47

Key Combinations
System Functions
<Ctrl><Shift><Esc> Opens the Task Manager window.
Battery
<Fn><F3> Displays the Dell™ QuickSet Battery
Meter (see "Dell™ QuickSet" on
page 139).
CD or DVD Tray
<Fn><F10> Ejects the tray out of the drive (if Dell
QuickSet is installed; see "Dell™
QuickSet" on page 139).
Display Functions
<Fn><F8> Switches the video image to the next
display option. The options include the
integrated display, an external monitor,
and both displays simultaneously.
<Fn> and up-arrow key Increases brightness on the integrated
display only (not on an external monitor).
<Fn> and down-arrow key Decreases brightness on the integrated
display only (not on an external monitor).
®
Wireless Networking and Bluetooth
Wireless Technology Function
<Fn><F2> Enables and disables wireless networking
and Bluetooth wireless technology.
48 Using the Keyboard

Power Management
<Fn><Esc> Activates a power management mode.
You can reprogram this keyboard shortcut
to activate a different power management
mode using the Advanced tab in the
Power Options Properties window.
<Fn><F1> Puts the computer into hibernate mode.
Dell QuickSet is required.
Speaker Functions
<Fn><Page Up> Increases the volume of the integrated
speakers and external speakers, if
attached.
<Fn><Page Dn> Decreases the volume of the integrated
speakers and external speakers, if
attached.
<Fn><End> Enables and disables the integrated
speakers and external speakers, if
attached.
®
®
Microsoft
Windows
XP Logo Key Functions
Windows logo key and <m> Minimizes all open windows
Windows logo key and <Shift><m> Restores all minimized windows. This key
combination functions as a toggle to
restore minimized windows following the
use of the Windows logo key and <m>
key combination.
Windows logo key and <e> Runs Windows Explorer.
Windows logo key and <r> Opens the Run dialog box.
Windows logo key and <f> Opens the Search Results dialog box.
Windows logo key and <Ctrl><f> Opens the Search Results-Computer
dialog box (if the computer is connected
to a network).
Windows logo key and <Pause> Opens the System Properties dialog box.
Using the Keyboard 49

®
®
Microsoft
Windows Vista
Logo Key Functions
Windows logo key and <TAB> Cycle through programs on the Windows
Notification area by using Windows Flip 3-D (only
if using the Aero™ interface).
Ctrl+Windows logo key and
Use the arrow keys to cycle through programs on
<TAB>
the Windows Notification area by using Windows
Flip 3-D (only if using the Aero interface).
Windows logo key and
Bring all gadgets to the front and select Windows
<SPACEBAR>
Sidebar (if using Windows Sidebar).
Windows logo key and <g> Cycles through Windows Sidebar gadgets (if using
Windows Sidebar).
Windows logo key and <u> Opens the Ease of Access Center.
Windows logo key and <x> Opens the Windows Mobility Center.
Windows logo key and any
Opens the Quick Launch shortcut that is in the
number key
position that corresponds to the number. For
example, use the Windows logo key and <1> to
launch the first shortcut in the Quick Launch
menu.
Windows logo key and <m> Minimizes all open windows.
Windows logo key and
Restores all minimized windows. This key
<Shift><m>
combination functions as a toggle to restore
minimized windows following the use of the
Windows logo key and <m> key combination.
Windows logo key and <e> Runs Windows Explorer.
Windows logo key and <r> Opens the Run dialog box.
Windows logo key and <f> Opens the Search Results dialog box.
Windows logo key and
Opens the Search Results-Computer dialog box (if
<Ctrl><f>
the Tablet-PC is connected to a network).
Windows logo key and
Opens the System Properties dialog box.
<Fn><F12>
50 Using the Keyboard
To adjust keyboard operation, such as the character repeat rate, open the
Control Panel, click Printers and Other Hardware, and click Keyboard. For
information about the Control Panel, see Windows Help and Support. To
access Help and Support, see "Windows Help and Support" on page 18.
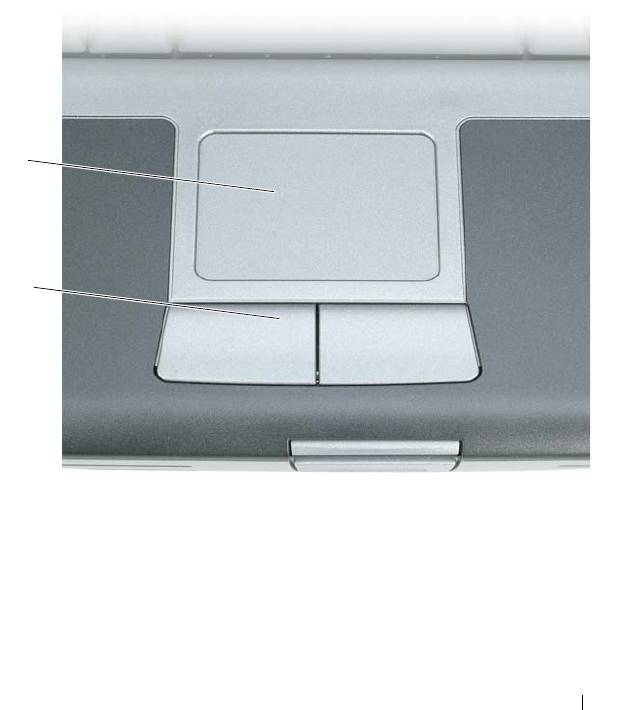
Touch Pad
The touch pad detects the pressure and movement of your finger to allow you
to move the cursor on the display. Use the touch pad and touch pad buttons
as you would use a mouse.
1
2
1 touch pad 2 touch pad buttons
• To move the cursor, lightly slide your finger over the touch pad.
• To select an object, lightly tap once on the surface of the touch pad or use
your thumb to press the left touch-pad button.
Using the Keyboard 51

• To select and move (or drag) an object, position the cursor on the object
and tap twice on the touch pad. On the second tap, leave your finger on
the touch pad and move the selected object by sliding your finger over the
surface.
• To double-click an object, position the cursor on the object and tap twice
on the touch pad or use your thumb to press the left touch-pad button
twice.
Customizing the Touch Pad
You can use the Mouse Properties window to disable the touch pad or adjust
its settings.
1
Click
Start
→
Control Panel
→
Printers and Other Hardware
→
Mouse
.
See the Windows Help and Support for information about the Control
Panel,. To access Windows Help and Support, see "Windows Help and
Support" on page 18.
2
In the
Mouse Properties
window:
•Click the
Device Select
tab to disable the touch pad and track stick.
•Click the
Touch Pad
tab to adjust touch pad and track stick settings.
3
Click
OK
to save the settings and close the window.
52 Using the Keyboard

6
Using the Display
Adjusting Brightness
When a Dell™ computer is running on battery power, you can conserve power
by setting the display brightness to the lowest comfortable setting by pressing
<Fn> and the up- or down-arrow key on the keyboard.
NOTE: Brightness key combinations only affect the display on your portable
computer, not monitors or projectors that you attach to your portable computer or
docking device. If your computer is connected to an external monitor and you try to
change the brightness level, the Brightness Meter may appear, but the brightness
level on the external device does not change.
You can press the following keys to adjust display brightness:
• Press <Fn> and the up-arrow key to increase brightness on the integrated
display only (not on an external monitor).
• Press <Fn> and the down-arrow key to decrease brightness on the
integrated display only (not on an external monitor).
Using a Projector
When you start the computer with an external device (such as an external
monitor or projector) attached and turned on, the image may appear on
either the computer display or the external device.
Press <Fn><F8> to switch the video image between the display only, the
external device only, or the display and the external device simultaneously.
Making Images and Text Look Bigger or Sharper
NOTE: If you change the display resolution from the current settings, the image
may appear blurry or text may be hard to read if you change the resolution to one
not supported by your computer and display. Before you change any of the display
settings, make a note of the current settings so you can change back to the
previous settings if you need to.
Using the Display 53

You can enhance the legibility of text and change the appearance of images
on the screen by adjusting display resolution. As you increase resolution,
items appear smaller on the screen. In contrast, lower resolution causes text
and images to appear larger and can benefit people with vision impairments.
To display a program at a specific resolution, both the video card and the
display must support the program, and the necessary video drivers must be
installed.
NOTE: Use only the Dell-installed video drivers, which are designed to offer the
best performance with your Dell-installed operating system.
If you choose a resolution or color palette that is higher than the display
supports, the settings adjust automatically to the closest supported values.
To set the display resolution and refresh rate for your display, perform the
steps in the following section that corresponds to the operating system your
computer is using.
®
®
Microsoft
Windows
XP
1
Click
Start
→
Settings
→
Control Panel
.
2
Under
Pick a category
, click
Appearance and Themes
.
3
Under
Pick a task...
, click the area you want to change, or under
or pick a
Control Panel icon
, click
Display
.
4
In the
Display Properties
window, click the
Settings
tab.
5
Try different settings for
Color quality
and
Screen resolution
.
NOTE: As the resolution increases, icons and text appear smaller on the screen.
®
Windows Vista
1
Click the Windows Vista Start button , and click
Control Panel
.
2
Under
Appearance and Personalization
, click
Adjust screen resolution
.
3
In the
Display Settings
window, under
Resolution
, slide the slide bar to
the left/right to decrease/increase the screen resolution.
4
Click
How do I get the best display?
for further instructions.
If the video resolution setting is higher than that supported by the display, the
computer enters pan mode. In pan mode, the entire video image cannot be
displayed at one time, and the taskbar that usually appears at the bottom of
54 Using the Display

the desktop may no longer be visible. To view the parts of the video image
that are not visible, you can use the touch pad or track stick to pan (or move)
the image up, down, left, and right.
NOTICE: You can damage an external monitor by using an unsupported refresh
rate. Before adjusting the refresh rate on an external monitor, see the user’s guide
for the monitor.
Using Both a Monitor and Your Computer Display
You can attach an external monitor or projector to your computer and use it
as an extension of your display (known as dual independent display or extended
desktop mode). This mode allows you to use both screens independently and
drag objects from one screen to the other, effectively doubling the amount of
viewable work space.
To use extended desktop mode, perform the steps in the following section
that corresponds to the operating system your computer is using.
®
®
Microsoft
Windows
XP
1
Connect the external monitor, TV, or projector to the computer.
2
Click
Start
→
Settings
→
Control Panel
.
3
Under
Pick a category
, click
Appearance and Themes
.
4
Under
Pick a task...
, click the area you want to change, or under
or pick a
Control Panel icon
, click
Display
.
5
In the
Display Properties
window, click the
Settings
tab.
NOTE: If you choose a resolution or color palette that is higher than the display
supports, the settings adjust automatically to the closest supported values. For
more information, see your operating system documentation.
6
Click the monitor 2 icon, click the
Extend my Windows desktop...
check
box, and then click
Apply
.
7
Change
Screen Area
to the appropriate sizes for both displays and click
Apply
.
8
If prompted to restart the computer, click
Apply the new color setting
without restarting
and click
OK
.
9
If prompted, click
OK
to resize your desktop.
Using the Display 55

10
If prompted, click
Yes
to keep the settings.
11
Click
OK
to close the
Display Properties
window.
To disable dual independent display mode:
1
Click the
Settings
tab in the
Display Properties
window.
2
Click the monitor 2 icon, uncheck the
Extend my Windows desktop onto
this monitor
option, and then click
Apply
.
If necessary, press <Fn><F8> to bring the screen image back to the
computer display.
Windows Vista
1
Click the Windows Vista Start button , and click
Control Panel
.
2
Under
Appearance and Personalization
, click
Adjust screen resolution
.
3
In the
Display Settings
window, click the monitor 2 icon, click the
Extend
the desktop onto this monitor
check box, and then click
Apply
.
4
Click
OK
to close the
Display Settings
window.
To disable extended desktop mode:
1
In the
Display Settings
window, click the
Settings
tab.
2
Click the monitor 2 icon, uncheck the
Extend the desktop onto this
monitor
option, and then click
Apply
.
Using a Monitor as Your Primary Display
To swap your primary and secondary display designations (for example, to use
your external monitor as your primary display after docking), perform the
steps in the following section that corresponds to the operating system your
computer is using.
®
®
Microsoft
Windows
XP
1
Click the
Start
button and click
Control Panel
.
2
Under
Pick a category
, click
Appearance and Themes
.
3
Under
Pick a task...
, click the area you want to change, or under
or pick a
Control Panel icon
, click
Display
.
4
Click the
Settings
tab
→
Advanced
→
Displays
tab.
56 Using the Display

See the documentation that came with your video card for additional
information.
Windows Vista
1
Click the Windows Vista Start button , and click
Control Panel
.
2
Under
Appearance and Personalization
, click
Adjust screen resolution
.
3
In the
Display Settings
window, click the monitor 2 icon, click the
This is
my main monitor
check box, and then click
Apply
.
4
Click
OK
to close the
Display Settings
window.
Using the Display 57

58 Using the Display

7
Using Multimedia
Playing CDs or DVDs
NOTICE: Do not press down on the CD/DVD tray when you open or close it. Keep
the tray closed when you are not using the drive.
NOTICE: Do not move the computer while playing CDs or DVDs.
1
Press the eject button on the front of the drive.
2
Pull out the tray.
3
Place the disc, label side up, in the center of the tray and snap the disc
onto the spindle.
Using Multimedia 59
NOTE: If you use a module that shipped with another computer, you need to install
the drivers and software necessary to play DVDs or write data. For more
information, see the Drivers and Utilities media (the Drivers and Utilities media is
optional and may not be available for your computer or in certain countries).
4
Push the tray back into the drive.
To format CDs for storing data, to create music CDs, or to copy CDs, see the
CD software that came with your computer.
NOTE: Ensure that you follow all copyright laws when you create CDs.
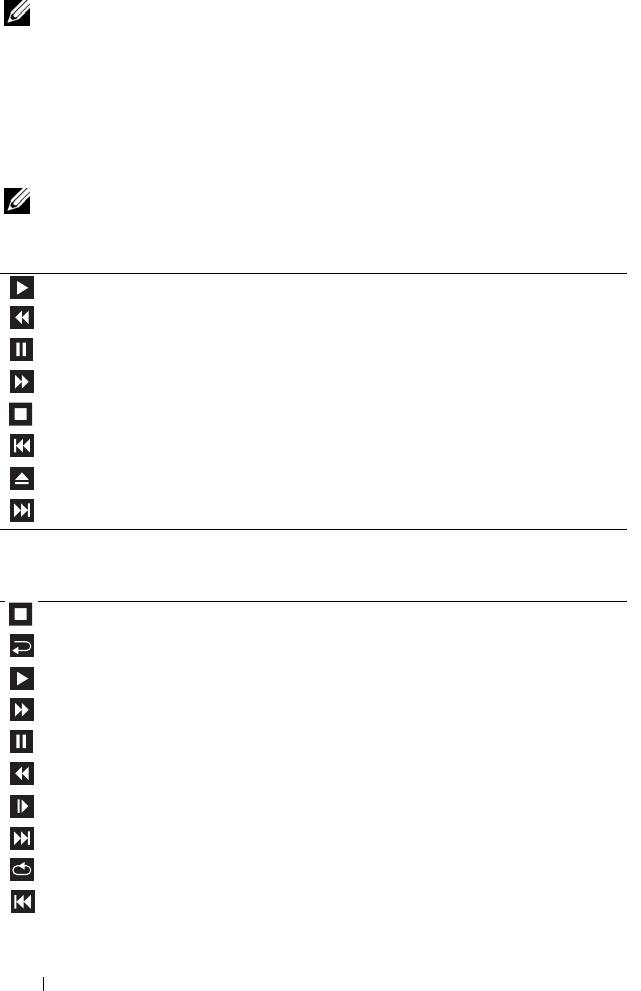
A CD player includes the following basic buttons:
Play.
Move backward within the current track.
Pause.
Move forward within the current track.
Stop.
Go to the previous track.
Eject.
Go to the next track.
A DVD player includes the following basic buttons:
Stop.
Restart the current chapter.
Play.
Fast forward.
Pause.
Fast reverse.
Advance a single frame while in pause mode.
Go to the next title or chapter.
Continuously play the current title or chapter.
Go to the previous title or chapter.
60 Using Multimedia
