Dell E2011H Monitor: Operating the Monitor
Operating the Monitor : Dell E2011H Monitor
Back to Contents Page
Operating the Monitor
Dell™E2011HMonitorUser'sGuide
Using the Front Panel Controls
Using the On-Screen Display (OSD) Menu
PowerNap Software
Setting the Maximum Resolution
Using the Dell Soundbar (Optional)
Using the Tilt
Using the Front Panel Controls
Use the control buttons on the front of the monitor to adjust the characteristics of the image being displayed. As you use these buttons to adjust the controls,
an OSD shows the numeric values of the characteristics as they change.
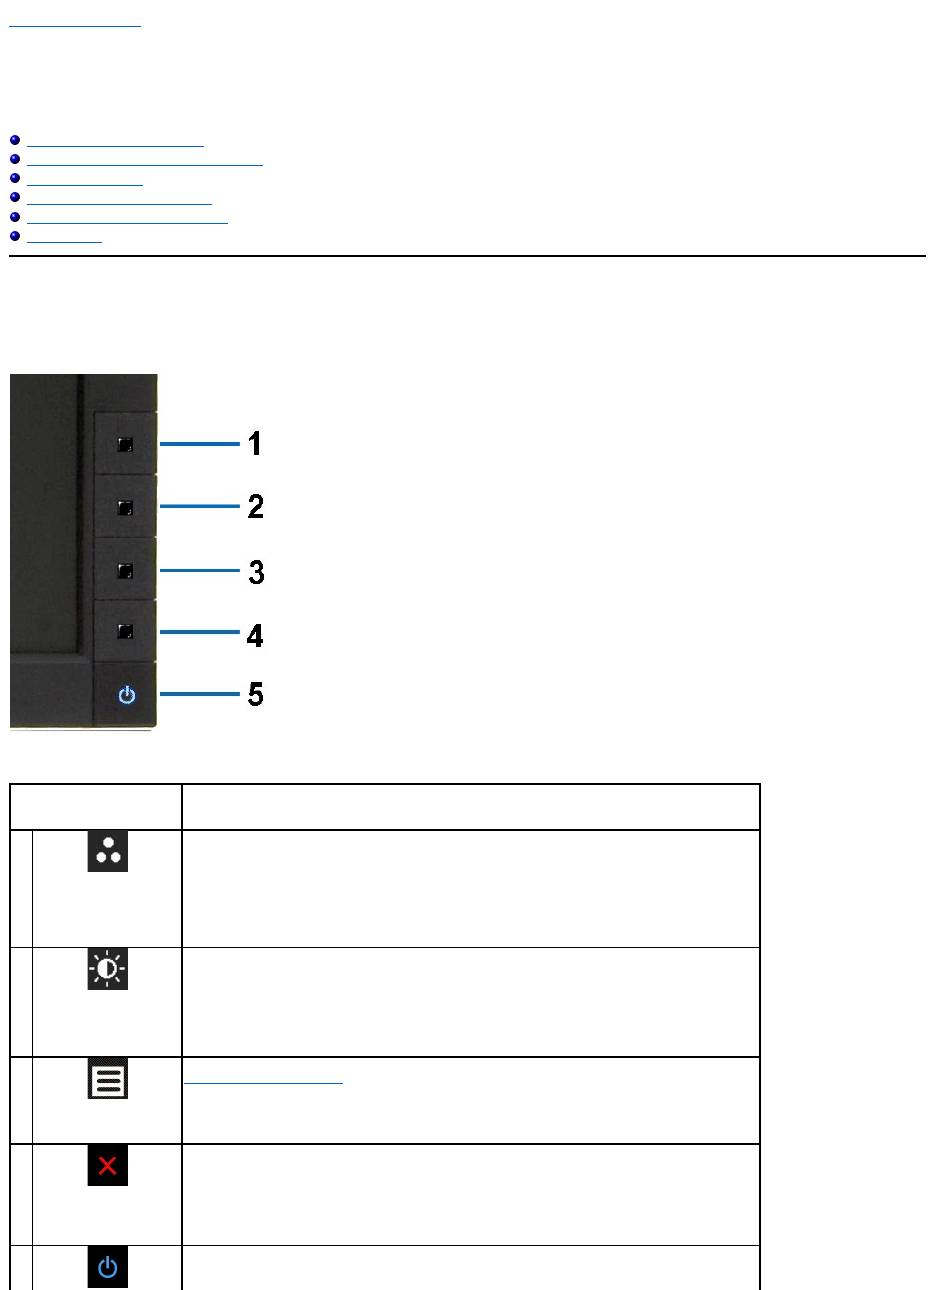
The following table describes the front panel buttons:
Front panel Button
Description
1
Shortcut
key/ Preset
Modes
Use this button to choose from a list of preset color modes.
2
Shortcut key /
Brightness/Contrast
Use this button to directly access the "Brightness/Contrast" menu.
3
Menu
Use the MENU button to launch the on-screen display (OSD) and select the OSD Menu. See
Accessing the Menu System.
4
Exit
Use this button to go back to the main menu or exit the OSD main menu.
5
Use the Power button to turn the monitor on and off.
The Blue LED indicates the monitor is on and fully functional. An amber LED indicates DPMS power
Using the On-Screen Display (OSD) Menu
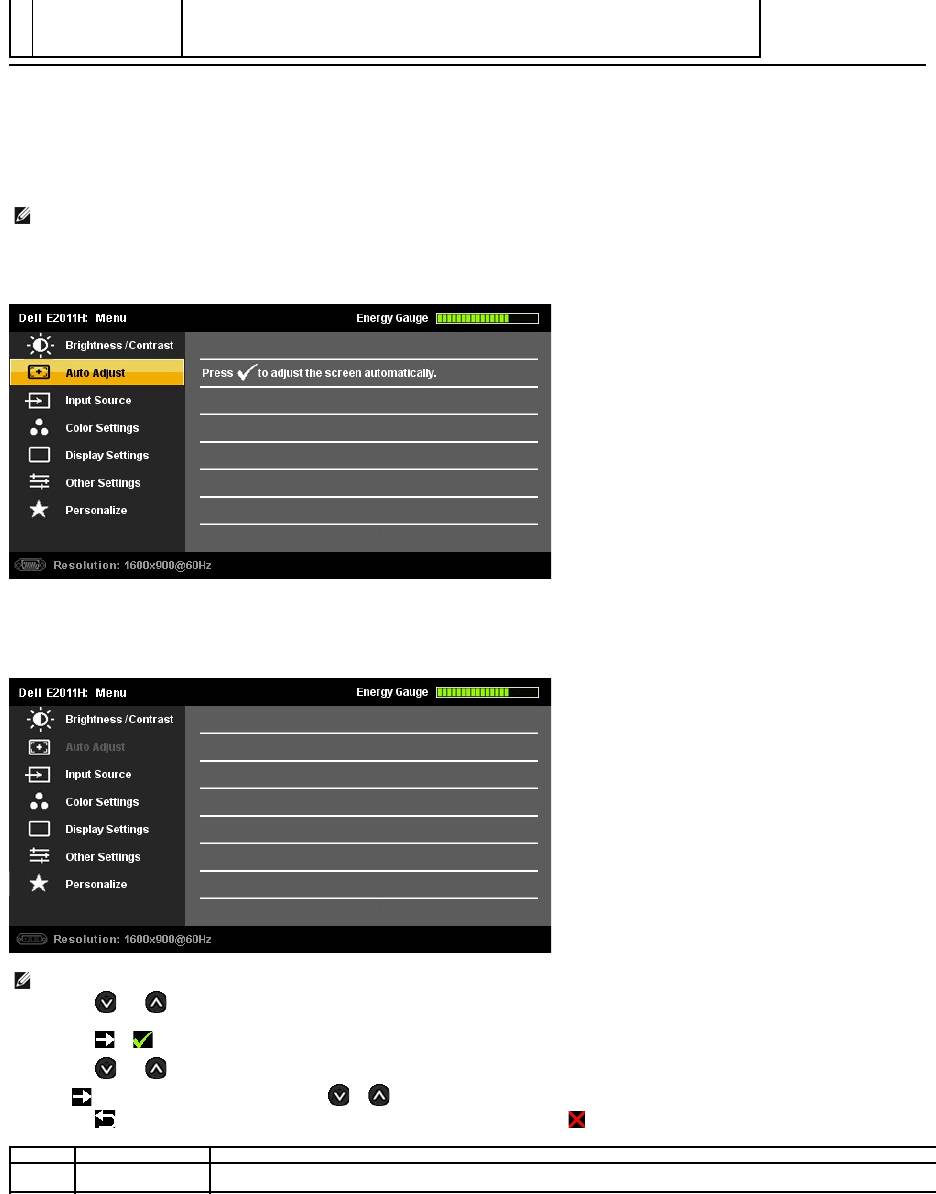
Accessing the Menu System
Main Menu for Analog (VGA) Input
or
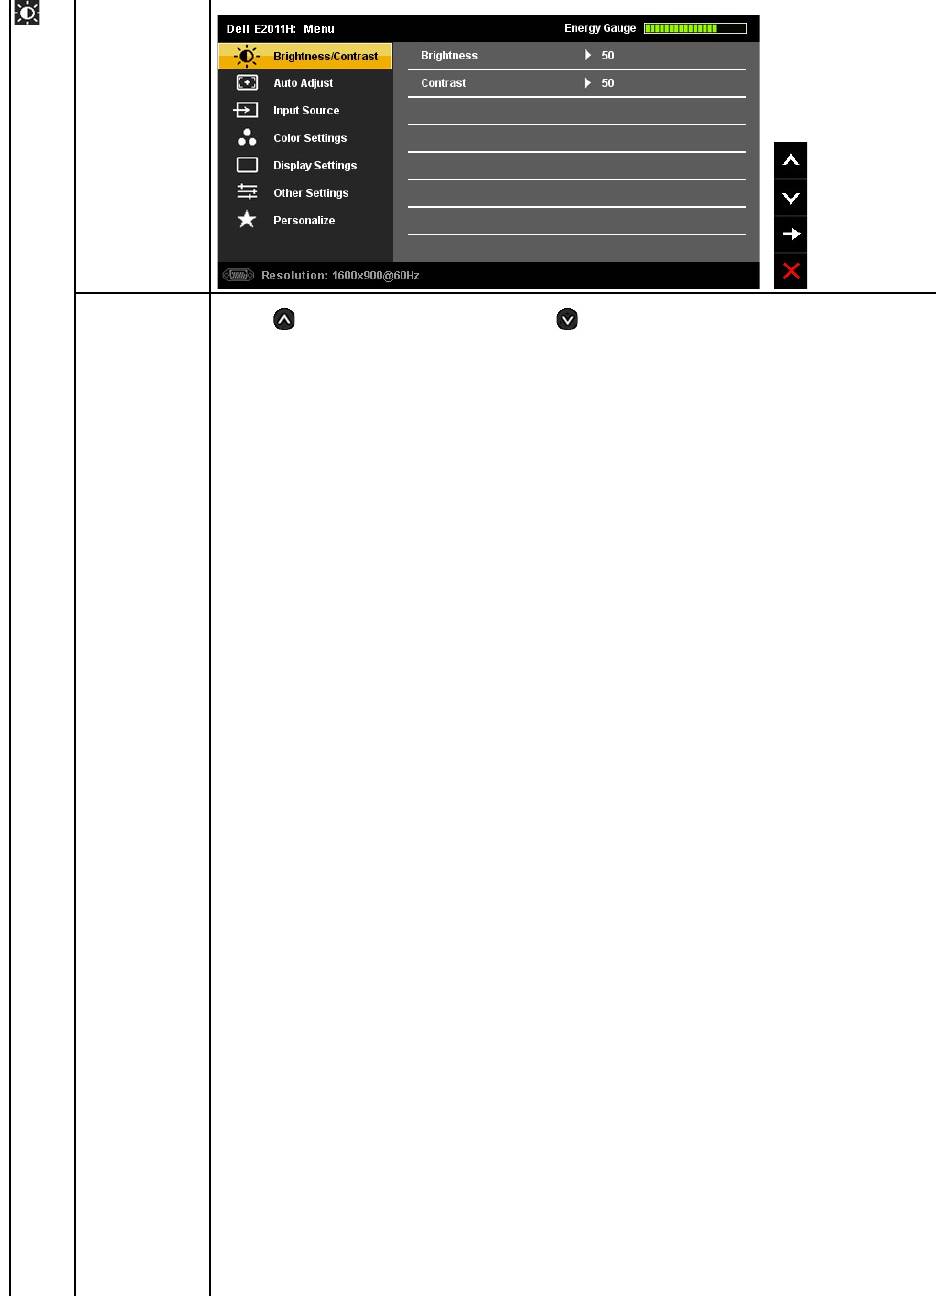
Main Menu for Digital (DVI-D) Input
Power
(withpowerlight
indicator)
save mode.
NOTE: IfyouchangethesettingsandtheneitherproceedtoanothermenuorexittheOSDmenu,themonitorautomaticallysavesthosechanges.The
changes are also saved if you change the settings and then wait for the OSD menu to disappear.
1.
Press the MENU button to launch the OSD menu and display the main menu.
NOTE: AUTO ADJUST is only available when you use the analog (VGA) connector.
2.
Press the and buttons to move between the setting options. As you move from one icon to another, the option name is highlighted. See the
following table for a complete list of all the options available for the monitor.
3.
Press the or button once to activate the highlighted option.
4.
Press the and buttons to select the desired parameter.
5.
Press toentertheslidebarandthenusethe or button, according to the indicators on the menu, to make your changes.
6.
Press the button once to return to the main menu to select another option or press the button two or three times to exit from the OSD menu.
Icon
Menu and Submenus
Description
Energy Gauge
This meter shows the energy level being consumed by the monitor in real time. When the meter is green, it indicates the monitor is
consuming low energy level. When the energy consumed increases, the meter will change to yellow and subsequently red.
Brightness/Contrast
Use this menu to activate Brightness/Contrast adjustment.
Brightness
Brightness adjusts the luminance of the backlight.
Press the button to increase brightness and Press the button to decrease brightness (min 0 ~ max 100).
NOTE:Brightness control will be greyed out during "Screen dim" in PowerNap option when screen saver is activated.


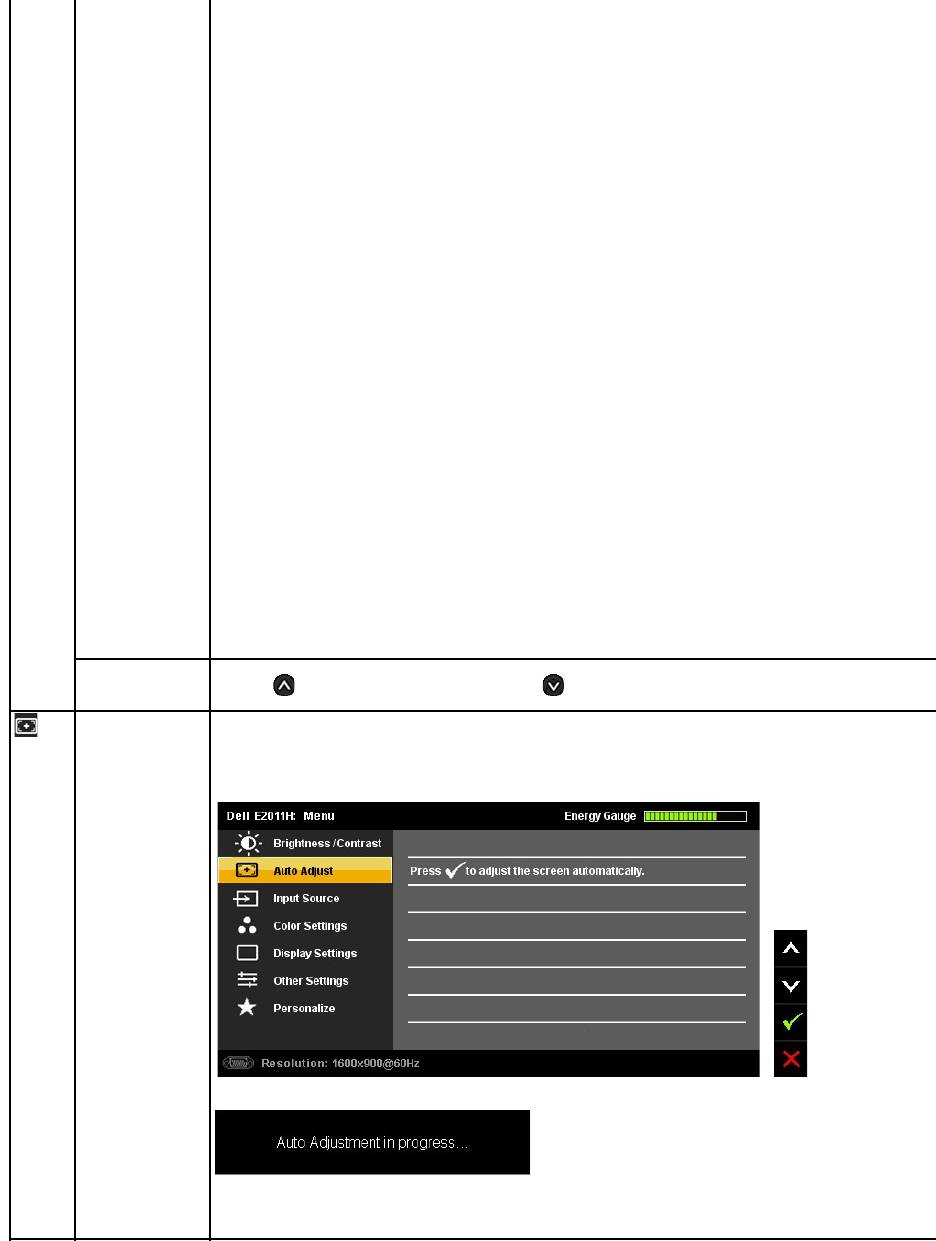
Contrast
Adjust Brightness first, and then adjust Contrast only if further adjustment is necessary.
Press the button to increase contrast and Press the button to decrease contrast (min 0 ~ max 100).
The Contrast function adjusts the degree of difference between darkness and lightness on the monitor screen.
AUTO ADJUST
Even though your computer recognizes your monitor on startup, the Auto Adjustment function optimizes
the display settings for use
with your particular setup.
Auto Adjustment allows the monitor to self-
adjust to the incoming video signal. After using Auto Adjustment, you can further tune
your monitor by using the Pixel Clock and Phase controls under Displays Settings.
The following dialog appears on a black screen as the monitor automatically adjusts to the current input:
NOTE: Inmostcases,AutoAdjustproducesthebestimageforyourconfiguration.
NOTE: AUTO ADJUST option is only available when you are using the analog (VGA) connector.
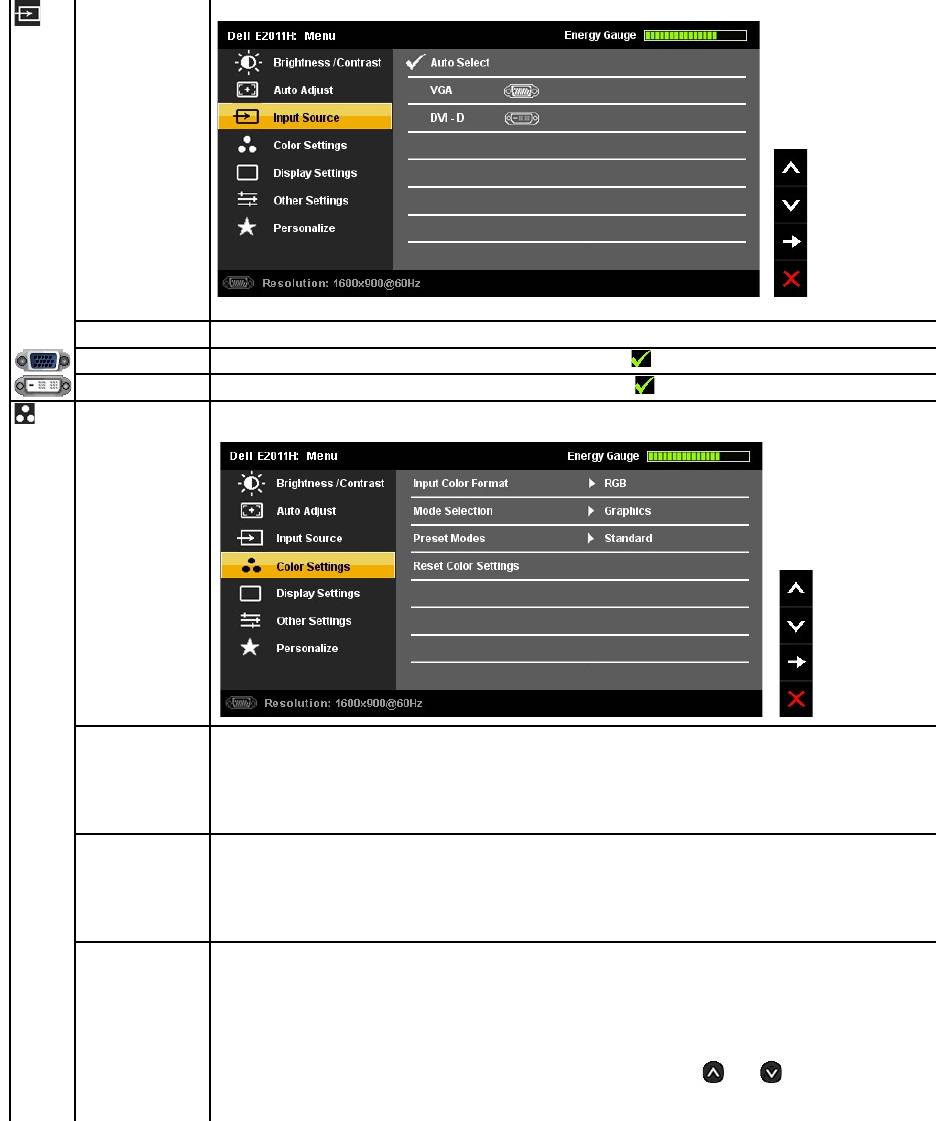
INPUT SOURCE
Use the INPUT SOURCE menu to select between different video signals that may be connected to your monitor.
Auto Select
Select Auto Select to scan for available input signals.
VGA
Select VGA input when you are using the analog (VGA) connector. Press to select the VGA input source.
DVI-D
Select DVI-D input when you are using the Digital (DVI) connector. Press to select the DVI input source.
Color Settings
Use the Color Settings to adjust the color setting mode and color temperature.
There are different color setting sub-menus for VGA/DVI-D and Video input.
Input Color Format
Allows you to set the video input mode to.
l RGB
: Select this option if your monitor is connected to a computer or DVD player using the VGA and DVI cable or the HDMI to
DVI adapter.
l YPbPr: Select this option if your DVD player supports only YPbPr output.
Mode Selection
Allows you to set the display mode to:
l Graphics: Select this mode if your monitor is connected to your computer.
l Video: Select this mode if your monitor is connected to a DVD player.
NOTE: Depending upon the Display Mode you select the Preset Modes available for your monitor changes.
Preset Mode
When you select Graphics, you can choose Standard, Multimedia, Game, Warm, Cool, or Custom (RGB):
l Standard: Loads the monitor's default color settings. This is the default preset mode.
l Multimedia: Loads color settings ideal for multimedia applications.
l Game: Loads color settings ideal for most gaming applications.
l Warm: Increases the color temperature. The screen appears warmer with a red/yellow tint.
l Cool: Decreases the color temperature. The screen appears cooler with a blue tint.
l Custom (R, G, B): Allows you to manually adjust the color settings. Press the and
buttons to adjust the Red, Green,
and Blue values and create your own preset color mode.
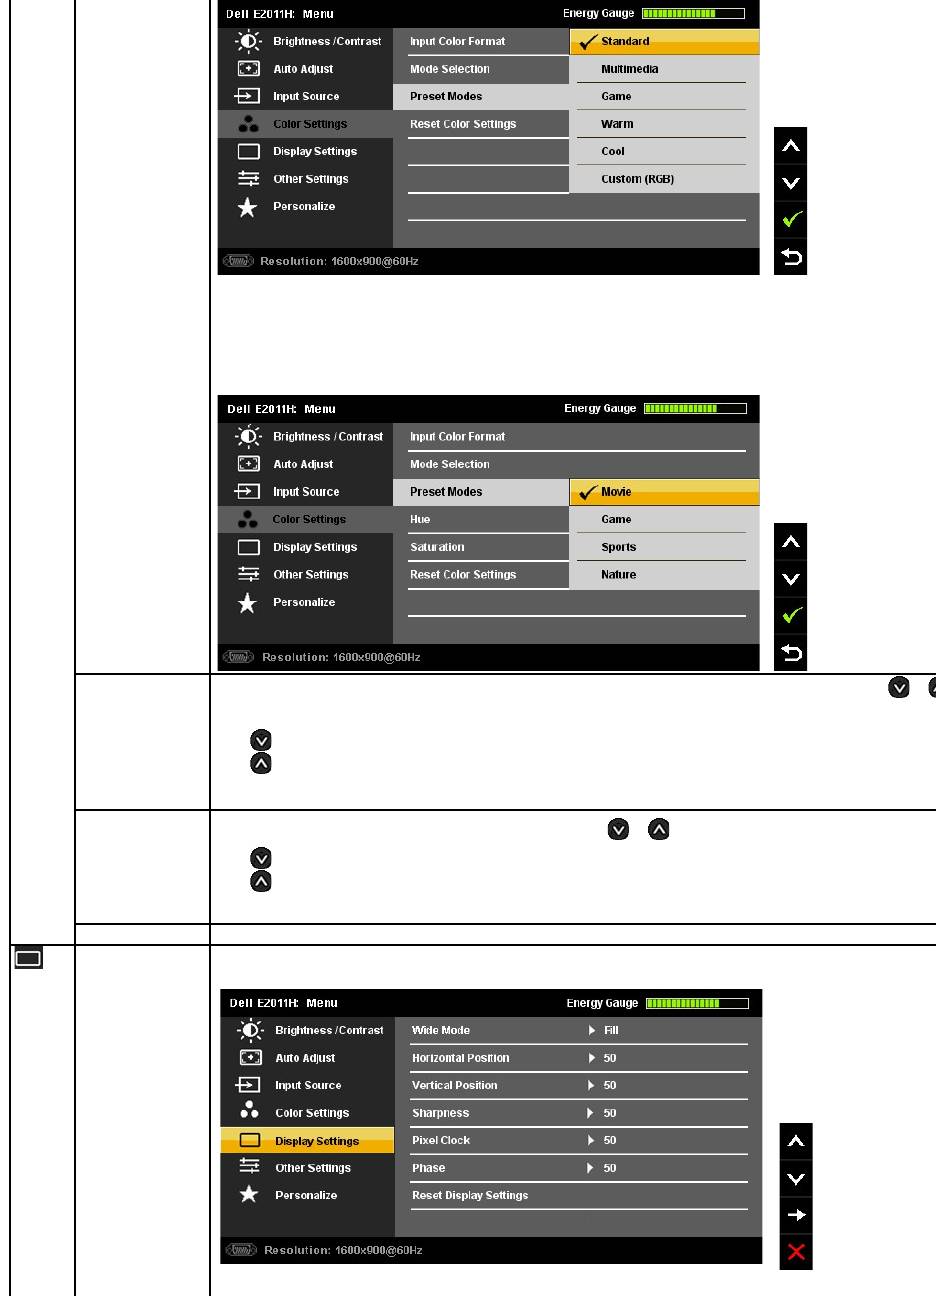
When you select Video, you can choose Movie, Game, Sports, or Nature:
l Movie: Loads color settings ideal for movies. This is the default preset mode.
l Game: Loads color settings ideal for games.
l Sports: Loads color settings ideal for sports.
l Nature: Loads color settings ideal for nature.
Hue
This feature can shift color of video image to green or purple. This is used to adjust the desired flesh tone color. Use or
adjust the hue from '0' to '100' .
Press to increase the green shade of the video image.
Press to increase the purple shade of the video image.
NOTE: Hue adjustment is available only for video input.
Saturation
This feature can adjust the color saturation of the video image. Use or to adjust the saturation from '0' to '100'.
Press to increase the monochrome appearance of the video image.
Press to increase the colorful appearance of the video image.
NOTE: Saturation adjustment is available only for video input.
Reset Color Settings
Resets your monitor's color settings to the factory defaults.
DISPLAY SETTINGS
Use the Display Settings to adjust image.
Display Setting submenu for VGA input
Display Setting submenu for DVI-D input
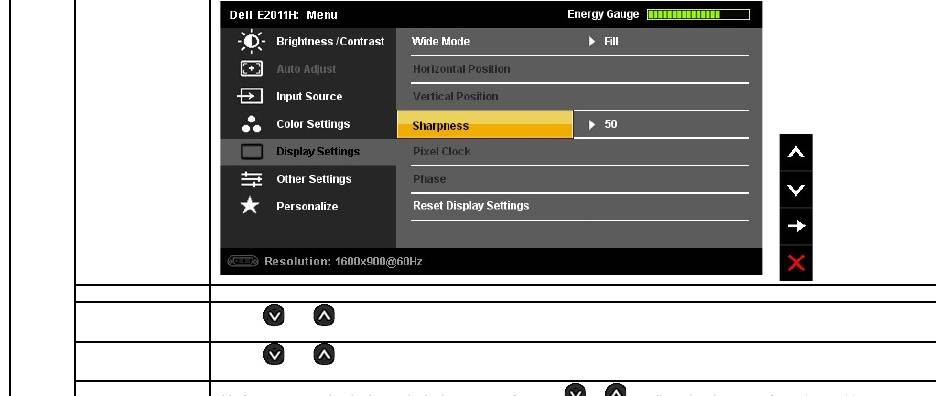
Wide Mode
Adjust the image ratio as 4:3 or full screen.
Horizontal Position
Use the and buttons to adjust image left and right. Minimum is '0' (-). Maximum is '100' (+).
NOTE: WhenusingaDVIsource,theHorizontalPositionsettingisnotavailable.
Vertical Position
Use the and buttons to adjust image up and down. Minimum is '0' (-). Maximum is '100' (+).
NOTE: WhenusingaDVIsource,theVerticalPositionsettingisnotavailable.
Sharpness
This feature can make the image look sharper or softer. Use
or
to adjust the sharpness from '0' to '100'.
