Dell AW2310 Monitor: Setting Up the Monitor
Setting Up the Monitor : Dell AW2310 Monitor
Back to Contents Page
Setting Up the Monitor
AlienwareOptX™AW2310User'sGuide
Attaching the Stand
Connecting the Monitor
Organizing the Cables and Attaching the Cable Cover
Removing the Stand
Wall Mounting (Optional)
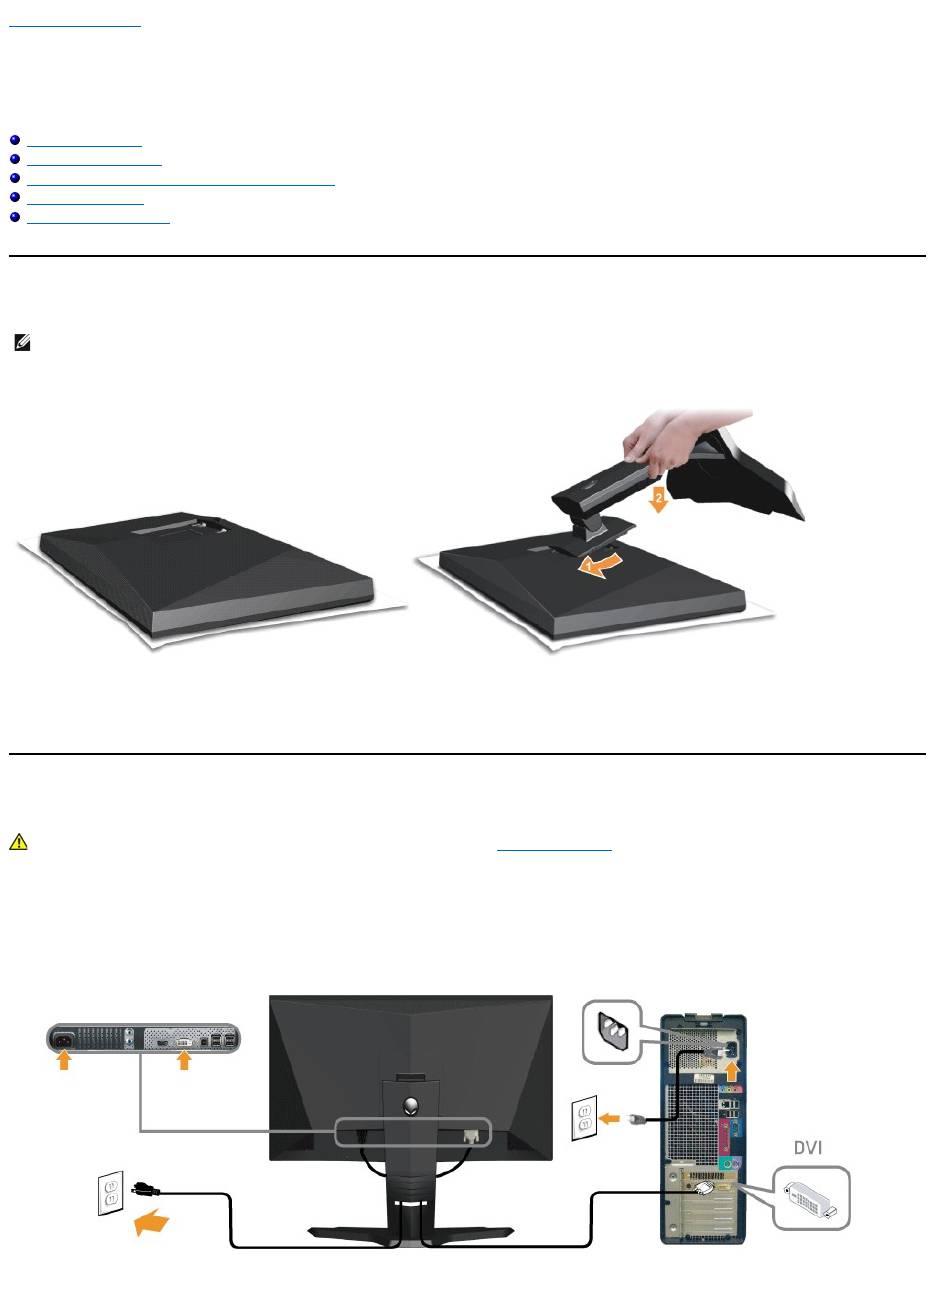
Attaching the Stand
Remove the monitor cover and place the monitor on it.
1. Fit the two tabs on the upper part of the stand into the grooves on the back of the monitor.
2. Lower the stand so that the stand snap onto the monitor mounting area.
Connecting Your Monitor
To connect your monitor to the computer:
1. Turnoffyourcomputeranddisconnectthepowercable.
2. Connect your monitor to your computer using ONLY ONE of the following cables: the DVI (digital DVI-D) or the HDMI cable. Use both the cables only
when they are connected to two different computers with appropriate video systems.
Connecting the White DVI Cable
NOTE: The stand is detached from the monitor when it is shipped from the factory.
WARNING: Before you begin any of the procedures in this section, follow the Safety Instructions.
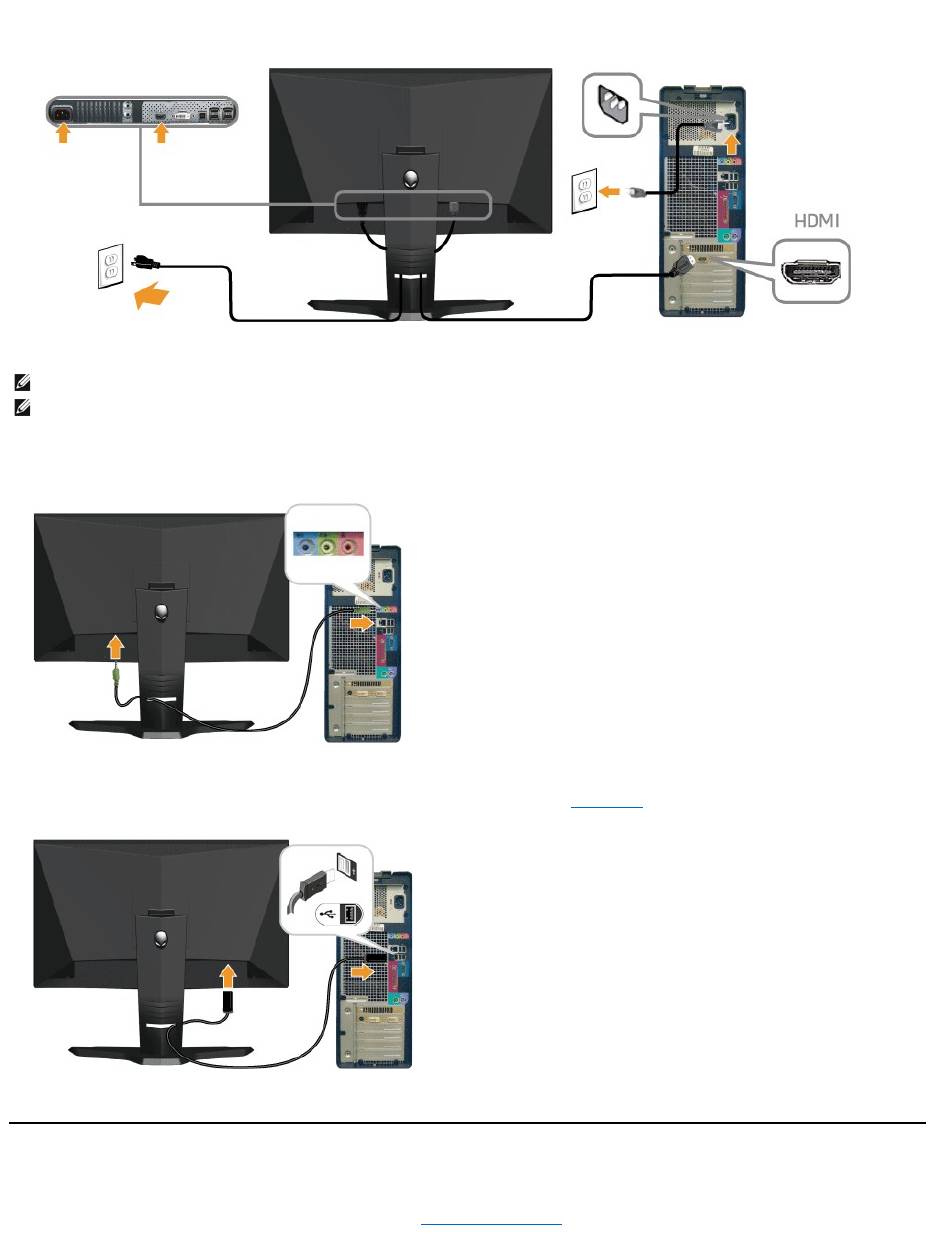
Connecting the HDMI Cable
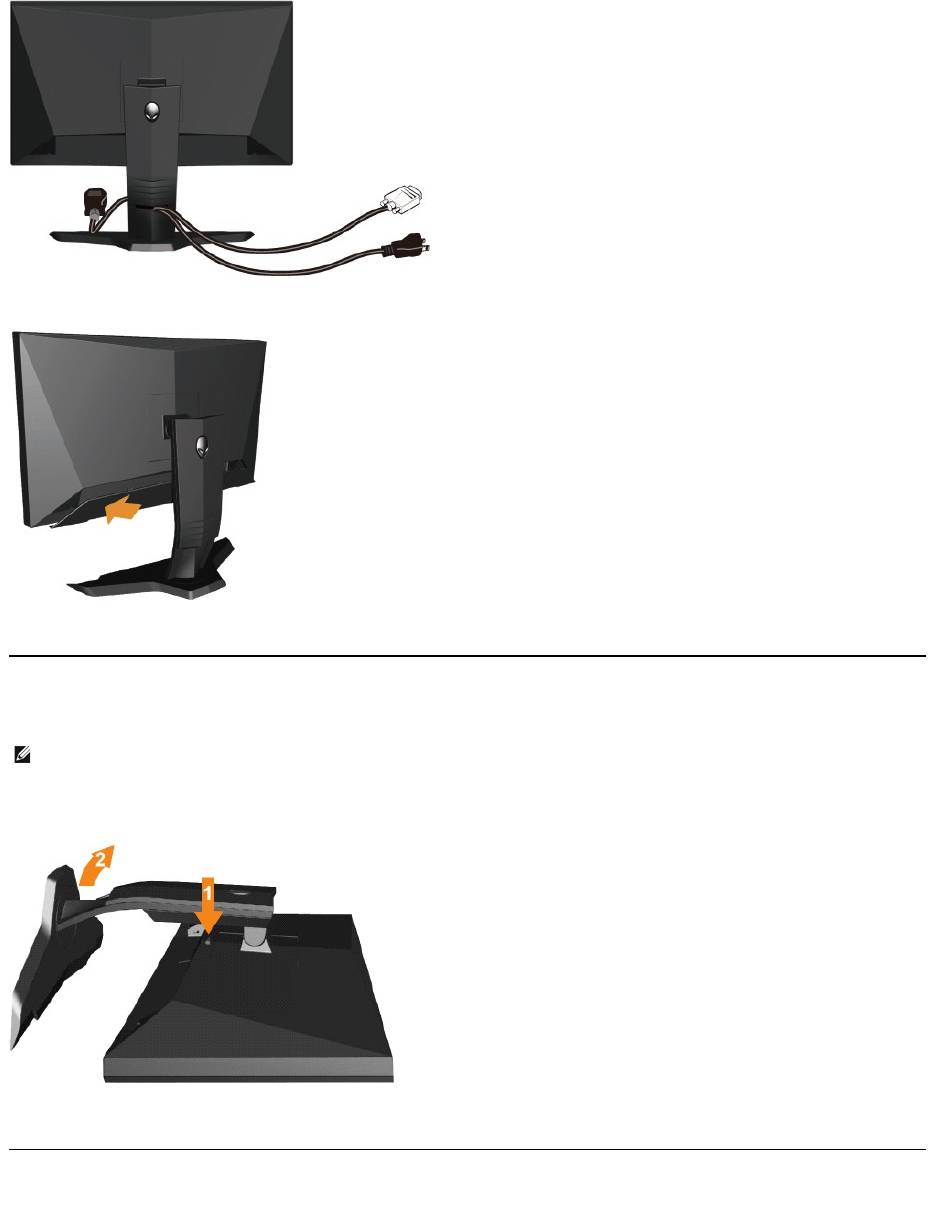
Connecting the Audio Cable
Connect one end of the audio cable to the green audio connector on your computer and the other end to the audio in connector on your monitor.
Connecting the USB Cable
Connect one end of the USB cable that shipped with your monitor to the USB upstream port (see bottom view) on your monitor, and the other end to an
availble USB port on your computer/device.
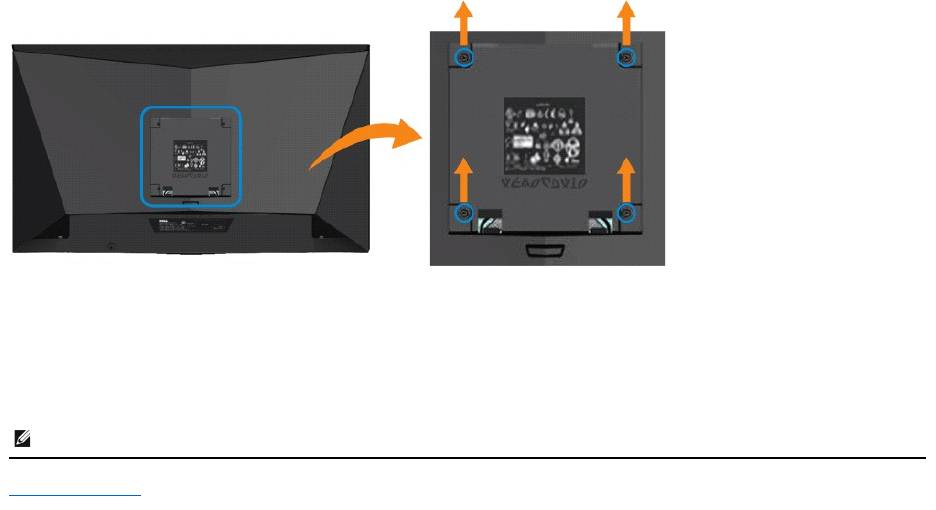
Organizing the Cables and Attaching the Cable Cover
After attaching all necessary cables to your monitor and computer (see Connecting Your Monitor for cable attachment), use the cable management slot
toorganizeallcablesasshownbelow.
NOTE: You can connect your Alienware display to an Xbox, PlayStation or DVD player.
NOTE: The graphics above are used for the purpose of illustration only. Appearance of your computer may vary.
Attaching the Cable Cover
Attach the cable cover to the monitor after making the required cable connections to the monitor.
Removing the Stand
To remove the stand:
1. Press and hold the stand release button.
2. Lift the stand up and away from the monitor .
Wall Mounting (Optional)
NOTE: To prevent scratches on the LCD screen while removing the stand,ensure that the monitor is placed on a clean surface.
(Screw dimension: M4 x 10mm).
See the instructions that came with the VESA compatible base mounting kit.
1. Place the monitor panel on a soft cloth or cushion on a stable flat table.
2. Remove the stand.
3. Remove the four screws securing the plastic cover using a screwdriver.
4. Attach the mounting bracket from the wall mounting kit to the monitor.
5. Mount the monitor on the wall by following the instructions that came with the base mounting kit.
Back to Contents Page
NOTE: Wall mounting should be done only with UL Listed Wall Mount Bracket with minimum weight/load bearing capacity of 5.21 kg.
