Yamaha R-S201 Silver: BASIC OPERATION
BASIC OPERATION: Yamaha R-S201 Silver
BASIC OPERATION
PLAYBACK
Playing a source
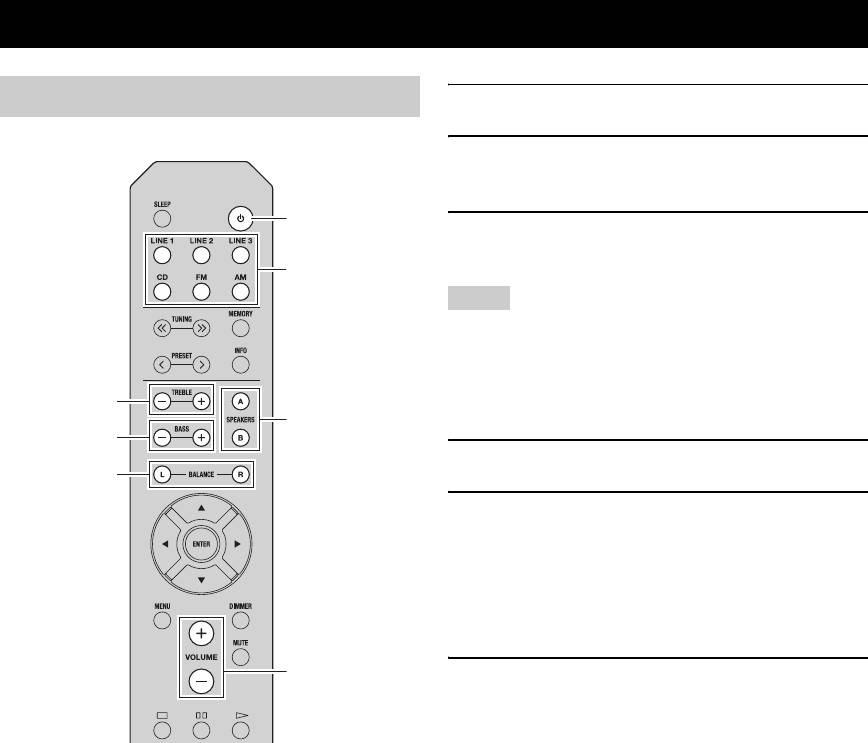
1 Press A (power) to turn on this unit.
2 Press one of the Input selector buttons to
select the desired input source.
A (power)
3 Press SPEAKERS A and/or SPEAKERS B to
Input selector
select desired speaker(s).
buttons
Notes
• When one set of speakers is connected using bi-wire
connections, or when using two sets of speakers simultaneously
(A and B), make sure SP A and SP B are displayed on the front
panel display.
TREBLE –/+
SPEAKERS A/B
• When listening with headphones, turn off the speakers.
BASS –/+
4 Play the source.
BALANCE L/R
5 Press VOLUME +/– to adjust the sound
output level.
y
You can adjust the tonal quality by using BASS –/+ and
TREBLE –/+, and the left/right sound balance of speakers
by using BALANCE L/R (see page 6).
VOLUME +/–
6 When finished listening, press A (power) to
set this unit to standby mode.
Press A (power) to turn this unit on again.
y
• You can also use the buttons or knobs on the front panel if they
have the same or similar names as those on the remote control.
• For recording, see page 5.
12 En
PLAYBACK
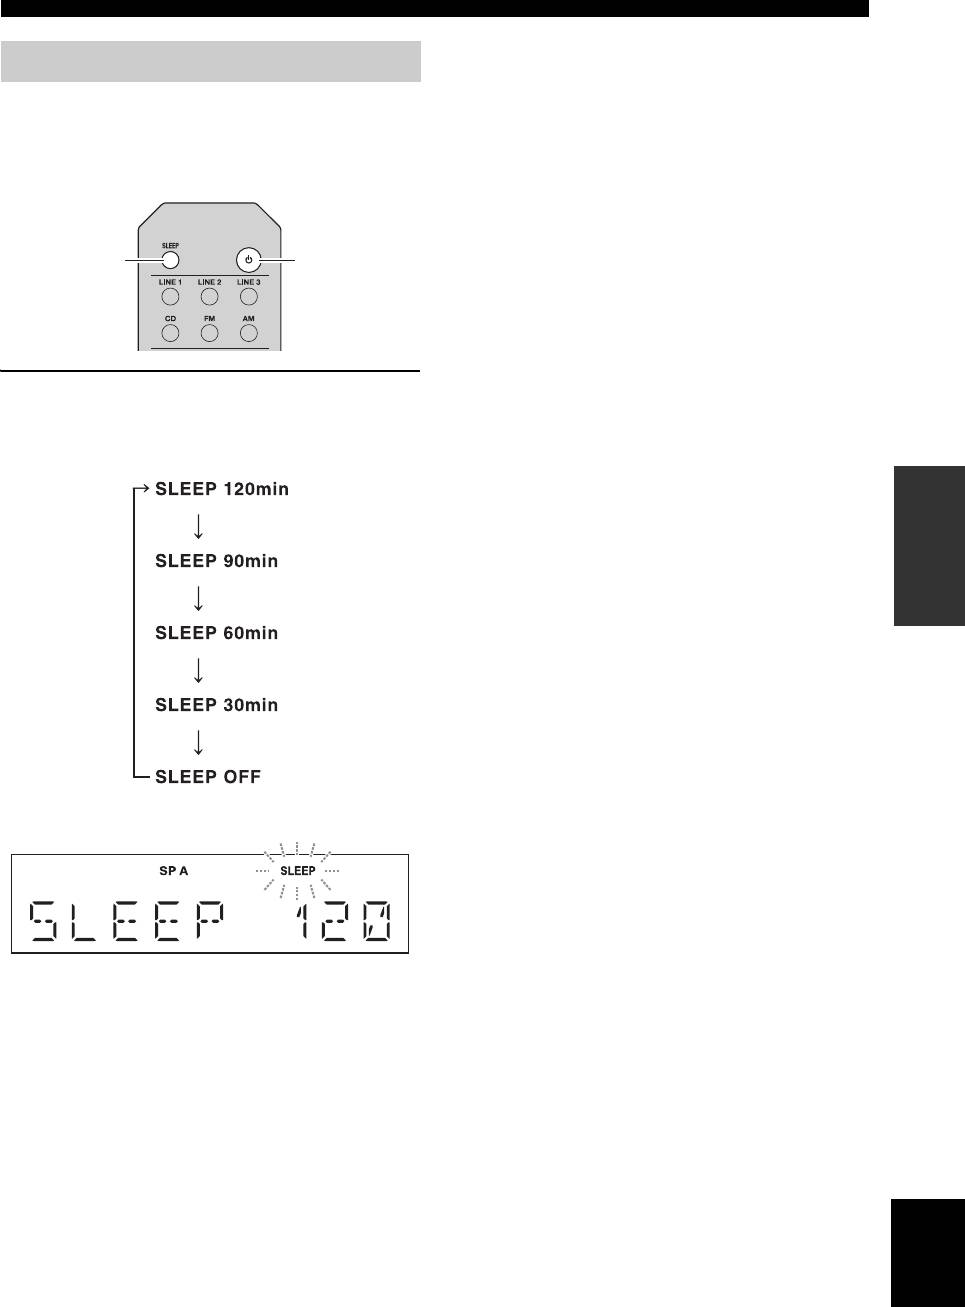
Using the sleep timer
Use this feature to automatically set this unit to standby
mode after a certain amount of time. The sleep timer is
useful when you are going to sleep while this unit is
playing or recording a source.
SLEEP
A (power)
Press SLEEP repeatedly to set the amount of
time before this unit is set to standby mode.
Each time you press SLEEP, the front panel display
changes cyclically as shown below.
OPERATION
BASIC
The SLEEP indicator blinks while setting the amount
of time for the sleep timer.
If the sleep timer is set, the SLEEP indicator on the
front panel display lights up.
y
To cancel the sleep timer, do one of the following:
– Select “SLEEP OFF”.
– Set this unit to standby mode.
English
13 En
FM/AM TUNING
Notes
• The radio frequencies differ depending on the country or region where this unit is being used. Front panel display illustrations shown
in this section are based on Europe model.
• Only for Asia and General models:
Be sure to set the tuner frequency step according to the frequency spacing in your area before you tune into a radio station (see
page 19).
Using preset functions
You can register up to 40 radio stations as presets. Once
you have registered stations, you can easily tune in to
them by recalling the presets.
■ Presetting stations automatically
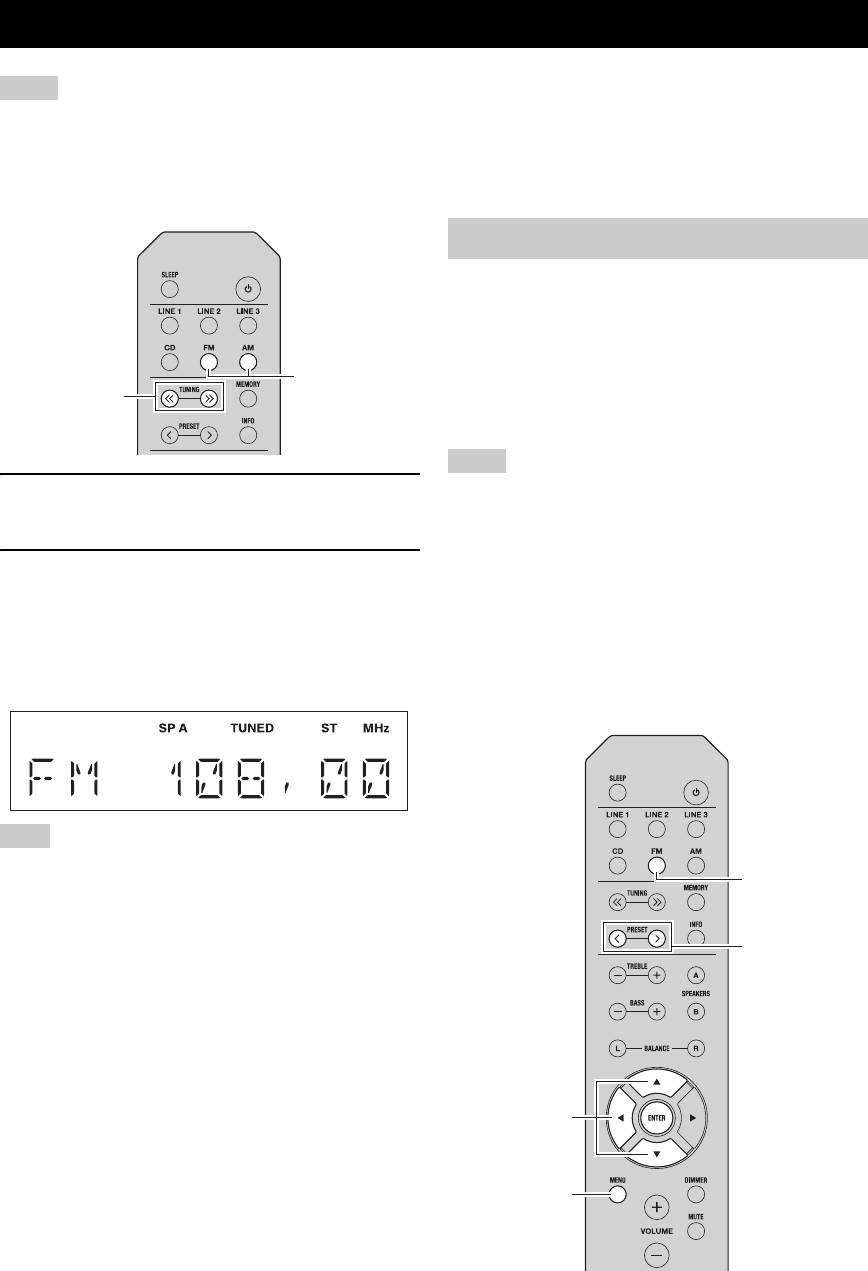
FM/AM
(FM stations only)
TUNING jj / ii
You can automatically register FM stations that have
strong signals.
Notes
1 Press FM/AM to select TUNER as the input
• If a station is registered to a preset number that already has a
source and select the band.
station registered to it, the previously registered station is
overwritten.
• If the station you want to store is weak in signal strength, press
2 Press and hold TUNING jj / ii to begin
TUNING jj / ii repeatedly to tune in to the desired station.
tuning.
• Only for Europe model:
Press ii to tune in to a higher frequency.
Only Radio Data System broadcasting stations can be preset
Press jj to tune in to a lower frequency.
automatically.
When this unit tunes in to a station, the TUNED
y
indicator lights up on the front panel display.
FM stations registered as presets using the automatic preset
registration feature will be heard in stereo.
Note
If the tuning search does not stop at the desired station because
FM
the station signals are weak, press TUNING jj / ii repeatedly to
tune in to the desired station.
y
PRESET j / i
You can also use the buttons on the front panel if they have the
same or similar names as those on the remote control.
■ Improving FM reception
If the signal from the station is weak and the sound quality
is not good, set the FM band reception mode to monaural
mode to improve reception.
Front panel
B / C / D
ENTER
Press FM MODE, and then make sure the ST indicator is
turned off (see page 4).
Remote control
MENU
Enter FM MODE from the Option menu to select MONO
(monaural mode) (see page 19).
14 En
FM/AM TUNING
1 Press FM to select TUNER as the input
1 Tune in to the desired FM/AM station.
source.
See page 14 for tuning instructions.
2 Press MENU to enter the Option menu.
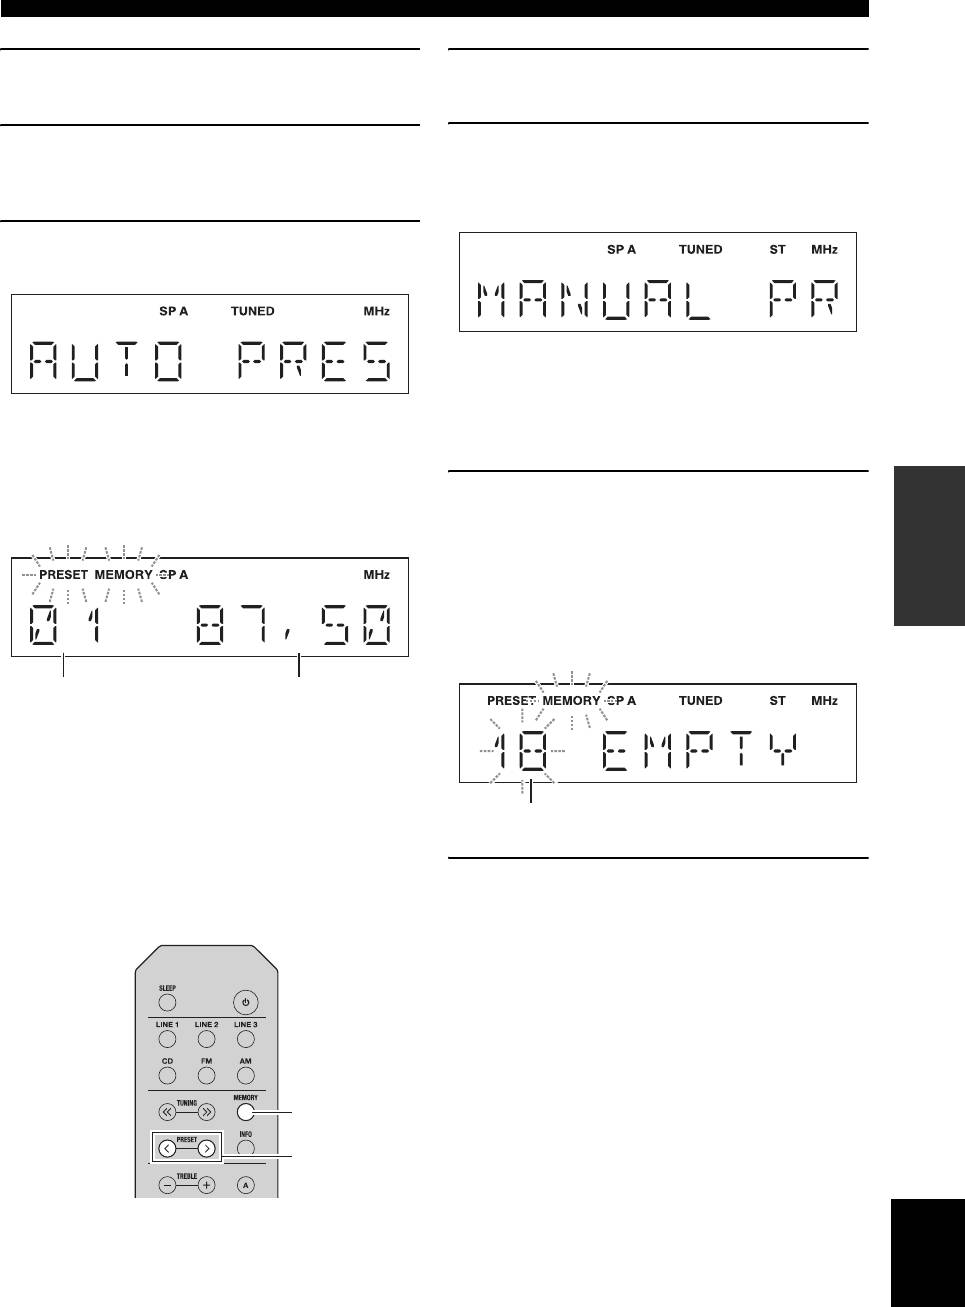
2 Press MEMORY.
The Option menu for TUNER is displayed (see
“MANUAL PRESET” is displayed briefly on the
page 19).
front panel display, and then the preset number to
which the station will be registered is displayed.
3 Press B / C to select “AUTO PRESET”, and
then press ENTER.
y
By holding down MEMORY for more than 2 seconds, you
can skip the following steps and automatically register the
This unit starts scanning the FM band about
selected station to an empty preset number (i.e., the preset
3 seconds later from the lowest frequency upwards.
number following the last preset number used).
y
• Before scanning begins, you can specify the first preset
3 Press PRESET j / i to select the preset
OPERATION
number to be used by pressing PRESET j / i or B/C.
number to which the station will be
BASIC
• To cancel scanning, press D.
registered.
When you select a preset number to which no station
is registered, “EMPTY” is displayed. When you
select a preset number to which a station has already
been registered, the frequency of the station is
displayed.
Preset number Frequency
When a station to preset is found, information is
displayed on the front panel display as shown in the
illustration above.
When scanning is complete, “FINISH” is displayed,
and then the display returns to the Option menu.
Preset number
To return the display to the original state, press
MENU.
4 Press MEMORY.
■ Presetting stations manually
When registration is complete, the display returns to
You can manually register the desired radio stations.
the original state.
y
• To cancel registration, switch input or band or do not perform
any operations for about 30 seconds.
• You can also preset stations manually by pressing buttons on
the front panel with the same names as remote control .
MEMORY
PRESET j / i
English
15 En

FM/AM TUNING
■ Recalling a preset station
■ Clearing a preset station
You can recall preset stations that were registered by
Follow the steps below to clear a preset station.
presetting automatically or manually.
FM/AM
FM/AM
PRESET j / i
PRESET j / i
1 Press FM/AM to select TUNER as the input
source.
B / C / D
2 Press PRESET j / i to select a preset
ENTER
number.
y
MENU
• Preset numbers to which no stations are registered are
skipped.
• If this unit does not have any preset stations, “NO
PRESET” is displayed.
1 Press FM/AM to select TUNER as the input
• If the station signals that you want to recall are weak, try
tuning in to a station manually.
source.
• You can also recall a preset station by pressing
PRESET j / i on the front panel.
2 Press MENU to enter the Option menu.
The Option menu for TUNER is displayed (see
page 19).
3 Press B / C to select “CLEAR PRESET”, and
then press ENTER.
4 Select the desired preset station number by
pressing B / C repeatedly.
The selected preset number blinks on the front panel
display.
y
• You can also use PRESET j / i instead.
• To cancel clearing the preset station, press D or leave this
unit without any operations for about 30 seconds.
16 En
FM/AM TUNING
5 Press ENTER again to confirm.
1 Press FM/AM to select TUNER as the input
“CLEARED” is displayed on the front panel display.
source.
Then, another preset station is shown on the front
panel display. When there is no more preset station,
2 Press MENU to enter the Option menu.
“NO PRESET” is displayed, and then the display
The Option menu for TUNER is displayed (see
returns to the Option menu.
page 19).
To return the display to the original state, press
MENU.
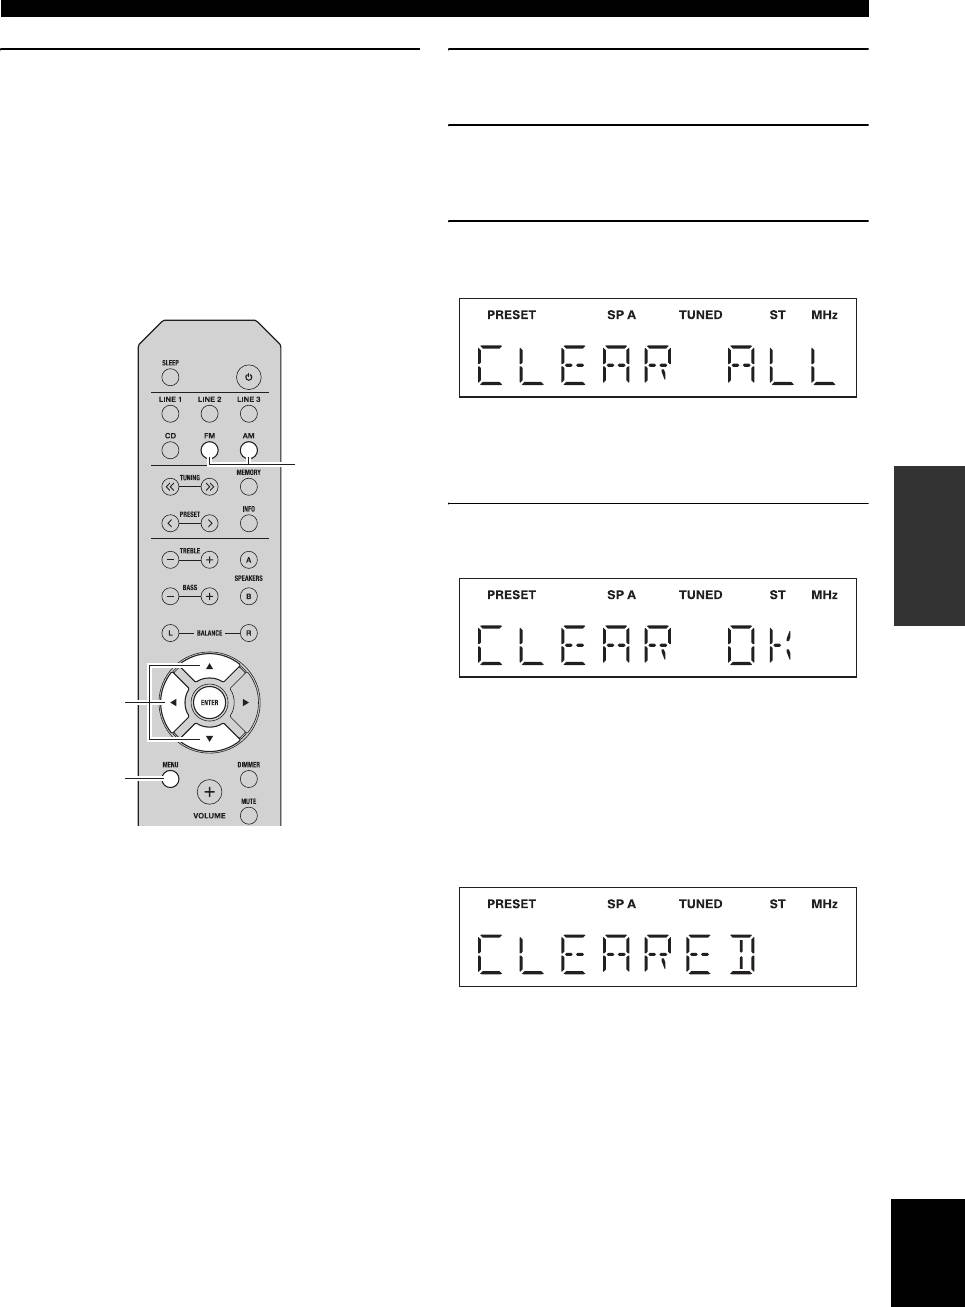
3 Press B / C to select “CLEAR ALL PRESET”,
■ Clearing all preset stations
and then press ENTER.
Follow the steps below to clear all preset stations.
y
To cancel the operation and return to the Option menu,
FM/AM
press D.
OPERATION
4 Press B / C to select “CLEAR OK”, and then
BASIC
press ENTER.
B / C / D
ENTER
y
To cancel without clearing the presets, select “CLEAR NO”.
MENU
When all presets have been cleared, “CLEARED” is
displayed, and then the display returns to the Option
menu.
To return the display to the original state, press
MENU.
English
17 En
FM/AM TUNING
When you select Program Type, the following program
Receiving Radio Data System
types can be displayed.
information
Program type Description
(Only for Europe model)
NEWS
News
Radio Data System is a data transmission system used by
AFFAIRS
FM stations in many countries.
Current affairs
INFO
General information
SPORT
Sport
EDUCATE
Education
DRAMA
Drama
CULTURE
Culture
FM
SCIENCE
Science
INFO
VARIED
Light entertainment
POP M
Popular music
1 Press FM to select TUNER as the input
ROCK M
Rock music
source.
EASY M
Middle-of-the-road
music (easy listening)
2 Tune in to the desired Radio Data System
broadcasting station.
LIGHT M
Light classics
CLASSICS
Serious classics
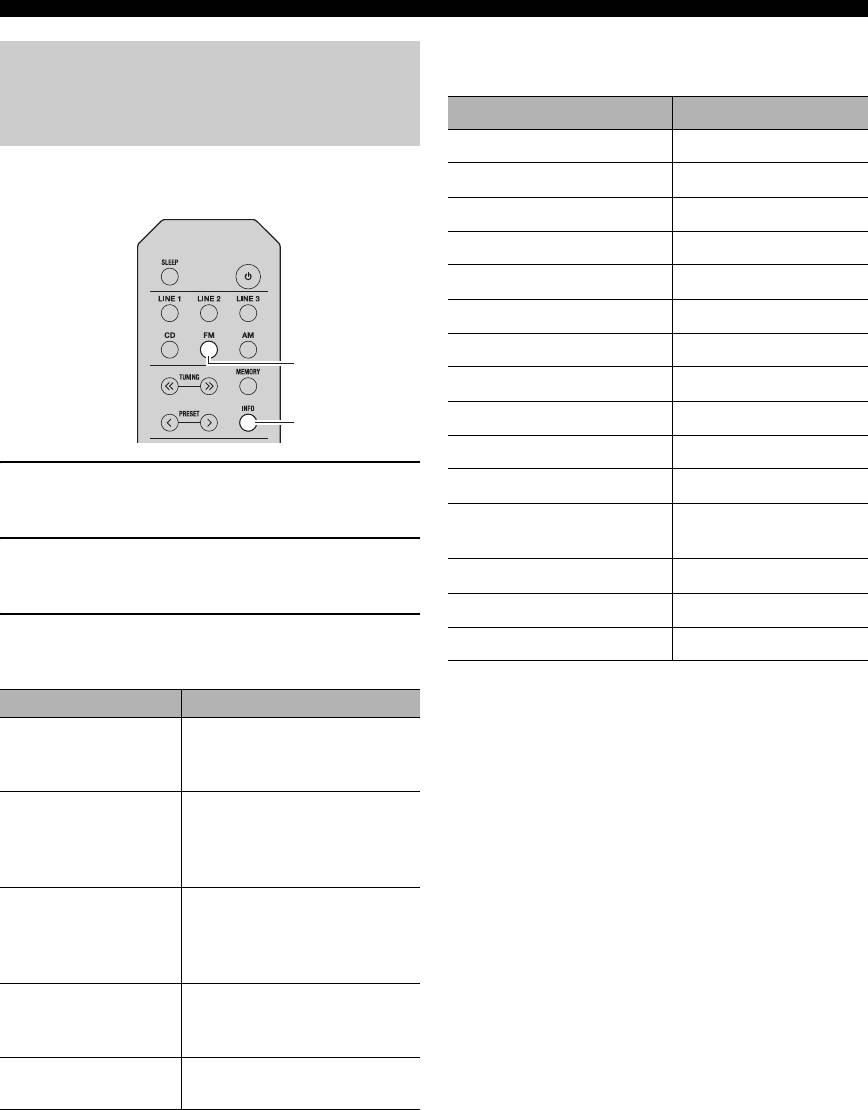
3 Press INFO repeatedly to select the desired
OTHER M
Other music
Radio Data System display mode.
Choice Description
Frequency This unit displays the
frequency of the current
station.
Program Service Default setting. This unit
displays the name of the Radio
Data System program currently
being received.
Program Type This unit displays the type of
the Radio Data System
program currently being
received.
Radio Text This unit displays about the
Radio Data System program
currently being received.
Clock Time This unit displays the current
time being received.
18 En
Оглавление
- Integrated Amplifier Receiver Amplificateur Intégré Ampli-Tuner
- INTRODUCTION
- PREPARATION
- BASIC OPERATION
- ADVANCED OPERATION
- ADDITIONAL INFORMATION
- INTRODUCTION
- PRÉPARATION
- OPÉRATIONS DE BASE
- OPÉRATIONS AVANCÉES
- INFORMATIONS COMPLÉMENTAIRES
- EINFÜHRUNG
- VORBEREITUNG
- BEDIENUNG DER GRUNDFUNKTIONEN
- ERWEITERTE BEDIENUNG
- ZUSÄTZLICHE INFORMATIONEN
- INTRODUKTION
- FÖRBEREDELSE
- GRUNDLÄGGANDE ANVÄNDNING
- AVANCERAD ANVÄNDNING
- YTTERLIGARE INFORMATION
- INTRODUZIONE
- PREPARATIVI
- FUNZIONAMENTO DI BASE
- FUNZIONAMENTO AVANZATO
- INFORMAZIONI AGGIUNTIVE
- INTRODUCCIÓN
- PREPARACIÓN
- MANEJO BÁSICO
- MANEJO AVANZADO
- INFORMACIÓN ADICIONAL
- INLEIDING
- VOORBEREIDINGEN
- BASISBEDIENING
- GEAVANCEERDE BEDIENING
- AANVULLENDE INFORMATIE
- ВВЕДЕНИЕ
- ПОДГОТОВКА
- ОСНОВНЫЕ ФУНКЦИИ
- ДОПОЛНИТЕЛЬНЫЕ ФУНКЦИИ
- ДОПОЛНИТЕЛЬНАЯ ИНФОРМАЦИЯ


