Yamaha R-S201 Silver: ADDITIONAL INFORMATION
ADDITIONAL INFORMATION: Yamaha R-S201 Silver

ADDITIONAL INFORMATION
TROUBLESHOOTING
Refer to the chart below if this unit does not function properly. If the problem you are experiencing is not listed below or
if the instructions below do not help, set this unit to standby mode, disconnect the power cable, and then contact the
nearest authorized Yamaha dealer or service center.
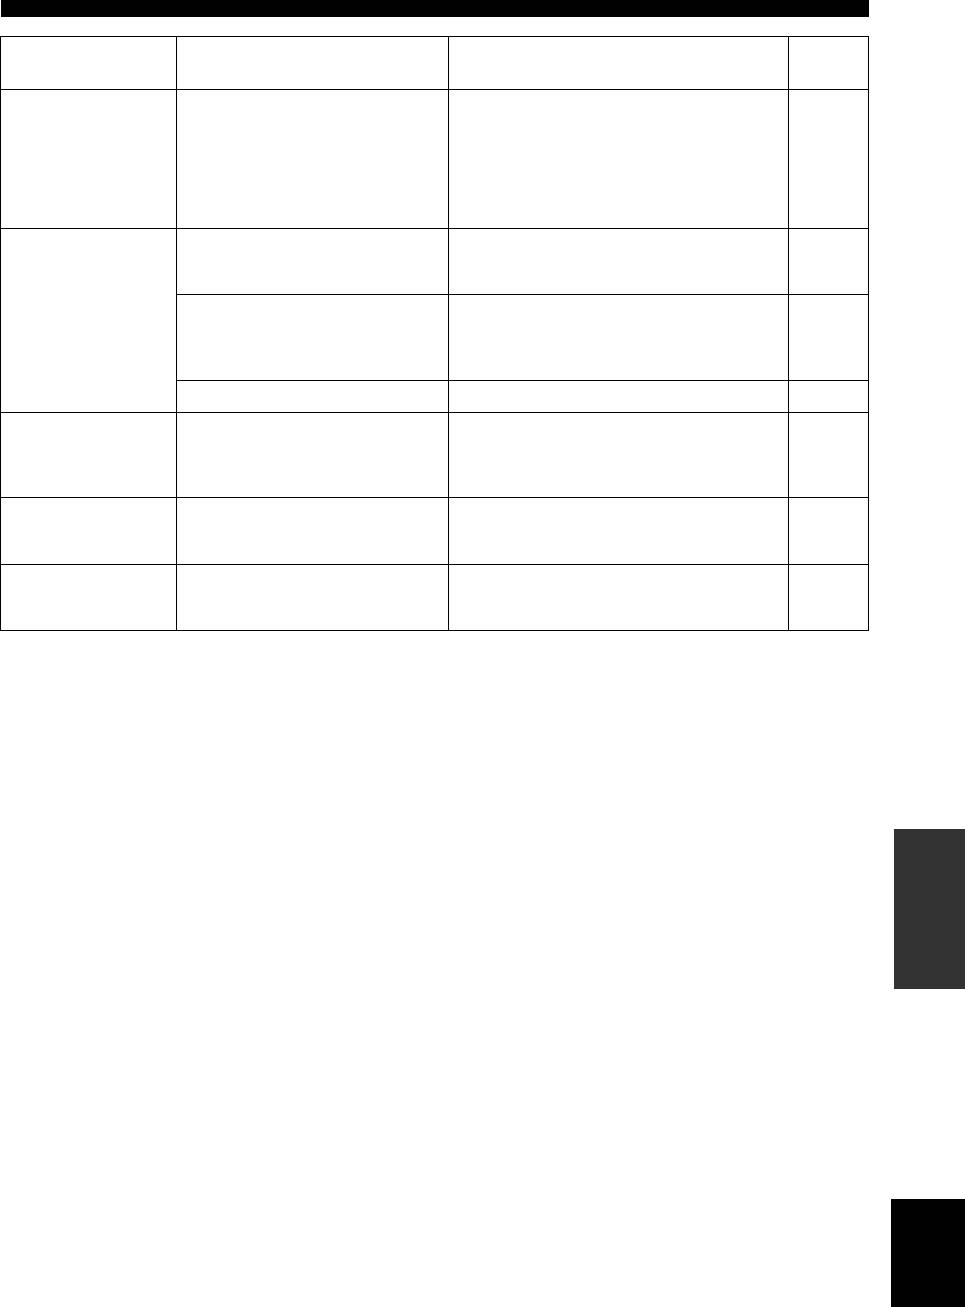
■ General
See
Problem Cause Remedy
page
This unit fails to turn
The power cable is not connected or the
Connect the power cable firmly.
on.
plug is not completely inserted.
—
The impedance setting of the connected
Use speaker(s) with proper speaker impedance.
speaker is too small.
10
The protection circuitry has been activated
Check that the speaker wires are not touching each
because of a short circuit, etc.
other and then turn the power of this unit back on.
9
This unit has been exposed to a strong
Set this unit to standby mode, disconnect the power
external electric shock (such as lightning
cable, plug it back in after 30 seconds, then use it
—
or strong static electricity).
normally.
No sound Incorrect input or output cable
Connect the cables properly. If the problem persists,
connections.
the cables may be defective.
9
No appropriate input source has been
Select an appropriate input source by pressing one of
selected.
the Input selector buttons on the remote control
12
(INPUT l / h or FM/AM on the front panel).
The SPEAKERS A/B switches are not set
Turn on the corresponding SPEAKERS A or
properly.
SPEAKERS B.
12
Speaker connections are not secure. Secure the connections.
9
Output has been muted. Deactivate the mute function.
6
The MAX VOL or INITIAL VOLUME
Set the setting to a higher value.
setting is set too low.
19
The component corresponding to the
Turn the component on and make sure it is playing.
selected input source is turned off or is not
—
playing.
The sound suddenly
The protection circuitry has been activated
Check that the speaker wires are not touching each
goes off.
because of a short circuit, etc.
other and then turn the power of this unit back on.
9
This unit has become too hot. Make sure the openings on the top panel are not
blocked.
—
The AUTO POWER STANDBY or
Change the AUTO POWER STANDBY setting to a
SLEEP function has set this unit to
longer setting or OFF from the Option menu by
19
standby mode.
pressing MENU.
Only the speaker on
Incorrect cable connections. Connect the cables properly. If the problem persists,
one side can be
the cables may be defective.
9
heard.
Incorrect setting for the BALANCE L/R
Set the BALANCE L/R setting to the appropriate
setting.
position.
6
There is a lack of bass
The + and – wires are connected in
Connect the speaker wires to the correct + and –
and no ambience.
reverse at the amplifier or the speakers.
phase.
9
A “humming” sound
Incorrect cable connections. Connect the audio plugs firmly. If the problem
can be heard.
persists, the cables may be defective.
9
The volume level
The component connected to the LINE 3
Turn on the power of the component.
cannot be increased,
PB/REC jacks of this unit is turned off.
or the sound is
—
distorted.
20 En
TROUBLESHOOTING
See
Problem Cause Remedy
page
The sound is
This unit has been set to standby mode. Turn on the power of this unit.
degraded when
listening with
headphones
12
connected to a CD
player connected to
this unit.
The remote control
Wrong distance or angle. The remote control will function within a maximum
does not work nor
range of 6 m (20 ft) and no more than 30 degrees off-
8
function properly.
axis from the front panel.
Direct sunlight or lighting (from an
Reposition this unit.
inverter type of fluorescent lamp, etc.) is
striking the remote control sensor of this
—
unit.
The batteries are weak. Replace all batteries.
8
Your CD player
The remote control does not support the
Refer to the owner’s manual supplied with the CD
cannot be operated
CD player.
palyer.
with the remote
—
control.
“OVER HEAT”
This unit has become too hot. Make sure the openings on the top panel are not
appears on the front
blocked.
—
panel display.
“CHECK SP” appears
Speaker cables got shorted out. Twist bare wires of speaker cables firmly, and then
on the front panel
connect to this unit and speakers properly.
—
display.
INFORMATION
ADDITIONAL
English
21 En

TROUBLESHOOTING
■ Tuner
See
Problem Cause Remedy
page
FM stereo
The particular characteristics of the FM
Check the antenna connections.
reception is
stereo broadcasts being received may
Try using a high-quality directional FM antenna.
11
noisy.
cause this problem when the transmitter is
too far away or the antenna input is poor.
Switch to monaural mode.
14
There is
There is multipath interference. Adjust the antenna position to eliminate the multipath
distortion, and
interference.
clear reception
FM
cannot be
—
obtained even
with a good FM
antenna.
The desired
The signal is too weak. Try using a high-quality directional FM antenna.
11
station cannot
be tuned in
Try tuning manually.
14
automatically.
FM/
“NO PRESET”
No preset stations are registered. Register stations you want to listen to as preset
AM
is displayed.
stations before operation.
14
The desired
The signal is weak or the antenna
Tighten the AM loop antenna connections and orient
station cannot
connections are loose.
it for the best reception.
—
be tuned in
automatically.
Try tuning manually.
14
Automatic
Automatic station preset is not available
Use manual station preset.
station preset
for AM stations.
15
does not work.
AM
There are
The noises may result from lightning,
Try using an outdoor antenna and a earth ground.
continuous
fluorescent lamps, motors, thermostats or
This will help somewhat, but it is difficult to
crackling and
other electrical equipment.
eliminate all noise.
—
hissing noises.
There are
A TV set is being used nearby. Move this unit away from the TV set.
buzzing and
—
whining noises.
22 En
SPECIFICATIONS
AUDIO SECTION
• 50 dB quieting sensitivity (IHF, 1 kHz, 100% MOD.)
• Minimum RMS output power
Mono ................................................................ 3.0 µV (20.8 dBf)
(8 Ω, 40 Hz to 20 kHz, 0.2% THD)
• Signal to noise ratio (IHF)
[North America, General, Australia and Europe models]
Mono/Stereo .............................................................. 72 dB/70 dB
........................................................................... 100 W + 100 W
• Harmonic distortion (1 kHz)
[Asia model] ......................................................... 85 W + 85 W
Mono/Stereo ................................................................ 0.3%/0.5%
• Input sensitivity/Input impedance (1 kHz, 100 W/8 Ω)
• Antenna Input......................................................... 75 Ω, unbalanced
CD, etc. ................................................................. 500 mV/47 kΩ
• Output level/Output impedance
AM SECTION
CD, etc. (Input 1 kHz, 500 mV)
• Tuning range
REC .................................................................. 500 mV/2.2 kΩ
[North America model] ...................................... 530 to 1710 kHz
CD, etc. (Input 1 kHz, 500 mV, 8 Ω)
[Asia and General models] ...... 530 to 1710 kHz/531 to 1611 kHz
PHONES ............................................................ 470 mV/470 Ω
[Australia and Europe models] ........................... 531 to 1611 kHz
• Frequency response
CD, etc. (20 Hz to 20 kHz) ........................................... 0 ± 0.5 dB
GENERAL
CD, etc. (10 Hz to 100 kHz) ......................................... 0 ± 3.0 dB
• Power supply
• Total harmonic distortion
[North America model] ...................................... AC 120 V, 60 Hz
CD, etc. to SPEAKERS
[General model] ...................... AC 110-120/220-240 V, 50/60 Hz
(20 Hz to 20 kHz, 50 W, 8 Ω) .................................... 0.2% or less
[Australia model] ............................................... AC 240 V, 50 Hz
• Signal to noise ratio (IHF-A network)
[Europe model] ................................................... AC 230 V, 50 Hz
CD, etc. (500 mV input shorted) ......................... 100 dB or more
[Asia model] .......................................... AC 220-240 V, 50/60 Hz
• Residual noise (IHF-A network) ........................................... 70 µV
• Power consumption
• Tone control characteristics
[North America, General, Australia and Europe models]
BASS
.......................................................................................... 175 W
Boost/Cut (50 Hz) .......................................................... ± 10 dB
[Asia model] ....................................................................... 140 W
TREBLE
• Standby power consumption
Boost/Cut (20 kHz) ........................................................ ± 10 dB
[North America, Australia, Europe and Asia models]
................................................................................ 0.5 W or less
FM SECTION
• Dimensions (W × H × D) ................................ 435 × 141 × 322 mm
• Tuning range
(17'1/8" × 5'1/2" × 12'5/8")
[North America model] ................................... 87.5 to 107.9 MHz
• Weight .................................................................... 6.7 kg (14.8 lbs)
[Asia and General models]
................................... 87.5 to 107.9 MHz/87.50 to 108.00 MHz
[Australia and Europe models] ................... 87.50 to 108.00 MHz
* Specifications are subject to change without notice.
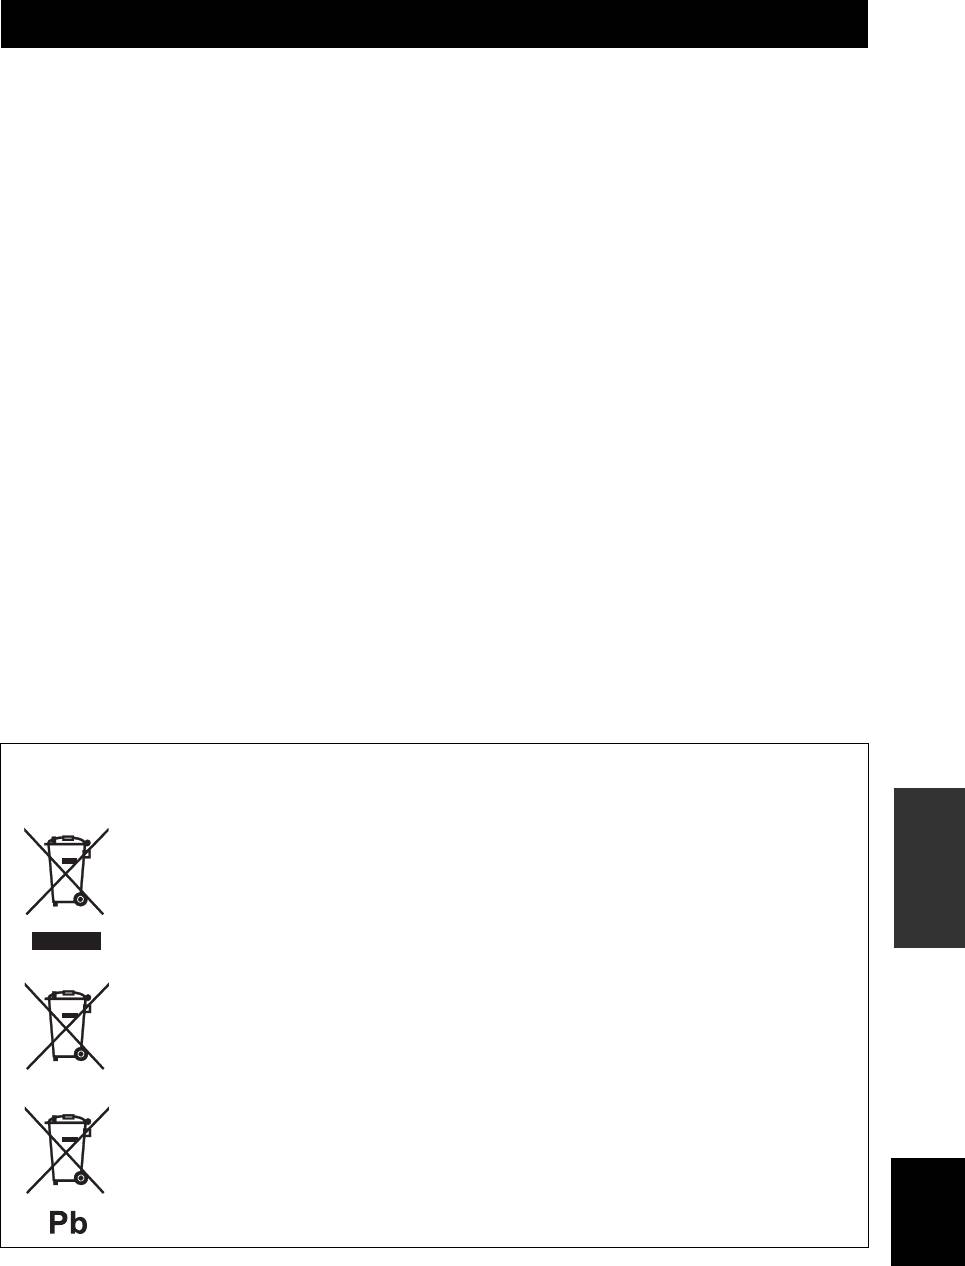
Information for Users on Collection and Disposal of Old Equipment
and Used Batteries
INFORMATION
ADDITIONAL
These symbols on the products, packaging, and/or accompanying documents mean that used electrical and
electronic products and batteries should not be mixed with general household waste.
For proper treatment, recovery and recycling of old products and used batteries, please take them to
applicable collection points, in accordance with your national legislation and the Directives 2002/96/EC
and 2006/66/EC.
By disposing of these products and batteries correctly, you will help to save valuable resources and prevent
any potential negative effects on human health and the environment which could otherwise arise from
inappropriate waste handling.
For more information about collection and recycling of old products and batteries, please contact your
local municipality, your waste disposal service or the point of sale where you purchased the items.
[Information on Disposal in other Countries outside the European Union]
These symbols are only valid in the European Union. If you wish to discard these items, please contact
your local authorities or dealer and ask for the correct method of disposal.
Note for the battery symbol (bottom two symbol examples):
English
This symbol might be used in combination with a chemical symbol. In this case it complies with the
requirement set by the Directive for the chemical involved.
23 En
ATTENTION : VEUILLEZ LIRE CE QUI SUIT AVANT D’UTILISER L’APPAREIL.
ATTENTION : VEUILLEZ LIRE CE QUI SUIT AVANT D’UTILISER
L’APPAREIL.
1 Pour utiliser l’appareil au mieux de ses possibilités, lisez
13 Pour empêcher tout dommage causé par les éclairs,
attentivement ce mode d’emploi. Conservez-le
déconnectez le câble d’alimentation et toute antenne
soigneusement pour référence.
extérieure de la prise murale pendant un orage.
2 Installez cet ensemble audio dans un endroit bien aéré,
14 Ne tentez pas de modifier ni de réparer l’appareil.
frais, sec et propre - veillez à ce qu’il soit à l’abri de la
Consultez le service Yamaha compétent pour toute
lumière directe du soleil, des sources de chaleur, des
réparation qui serait requise. Le coffret de l’appareil ne
vibrations, des poussières, de l’humidité et/ou du froid.
doit jamais être ouvert, quelle que soit la raison.
Pour une ventilation correcte, ménagez l’espace
15 Si vous envisagez de ne pas vous servir de l’appareil
minimum suivant autour de cet appareil.
pendant une longue période (par exemple, pendant les
Au-dessus : 30 cm
vacances), débranchez la fiche du câble d’alimentation au
À l’arrière : 20 cm
niveau de la prise secteur.
Sur les côtés : 20 cm
16 Lisez la section intitulée « GUIDE DE DÉPANNAGE »
3 Placez l’appareil loin des équipements, moteurs et
où figurent une liste d’erreurs de manipulation
transformateurs électriques, pour éviter les ronflements
communes avant de conclure que l’appareil présente une
parasites.
anomalie de fonctionnement.
4 N’exposez pas l’appareil à des variations brutales de
17 Avant de déplacer l’appareil, appuyez sur
température, ne le placez pas dans un environnement très
A (alimentation) pour mettre l’appareil en mode veille,
humide (par exemple dans une pièce contenant un
puis débranchez la fiche du cordon d’alimentation au
humidificateur) car cela peut entraîner la condensation
niveau de la prise secteur.
d’humidité à l’intérieur de l’appareil qui elle-même peut
18 La condensation se forme lorsque la température
être responsable de décharge électrique, d’incendie, de
ambiante change brusquement. En ce cas, débranchez la
dommage à l’appareil ou de blessure corporelle.
fiche du câble d’alimentation et laissez l’appareil reposer.
5 Evitez d’installer l’appareil dans un endroit où des objets
19 La température de l’appareil peut augmenter en raison
peuvent tomber, ainsi que là où l’appareil pourrait être
d’une utilisation prolongée. En ce cas, coupez
exposé à des éclaboussures ou des gouttes d’eau. Sur le
l’alimentation de l’appareil et laissez-le au repos pour
dessus de l’appareil, ne placez pas :
qu’il refroidisse.
– d’autres appareils qui peuvent endommager la surface
20 Installez cet appareil à proximité de la prise secteur et à
de l’appareil ou provoquer sa décoloration.
un emplacement où la fiche du câble d’alimentation est
– des objets se consumant (par exemple, une bougie)
facilement accessible.
qui peuvent être responsables d’incendie, de
21 Les piles ne doivent pas être exposées à une chaleur
dommage à l’appareil ou de blessure corporelle.
extrême, par exemple au soleil, à une flamme, etc.
– des récipients contenant des liquides qui peuvent être
22 Une pression excessive du son par les écouteurs et le
à l’origine de décharge électrique ou de dommage à
casque d’écoute peut entraîner la perte de l’ouïe.
l’appareil.
6 Ne couvrez pas l’appareil d’un journal, d’une nappe, d’un
Cet appareil n’est pas déconnecté du secteur tant qu’il reste
rideau, etc. car cela empêcherait l’évacuation de la
branché à la prise de courant, même si l’appareil en soi est éteint
chaleur. Toute augmentation de la température intérieure
par la touche A. Il se trouve alors « en veille ». En mode veille,
de l’appareil peut être responsable d’incendie, de
l’appareil consomme une très faible quantité de courant.
dommage à l’appareil ou de blessure corporelle.
7 Ne branchez pas la fiche du câble d’alimentation de
l’appareil sur une prise secteur aussi longtemps que tous
AVERTISSEMENT
les raccordements n’ont pas été effectués.
POUR RÉDUIRE LES RISQUES D’INCENDIE OU DE
8 Ne pas faire fonctionner l’appareil à l’envers. Il risquerait
DÉCHARGE ÉLECTRIQUE, N’EXPOSEZ PAS CET
de chauffer et d’être endommagé.
APPAREIL À LA PLUIE OU À L’HUMIDITÉ.
9 N’exercez aucune force excessive sur les commutateurs,
les boutons et les cordons.
10 Pour débrancher la fiche du câble d’alimentation au
niveau de la prise secteur, saisissez la fiche et ne tirez pas
sur le cordon.
11 Ne nettoyez pas l’appareil au moyen d’un solvant
chimique, ce qui pourrait endommager la finition.
Cette étiquette doit être apposée sur un produit dont le
Utilisez un chiffon sec et propre.
12 N’alimentez l’appareil qu’à partir de la tension prescrite.
capot supérieur peut devenir chaud lorsqu’il fonctionne.
Alimenter l’appareil sous une tension plus élevée est
dangereux et peut être responsable d’incendie, de
dommage à l’appareil ou de blessure corporelle. Yamaha
ne saurait être tenue responsable des dommages résultant
de l’alimentation de l’appareil sous une tension autre que
celle prescrite.
i Fr
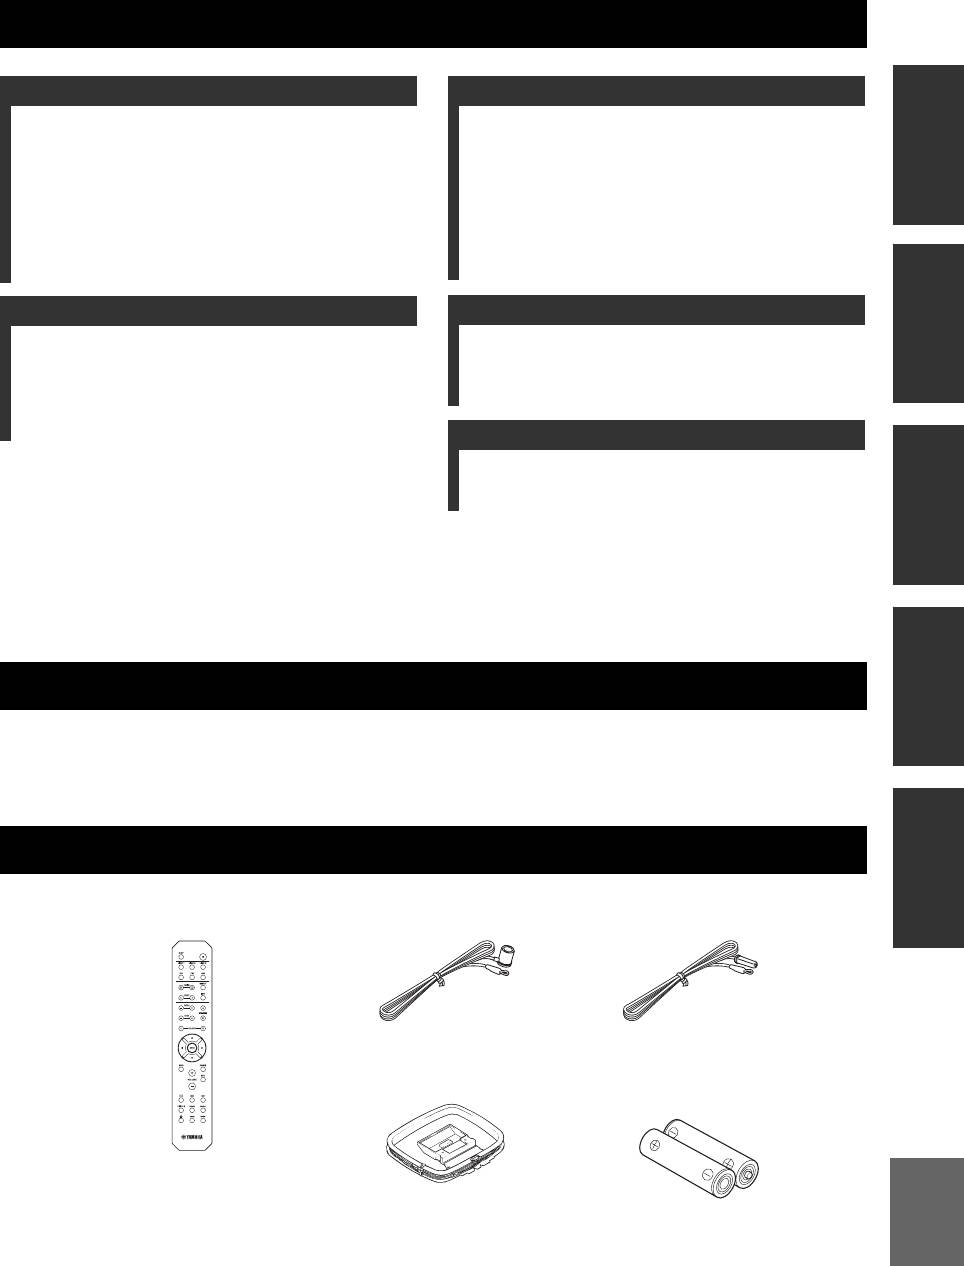
TABLE DES MATIÈRES
INTRODUCTION
OPÉRATIONS DE BASE
FONCTIONS UTILES........................................... 1
LECTURE .............................................................12
ACCESSOIRES FOURNIS................................... 1
Lecture d’une source................................................ 12
COMMANDES ET FONCTIONS........................ 2
Utilisation de la minuterie de veille......................... 13
Panneau avant ............................................................ 2
SYNTONISATION FM/AM ................................14
Afficheur du panneau avant....................................... 4
Utilisation des fonctions de présélection................. 14
Panneau arrière .......................................................... 5
Recevoir et afficher des informations Radio Data
Télécommande........................................................... 6
System (Seulement pour le modèle pour
Utilisation de la télécommande ................................. 8
l’Europe )............................................................. 18
PRÉPARATIONINTRODUCTION
PRÉPARATION
OPÉRATIONS AVANCÉES
RACCORDEMENTS............................................. 9
PARAMÉTRAGE DU MENU OPTION POUR
Raccordement des enceintes et des
CHAQUE SOURCE D’ENTRÉE....................19
composants source................................................. 9
Éléments du menu Option ....................................... 19
Réglage des commandes FM et AM........................ 11
Raccordement du cordon d’alimentation................. 11
INFORMATIONS COMPLÉMENTAIRES
OPÉRATIONS DE
GUIDE DE DÉPANNAGE...................................20
BASE
CARACTÉRISTIQUES TECHNIQUES............23
■ À propos de ce manuel
• Le symbole y attire votre attention sur un conseil d’utilisation.
• Les instructions de ce mode d’emploi décrivent les opérations de cet appareil à l’aide de la télécommande fournie avec l’appareil.
Vous pouvez également utiliser les touches ou les boutons du panneau avant s’ils portent le même nom ou un nom semblable sur la
OPÉRATIONS
télécommande.
AVANCÉES
FONCTIONS UTILES
Cet appareil permet d’effectuer les opérations suivantes :
◆ Écouter des stations de radio FM et AM (voir page 14)
◆ Économiser de l’énergie grâce à la fonction AUTO
◆ Utiliser la télécommande de cet appareil pour
POWER STANDBY (voir page 19)
commander un lecteur de CD Yamaha (voir page 7)
COMPLÉMENTAIRES
INFORMATIONS
ACCESSOIRES FOURNIS
Vérifiez que vous avez reçu tous les articles suivants.
Télécommande
Antenne FM intérieure
*
L’un des éléments ci-dessus est fourni selon la région où a été acheté
l’appareil.
Antenne cadre AM
Piles (× 2)
(AA, R6, UM-3)
Français
1 Fr
Оглавление
- Integrated Amplifier Receiver Amplificateur Intégré Ampli-Tuner
- INTRODUCTION
- PREPARATION
- BASIC OPERATION
- ADVANCED OPERATION
- ADDITIONAL INFORMATION
- INTRODUCTION
- PRÉPARATION
- OPÉRATIONS DE BASE
- OPÉRATIONS AVANCÉES
- INFORMATIONS COMPLÉMENTAIRES
- EINFÜHRUNG
- VORBEREITUNG
- BEDIENUNG DER GRUNDFUNKTIONEN
- ERWEITERTE BEDIENUNG
- ZUSÄTZLICHE INFORMATIONEN
- INTRODUKTION
- FÖRBEREDELSE
- GRUNDLÄGGANDE ANVÄNDNING
- AVANCERAD ANVÄNDNING
- YTTERLIGARE INFORMATION
- INTRODUZIONE
- PREPARATIVI
- FUNZIONAMENTO DI BASE
- FUNZIONAMENTO AVANZATO
- INFORMAZIONI AGGIUNTIVE
- INTRODUCCIÓN
- PREPARACIÓN
- MANEJO BÁSICO
- MANEJO AVANZADO
- INFORMACIÓN ADICIONAL
- INLEIDING
- VOORBEREIDINGEN
- BASISBEDIENING
- GEAVANCEERDE BEDIENING
- AANVULLENDE INFORMATIE
- ВВЕДЕНИЕ
- ПОДГОТОВКА
- ОСНОВНЫЕ ФУНКЦИИ
- ДОПОЛНИТЕЛЬНЫЕ ФУНКЦИИ
- ДОПОЛНИТЕЛЬНАЯ ИНФОРМАЦИЯ


