Dell Latitude XT2 – страница 4
Инструкция к Ноутбуку Dell Latitude XT2
Оглавление
- Dell™ Latitude™ XT2 Service Manual
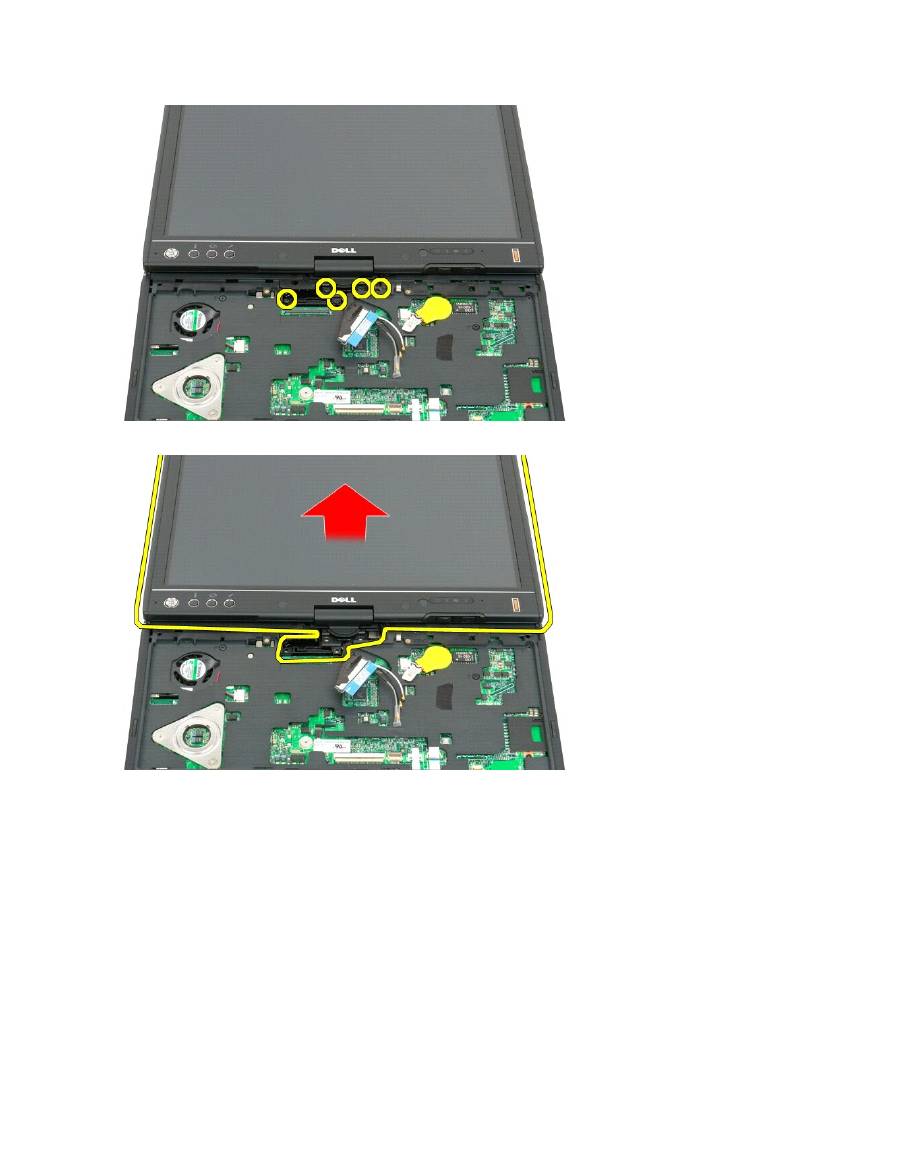
11.
Lift the display assembly straight up to separate it from the Tablet-PC.
12.
Remove the display assembly.

Hinge Cover
Dell™ Latitude™ XT2 Service Manual
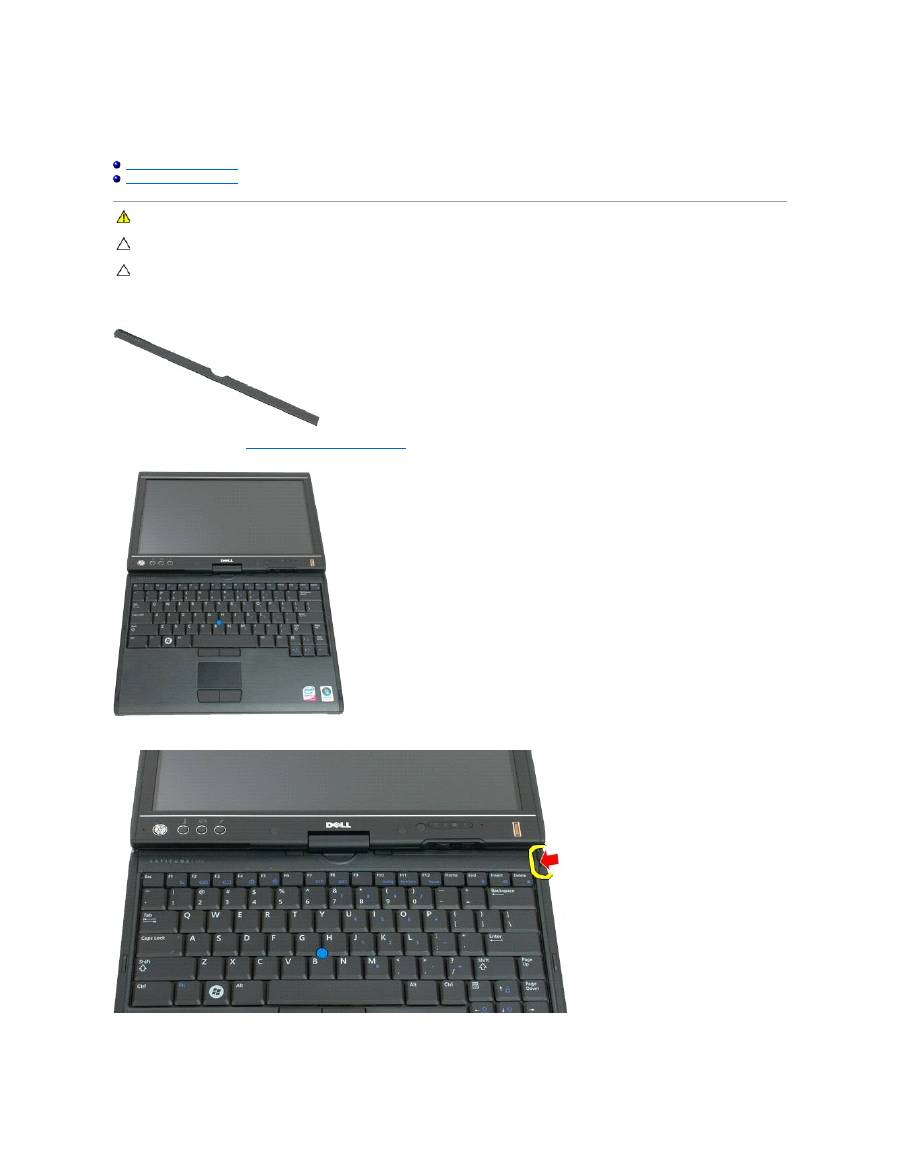
Removing the Hinge Cover
Replacing the Hinge Cover
Removing the Hinge Cover
1.
Follow the procedures in
Before Working Inside Your Tablet-P C
.
2.
Turn the computer top-side up, and then open the display all the way (180 degrees) so that it rests on your work surface.
3.
Insert a plastic scribe or flathead screwdriver into the slot and gently pry up the hinge cover on the right side to release.
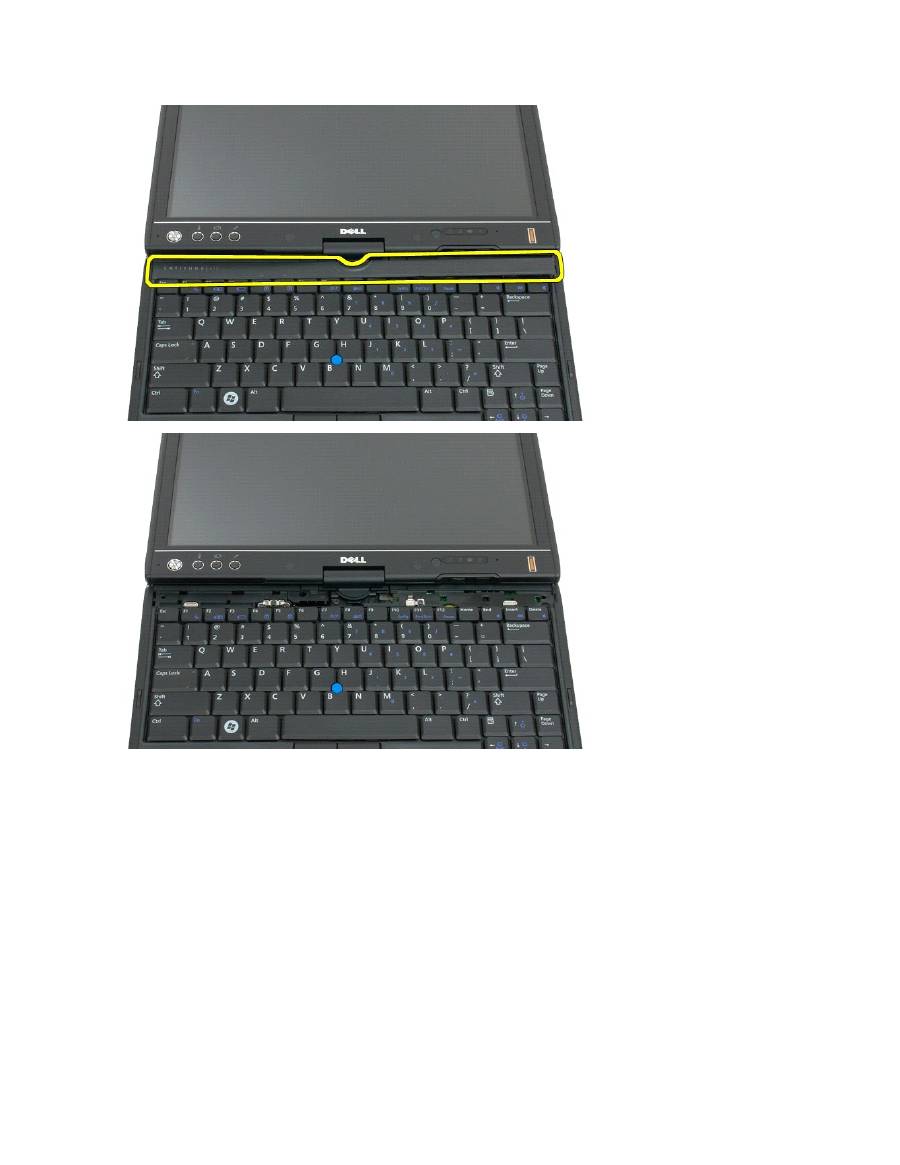
4.
Ease the hinge cover up, moving from right to left, and remove it.
WARNING:
Before working inside your Tablet-PC, read the safety information that shipped with your Tablet-PC. For additional safety best
practices information, see the Regulatory Compliance Homepage at www.dell.com/regulatory_compliance.
CAUTION: To avoid electrostatic discharge, ground yourself by using a wrist grounding strap or by periodically touching a connector on the back
panel of the computer.
CAUTION: The hinge cover is fragile and can be damaged if extreme force is used. Be careful when removing the hinge cover.
Replacing the Hinge Cover
To replace the hinge cover, insert the left edge of the cover into the hinge cover slot and press from left to right until the cover snaps into place.
Memory
Dell™ Latitude™ XT2 Service Manual
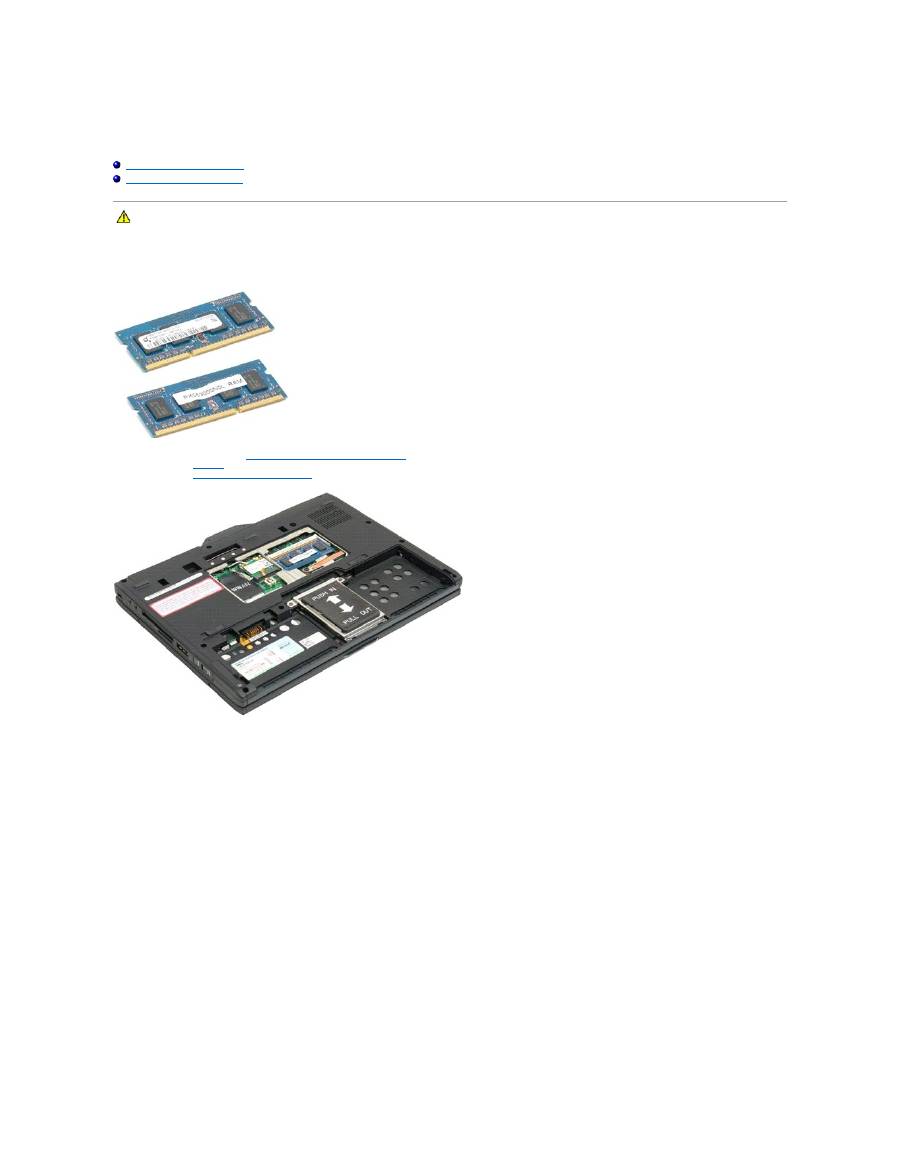
Removing a Memory Module
Replacing a Memory Module
Removing a Memory Module
1.
Follow the procedures in
Before Working Inside Your Tablet-P C
.
2.
Remove the
battery
from the Tablet-PC.
3.
Remove the
memory and mini-card cover
from the Tablet-PC.
3.
Use your fingers to gently pry the retaining clips away from the memory module.
WARNING:
Before working inside your Tablet-PC, read the safety information that shipped with your Tablet-PC. For additional safety best
practices information, see the Regulatory Compliance Homepage at www.dell.com/regulatory_compliance.

4.
Remove the memory module from the Tablet-PC at an angle.

Replacing a Memory Module
1.
Position the memory module into place by starting with the top side of the module and easing it down into place at an angle.
2.
Ease the memory module down until it snaps into place between the retainer clips.
3.
Replace the
memory and mini-card cover
.
4.
Replace the battery. See
Replacing the Main Battery
.
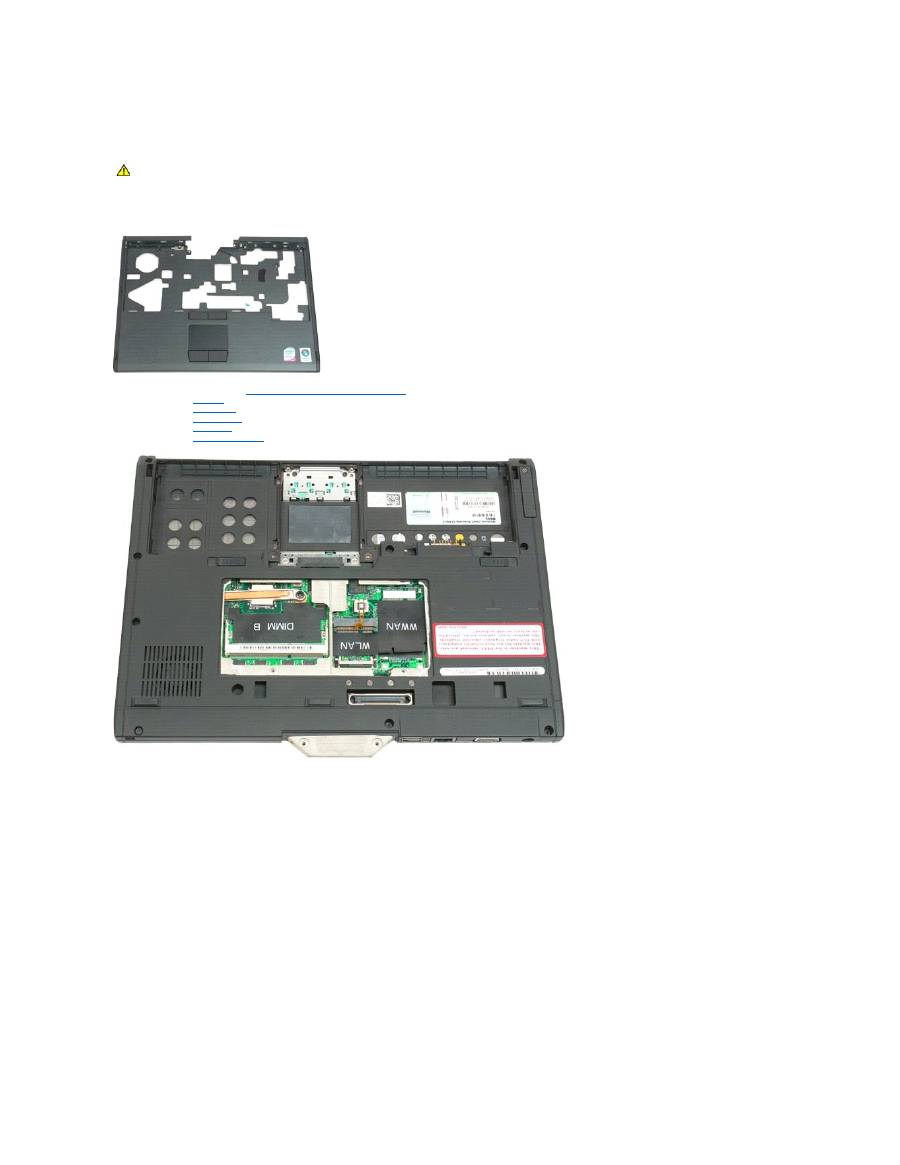
Palm Rest
Dell™ Latitude™ XT2 Service Manual
Removing the Palm Rest
1.
Follow the procedures in
Before Working Inside Your Tablet-P C
.
2.
Remove the
battery
from the Tablet-PC.
3.
Remove the
hard drive
from the Tablet-PC.
4.
Remove the
hinge cover
from the Tablet-PC.
5.
Remove the
keyboard
from the Tablet-PC.
6.
Remove the
display assembly
from the Tablet-PC.
7.
Remove the nine screws from securing the palm rest from the bottom of the Tablet-PC.
WARNING:
Before working inside your Tablet-PC, read the safety information that shipped with your Tablet-PC. For additional safety best
practices information, see the Regulatory Compliance Homepage at www.dell.com/regulatory_compliance.
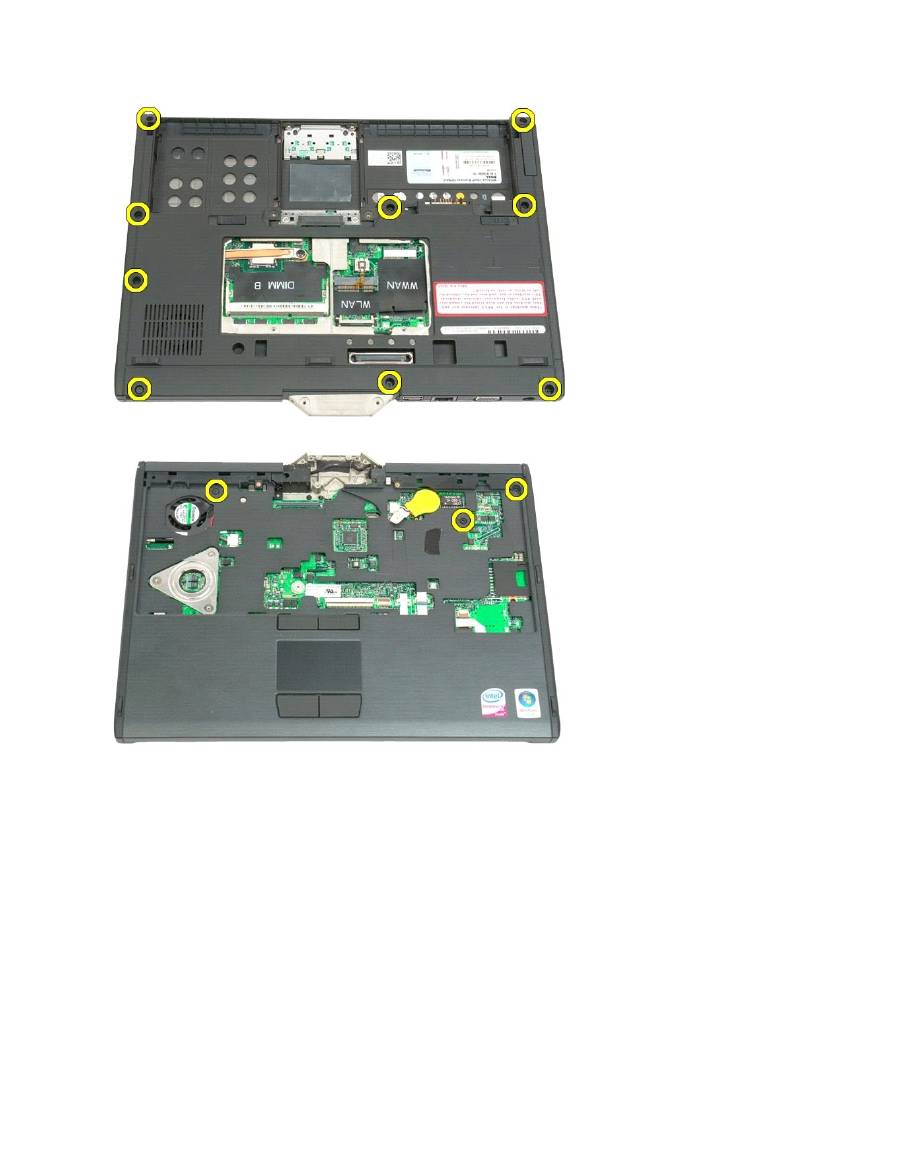
8.
Turn the Tablet-PC over and remove three screws securing the palm rest to the top of the Tablet-PC.
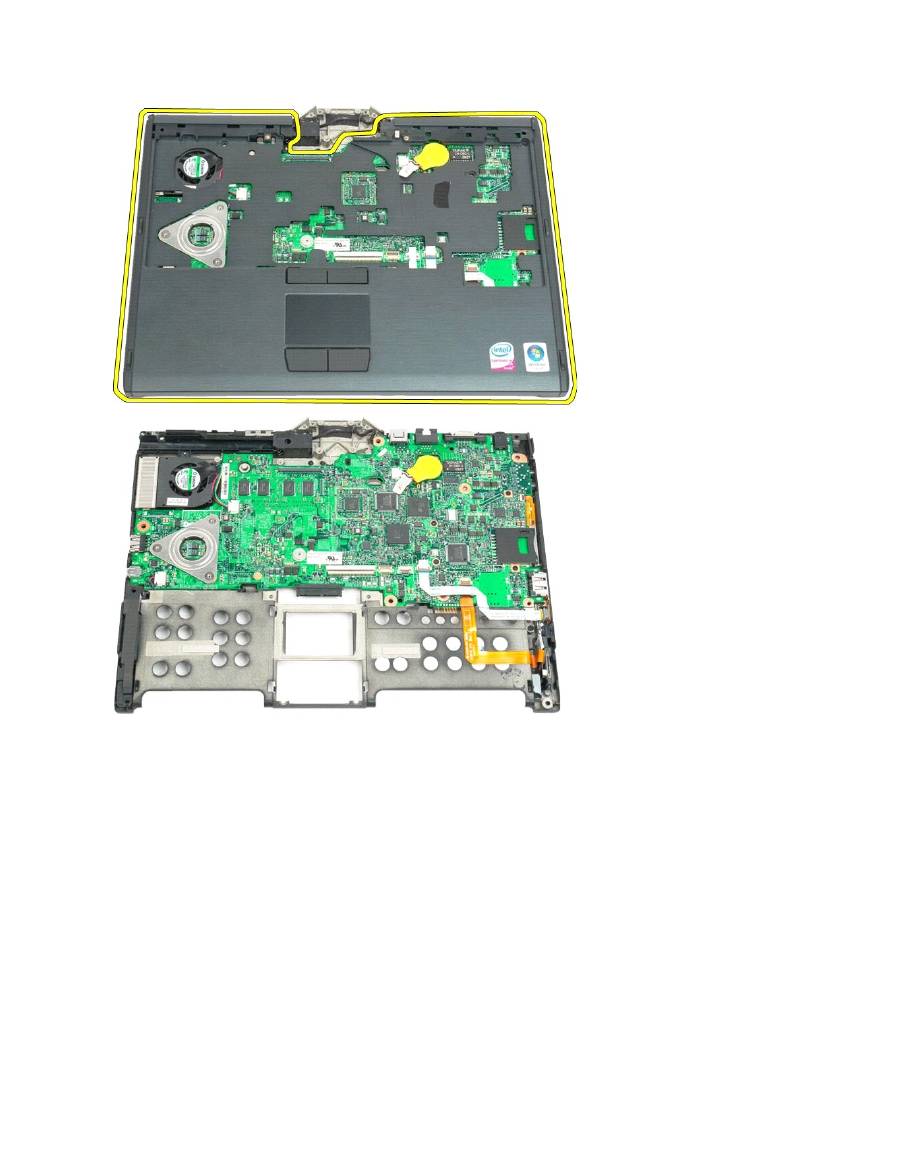
9.
Remove the palm rest from the Tablet-PC.

Speaker
Dell™ Latitude™ XT2 Service Manual
Removing the Speaker
1.
Follow the procedures in
Before Working Inside Your Tablet-P C
.
2.
Remove the
battery
from the Tablet-PC.
3.
Remove the
hard drive
from the Tablet-PC.
4.
Remove the
memory and mini-card cover
from the Tablet-PC.
5.
Remove the
memory
from the Tablet-PC.
6.
Remove the
mini-card
from the Tablet-PC.
7.
Remove the
BIOS chip
from the Tablet-PC.
8.
Remove the
Bluetooth module
from the Tablet-PC.
9.
Remove the
hinge cover
from the Tablet-PC.
10.
Remove the
keyboard
from the Tablet-PC.
11.
Remove the
coin-cell battery
from the Tablet-PC.
12.
Remove the
display assembly
from the Tablet-PC.
13.
Remove the
palm rest
from the Tablet-PC.
14.
Disconnect the speaker cable from the system board.
WARNING:
Before working inside your Tablet-PC, read the safety information that shipped with your Tablet-PC. For additional safety best
practices information, see the Regulatory Compliance Homepage at www.dell.com/regulatory_compliance.
15.
Remove the speaker assembly from the Tablet-PC.

System Board
Dell™ Latitude™ XT2 Service Manual
Removing the System Board
1.
Follow the procedures in
Before Working Inside Your Tablet-P C
.
2.
Remove the
battery
from the Tablet-PC.
3.
Remove the
hard drive
from the Tablet-PC.
4.
Remove the
memory and mini-card cover
from the Tablet-PC.
5.
Remove the
memory
from the Tablet-PC.
6.
Remove the
mini-card
from the Tablet-PC.
7.
Remove the
BIOS chip
from the Tablet-PC.
8.
Remove the
Bluetooth module
from the Tablet-PC.
9.
Remove the
hinge cover
from the Tablet-PC.
10.
Remove the
keyboard
from the Tablet-PC.
11.
Remove the
coin-cell battery
from the Tablet-PC.
12.
Remove the
display assembly
from the Tablet-PC.
13.
Remove the
palm rest
from the Tablet-PC.
14.
Disconnect the speaker cable from the system board.
WARNING:
Before working inside your Tablet-PC, read the safety information that shipped with your Tablet-PC. For additional safety best
practices information, see the Regulatory Compliance Homepage at www.dell.com/regulatory_compliance.
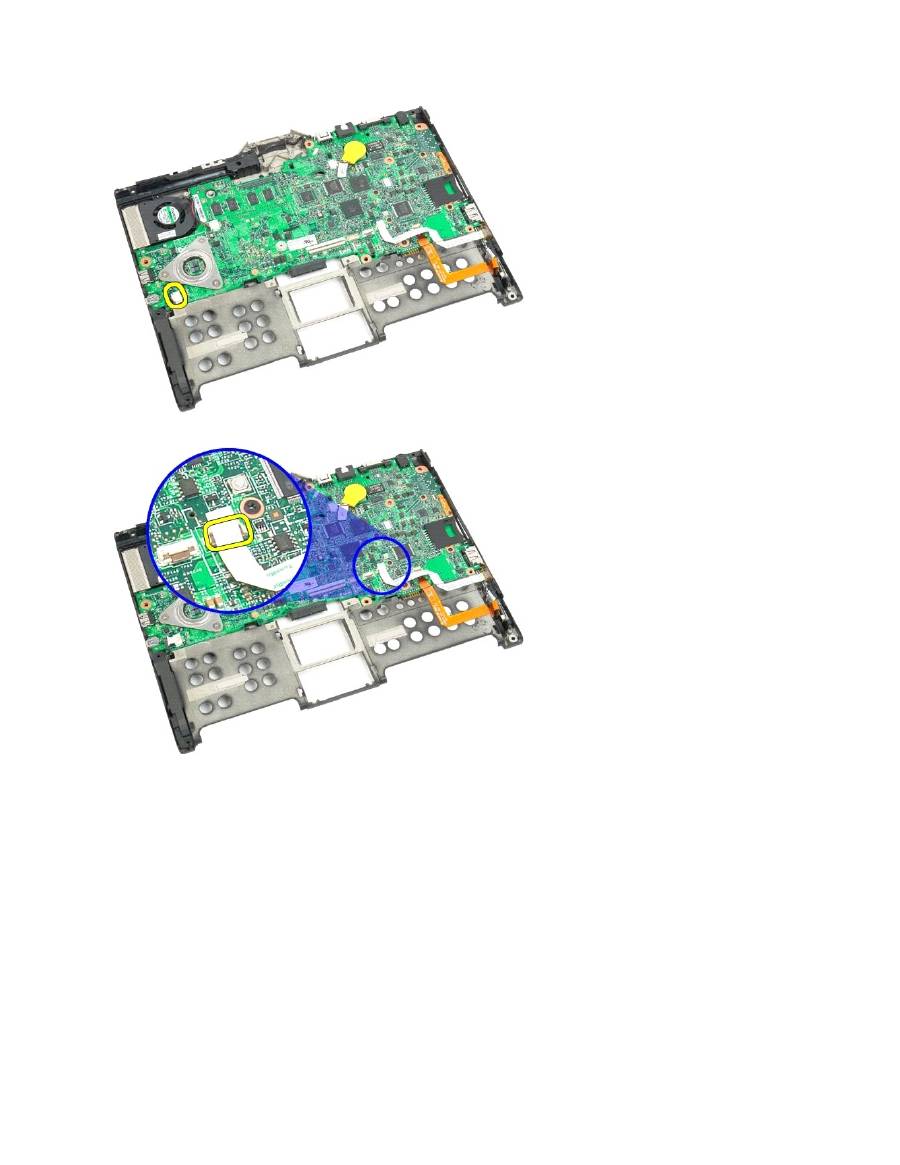
15.
Lift the retaining clip on the SATA cable.
16.
Disconnect the SATA cable from the system board.
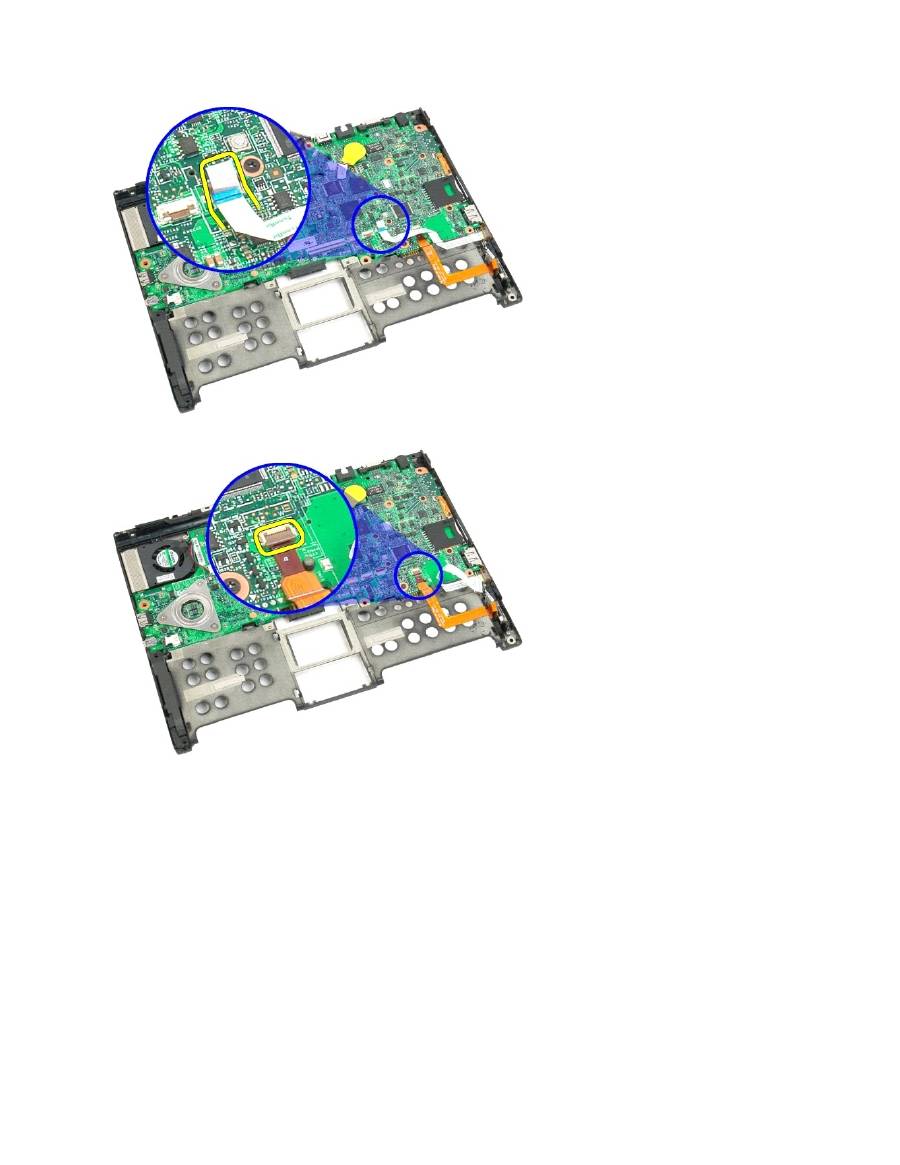
17.
Lift the retaining clip on the wireless cable connector.
18.
Disconnect the wireless cable connector from the system board.
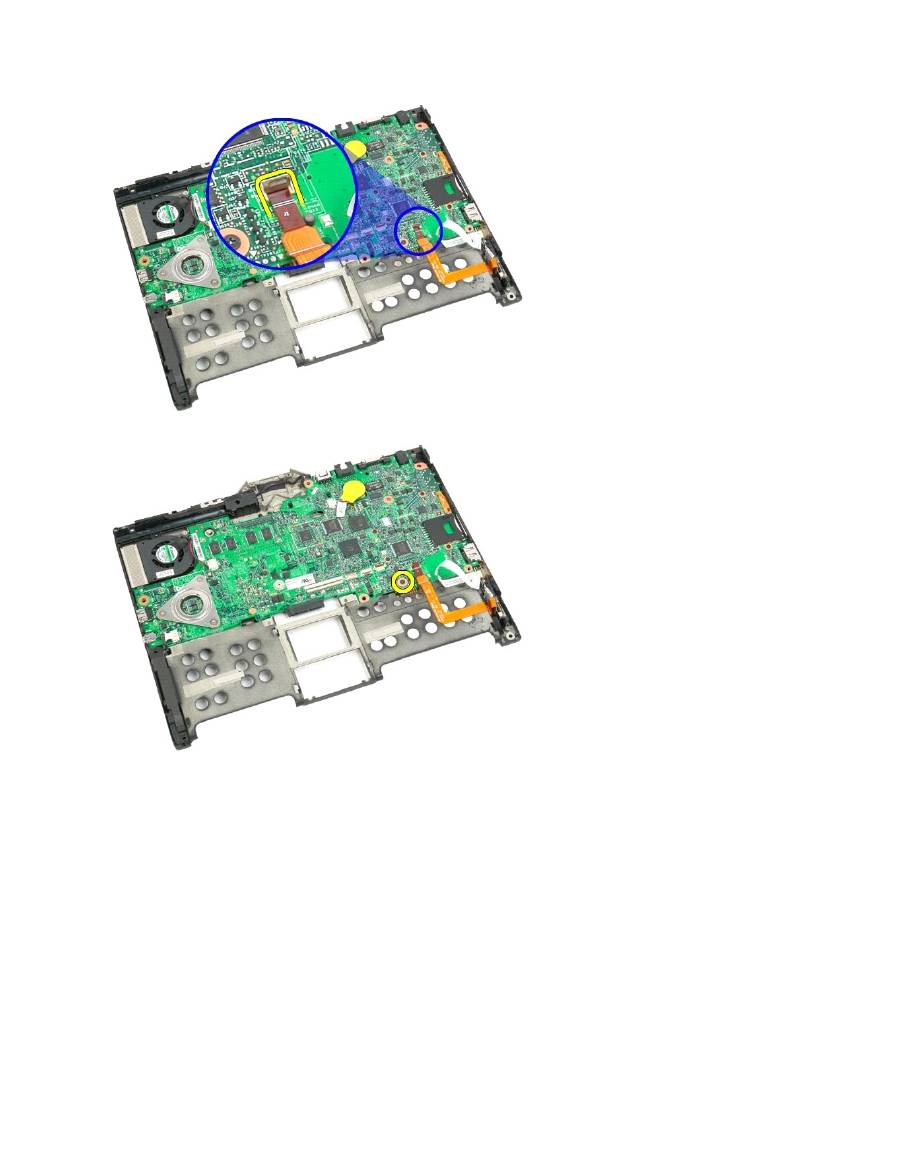
19.
Remove the one screw securing the system board to the bottom plastic.
20.
Lift the system board up at an angle and remove from the Tablet-PC.

21.
Disconnect the fan cable from the system board connector, then flip the system board over.
22.
Loosen the four captive screws on the heat sink.
23.
Remove the top section of the heat sink assembly from the system board, then turn the system board over again.

24.
Remove the bottom section of the heat sink assembly.
Mini-Card
Dell™ Latitude™ XT2 Service Manual
Removing the Mini-Card
Replacing the Mini-Card
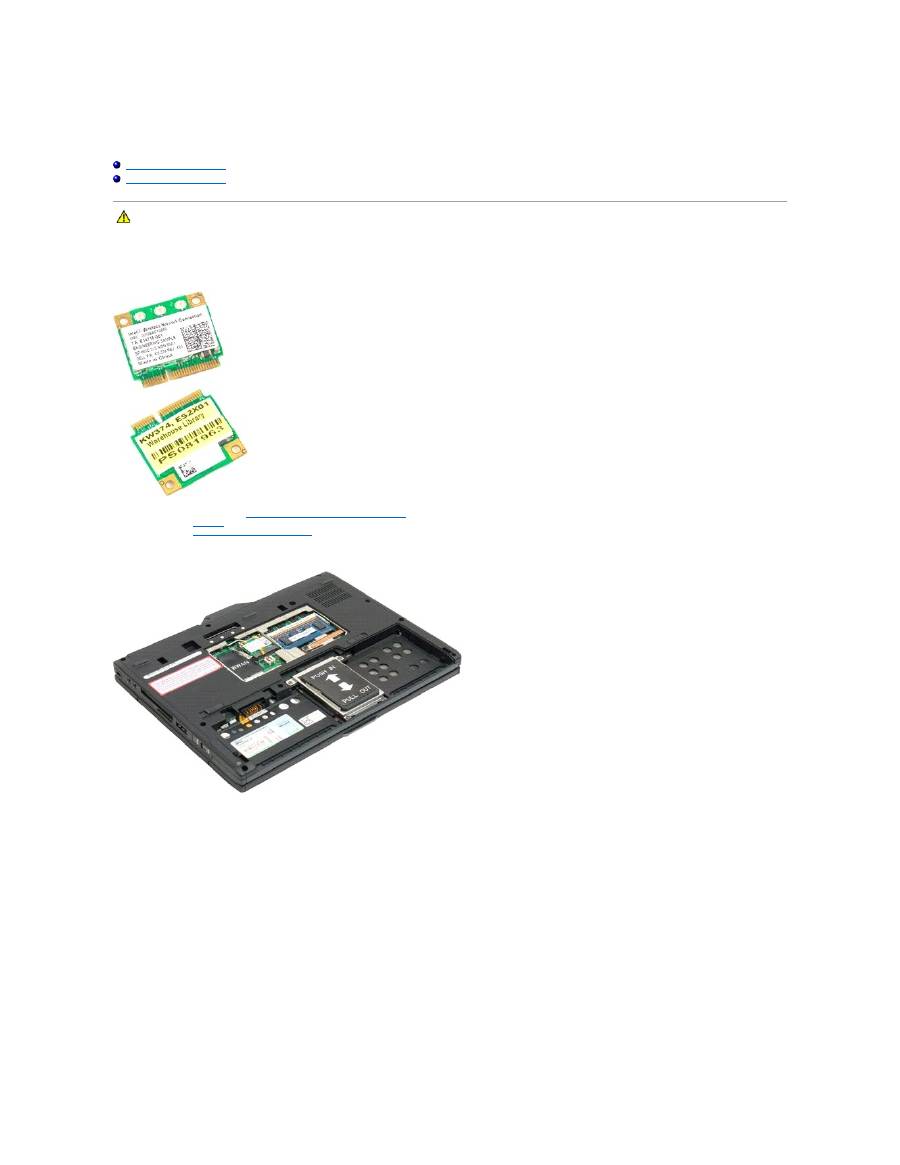
Removing the Mini-Card
1.
Follow the procedures in
Before Working Inside Your Tablet-P C
.
2.
Remove the
battery
from the Tablet-PC.
3.
Remove the
memory and mini-card cover
from the Tablet-PC.
4.
Disconnect the two antenna cables from the mini-card.
WARNING:
Before working inside your Tablet-PC, read the safety information that shipped with your Tablet-PC. For additional safety best
practices information, see the Regulatory Compliance Homepage at www.dell.com/regulatory_compliance.
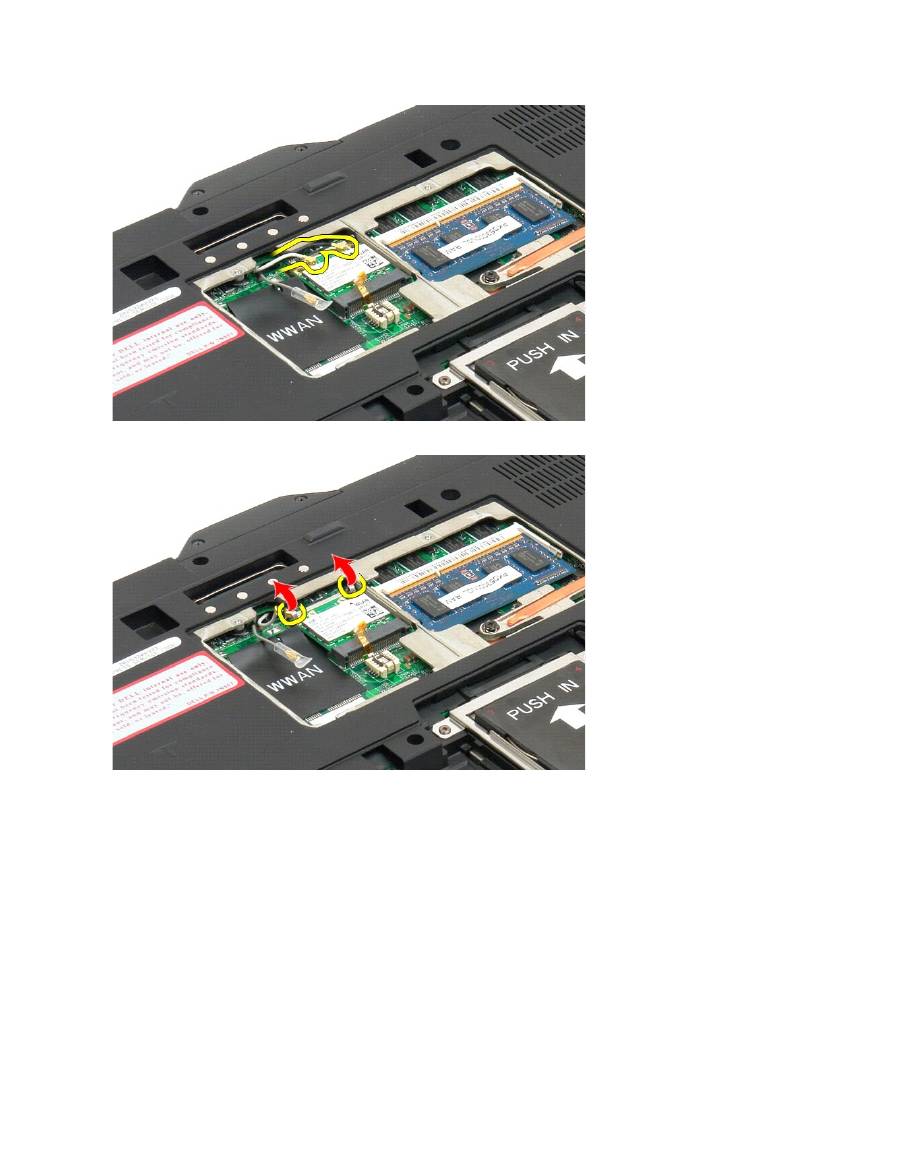
5.
Use your finger to gently pry the retaining clips back and release the mini-card.
6.
Remove the mini-card from the Tablet-PC at an angle.
