Dell Latitude XT2 – страница 3
Инструкция к Ноутбуку Dell Latitude XT2
Оглавление
- Dell™ Latitude™ XT2 Service Manual

Replacing the Internal Card With Bluetooth Wireless Technology
1.
Connect the Bluetooth cable to the new Bluetooth assembly.
2.
Carefully slide the Bluetooth assembly into the bay.
3.
Replace the captive screw on the Bluetooth assembly to secure the Bluetooth assembly in place.
4.
Replace the battery. See
Replacing the Main Battery.
Note:
Ensure that the Bluetooth cable does not disconnect from the Bluetooth assembly when sliding it into the bay.

Coin-Cell Battery
Dell™ Latitude™ XT2 Service Manual
Removing the Coin-Cell Battery
Replacing the Coin-Cell Battery
Removing the Coin-Cell Battery
1.
Follow the procedures in
Before Working Inside Your Tablet-P C
.
2.
Turn the computer over and remove the
main battery
from the Tablet-PC.
3.
Turn the computer over to the top side and remove the
hinge cover
from the Tablet-PC.
4.
To get to the coin-cell battery, remove the
keyboard
from the Tablet-PC.
5.
Disconnect the coin-cell cable from the system board.
6.
Gently pry the coin-cell loose from the adhesive that attaches it to the system board and remove from the Tablet-PC.
WARNING:
Before working inside your Tablet-PC, read the safety information that shipped with your Tablet-PC. For additional safety best
practices information, see the Regulatory Compliance Homepage at www.dell.com/regulatory_compliance.

Replacing the Coin-Cell Battery
1.
Peel the backing from the new coin-cell battery.
2.
Connect the coin-cell cable to the system board and press the coin-cell battery into place on the system board. See diagram in step 6 above for
placement.
3.
Replace the keyboard
, attaching it securely with the keyboard screws.
4.
Replace the
hinge cover
.
5.
Turn the computer over and replace the battery. See
Replacing the Main Battery
.

Grip Cover
Dell™ Latitude™ XT2 Service Manual
Removing the Grip Cover
Replacing the Grip Cover
Removing the Grip Cover
1.
Follow the procedures in
Before Working Inside Your Tablet-P C
.
2.
Remove the
battery
from the Tablet-PC.
3.
Remove the two screws from the bottom of the grip cover.
WARNING:
Before working inside your Tablet-PC, read the safety information that shipped with your Tablet-PC. For additional safety best
practices information, see the Regulatory Compliance Homepage at www.dell.com/regulatory_compliance.

4.
Slide the grip cover away from the Tablet-PC and remove.
Replacing the Grip Cover
1.
Slide the new grip cover onto the base of the Tablet-PC.
2.
Attach the grip cover with the two grip cover screws.
3.
Replace the battery. See
Replacing the Main Battery
.
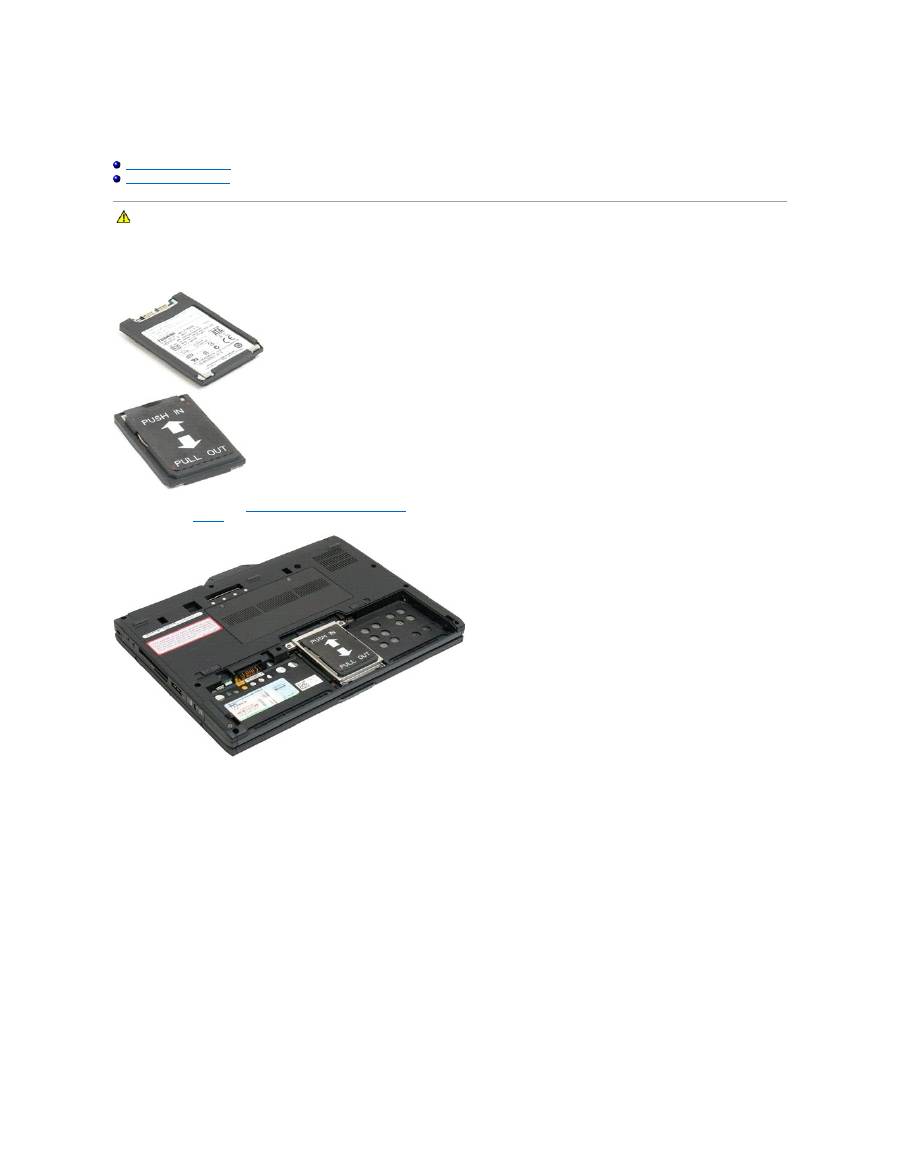
Hard Drive
Dell™ Latitude™ XT2 Service Manual
Removing the Hard Drive
Replacing the Hard Drive
Removing the Hard Drive
1.
Follow the procedures in
Before Working Inside Your Tablet-P C
.
2.
Remove the
battery
from the Tablet-PC.
3.
Loosen the four captive screws on the hard drive bracket.
WARNING:
Before working inside your Tablet-PC, read the safety information that shipped with your Tablet-PC. For additional safety best
practices information, see the Regulatory Compliance Homepage at www.dell.com/regulatory_compliance.
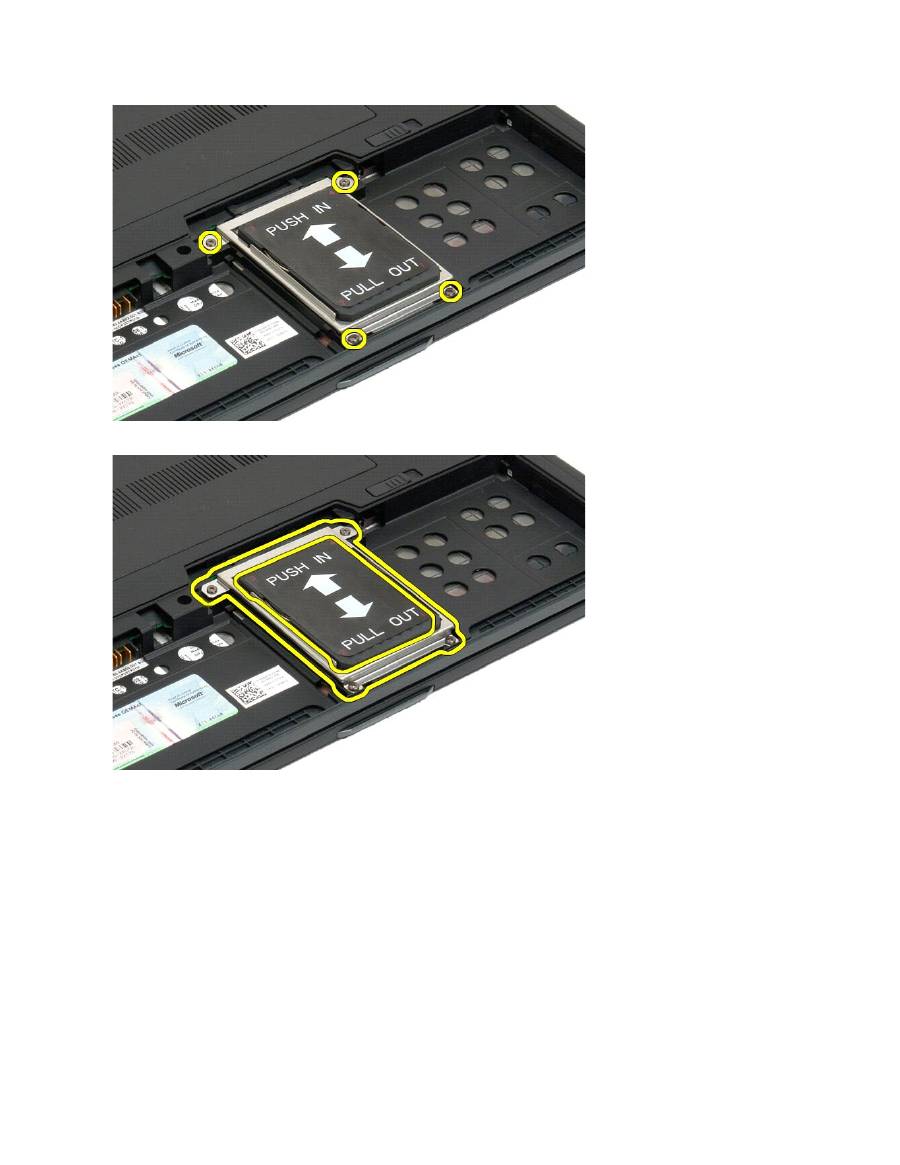
4.
Remove the hard drive bracket.
5.
Slide the hard drive towards the edge of the Tablet-PC to disconnect from the system board.
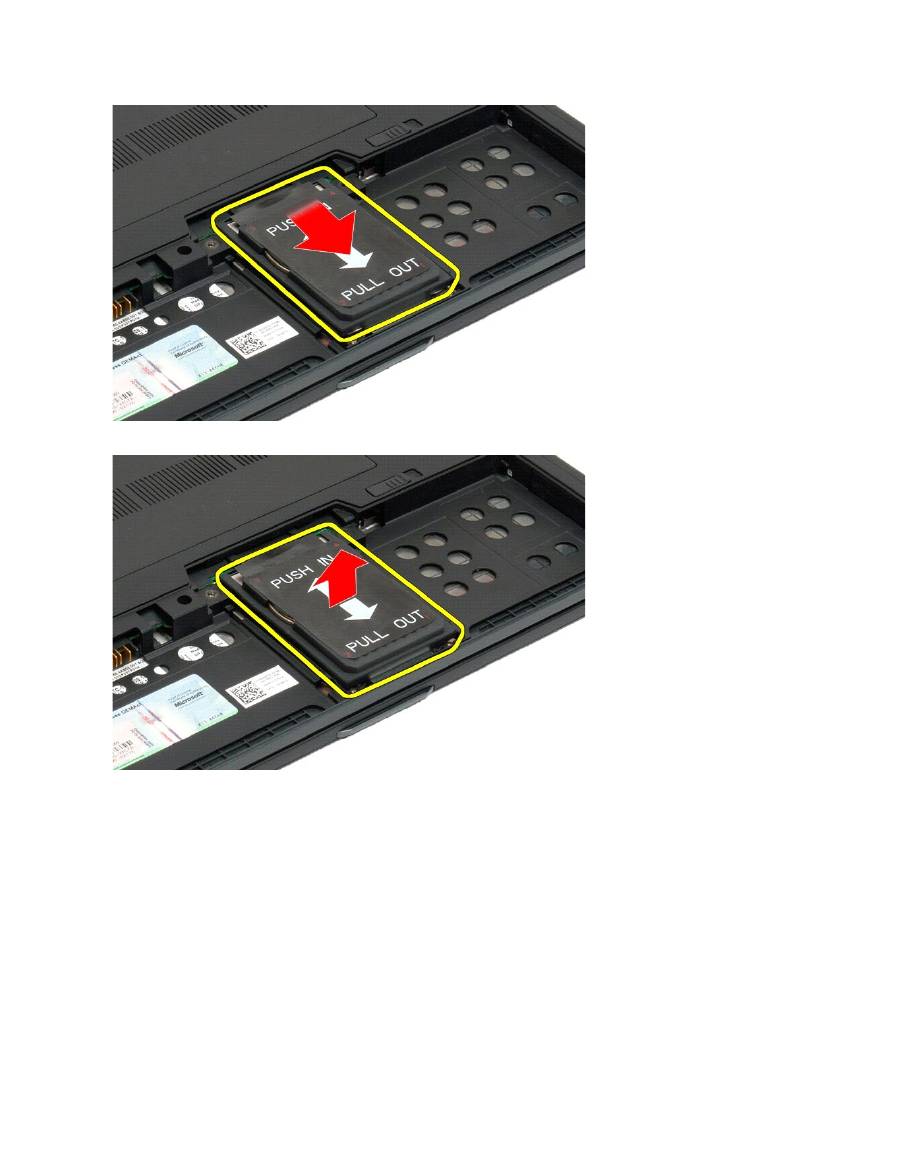
6.
Remove the hard drive from the Tablet-PC.

Replacing the Hard Drive
1.
Slide the new hard drive into position gently until the connector end fits into the system-board connector.
2.
Secure the hard drive into place by replacing the hard drive bracket. Attach the bracket to the Tablet-PC with the four captive screws.
3.
Replace the battery. See
Replacing the Main Battery
.
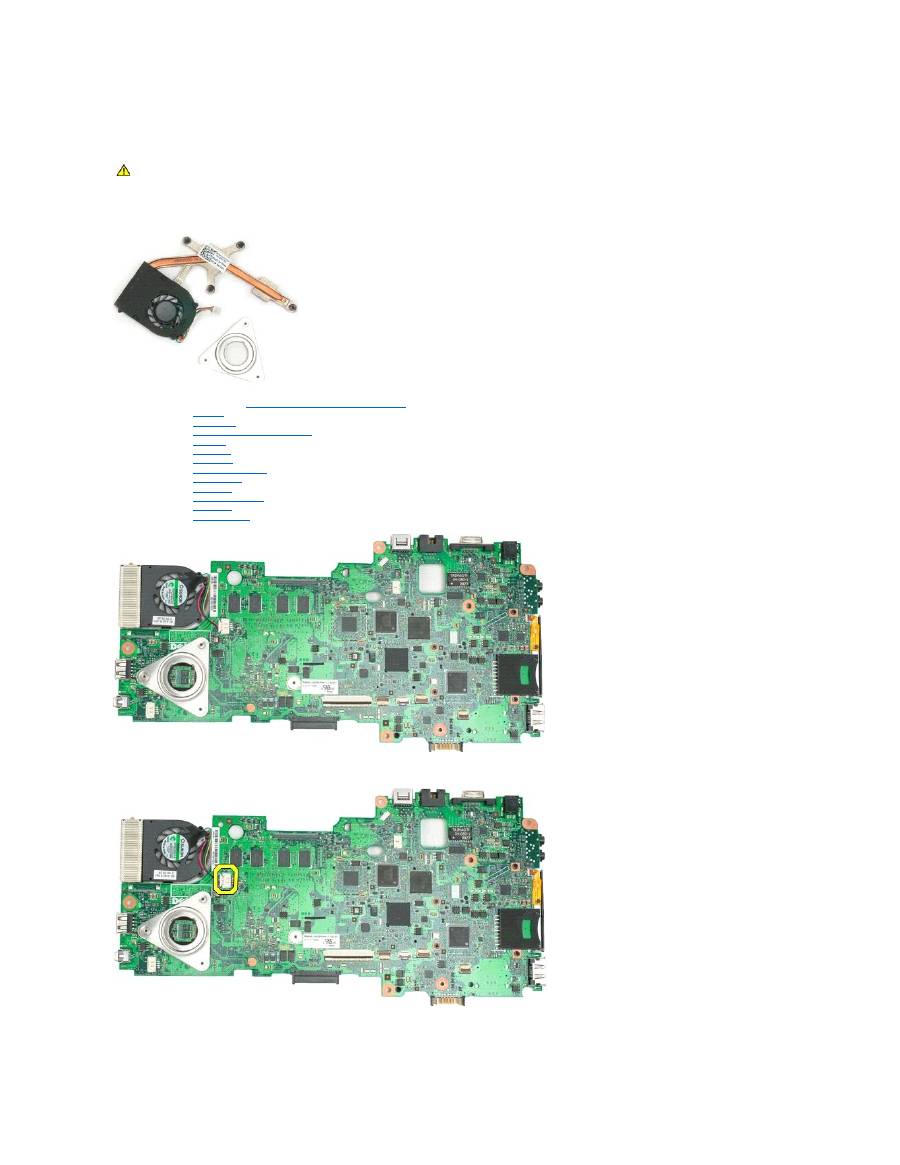
Heat Sink and Fan Assembly
Dell™ Latitude™ XT2 Service Manual
Removing the Heat Sink and Fan Assembly
1.
Follow the procedures in
Before Working Inside Your Tablet-P C
.
2.
Remove the
battery
from the Tablet-PC.
3.
Remove the
hard drive
from the Tablet-PC.
4.
Remove the
memory and mini-card cover
from the Tablet-PC.
5.
Remove the
memory
from the Tablet-PC.
6.
Remove the
mini-card
from the Tablet-PC.
7.
Remove the
BIOS chip
from the Tablet-PC.
8.
Remove the
Bluetooth module
from the Tablet-PC.
9.
Remove the
hinge cover
from the Tablet-PC.
10.
Remove the
keyboard
from the Tablet-PC.
11.
Remove the
display assembly
from the Tablet-PC.
12.
Remove the
palm rest
from the Tablet-PC.
13.
Remove the
system board
from the Tablet-PC.
14.
Disconnect the fan cable from the system board connector, then flip over the system board.
15.
Loosen the four captive screws on the heat sink.
WARNING:
Before working inside your Tablet-PC, read the safety information that shipped with your Tablet-PC. For additional safety best
practices information, see the Regulatory Compliance Homepage at www.dell.com/regulatory_compliance.
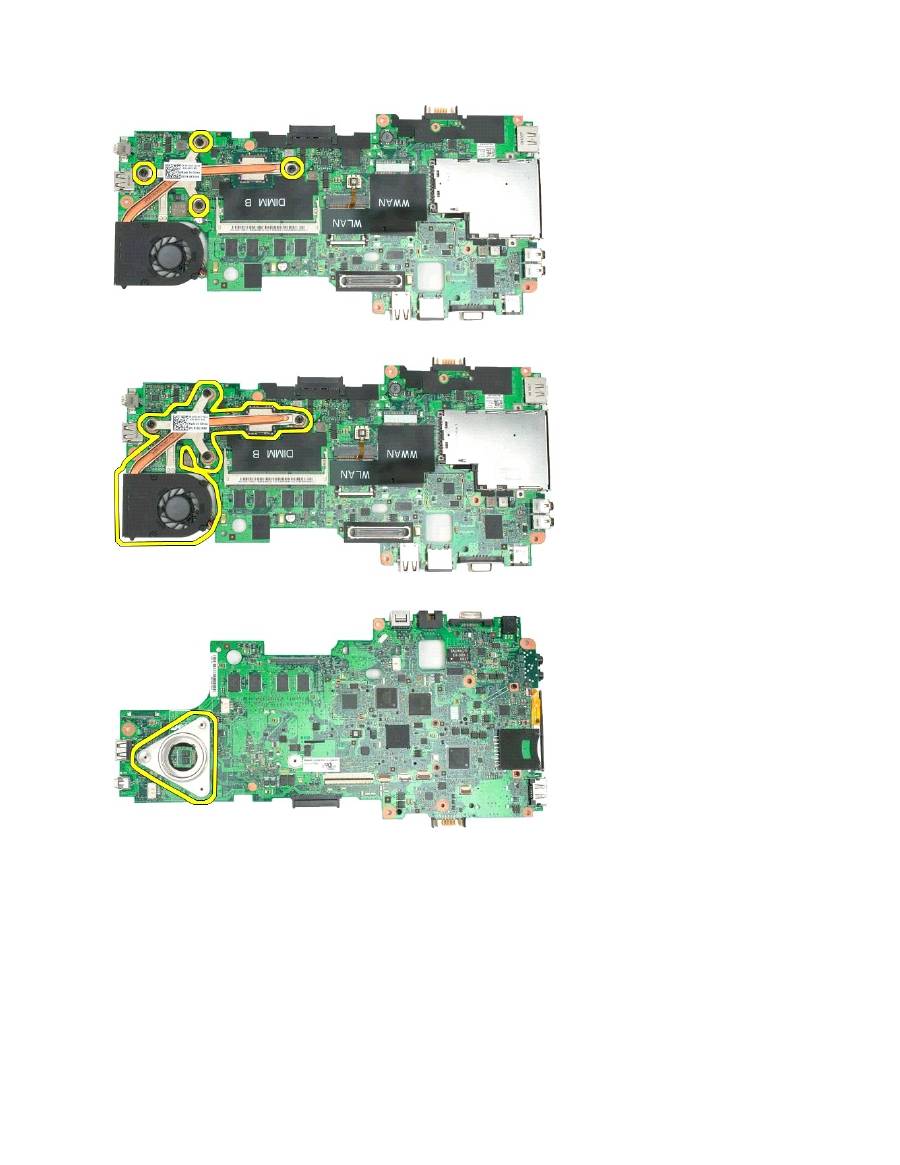
16.
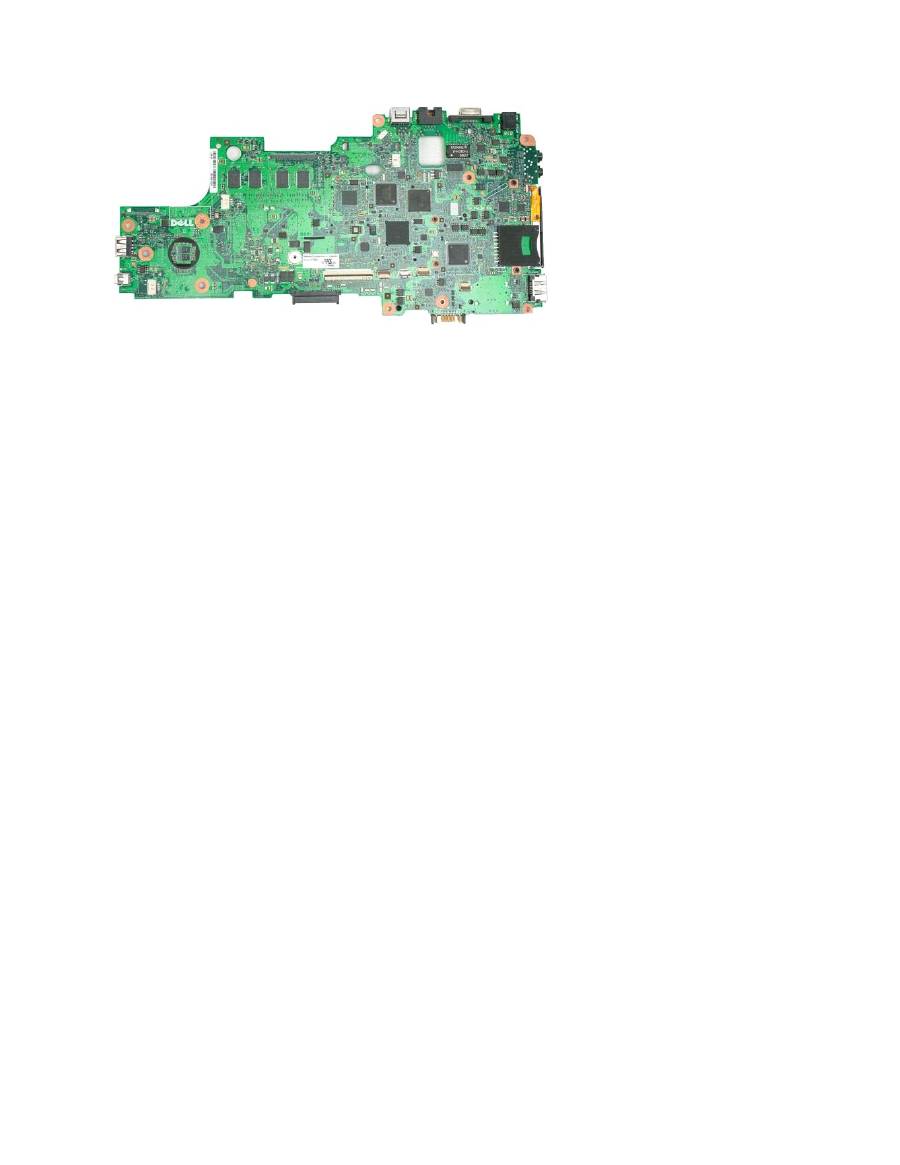
Remove the top section of the heat sink assembly from the system board, then turn over the system board again.
17.
Remove the bottom section of the heat sink assembly.
Keyboard
Dell™ Latitude™ XT2 Service Manual
Removing the Keyboard
Replacing the Keyboard
Removing the Keyboard
1.
Follow the procedures in
Before Working Inside Your Tablet-P C
.
2.
Remove the
battery
from the Tablet-PC.
3.
Remove the
hinge cover
from the Tablet-PC.
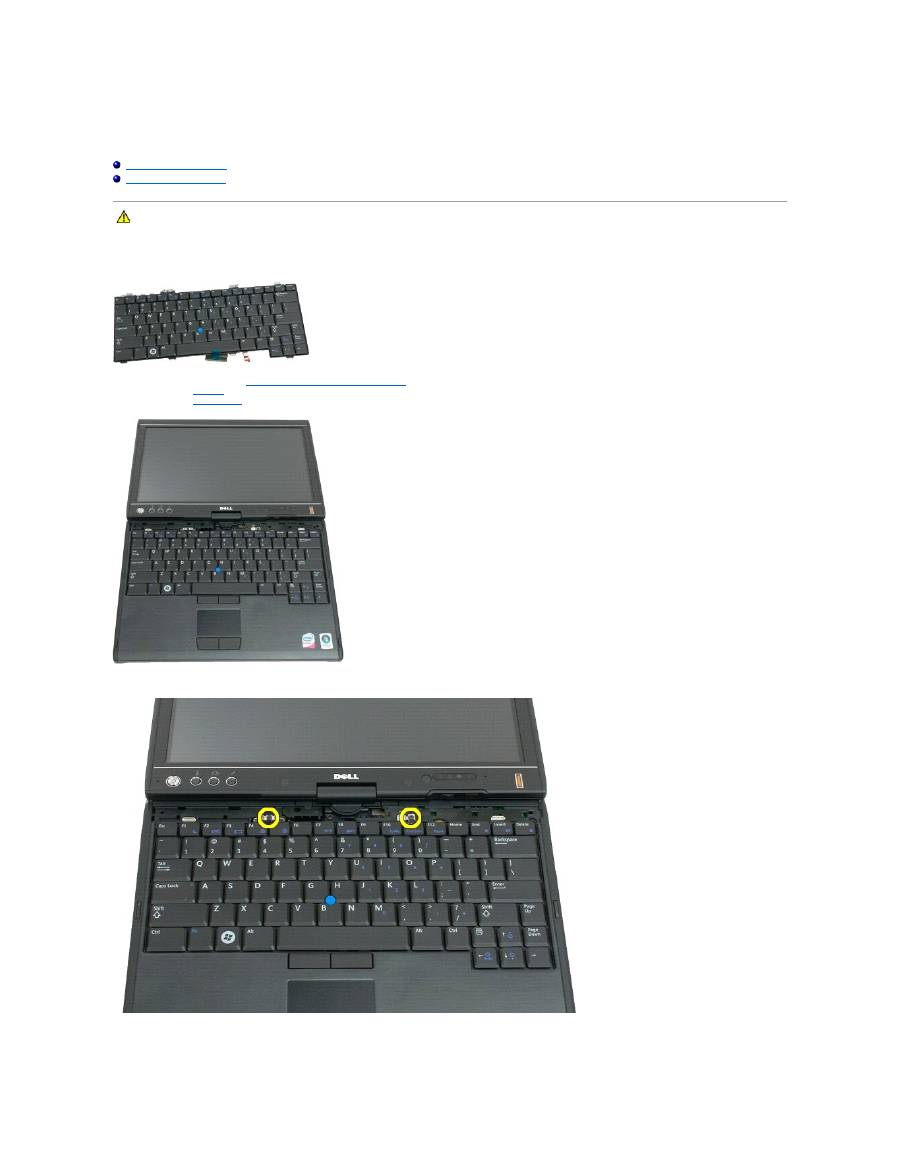
4.
Remove the two screws securing the keyboard to the Tablet-PC.
5.
Gently slide the keyboard towards the display, being careful not to scratch the LCD bezel.
WARNING:
Before working inside your Tablet-PC, read the safety information that shipped with your Tablet-PC. For additional safety best
practices information, see the Regulatory Compliance Homepage at www.dell.com/regulatory_compliance.

6.
Release the zif connector on the touchpad connection.
7.
Disconnect the touch pad cable.

8.
Release the retaining clip on the keyboard connector.
9.
Disconnect the keyboard cable from the system board.

10.
Remove the keyboard from the Tablet-PC.

Replacing the Keyboard
1.
Holding the top of the keyboard slightly above the computer, connect the touchpad cable and the keyboard cable to the system board.
2.
Carefully press each side to snap the keyboard into place.
3.
Secure the keyboard to the Tablet-PC with the two keyboard screws as shown in the illustration in step 4 of Removing the Keyboard.
4.
Replace the
hinge cover
.
5.
Close the display and turn the computer over.
6.
Replace the battery. See
Replacing the Main Battery.
CAUTION:
The key caps on the keyboard are fragile, easily dislodged, and time-consuming to replace. Exercise care when removing and handling
the keyboard.
Display Assembly
Dell™ Latitude™ XT2 Service Manual
Removing the Display Assembly
1.
Follow the procedures in
Before Working Inside Your Tablet-P C
.
2.
Remove the
battery
from the Tablet-PC.
3.
Remove the
memory and mini-card cover
from the Tablet-PC.
4.
Remove the
hinge cover
from the Tablet-PC.
5.
Remove the
grip cover
from the Tablet-PC.
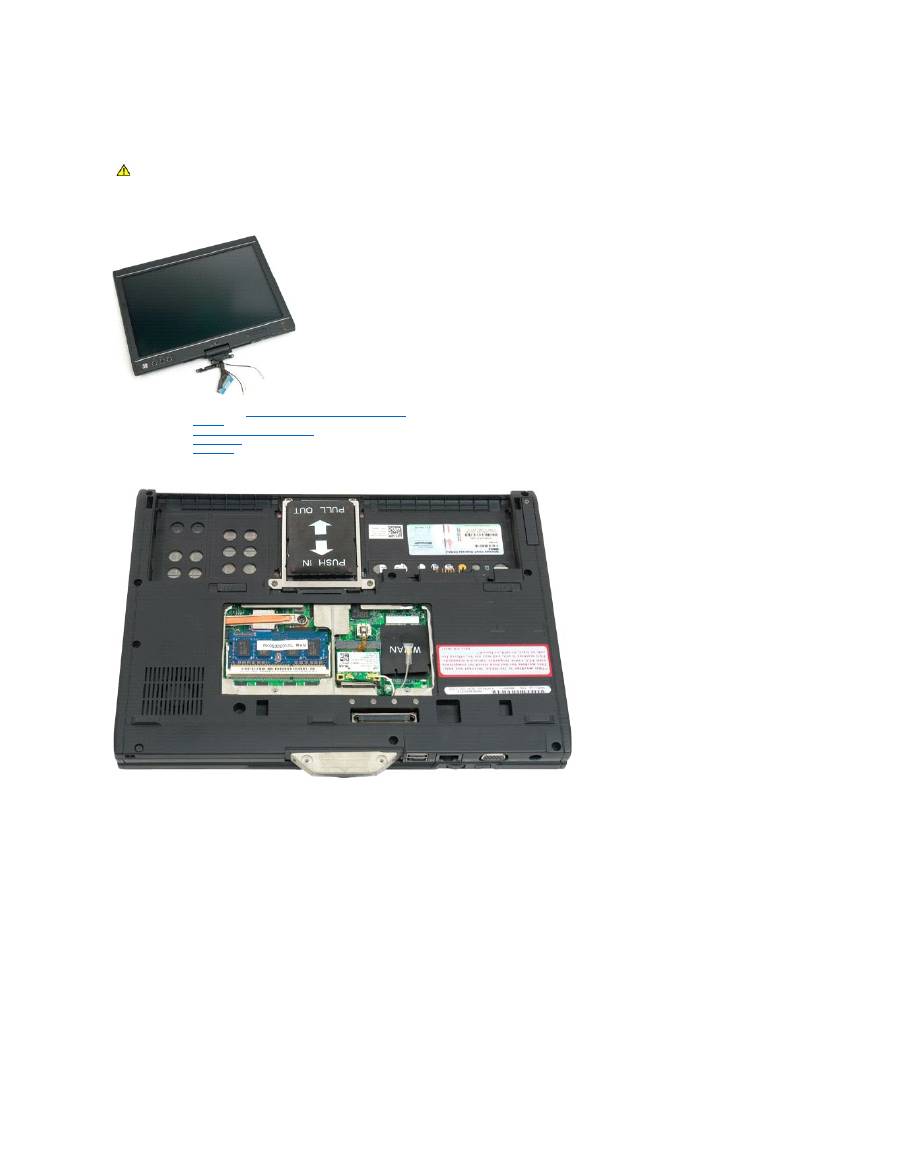
6.
Disconnect any antenna cables from the bottom of the Tablet-PC.
WARNING:
Before working inside your Tablet-PC, read the safety information that shipped with your Tablet-PC. For additional safety best
practices information, see the Regulatory Compliance Homepage at www.dell.com/regulatory_compliance.
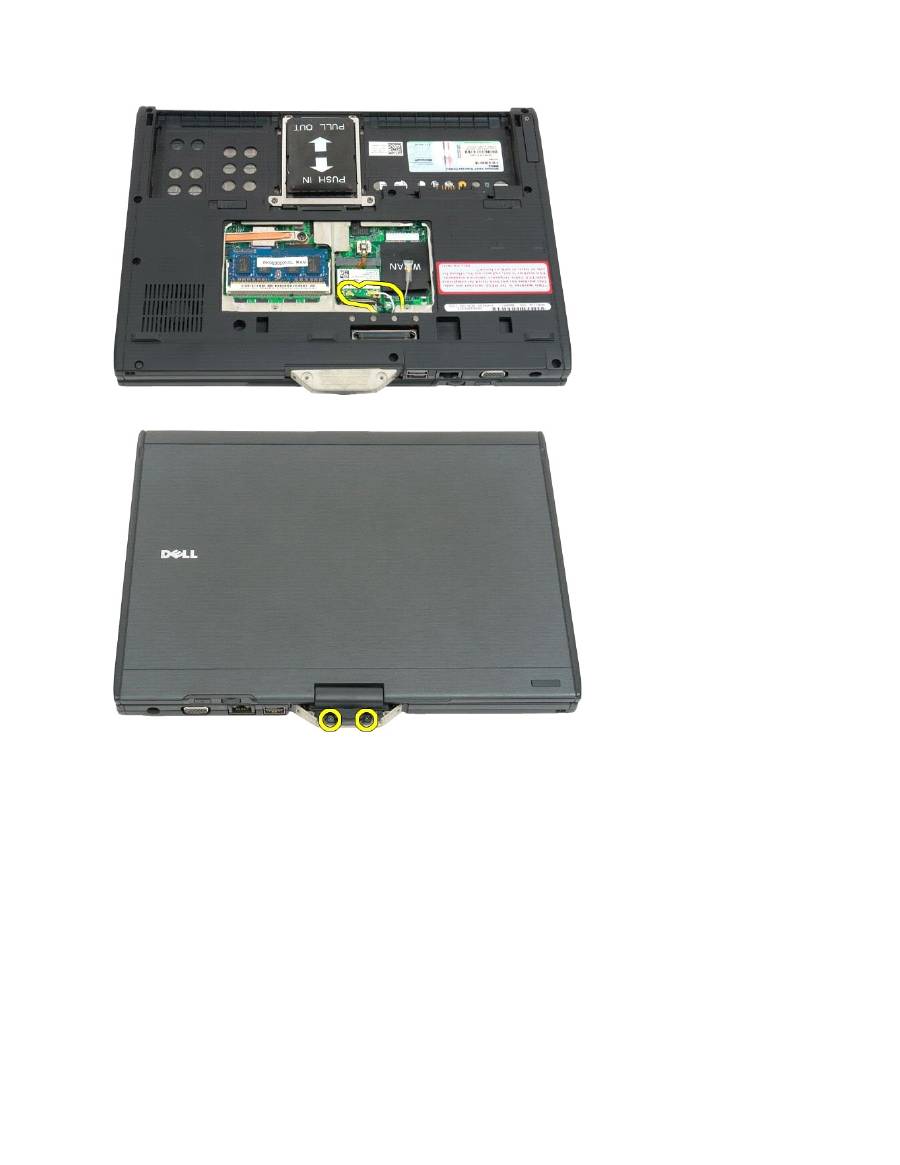
7.
From the top of the closed Tablet-PC, remove the two screws from the display assembly hinge grip.
8.
From the inside of the Tablet-PC, disconnect the display assembly cable from the system board.
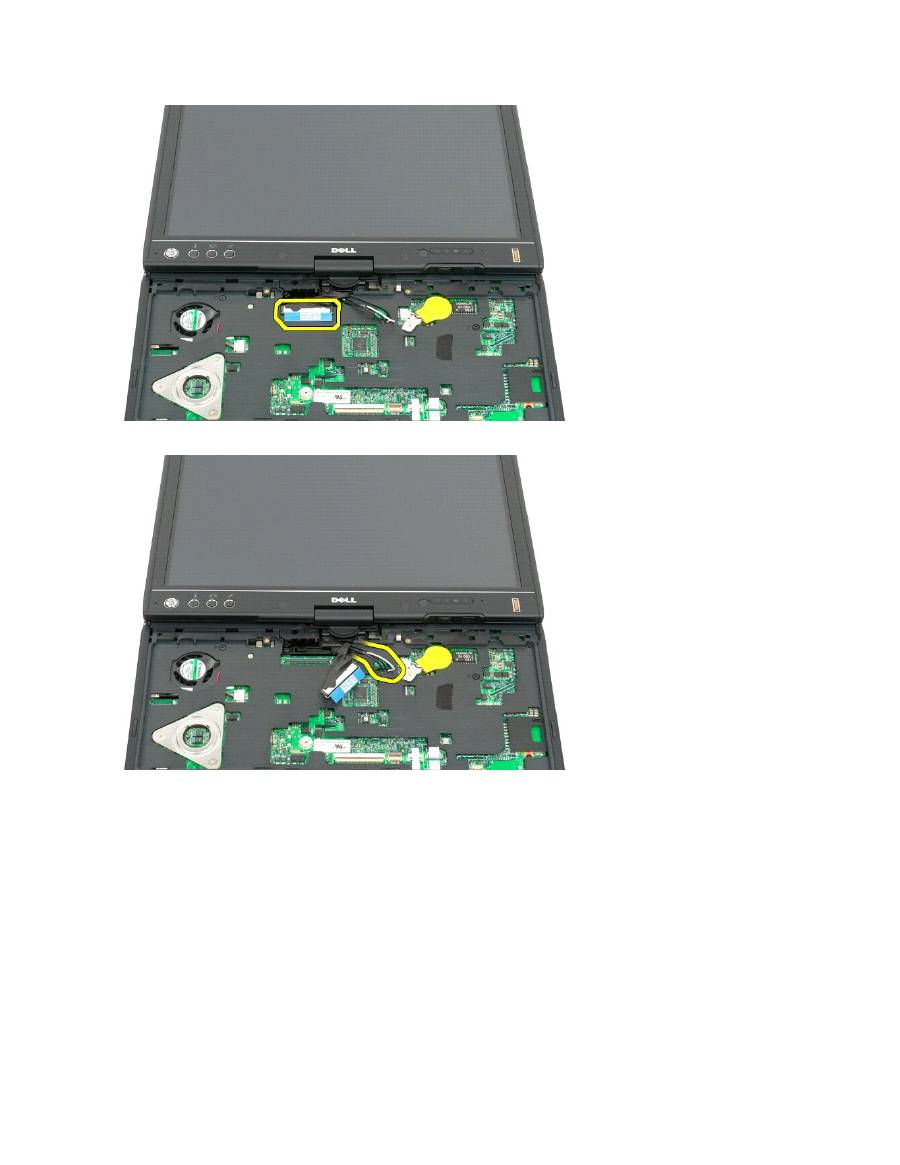
9.
Unthread the antenna cables from the inside of the Tablet-PC.
10.
Remove the five screws securing the display assembly to the Tablet-PC.
