Asus WL-107G: ASUS WLAN Utility Quick Start
ASUS WLAN Utility Quick Start: Asus WL-107G
Quick Start Guide
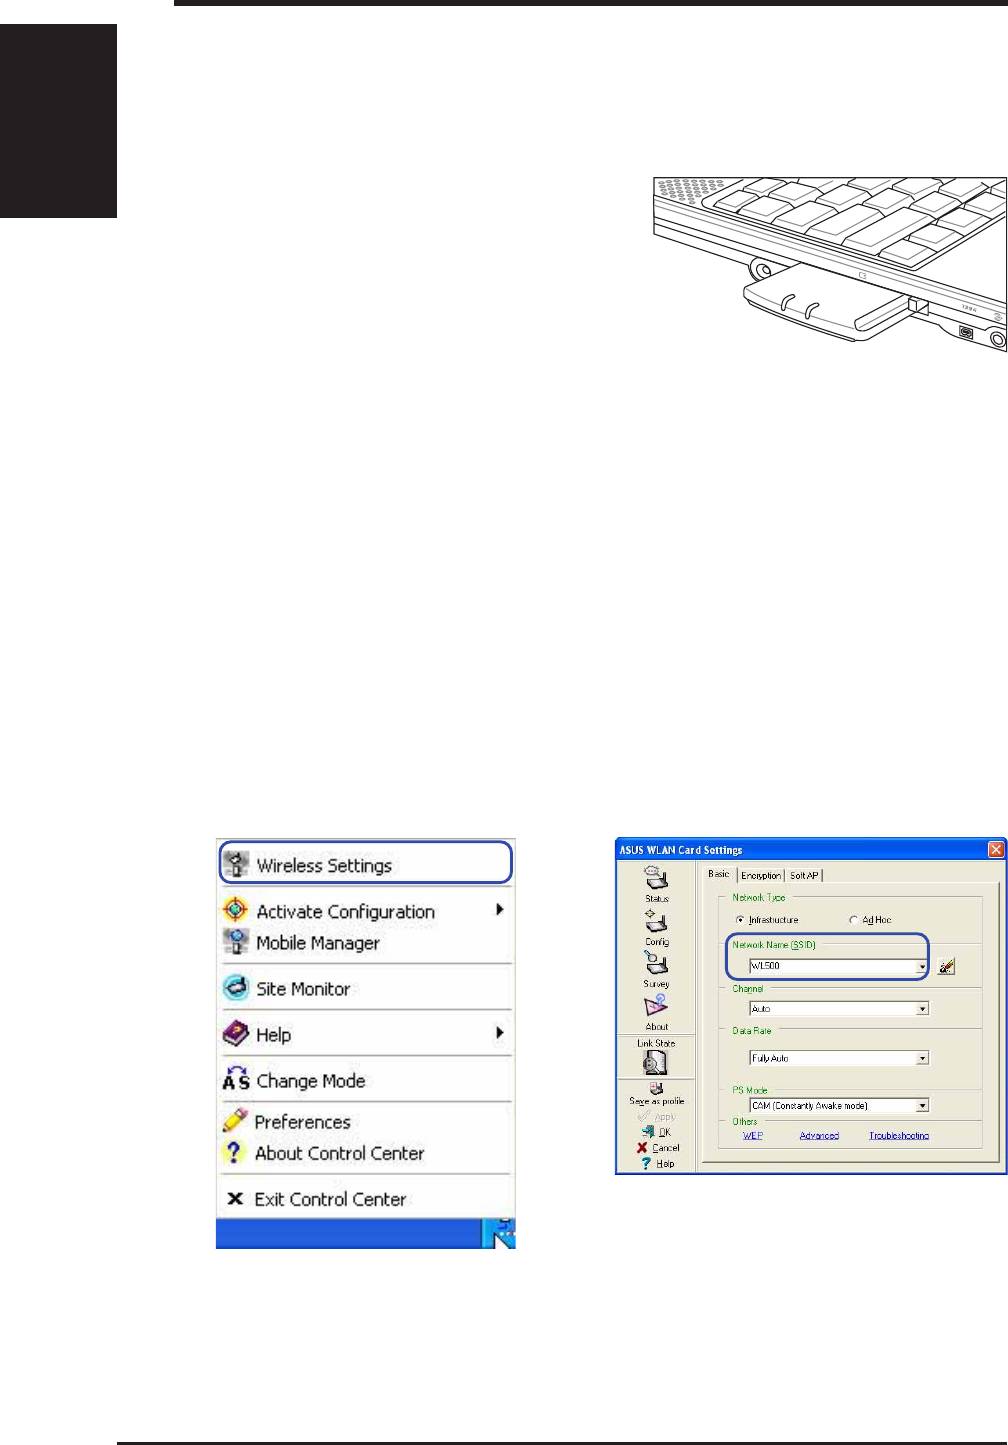
Inserting the ASUS WLAN card
English
Follow these instructions to install the ASUS WLAN card into your computer.
1. Turn ON your computer and enter Windows.
2. Insert the ASUS WLAN card into your
computer’s PCMCIA slot until it is
firmly seated.
3. Windows will automatically detect the
ASUS WLAN card. The “Found New
Hardware” wizard dialog will appear
and begin installing the driver. (Windows 98SE / Me users: During in-
stallation, Windows may prompt you to insert the “ Windows 98SE /
Me CD-ROM” which contains some driver files. Insert your “Windows
98SE / Me CD-ROM” and click Yes.)
4. When the ASUS WLAN card setup is completed you can start up the
WLAN utility to configure your ASUS WLAN card. Please refer to the
User’s Manual for more information.
ASUS WLAN Utility Quick Start
After installing the ASUS WLAN Card Utilities, you may need to make some
settings before being able to use your wireless connection.
1. Right-click the ASUS WLAN icon and se-
2. Set the Network Name (SSID) to the same
lect “Wireless Settings”
name as the SSID set in your wireless ac-
cess point.
4
ASUS WLAN Card
Quick Start Guide
English
English
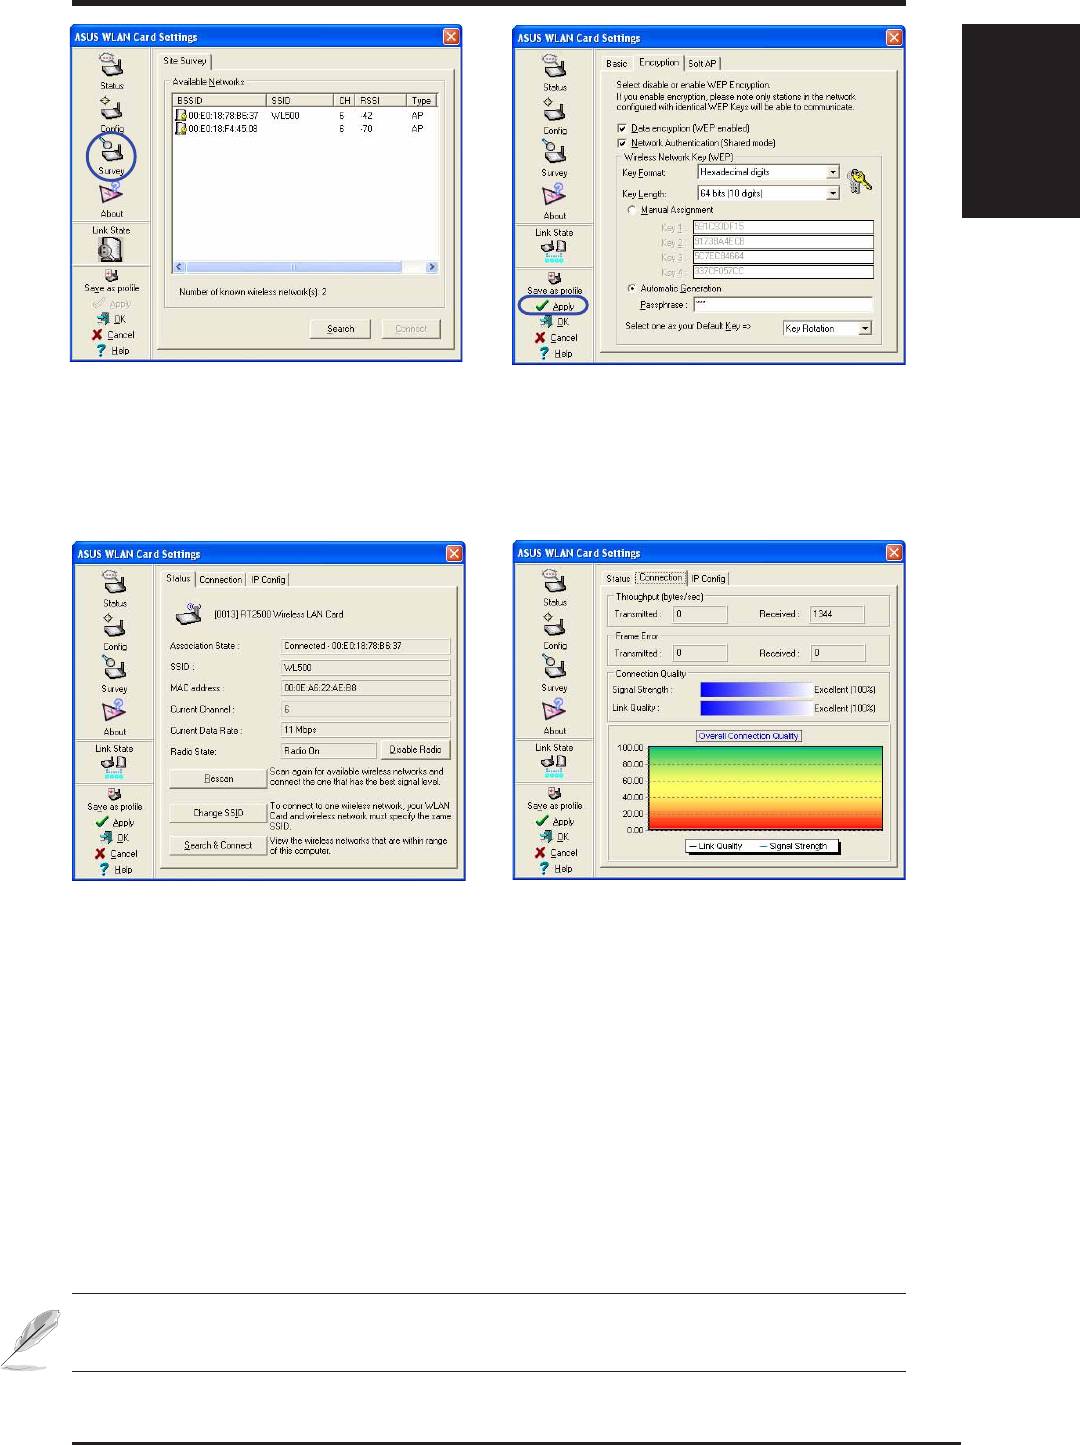
3. Use “Site Survey” if you don’t know the
4. Encryption settings must also match those
name of your access point(s).
set in the access point. Ask your network
administrator about settings if necessary.
Click Apply to save your settings
5. Check the “Status” page to see the “Asso-
6. You can also see the connection quality on
ciation State”. It should show “Connected -
the “Connection” page. Click OK to exit the
xx:xx:xx:xx:xx:xx”.
utility.
NOTE: Please refer to the User’s Manual for details on WEP/WPA
settings and details on using the WLAN utility.
ASUS WLAN Card
5
Оглавление
- System Requirements
- ASUS WLAN Utility Quick Start
- Soft AP (Windows XP Only)
- Configuration requise
- Démarrage rapide des utilitaires ASUS WLAN
- Soft AP (Windows XP uniquement)
- Systemvoraussetzungen
- ASUS WLAN Hilfsprogramm Kurzanleitung
- Soft AP (nur unter Windows XP)
- Requisiti di Sistema
- Esecuzione veloce delle utility ASUS WLAN
- Soft AP (Solo Windows XP)
- Requisitos del sistema
- Inicio rápido de la utilidad ASUS WLAN
- Soft AP (Sólo en Windows XP)
- ребования к системе
- ачало работы с приложениями ASUS
- рограммируемая точка доступа (только в О Windows XP)


