JVC KD-G827: General settings — PSM
General settings — PSM: JVC KD-G827
The list below shows the preset value setting for each sound mode:
Preset values
Sound
Low Mid High
modes
Level FREQ
Q (Band
Level FREQ
Q (Band
Level FREQ
Q (Band
(Frequency)
width)
(Frequency)
width)
(Frequency)
width)
ENGLISH
FLAT 00 60 Hz Q1.25 00 1 kHz Q1.25 00 10 kHz
H.ROCK +03 100 Hz Q1.0 00 1 kHz Q1.25 +02 10 kHz
R & B +03 80 Hz Q1.25 +01 1 kHz Q1.25 +03 15 kHz
POP +02 100 Hz Q1.25 +01 1 kHz Q1.25 +02 10 kHz
JAZZ +03 80 Hz Q1.25 00 1 kHz Q1.25 +03 10 kHz
Fix
DANCE +04 60 Hz Q1.0 -02 1 kHz Q1.0 +01 10 kHz
COUNTRY +02 60 Hz Q1.0 00 1 kHz Q1.0 +02 12.5kHz
REGGAE +03 60 Hz Q1.25 +02 1 kHz Q1.25 +02 12.5kHz
CLASSIC +01 80 Hz Q1.25 00 1 kHz Q1.25 +03 10 kHz
General settings — PSM
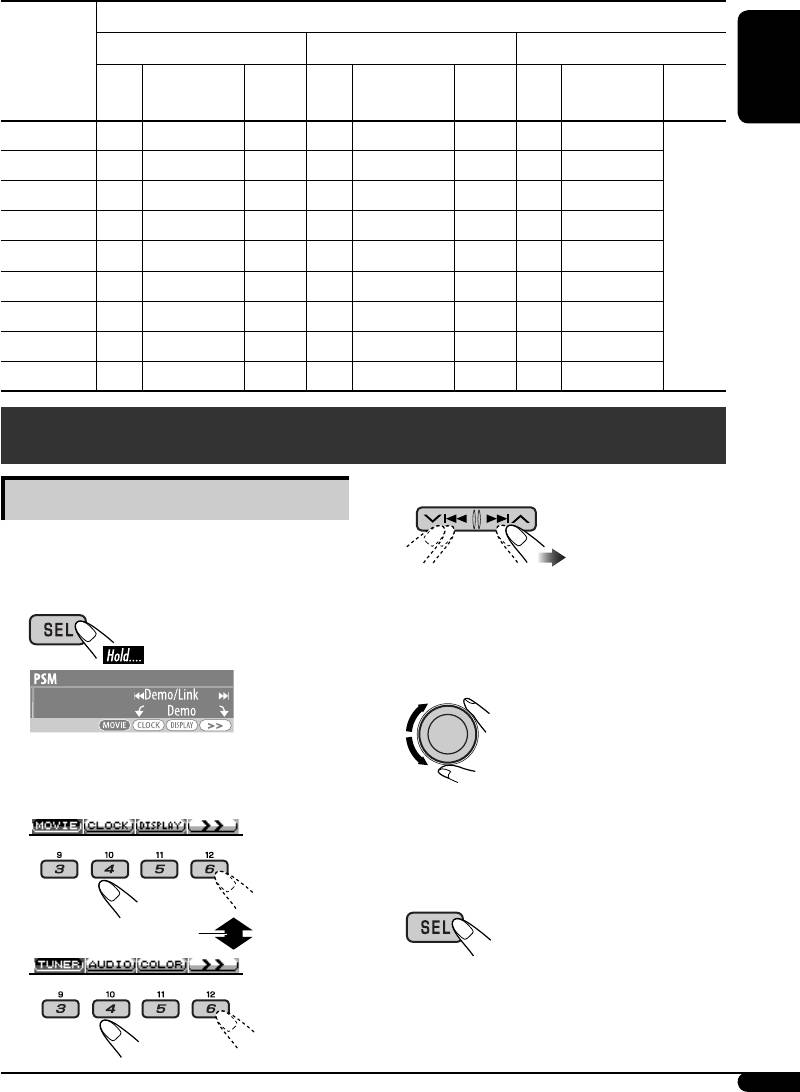
3 Select a PSM item.
Basic procedure
You can change PSM (Preferred Setting Mode)
items listed in the table that follows.
• By pressing either of the buttons
repeatedly, you can also move to the item
1
of the other categories.
4 Adjust the selected PSM item.
An item previously selected appears on the
display.
2 Select a PSM category.
5 Repeat steps 2 to 4 to adjust other
PSM items if necessary.
6 Exit from the setting.
To display the rest
Continued on next page...
19
EN18-27KD-G827[EE]f.indd 19EN18-27KD-G827[EE]f.indd 19 12/23/05 9:53:05 AM12/23/05 9:53:05 AM
Category Indications Selectable settings, [reference page]
Demo/Link
Demo: [Initial]; Display demonstration will be
Display
activated automatically, [6].
demonstration
Image Link: To show a still image while playing MP3/
WMA tracks, [14, 37].
Off: Cancels.
ENGLISH
• Still image appears if no operation is done for about
20 seconds.
MOVIE
LevelMeter
You can select the different level meter patterns.
Audio level meter
Meter 1 [Initial] O Meter 2
• Press DISP repeatedly to show the selected level meter.
Pict
Download: [Initial]; Download files, [24].
Pictures
Set: Activate the stored files, [26]
Delete: Delete the stored files, [24].
Clock Hr
0 – 23 (1 – 12AM/1 – 12PM), [7]
Hour adjustment
[Initial: 0 (0:00)]
Clock Min
00 – 59, [7]
Minute adjustment
[Initial: 00 (0:00)]
24H/12H
12Hours – 24Hours, [7]
CLOCK
Time display mode
[Initial: 24Hours]
Clock Adj
Auto: [Initial]; The built-in clock is automatically
Clock adjustment
adjusted using the CT (clock time) data in
the RDS signal.
Off: Cancels.
Scroll
Once: [Initial]; For disc information: scrolls the
Scroll
disc information only once.
For DAB text: scrolls the detailed DAB text.
Auto: For disc information: repeats the scroll (in
5-second intervals).
For DAB text: scrolls the detailed DAB text.
Off: For disc information: cancels.
For DAB text: shows only headline if any.
• Pressing DISP for more than one second can scroll the
DISPLAY
display regardless of the setting.
Dimmer
Auto: [Initial]; Dims the display when you turn on
Dimmer
the headlights.
Off: Cancels.
On: Activates dimmer.
Time Set: Set the timer for dimmer, [26].
Any hour – Any hour
1
From – To*
:
[Initial: 18 – 7]
20
EN18-27KD-G827[EE]f.indd 20EN18-27KD-G827[EE]f.indd 20 12/23/05 9:53:06 AM12/23/05 9:53:06 AM

Category Indications Selectable settings, [reference page]
Contrast
1 – 10: [Initial: 5]; Adjust the display contrast to
Contrast
make the display indications clear and
legible.
LCD Type
Negative: [Initial]; Negative pattern of the display
Display type
(except still images and animation).
ENGLISH
Auto: Positive pattern will be selected during the
2
day time*
; while negative pattern will be
2
used during the night time*
.
DISPLAY
Positive: Positive pattern of the display.
Font Type
You can select the font type used on the display.
Font type
1 [Initial] O 2
Tag
On: [Initial]; Shows the Tag information display
Tag display
while playing MP3/WMA tracks, [13].
Off: Cancels.
AF-Regn’l
When the received signals from the current FM RDS station
Alternative
become weak....
frequency/
AF: [Initial]; Switches to another station (or
regionalization
service) (the programme may differ from the
reception
one currently received), [12, 34].
• The AF indicator lights up.
AF REG: Switches to another station broadcasting the
same programme.
• The AF and REG indicators light up.
Off: Cancels (not selectable when “DAB AF” is
set to “On”).
TUNER
3
TA Volume
0 — 30 or 0 — 50*
, [11]
Traffic announcement
[Initial 15]
volume
P-Search
On: Using the AF data, the unit tunes in to
Programme search
another frequency broadcasting the same
programme as the original preset RDS
station is if the preset station signals are not
sufficient.
Off: [Initial]; Cancels
1
*
Adjustable only when “Dimmer” is set to “Time Set.”
2
*
Depends on the “Dimmer” setting.
3
*
Depends on the amplifier gain control.
Continued on next page...
21
EN18-27KD-G827[EE]f.indd 21EN18-27KD-G827[EE]f.indd 21 12/23/05 9:53:07 AM12/23/05 9:53:07 AM

Category Indications Selectable settings, [reference page]
IF Band
Auto: [Initial]; Increases the tuner selectivity to
Intermediate
reduce interference noises between close
frequency filter
stations. (Stereo effect may be lost.)
Wide: Subject to the interference noises from
adjacent stations, but sound quality will
ENGLISH
not be degraded and the stereo effect will
TUNER
remain.
4
DAB AF*
On: [Initial]; Traces the programme among DAB
Alternative frequency
services and FM RDS stations, [12, 34].
reception
Off: Cancels.
5
Ext Input*
Changer: [Initial]; To use a JVC CD changer, [12], an
External input
Apple iPod or a JVC D. player, [28].
Ext In: To use any other external component than
the above, [30].
Beep
On: [Initial]; Activates the key-touch tone.
Key-touch tone
Off: Deactivates the key-touch tone.
Telephone
Muting1/Muting2: Select either one which mutes the
Telephone muting
sounds while using a cellular phone.
AUDIO
Off: [Initial]; Cancels.
• If CD, CD changer, or USB memory has been selected as
the source, playback pauses during telephone muting.
Amp Gain
You can change the maximum volume level of this unit.
Amplifier gain
High PWR: [Initial]; Volume 00 – Volume 50
control
Low PWR: Volume 00 – Volume 30 (Select this if the
maximum power of the speaker is less than
50 W to prevent them from being damaged.)
Color Sel
[Initial: All Source]; You can select your favorite display color
Color selection
for each source (or for all sources), [26].
Color Set
You can create your own colors, and select them for the
display color, [27].
6
Day Color: User color during the day time*
.
COLOR
6
NightColor: User color during the night time*
.
Red
+00 – +11 [Initial: Day Color: +07, NightColor: +05]
Green
+00 – +11 [Initial: Day Color: +07, NightColor: +05]
Blue
+00 – +11 [Initial: Day Color: +07, NightColor: +05]
4
*
Displayed only when the DAB tuner is connected.
5
*
Displayed only when one of the following sources is selected—TUNER, CD, or USB.
6
*
Depends on the “Dimmer” setting.
22
EN18-27KD-G827[EE]f.indd 22EN18-27KD-G827[EE]f.indd 22 12/23/05 9:53:09 AM12/23/05 9:53:09 AM
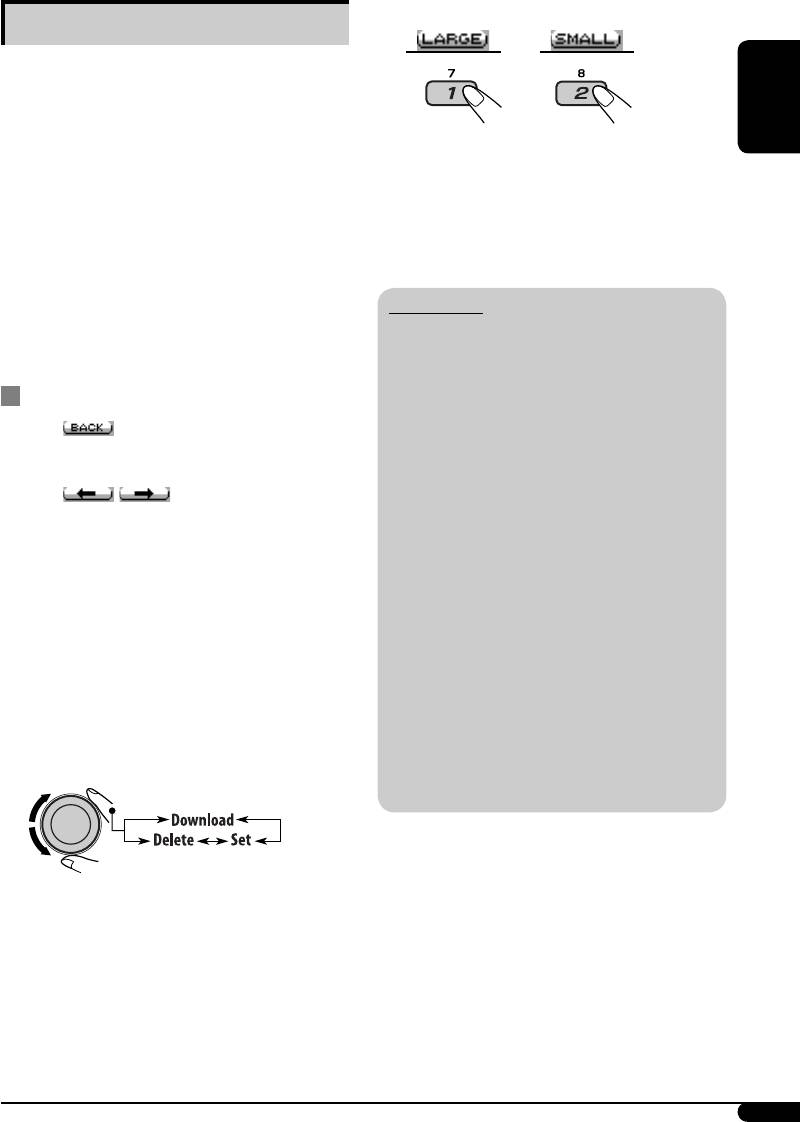
4 Select a picture size.
Graphic displays
Before starting the following procedure,
or
prepare a CD-R including still images (pictures)
and animations (movies).
• With Image Converter (Ver 3.0) included in
ENGLISH
The display goes to the PICT menu.
the supplied CD-ROM, you can create and
download your own images and animations.
• To download the file(s), see page 24.
(Samples are included in the CD-ROM.)
• To delete the file(s), see pages 24 and 25.
These images/animation will be shown during
• To activate the file(s), see page 26.
playing a source.
• You can store “LARGE” or “SMALL” pictures
and movies.
Picture: 30 still images each
IMPORTANT:
Movie: 60 frames each
• Refer also to Image Converter PDF files
included in the “Manual” folder on the
supplied CD-ROM.
Basic procedure
• Still images (pictures) and animations
(movie) should have the following
• When appears on the display, you can
extension code in their file names:
move back to the previous display by pressing
– jtl: for large size still images
number button 3.
– jtm: for small size still images
• When
/ appears on the display,
– jta: for large size animations
you can move to the other lists by pressing
– jtb: for small size animations
number button 5 or 6 repeatedly.
– jtw: for Image Link (see pages 14 and 20)
• Before you download or delete the files,
1 Insert a CD-R or the supplied
observe the following:
CD-ROM.
– Do not download a file while driving.
–
Do not turn off the ignition key of the car
while downloading or deleting a file.*
2 Follow steps 1 to 3 on page 19.
– Do not detach the control panel while
• In step 2, select “MOVIE.”
downloading or deleting a file.*
• In step 3, select “Pict.”
– Do not attach or detach a USB memory
while downloading a file.*
3 Select an item.
* If you do so, the file download or deletion
will not be done correctly.
23
EN18-27KD-G827[EE]f.indd 23EN18-27KD-G827[EE]f.indd 23 12/23/05 9:53:10 AM12/23/05 9:53:10 AM
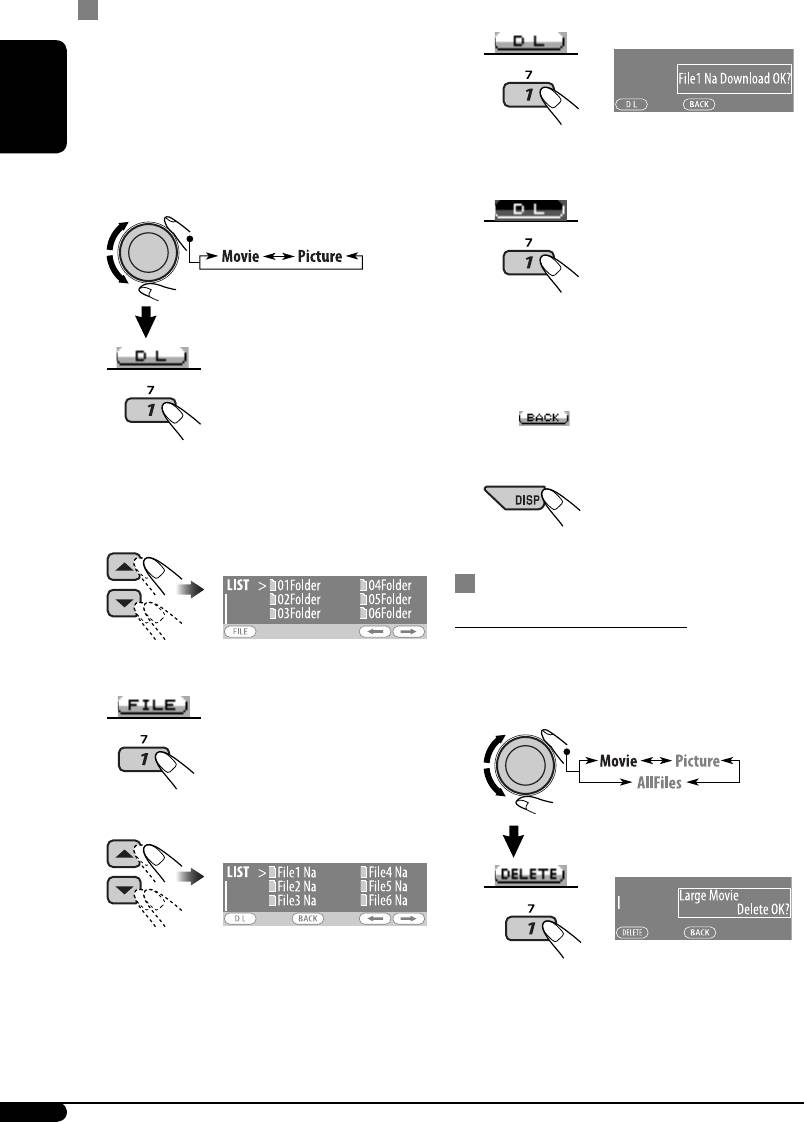
Downloading pictures or an animation
6 Confirm the selection.
• It takes a long time to download an
animation. For details, see page 38.
• To activate the downloaded files, see page 26.
EX.: When “File1 Na” is selected
ENGLISH
1 Follow steps 2 to 4 on page 23.
• In step 3, select “Download.”
7 Download the file.
2
8 • To download more pictures from
the same folder, repeat steps 5 to 7.
• To download more pictures from
another folder, press number button
3 ( ). Then, repeat steps 3 to 7.
“File Check” appears and then the Folder
9 Exit from the setting.
List appears on the display.
3 Select a folder.
Deleting the files
Deleting the stored animation
1 Follow steps 2 to 4 on page 23.
4 Enter the File List.
• In step 3, select “Delete.”
2
5 Select a file.
EX.: When “LARGE” is selected in
step 4 on page 23
24
EN18-27KD-G827[EE]f.indd 24EN18-27KD-G827[EE]f.indd 24 12/23/05 9:53:11 AM12/23/05 9:53:11 AM
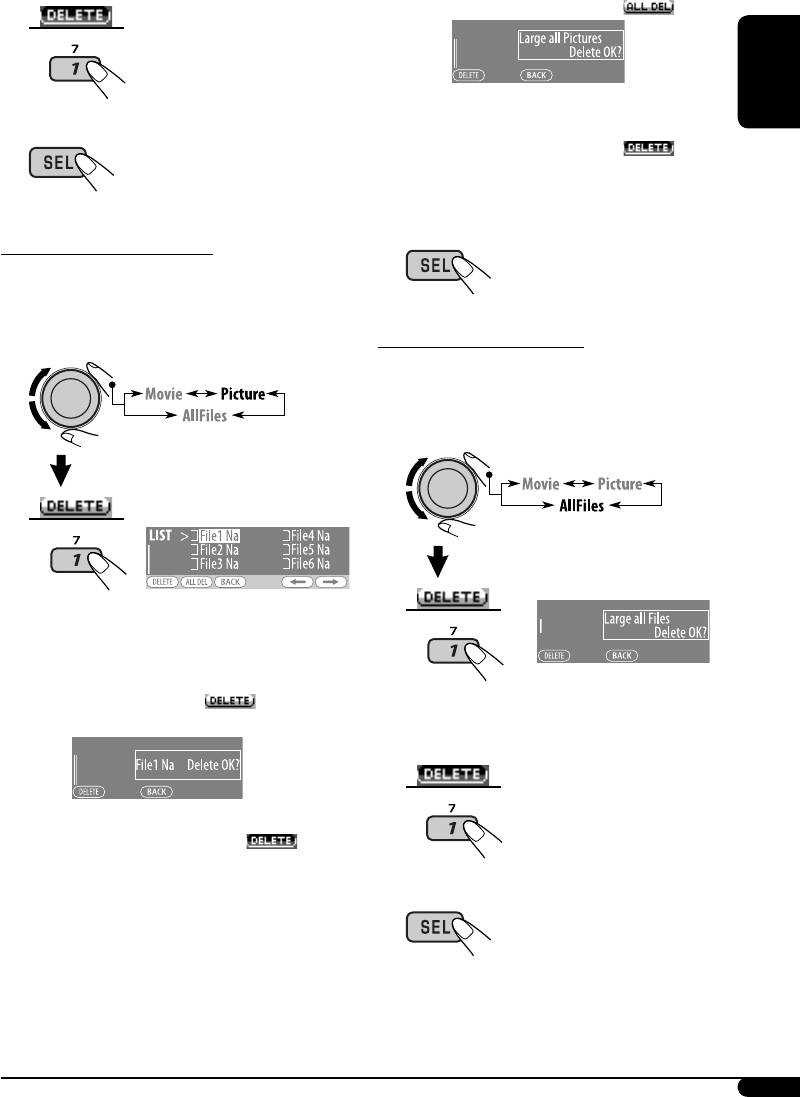
• To delete all the stored pictures
3 Delete the animation.
1 Press number button 2 ( ).
EX.: When “LARGE” is selected in step 4 on page
23
ENGLISH
4 Exit from the setting.
2 Press number button 1 (
) to
delete all the stored pictures.
4 Exit from the setting.
Deleting the stored pictures
1 Follow steps 2 to 4 on page 23.
• In step 3, select “Delete.”
Deleting all the stored files
2
1 Follow steps 2 to 4 on page 23.
• In step 3, select “Delete.”
2
The File List appears on the display.
3 • To delete one of the stored pictures
EX.: When “LARGE” is selected in
1 Use 5 / ∞ to select a file. Then, press
step 4 on page 23
number button 1 (
) to confirm
the selection.
3 Delete all the stored files.
EX.: When “File1 Na” is selected
2 Press number button 1 (
) to
delete the selected file.
3 Repeat steps 1 and 2 to delete more
4 Exit from the setting.
pictures.
25
EN18-27KD-G827[EE]f.indd 25EN18-27KD-G827[EE]f.indd 25 12/23/05 9:53:12 AM12/23/05 9:53:12 AM
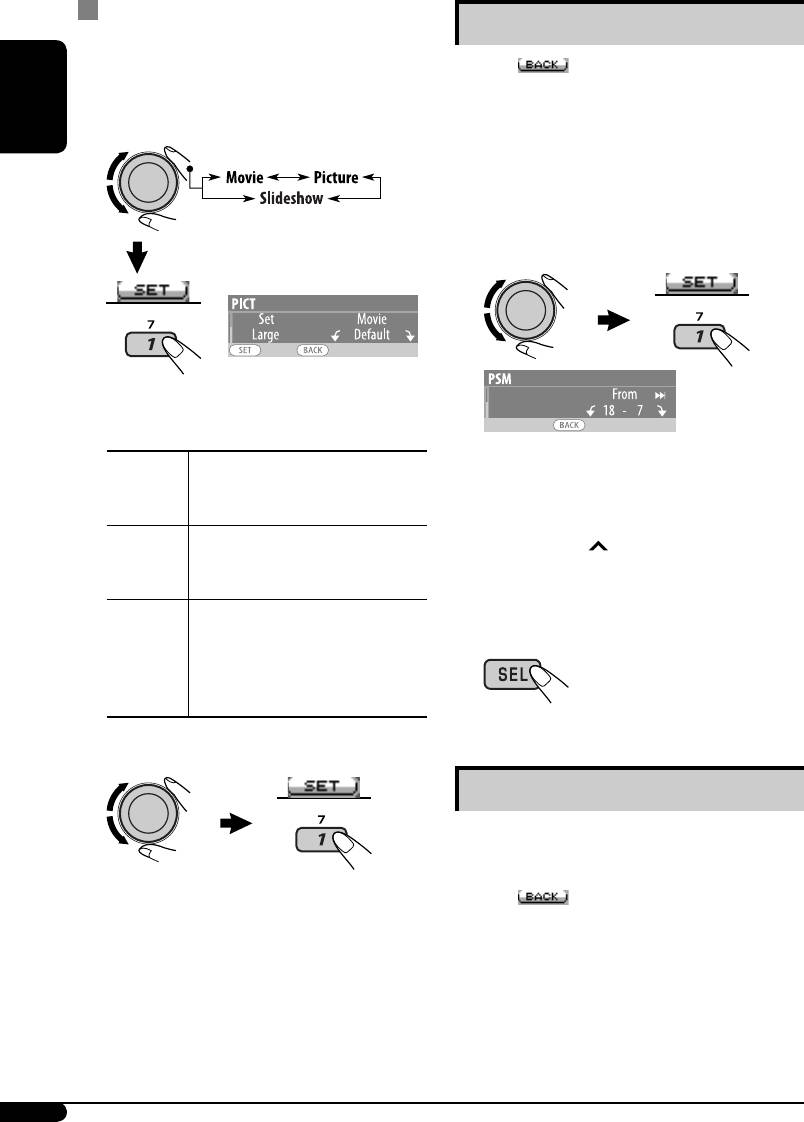
Activating the downloaded files
Setting the time for dimmer
1 Follow steps 2 to 4 on page 23.
• When appears on the display, you can
• In step 3, select “Set.”
move back to the previous display by pressing
number button 3.
2 Select the display type.
ENGLISH
1 Follow steps 1 to 3 on page 19.
• In step 2, select “DISPLAY.”
• In step 3, select “Dimmer.”
2 Select “Time Set.”
EX.: When “LARGE” is selected in
step 4 on page 23 and “Movie”
is selected
Movie
Your edited animation stored
3 Adjust the dimmer time.
in “Movie” is activated. \ Go
1 Turn the control dial to set the dimmer
to step 3.
time.
Picture
One of your edited still images
2 Press ¢ to select “To.” Then, turn
stored in “Picture” is activated.
the control dial to set the dimmer end
\ Go to step 3.
time.
Slideshow
All stored still images are
activated and shown in
4 Exit from the setting.
sequence (UserSlide).
• If no still image is stored,
beeps sound.
3 Select a file.*
Changing the display color
You can select your favorite display color for
each source (or all sources).
The unit returns to the playback display.
• When
appears on the display, you can
move back to the previous display by pressing
• To display the activated files, see page 7.
number button 3.
* If no still image or no animation is stored, you
can only select “Default.”
26
EN18-27KD-G827[EE]f.indd 26EN18-27KD-G827[EE]f.indd 26 12/23/05 9:53:13 AM12/23/05 9:53:13 AM
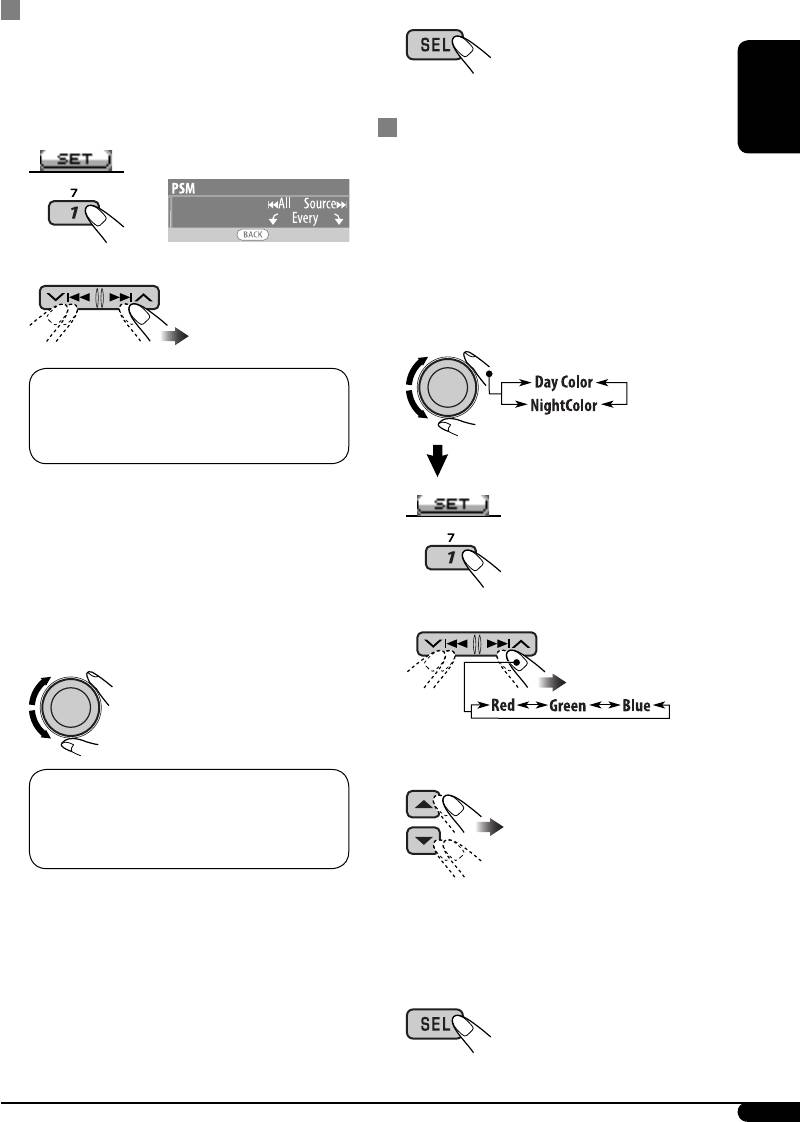
Setting the display color
6 Exit from the setting.
1 Follow steps 1 to 3 on page 19.
• In step 2, select “COLOR.”
• In step 3, select “Color Sel.”
Creating your own color—User Color
ENGLISH
2
You can create your own colors—“Day Color”
or “NightColor.”
1 Follow steps 1 to 3 on page 19.
• In step 2, select “COLOR.”
3
Select a source.
• In step 3, select “Color Set.”
2 Select “Day Color” or “NightColor.”
1
All Source*
O CD O Changer (or Ext
2
3
3
In*
) O USB*
O FM O AM O DAB*
3
3
O Ipod*
/D.PLAYER*
O (back to the
beginning)
1
*
When you select “All Source,” you can use
the same color for all the sources.
2
*
Depends on the “Ext Input” setting, see
page 22.
3
*
Displayed only when the target
component is connected.
3 Select a primary color.
4 Select a color.
4 Adjust the level (+00 to +11) of the
selected primary color.
4
Every*
O Aqua O Sky O Sea O Leaves
O Grass O Apple O Rose O Amber
O Honey O Violet O Grape O Pale O
5
User*
O (back to the beginning)
4
*
The color changes every 2 seconds.
5 Repeat steps 3 and 4 to adjust other
*
5
The user-edited colors—“Day Color” and
“NightColor” will be applied (see right
primary colors.
column for details).
6 Exit from the setting.
5 Repeat steps 3 and 4 to select the color
for each source (except when selecting
“All Source” in step 3).
27
EN18-27KD-G827[EE]f.indd 27EN18-27KD-G827[EE]f.indd 27 12/23/05 9:53:15 AM12/23/05 9:53:15 AM
Оглавление
- CONTENTS
- Control panel
- Remote controller — RM-RK50
- ⁄ Adjust the volume.
- Radio operations
- FM RDS operations
- ⁄ Start searching for your favorite
- Disc/USB memory
- ~
- Sound adjustments
- General settings — PSM
- Title assignment
- ~
- Other external component operations
- Ÿ Turn on the connected component Ÿ
- More about this unit
- Maintenance
- Troubleshooting
- Specifications
- CОДЕРЖАНИЕ
- Панель управления
- Пульт дистанционного управления — RM-RK50
- ⁄ Настройка громкости.
- Операции с радиоприемником
- Операции с FM RDS
- ⁄ Запустите поиск любимой
- ~
- ~
- Настройки звучания
- Общие настройки — PSM
- Присвоения названия
- ~
- Другие операции с внешним устройством
- Ÿ Включите подключенное Ÿ
- Дополнительная
- Обслуживание
- Устранение проблем
- Технические характеристики
- Please reset your unit


