Yamaha DVD-S1800: SETUP MENU
SETUP MENU: Yamaha DVD-S1800
SETUP MENU
English
SETUP MENU
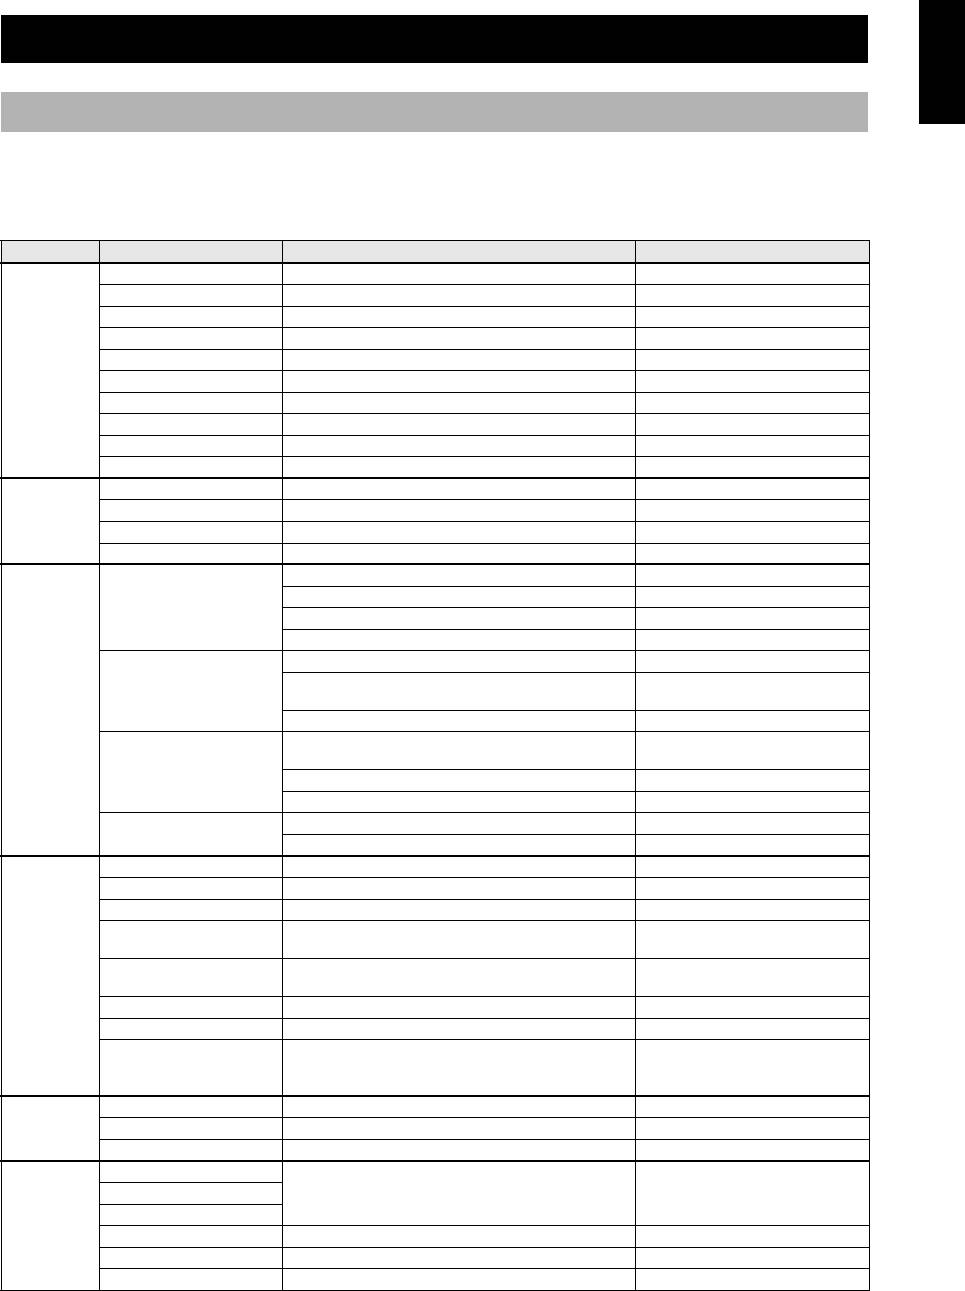
Menu overview
y
• The initial setting for each parameter is indicated in bold.
• If the settings you have made are inappropriate, you can always reset all options and your personal settings to the initial factory
settings. For details, see “Resetting the system” on page 30.
Main Menu Menu item Setting Item/Submenu Setting item/Parameter
GENERAL DVD-Audio mode DVD-Audio, DVD-Video
SA-CD mode SA-CD, CD
OSD Language
English
, Deutsch, Français, Español, Italiano,
Русский
Parental Rating _ _ _ _ (Enter your password) Level 1 to Level 8
Parental Password _ _ _ _ (Enter your password) New Password, Confirm Password
Screen Saver On, Off
Auto Power Off Mode 1, Mode 2, Off
Sleep Timer Off, 30min, 60min, 90min,120min,150min
Factory Default _ _ _ _ (Enter your password) Yes, No
DivX Registration (DivX registration code is displayed) Enter
AUDIO Analog Output Stereo, Multi-Channel
Digital Out All, PCM, Off
LPCM Output 48KHz, 96KHz
Night Listening Mode On, Off
SPEAKER Size Front L/R Large, Small
Center, Surround L/R Large, Small, Off
Subwoofer On, Off
Initialize On, Off
Distance Unit Feet, Meter
Front L/R, Center, Surround L/R 0.3m to 12.0m (1ft to 40ft)
Default setting: 3.0m (10ft)
Initialize On, Off
Level Front L, Center, Front R, Surround L, Surround R,
0dB to –12dB
Subwoofer
Test Tone Off, Manual, Auto
Initialize On, Off
SA-CD SA-CD Config Config 1, Config 2, Config 3
CUT-OFF Frequency 60, 80, 100, 120
VIDEO TV Display 16:9, 4:3 Pan Scan, 4:3 Letter Box
TV Type MULTI, NTSC, PAL
Wide Screen Format NL Stretch, Pillar Box, Off
Black Level (U.S.A. and
On, Off
Canada models only)
Closed Caption (U.S.A.
On, Off
and Canada models only)
Still Mode Frame, Field
Component Progressive, Interlaced
Scart Video Out (U.K.,
CVBS, RGB
Europe, and Russia
models only)
HDMI HDMI Video 480p/576p, 720p, 1080i, 1080p, Auto
DVI Output Range Standard, Enhanced
HDMI Audio Auto, PCM, Off
DISC AUDIO Language
Off ([Subtitle Language] only), English, French,
Subtitle Language
Spanish, Japanese, German, Italian, Russian,
Others
DVD Menu Language
Angle Mark On, Off
PBC On, Off
Time Interval 2 sec to 10 sec, Default setting: 3 sec
27 En
SETUP MENU
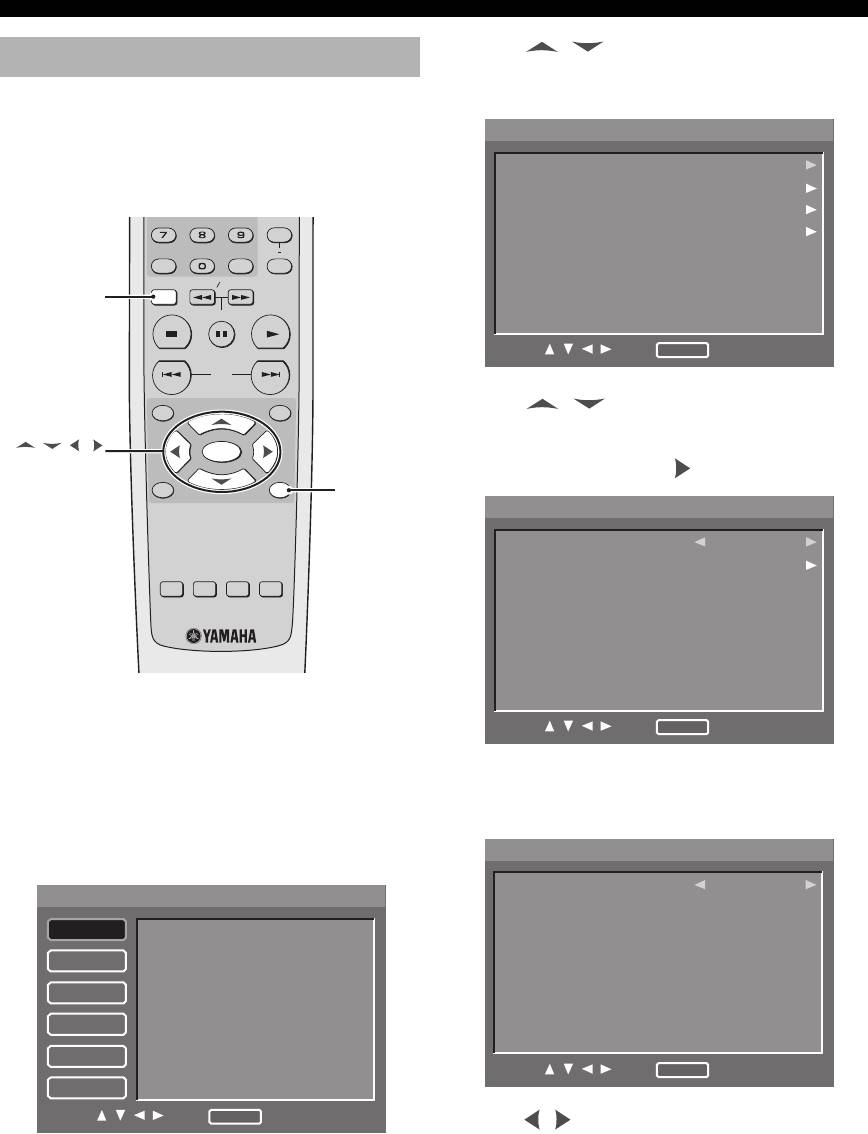
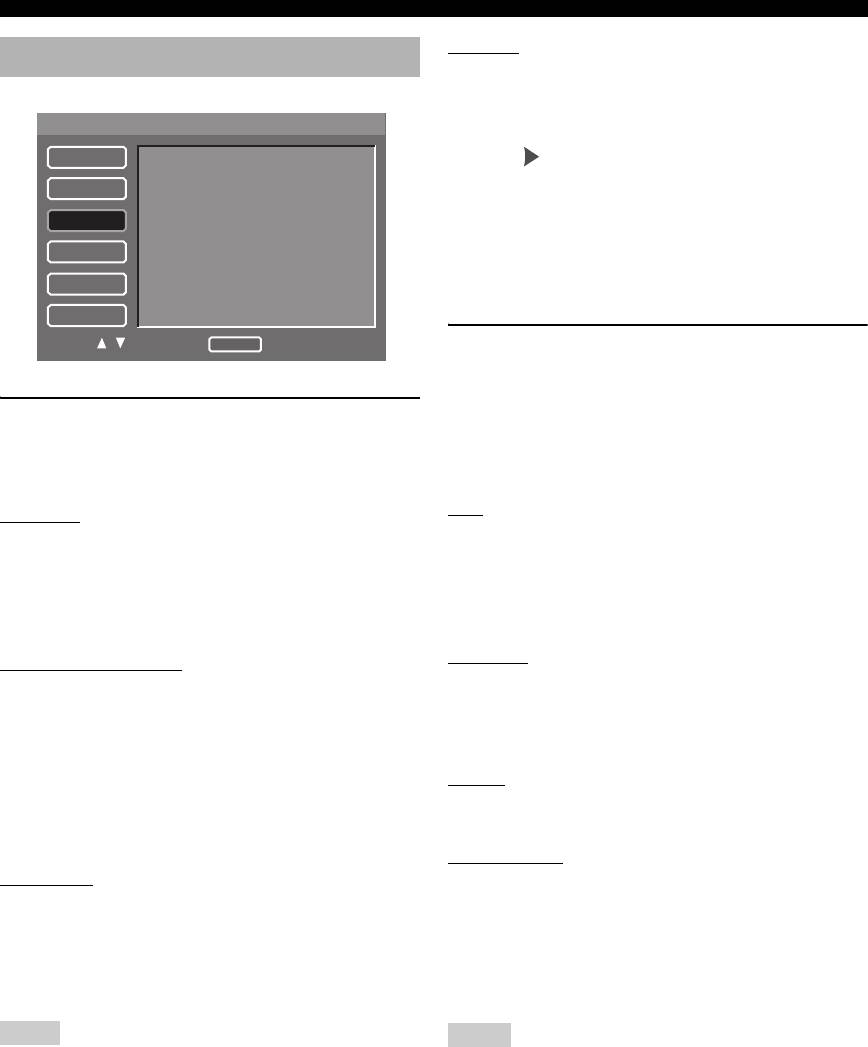
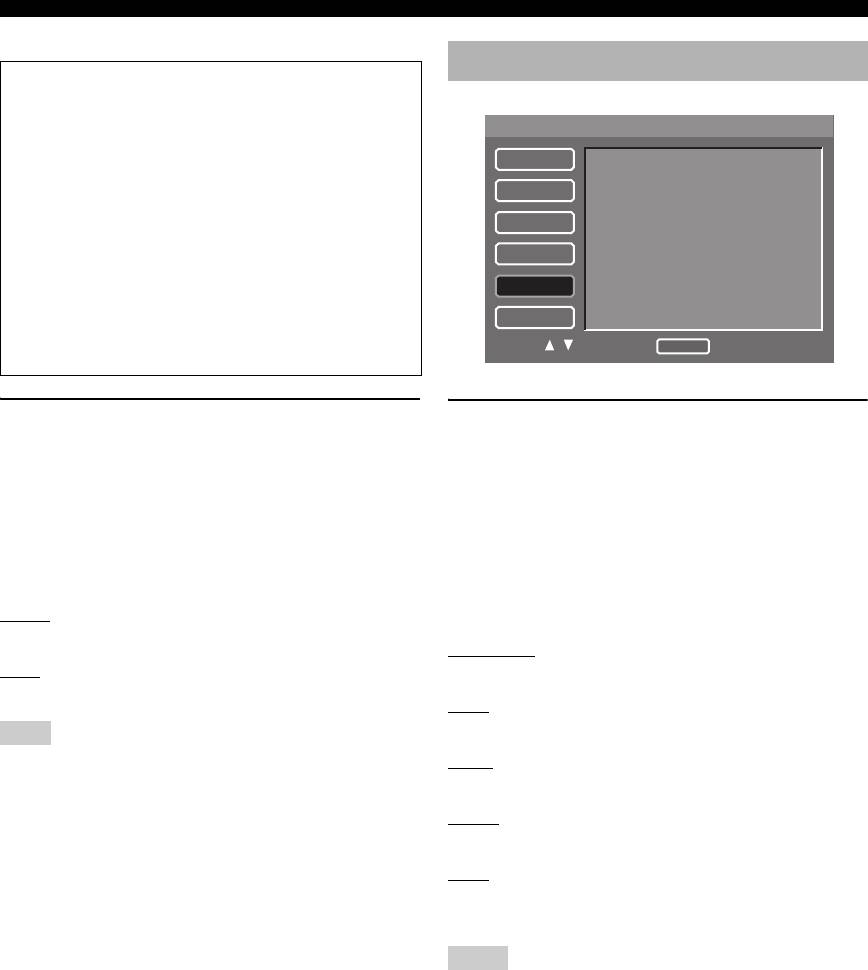
2 Press / to select the desired main menu,
Setup menu operation
and then press ENTER.
➜ Menu items and setting items appear.
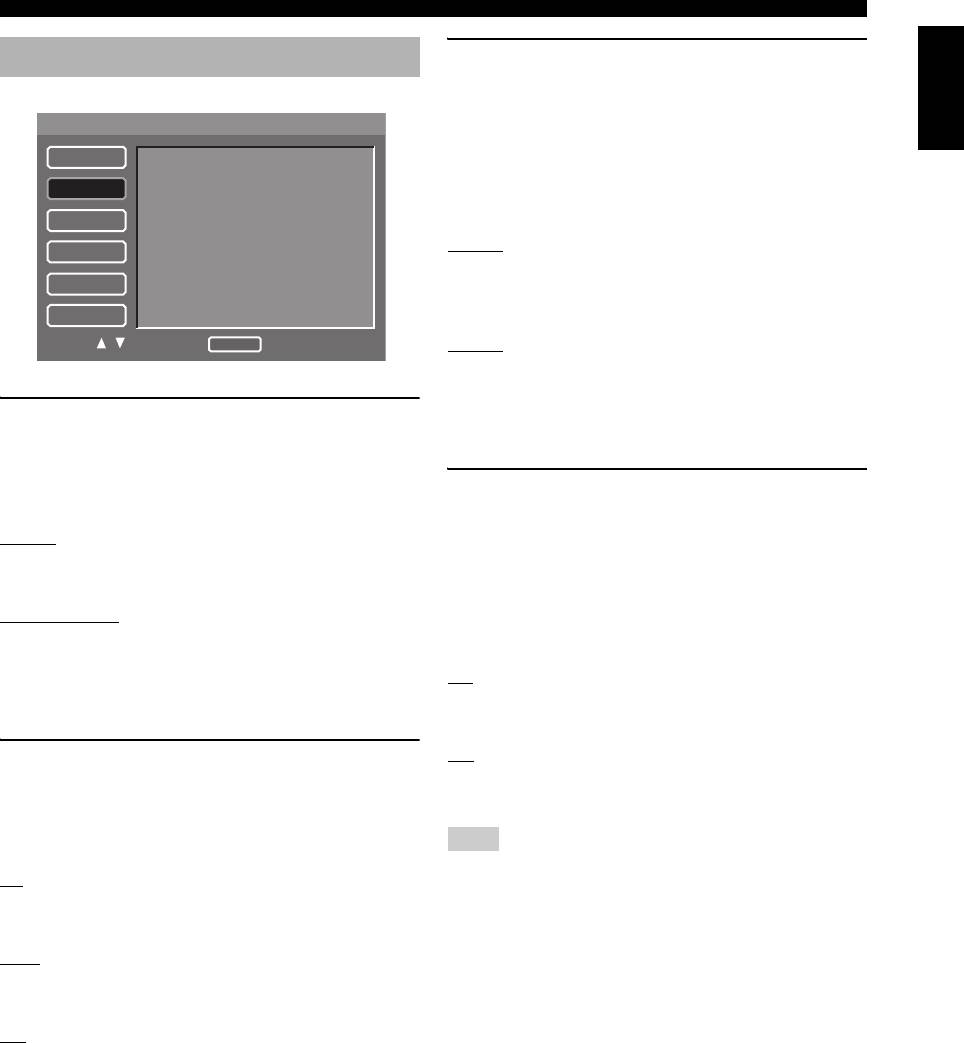
Setup is carried out on the TV screen, enabling you to
customize this unit to suit your own particular
SPEAKER
1/1
requirements. Follow the procedures below to start the
setup menu operations.
Size
Distance
Level
REPEAT
SA-CD
A B
ENTERCLEAR
SETUP
SLOW SEARCH
SETUP
STOP
PLAY
PAUSE
Move :
Return
Select : Enter
SKIP
ON SCREENTOP MENU
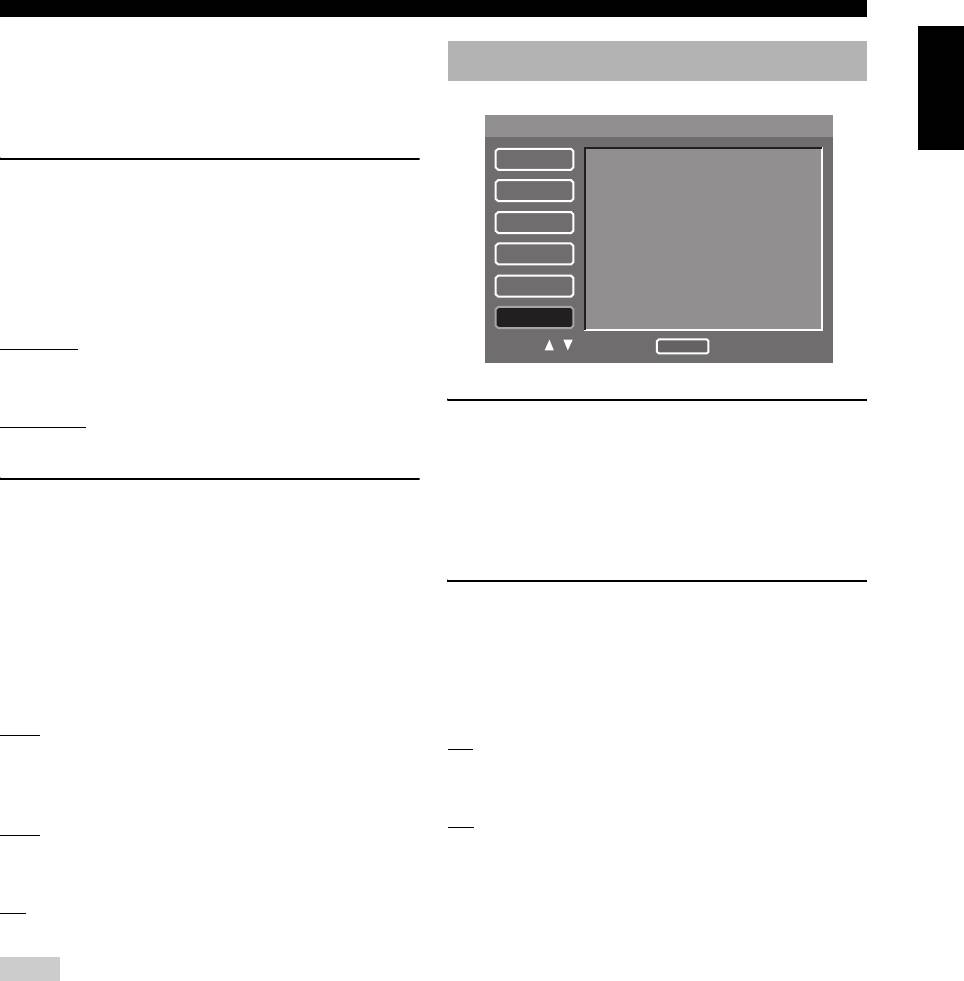
3 Press / to highlight the desired menu item.
➜ If the selected menu item has submenus, only a
/ / /
ENTER
right arrow is displayed on the side of the setting
ENTER
MENU RETURN
item. In this case, press , and then repeat step 3.
RETURN
SPEAKER
1/1
SA-CD Config
Config 1
CUT-OFF Frequency
100
SUBTITLE
AUDIO ZOOM
ANGLE
y
Move :
Return
Select : Enter
• Press RETURN to display the previous menu.
• Press SETUP to exit from the setup menu.
➜ If the selected menu item has only setting items,
• Refer to the following pages for details of the menu that
left and right arrows appear on both sides of the
requires a particular operation.
setting item.
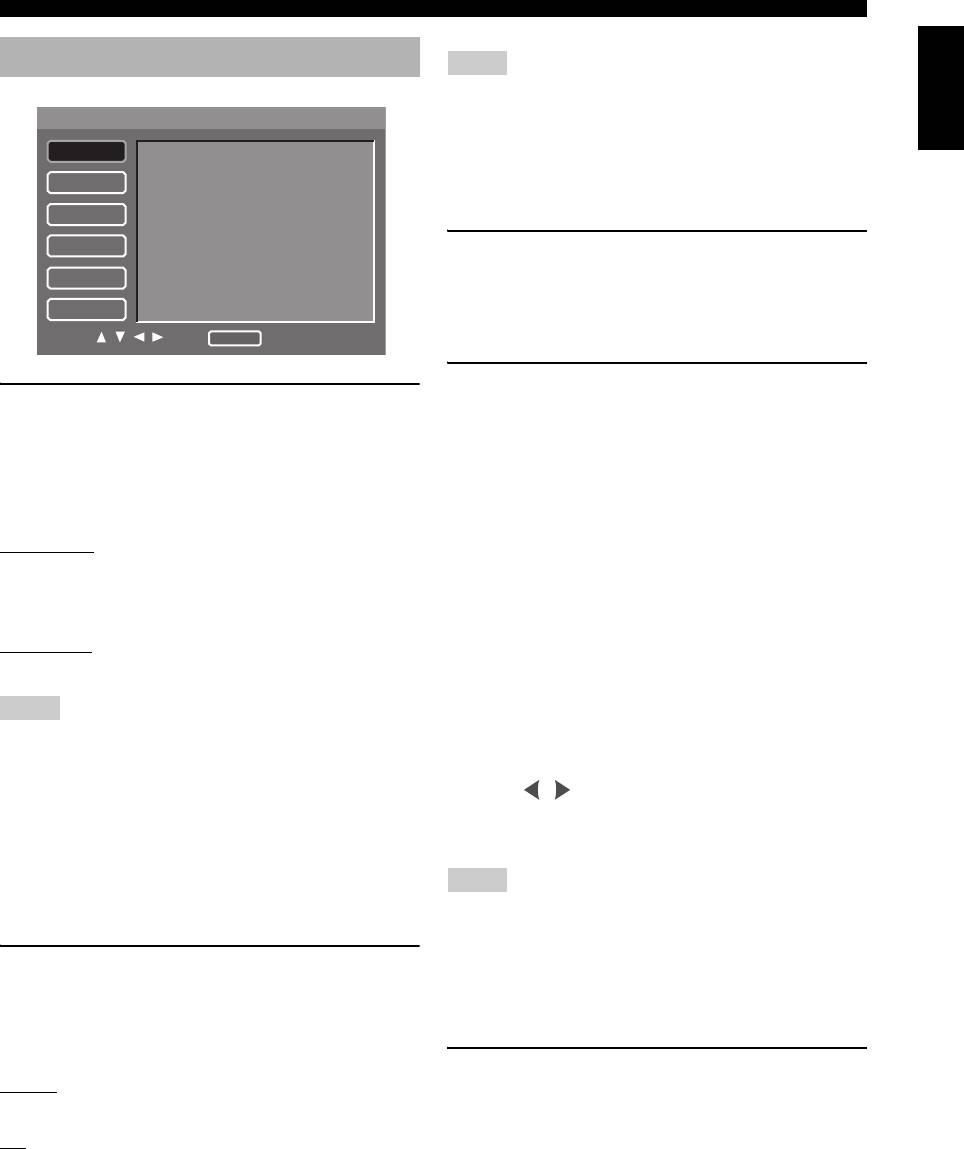
1 Press SETUP.
AUDIO
1/1
➜ Main menus and menu items appear on your TV.
Analog Output
Stereo
SETUP
1/2
Digital Out
PCM
GENERAL
DVD-Audio mode
LPCM Output
96KHz
SA-CD mode
Night Listening Mode
Off
AUDIO
OSD Language
SPEAKER
Parental Rating
Parental Password
VIDEO
Screen Saver
HDMI
Auto Power Off
Move :
Return
Select : Enter
Sleep Timer
DISC
Move :
Return
Select : Enter
4 Press / to toggle the setting items or to
adjust the parameter.
28 En
SETUP MENU
English
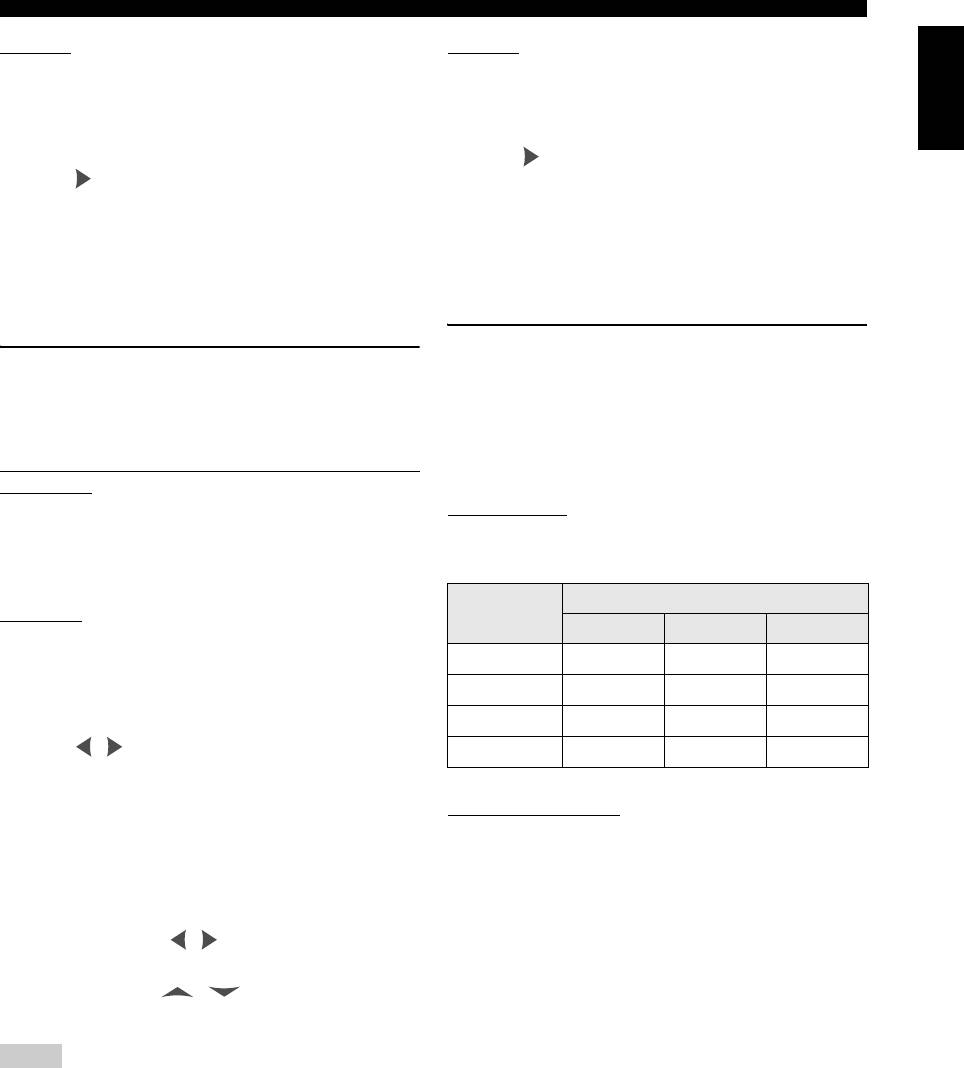
General setup menu
Notes
• This setting is only available when no disc is loaded in the disc
SETUP
1/2
tray.
• Selected mode becomes effective after you close the setup
GENERAL
DVD-Audio mode
menu.
SA-CD mode
• When you select [CD], this unit does not play back SA-CD
AUDIO
OSD Language
discs which do not have CD layer.
SPEAKER
Parental Rating
Parental Password
VIDEO
Setting the OSD language
Screen Saver
HDMI
Auto Power Off
This menu contains various options for the on-screen
Sleep Timer
display (OSD) language. For details, see “Setting the OSD
DISC
(On-Screen Display) language” on page 17.
Move :
Return
Select : Enter
Restricting playback with parental
Selecting DVD-Audio mode
control
Some DVD-Audio discs contain the DVD-Video content
Some DVD discs have a parental level assigned to the
in addition to the DVD-Audio content. You can select
complete disc or to certain scenes on the disc. This feature
DVD-Audio or DVD-Video mode.
lets you set a playback limitation level.
• Select [DVD-Audio mode] in [GENERAL] menu.
The rating levels are from 1 to 8 and are country
dependent. You can prohibit playback of certain discs that
DVD-Audio
are not suitable for your children or play certain discs in
Select this to play back both DVD-Audio and DVD-Video
alternative scenes.
contents. Only the DVD-Audio content may be played
back depending on the disc.
1 Select [Parental Rating] in [GENERAL] menu.
DVD-Video
2 Enter your four-digit password using the
Select this to play back only the DVD-Video content.
numeric buttons (0-9). (For details about the
password, see “Changing the parental password”
Notes
below.)
• This setting is only available when no disc is loaded in the disc
➜ If the password is correct, [Parental Rating] is
tray.
enabled to select.
• Selected mode becomes effective after you close the setup
3 Press / to select the rating level.
menu.
• To disable parental controls and have all discs play,
y
select [Level 8].
• When a DVD-Audio disc is played back, the DVD AUDIO
indicator lights up.
Notes
• When you select [DVD-Video], the DVD AUDIO indicator
goes out.
• VCD, SVCD, CD and SA-CD have no level indication, so the
parental control function has no effect with these types of
discs.
Selecting SA-CD mode
• Some DVD discs are not encoded with a rating though the
movie rating may be printed on the disc cover. The rating level
Some SA-CD discs contain both SA-CD layer and the
feature does not work for such discs.
standard CD layer. You can select SA-CD or CD mode.
• Select [SA-CD mode] in [GENERAL] menu.
Changing the parental password
SA-CD
You can change the password for parental control. Enter
Select this to play back SA-CD layer.
your four-digit password when prompted on the screen.
CD
The default password is “2580”.
Select this to play back CD layer.
1 Select [Parental Password] in [GENERAL]
menu.
29 En
SETUP MENU
2 Enter your old four-digit password using the
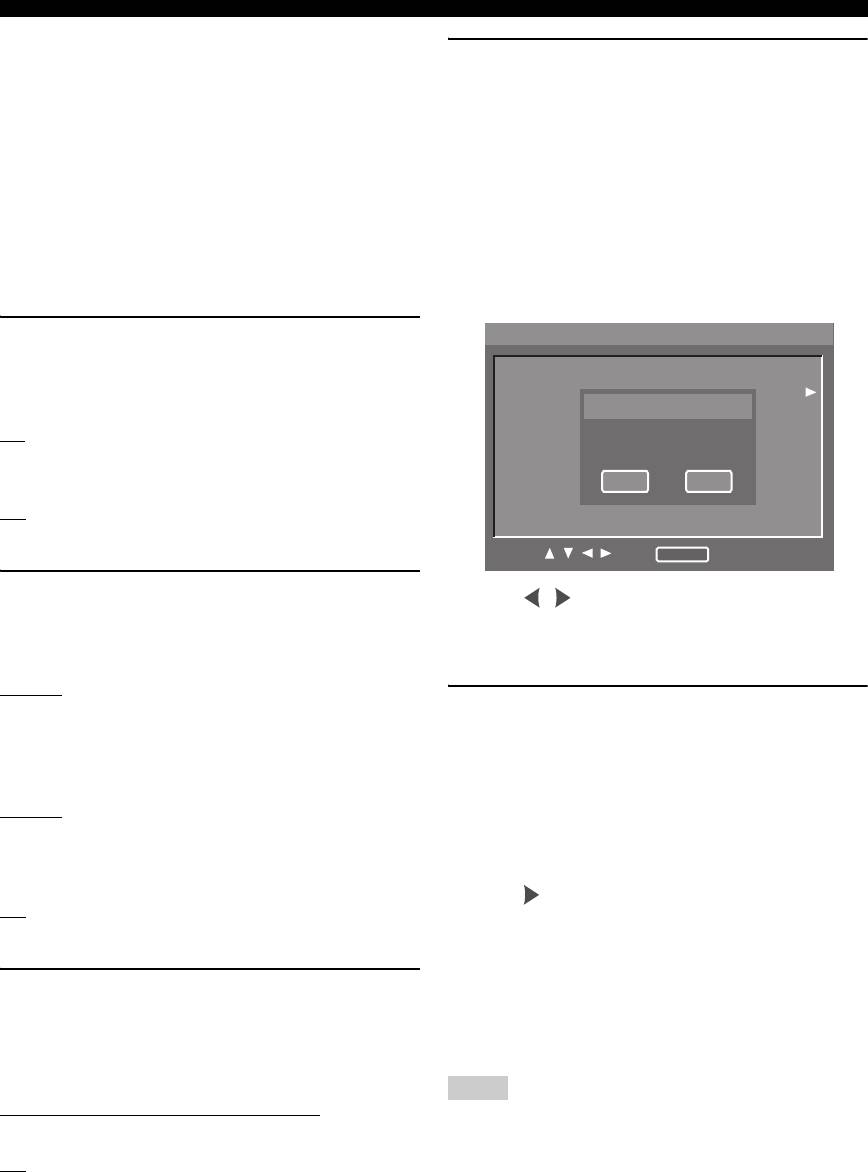
Resetting the system
numeric buttons (0-9).
• When doing this for the first time, enter “2580”.
You can reset all options and your personal settings to the
initial factory settings, except [Parental Rating] and
➜ If the password is correct, the submenu appears.
[Parental Password].
3 Enter the new four-digit password using the
1 Select [Factory Default] in [GENERAL] menu.
numeric buttons (0-9).
➜ [Confirm Password] is highlighted.
2 Enter your four-digit password using the
numeric buttons (0-9). (For details about the
4 Enter the new four-digit password again.
password, see “Changing the parental password”
➜ The previous menu screen appears and the new
on page 29.)
four-digit password is now valid.
➜ The confirmation screen appears.
Setting the screen saver
GENERAL
2/2
You can turn on or off the screen saver.
Factory Default
. . . .. . . .
DivX Regis
• Select [Screen Saver] in [GENERAL] menu.
Factory Default
On
Press [Yes] to confirm
Select this to turn on the screen saver when disc playback
is stopped for more than 15 minutes.
Yes
No
Off
Select this to disable the screen saver function.
Move :
Return
Select : Enter
Setting the auto power function
3 Press / to select [Yes] to reset the system,
You can set the auto standby mode.
and then press ENTER.
• Select [Auto Power Off] in [GENERAL] menu.
➜ All settings are reset to the initial factory settings.
Mode 1
Displaying the DivX
®
VOD registration
Select this to set this unit to the standby mode
automatically when disc playback is stopped for more
code
than 30 minutes or disc playback is continued for more
Yamaha provides you with the DivX
®
VOD (Video On
than six hours without operation.
Demand) registration code that allows you to rent and
Mode 2
purchase videos using the DivX
®
VOD service.
Select this to set this unit to the standby mode
For more information, visit at www.divx.com/vod.
automatically when disc playback is stopped for more
1
Select [DivX Registration] in [GENERAL] menu.
than 30 minutes.
2 Press .
Off
➜ The registration code appears.
Select this to disable the auto power off function.
3 Press ENTER to return to the previous menu.
Setting the sleep timer
y
To purchase or rent the videos from DivX
®
VOD service at
You can set this unit to the standby mode automatically
www.divx.com/vod, use the registration code and download the
after a certain elapsed period.
video onto a CD-R for playback on this unit.
• Select [Sleep Timer] in [GENERAL] menu.
Notes
30min, 60min, 90min, 120min, 150min
• All videos downloaded from DivX
®
VOD can only be played
Select one to set the sleep timer function.
back on this unit.
®
Off
• The time search function is not available during DivX
movie
playback.
Select this to cancel the sleep timer function.
30 En
SETUP MENU
English
Audio setup menu
Setting the LPCM output
Set the LPCM output if you have connected this unit to a
PCM-compatible receiver via a digital terminal, such as
SETUP
1/1
the coaxial or optical terminals.
GENERAL
Analog Output
Discs are recorded at a certain sampling rate. The higher
Digital Out
the sampling rate, the better the sound quality.
AUDIO
LPCM Output
• Select [LPCM Output] in [AUDIO] menu.
SPEAKER
Night Listening Mode
48KHz
VIDEO
Select this to play back discs recorded at the sampling rate
HDMI
of 48 kHz. All 96 kHz PCM data streams (if available) are
converted to the sampling rate of 48 kHz.
DISC
Move :
Return
Select : Enter
96KHz
Select this to play back discs recorded at the sampling rate
of 96 kHz. If the 96 kHz disc is copy protected, the digital
output is automatically converted to a sampling rate of 48
Setting the analog output
kHz.
Set the analog output to match the playback capability of
this unit.
Setting the night listening mode
• Select [Analog Output] in [AUDIO] menu.
In this mode, high volume output is softened and low
Stereo
volume output is brought upward to an audible level. It is
Select this to change channel output to stereo, which only
useful when you watch your favorite action movie without
delivers sound from the two front speakers.
disturbing others at night.
Multi-Channel
• Select [Night Listening Mode] in [AUDIO]
Select this when using a multi-channel audio/(video)
menu.
receiver with 6 channel inputs. In this mode, this unit
On
performs DTS decoding or Dolby Digital 5.1-channel
Select this to level out the volume. This feature is only
decoding when applicable.
available for movies with Dolby Digital mode.
Off
Setting the digital output
Select this when you want to enjoy the full dynamic range
Set the digital output according to your optional audio
of surround sound.
component connections.
• Select [Digital Out] in [AUDIO] menu.
Note
This mode is only effective for analog output.
All
Select this if you have connected the digital audio output
jack to a multi-channel decoder/receiver.
PCM
Select this only if your receiver is not capable of decoding
multi-channel audio signals.
Off
Select this to turn off the digital output.
31 En
SETUP MENU
Initialize
Speaker setup menu
You can reset [Size] settings to the initial factory settings.
1 Select [Initialize] under [Size] in [SPEAKER]
SETUP
1/1
menu.
GENERAL
Size
2 Press .
Distance
➜ The confirmation screen appears.
AUDIO
Level
SPEAKER
3 Select [Yes] to reset the setting, and then press
SA-CD
ENTER.
VIDEO
➜ [Size] settings are reset to the initial factory
HDMI
settings.
DISC
Move :
Return
Select : Enter
Setting speaker distances
You can set the distances for individual speakers.
Placing all speakers except for the subwoofer at equal
Setting speaker sizes
distances from the listener is the most ideal way of the
speaker positioning in 5.1 channel system.
You can set the sizes for individual speakers.
• Select [Distance] in [SPEAKER] menu.
• Select [Size] in [SPEAKER] menu.
Unit
Front L/R
You can select the display unit of measurement.
Set the sizes for front L/R speakers.
Feet
Large
Select this to input speaker distances in feet.
Select this if the connected speakers are large.
Meter
Small
Select this to input speaker distances in meters.
Select this if the connected speakers are small.
Front L/R
Center, Surround L/R
Set the distance from your listening position to the front
Set the sizes for center/surround L/R speakers.
speakers. We recommend to place the front left speaker
Large
and right speaker at the same distance from the listening
Select this if the connected speakers are large.
position.
Small
Select this if the connected speakers are small.
Center
Off
Set the distance from your listening position to the center
Select this if no center/surround L/R speakers are
speaker.
connected.
Surround L/R
Subwoofer
Set the distance from your listening position to the
Select on or off for the subwoofer.
surround speakers. We recommend to place the surround
On
left speaker and right speaker at the same distance from
Select this if a subwoofer is connected.
the listening position.
Off
Control range: 0.3m to 12.0m (1ft to 40ft)
Select this if no subwoofer is connected.
Control step: 0.3m (1ft)
Notes
Notes
• These settings are not available for SA-CD discs. See “Setting
• For the [Center] setting, you cannot specify the distance
the SA-CD configuration” on page 33 for the SA-CD setting.
beyond the [Front L/R] setting or below the [Front L/R] setting
• [Center], [Surround L/R] and [Subwoofer] settings are not
minus 1.5m (5ft).
available when the [Analog Output] setting is set to [Stereo]
• For the [Surround L/R] setting, you cannot specify the distance
(see “Setting the analog output” on page 31).
beyond the [Front L/R] setting or below the [Front L/R] setting
minus 4.5m (15ft).
32 En
SETUP MENU
Initialize
Initialize
English
You can reset [Distance] settings to the initial factory
You can reset [Level] settings to the initial factory settings.
settings.
1 Select [Initialize] under [Level] in [SPEAKER]
1 Select [Initialize] under [Distance] in
menu.
[SPEAKER] menu.
2 Press .
2 Press .
➜ The confirmation screen appears.
➜ The confirmation screen appears.
3 Select [Yes] to reset the setting, and then press
3 Select [Yes] to reset the setting, and then press
ENTER.
ENTER.
➜ [Level] settings are reset to the initial factory
➜ [Distance] settings are reset to the initial factory
settings.
settings.
Setting the SA-CD configuration
Setting speaker levels
You can select speaker sizes and on/off statuses for
You can set the volume levels for individual speakers.
SA-CD discs. You can also select a cut-off (cross-over)
frequency for all low-frequency signals. All frequencies
• Select [Level] in [SPEAKER] menu.
below the selected frequency are sent to the subwoofer.
Front L, Center, Front R, Surround L, Surround R,
• Select [SA-CD] in [SPEAKER] menu.
Subwoofer
Set the volume levels for front L/R speakers, center
SA-CD Config
speaker, surround L/R speakers or subwoofer.
Select speaker sizes and on/off statuses from the following
Control range: 0dB to –12dB
three settings.
Control step: 1dB
Size or on/off
Test Tone
Speaker
Config 1 Config 2 Config 3
A test tone can be output to help you judge the volume
level of each speaker.
Front L/R Large Small Large
1 Select [Test Tone] under [Level] in [SPEAKER]
Center Large Small Small
menu.
Surround L/R Large Small Small
2 Press / to select [Off], [Manual] or [Auto].
Subwoofer On On Off
Off
Select this to output no test tone.
CUT-OFF Frequency
Manual
Select a cut-off (cross-over) frequency for all low-
Select this to output the test tone manually.
frequency signals. All frequencies below the selected
Auto
frequency are sent to the subwoofer.
Select this to output the test tone from each speaker
Control range: 60, 80, 100, 120 (Hz)
automatically.
3 For [Auto], press / to select [Yes] and then
press ENTER to output the test tone. For
[Manual], press / to select each speaker,
and then press ENTER to output the test tone.
Notes
• The test tone is not output from a center speaker, surround
speakers, and a subwoofer when the [Analog Output] setting is
set to [Stereo] (see “Setting the analog output” on page 31).
• These settings are only effective for analog output.
33 En
SETUP MENU
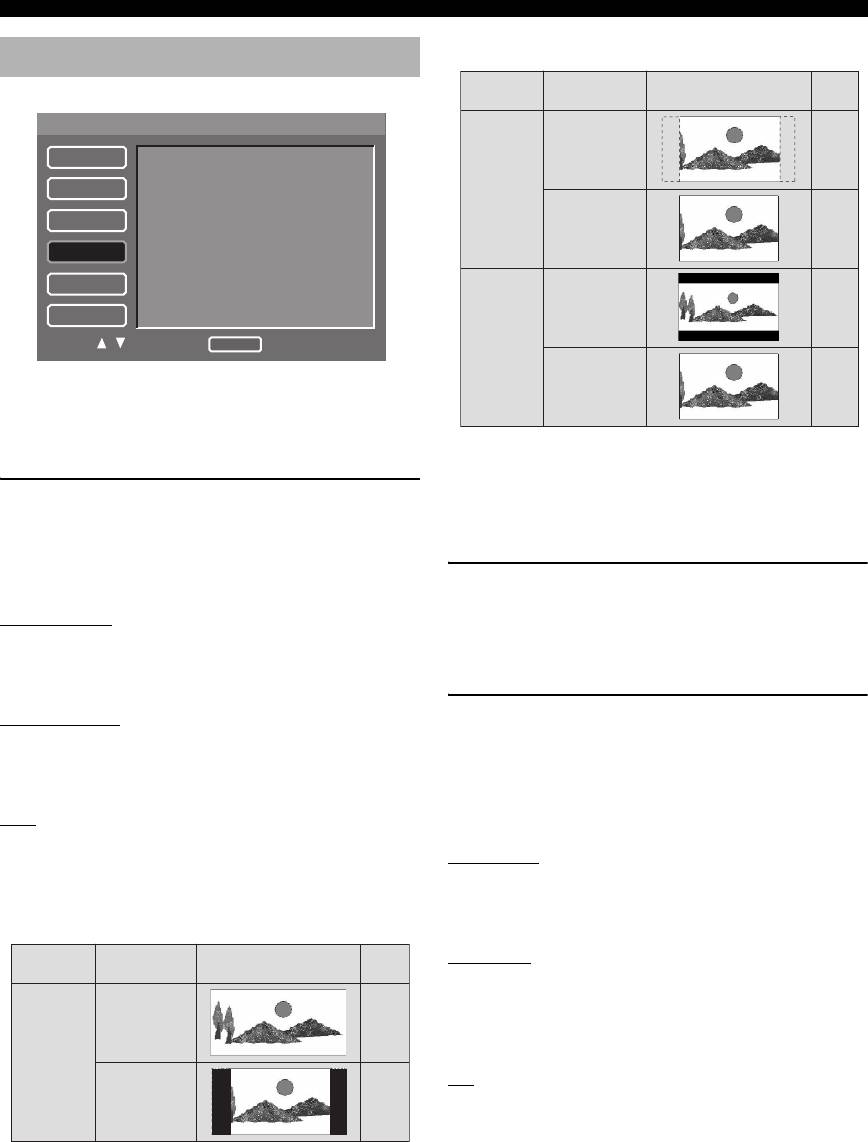
When the aspect ratio of your TV is 4:3:
Video setup menu
Playback
Setting
TV display
disc
SETUP
1/1
16:9
*2
GENERAL
TV Display
TV Type
4:3 Pan
AUDIO
Scan
Wide Screen Format
SPEAKER
Black Level
*1
4:3
Closed Caption*1
VIDEO
Still Mode
HDMI
Component
Scart Video Out
*2
16:9
DISC
4:3 Letter
Move :
Return
Select : Enter
Box
*1: [Black Level] and [Closed Caption] are only for U.S.A. and
4:3
Canada models.
*2: [Scart Video Out] is only for U.K., Europa, and Russia
models.
*1: The side of the picture may be stretched depending on the
TV. In this case, check the screen size and aspect ratio of
your TV.
Setting the TV display
*2: If the disc is not assigned to play back with panscan, it is
Set the aspect ratio of this unit to match your TV. The
played with letterbox.
format you select must be available on the disc.
• Select [TV Display] in [VIDEO] menu.
Setting the TV type
4:3 Pan Scan
This menu contains the options for selecting the color
Select this if the aspect ratio of your TV is 4:3. In this
system that matches your TV. For details, see “Step 3:
setting, both sides of the picture to be trimmed or
Setting a TV type” on page 16.
formatted to fit your TV screen.
4:3 Letter Box
Selecting the wide screen format
Select this if the aspect ratio of your TV is 4:3. In this
Set the aspect ratio of the projected images on the screen.
setting, a wide picture with black bands on the upper and
This function is only available for progressive scan and
lower portions of the TV screen are displayed.
HDMI output.
16:9
• Select [Wide Screen Format] in [VIDEO] menu.
Select this if you have a widescreen TV.
NL Stretch
■ The relationship between the setting of this
Select this to display of 4:3 image on the 16:9 screen with
unit and the TV display
non-linear stretching. (The center position of the screen is
When the aspect ratio of your TV is 16:9 (widescreen):
stretched less than the side.)
Playback
Pillar Box
Setting
TV display
disc
Select this to display 4:3 image on the 16:9 screen without
stretching. Even when this unit is playing a disc recorded
16:9
in the 16:9 squeeze mode, the picture is displayed in the
center of the screen.
16:9
Off
4:3
*1
Select this to make no aspect ratio adjustment.
34 En

SETUP MENU
English
Selecting the black level
Setting the still mode
(U.S.A. and Canada models only)
You can select the picture quality for pausing or frame-by-
frame playback.
If you set the [TV Type] to [NTSC] (see “Step 3: Setting a
TV type” on page 16), set this setting shift to [On] to
• Select [Still Mode] in [VIDEO] menu.
improve the color contrast during playback.
Frame
• Select [Black Level] in [VIDEO] menu.
Select this if the picture is unstable when you select
On
[Field].
Select this to enhance the black level.
Field
Off
Select this for the standard still mode setting. This setting
is suitable for playback of quick motion scenes.
Select this for the standard black level setting.
Notes
Selecting the scan function
• This function is only available for CVBS (composite video)
This function is only available if you have connected this
and S-video output.
unit to a progressive scan TV through the component
• This setting has no effect if the [TV Type] is set to [PAL] or
video jacks (see “Component video jacks <C>” on
[MULTI] (see “Step 3: Setting a TV type” on page 16).
page 12). This function is enable you to enjoy accurate
color reproduction and high quality images. This unit
Selecting the closed caption
features DCDi circuit.
(U.S.A. and Canada models only)
• Select [Component] in [VIDEO] menu.
Closed captions are data hidden in the video signals of
Progressive
specific discs, and are invisible without the use of a special
Select this to enable the progressive scan function. The
decoder. The difference between subtitles and captions is
confirmation screen appears if you select this. In this case,
that subtitles are intended for hearing persons and captions
select [Yes] and then press ENTER.
are for the hearing impaired. Subtitles rarely show all of
the audio. For example, captions show sound effects (e.g.,
Interlaced
“phone ringing” and “footsteps”), while subtitles do not.
Select this to enable the interlaced scan function.
Before you select this setting, please ensure that the disc
y
contains closed caption information and your TV set also
The P.SCAN indicator on the front panel display lights up during
supports this function.
progressive playback.
• Select [Closed Caption] in [VIDEO] menu.
Notes on activating progressive scan:
On
• While HDMI video signals are being output, component
video is fixed to interlaced video.
Select this to enable the closed caption function.
• In progressive mode, 4:3 aspect images are stretched
Off
horizontally on the widescreen TV. Change the aspect
Select this to disable the closed caption function.
ratio settings of your TV if you want to watch the
original aspect ratio images without distortion. You can
Note
also change the aspect ratio settings in [Wide Screen
This function is only available for CVBS (composite video) and
Format] menu (see “Selecting the wide screen format”
S-video output.
on page 34).
• Ensure that your TV is equipped with progressive scan.
• Connect using a component video cable.
35 En
SETUP MENU
HDMI setup menu
CONSUMERS SHOULD NOTE THAT NOT ALL HIGH
DEFINITION TELEVISION SETS ARE FULLY
COMPATIBLE WITH THIS PRODUCT AND MAY CAUSE
SETUP
1/1
ARTIFACTS TO BE DISPLAYED IN THE PICTURE. IN
CASE OF 525 OR 625 PROGRESSIVE SCAN PICTURE
GENERAL
HDMI Video
PROBLEMS, IT IS RECOMMENDED THAT THE USER
DVI Output Range
SWITCH THE CONNECTION TO THE “STANDARD
AUDIO
HDMI Audio
DEFINITION” OUTPUT. IF THERE ARE QUESTIONS
SPEAKER
REGARDING OUR VIDEO MONITOR COMPATIBILITY
WITH THIS MODEL 525P AND 625P DVD PLAYER,
VIDEO
PLEASE CONTACT OUR CUSTOMER SERVICE
HDMI
CENTER.
This unit is compatible with the complete line of Yamaha
DISC
products, including the projectors DPX-1300, DPX-830 and
Move :
Return
Select : Enter
the plasma monitor PDM-4220.
Switching the SCART video out
Setting the HDMI video
(U.K., Europe, and Russia models
You can adjust the resolution depending on the monitor
only)
you are using. This function is only available when this
unit is connected to an HDMI-compatible component via
Select this setting to toggle the video signal output from
the HDMI jack.
the AV terminal between CVBS (composite video) and
This unit is compatible with the following video formats:
RGB.
480p/60 Hz, 576p/50 Hz, 720p/50 Hz, 60 Hz, 1080i/50
• Select [Scart Video Out] in [VIDEO] menu.
Hz, 60 Hz, and 1080p/50 Hz, 60 Hz.
CVBS
• Select [HDMI Video] in [HDMI] menu.
Select this to output composite video signals.
480p/576p
RGB
Select this for 480/576 progressive-scan video.
Select this to output RGB video signals.
720p
Select this for 720 progressive-scan video.
Note
1080i
This unit does not output S-video signal from the AV terminal.
Select this for 1080 interlaced-scan video.
1080p
Select this for 1080 progressive-scan video.
Auto
Select this to set this unit to the best resolution setting
automatically based on your monitor.
Notes
• When [TV Type] is set to [NTSC] or [PAL], video signals with
480p or 576p are output accordingly.
• While HDMI video signals are being output, component video
is fixed to interlaced video.
• For settings other than [Auto], make sure that the selected
resolution is supported by the HDMI-compatible monitor you
are using.
If the selected resolution is not supported, this setting is
automatically switched to the most appropriate resolution, and
the newly selected resolution is displayed in the top left corner
of the display and in the front panel display temporarily.
• When you select [1080p] and use an HDMI cable longer than
5 m (16 ft), the picture quality may decrease.
36 En
SETUP MENU
y
English
• Refer to the manual supplied with your monitor to select the
DISC setup menu
appropriate aspect ratio.
• You can also select the HDMI resolution by pressing HDMI on
the remote control repeatedly.
SETUP
1/1
GENERAL
AUDIO Language
Selecting the DVI output range
Subtitle Language
AUDIO
DVD Menu Language
You can select the DVI output range to match the
SPEAKER
Angle Mark
connected component. This function is only available
PBC
when this unit is connected to an DVI-D-compatible
VIDEO
Time Interval
component via the HDMI jack.
HDMI
• Select [DVI Output Range] in [HDMI] menu.
DISC
Standard
Move :
Return
Select : Enter
Select this if you cannot see the correct image when you
select [Enhanced].
Enhanced
Selecting the default audio/subtitle/
Select this if black and white in the image is not distinct.
DVD menu language
These menus contain various language options for the
Setting the HDMI audio
audio, subtitles and disc menus recorded on the DVD. For
details, see “Setting the audio, subtitle and disc menu
Set the HDMI audio output to match the connected
languages” on page 17.
component. This function is only available when this unit
is connected to an HDMI-compatible component via the
HDMI jack.
Selecting an angle mark display
For details about the relationship between the audio
You can switch an angle mark display on or off when
format and the setting, see “HDMI audio output” on
sequences recorded from different camera angles are
page 13.
played back.
• Select [HDMI Audio] in [HDMI] menu.
• Select [Angle Mark] in [DISC] menu.
Auto
On
Select this to set this unit to the best setting automatically
Select this if you want to display an angle mark. An angle
based on the component you have connected via the
mark is displayed continuously.
HDMI jack.
Off
PCM
Select this if you do not want to display an angle mark. An
Select this to output the decoded multi-channel or 2ch
angle mark appears for five seconds, and then disappears.
linear PCM audio signals via the HDMI jack.
Off
Select this to turn off the HDMI audio output.
Notes
• SA-CD signals cannot be output using HDMI.
• When [HDMI Audio] is set to [Auto] or [PCM], digital output
signals are muted.
37 En

SETUP MENU
Selecting the PBC (playback control)
function
You can set playback control (PBC) to on or off. This
function is available only on Video CD 2.0 with the
playback control (PBC) feature.
• Select [PBC] in [DISC] menu.
On
Select this to display a disc menu.
Off
Select this not to display a disc menu.
y
You can also use the MENU button on the remote control to turn
on or off the playback control (PBC) function (see “Using the
Video CD playback control (PBC) menu (VCD/SVCD)” on
page 21).
Setting the duration for a slide show
You can set the duration that the slides for JPEG files are
displayed.
• Select [Time Interval] in [DISC] menu.
2 sec to 10 sec
Control step: 1 second
Note
This setting may not work correctly depending on file sizes.
38 En
Оглавление
- CAUTION: READ THIS BEFORE OPERATING THIS UNIT.
- CONTENTS
- INTRODUCTION
- FUNCTIONAL OVERVIEW
- CONNECTIONS
- GETTING STARTED
- DISC OPERATION
- SETUP MENU
- LANGUAGE CODE LIST
- TROUBLESHOOTING
- GLOSSARY
- SPECIFICATIONS
- ПРЕДУПРЕЖДЕНИЕ: ВНИМАТЕЛЬНО ИЗУЧИТЕ ЭТО ПЕРЕД ИСПОЛЬЗОВАНИЕМ АППАРАТА.
- СОДЕРЖАНИЕ
- ВВЕДЕНИЕ
- ФУНКЦИОНАЛЬНЫЙ ОБЗОР
- ПОДКЛЮЧЕНИЯ
- ПОДГОТОВКА К ЭКСПЛУАТАЦИИ
- УПРАВЛЕНИЕ ДИСКОМ
- МЕНЮ НАСТРОЙКИ
- СПИСОК ЯЗЫКОВЫХ КОДОВ
- ВОЗМОЖНЫЕ НЕИСПРАВНОСТИ И СПОСОБЫ ИХ УСТРАНЕНИЯ
- СПРАВОЧНИК
- ТЕХНИЧЕСКИЕ ХАРАКТЕРИСТИКИ


